Table of contents:
- Author Bailey Albertson [email protected].
- Public 2023-12-17 12:53.
- Last modified 2025-06-01 07:32.
What and how to make entrance door slopes

After the entrance doors are installed in the apartment or house, ensuring the safety of the home, finishing work must be done. Outside, the entrance doors are ennobled with platbands, and if there is damage to the wall, then they are sealed with mortar. From the inside, everything must be done beautifully, and slopes are made to hide the irregularities. You can make them on your own, there is nothing difficult in this. It is necessary to select the material, and then carry out all the work in accordance with the developed technologies.
Content
-
1 Features of the device of the slopes of the entrance doors
1.1 What materials are slopes made of
- 2 Required tools and materials
-
3 The main stages of finishing the slopes of the front door
- 3.1 Preparatory work
-
3.2 Plastering
3.2.1 Video: Plastering door slopes
-
3.3 Adhesive finish
3.3.1 Video: Adhesive Slope Finish
- 3.4 Frame method of finishing slopes
- 3.5 Decorating slopes with artificial stone
- 3.6 Video: creating the slopes of the front door with your own hands
- 4 Reviews
Features of the device of the slopes of the entrance doors
If the doors are installed by professionals, then finishing the slopes is not their responsibility. You will have to either pay extra for such work or do it yourself. If you understand the sequence of finishing, you can handle it without any problems.
The slopes of the entrance doors not only allow you to give a beautiful and complete look to the entrance to an apartment or house, but also hide the attachment points of the door frame, thus increasing the protection against burglary. In addition, correctly executed slopes help to insulate the entrance doors and increase their sound insulation characteristics.
Even the most expensive and beautiful doors will look unsightly if there are no slopes at all, or they are not neatly executed. When designing this element, it is imperative to take into account both the material of the door leaf and the frame, and the design of the corridor. Slopes should harmoniously fit into the interior of the room, therefore, the choice of material for their manufacture should be given special attention.
Door slopes are:
-
outdoor. The front door is almost always mounted flush with the wall surface. To finish external slopes, it is enough to install platbands, and if there is slight damage to the wall, then they are sealed with mortar, then the wall is covered with finishing material;

External slopes of the entrance door Outer slopes are usually covered with a casing
-
internal. Since these elements are located inside the apartment and are constantly in sight, a wide variety of materials can be used for their decoration. Internal slopes should be in harmony not only with the material of the canvas, but also with the entire environment in the room.

Internal slopes Different materials can be used to decorate internal slopes, the main thing is that they are in harmony with the interior of the entrance area
For the slopes of the entrance doors, you can use:
- plastering. It's a cheap and reliable way, but it takes some skill to do it. First, you need to properly prepare the solution, and then distribute it evenly over the wall surface around the door frame;
- panels fixed with glue. The walls are carefully leveled, special glue is applied to them, after which the finishing panels are glued. They can be from different materials, but the principle of the work is the same;
- panels installed on the frame. This finish allows you to cover uneven walls. The frame is made of metal profiles or wooden bars, fastened to the wall and panels are already installed on it. Inside, you can hide wires and other communications, install lighting fixtures or lay insulating material.
What materials are slopes made of
There are no ideal materials, they all have their own advantages and disadvantages, and the choice depends only on the financial capabilities and taste preferences of the owner of the house or apartment. To do it correctly, you first need to familiarize yourself with the characteristics and features of all used slope finishing options:
-
Drywall. This is a popular but time consuming method. First, the sheets are attached to the wall, and then putty and covered with finishing material. The result is a perfectly flat surface that can be painted in the desired color. Among the shortcomings, it should be noted that over time, the paint will smear, and if wallpaper is glued, then they can tear.

Plasterboard slopes The use of drywall for finishing the slopes is a popular but rather time consuming option.
-
Regular plaster. This type of finish requires special skills to obtain a beautiful and even surface. After plastering the opening, it will also need to be painted or pasted over with wallpaper. The main advantage of this option is its low cost. Cons - the finish coat can be damaged over time, and a lot of dirt and debris forms during work.

Plastering of slopes After plastering, the slopes must be finished with finishing material
-
Decorative plaster. This is a modern look of the previous material, it is applied to a previously plastered surface. You can choose textured plaster or with colored chips. Such a coating has a long service life and a beautiful appearance. Its disadvantage is the high cost, as well as the fact that the work is rather dirty and time consuming and also requires special skills.

Decorative plaster on slopes Decorative plaster has a long service life and a beautiful appearance
-
MDF panels. This is the easiest and most affordable way. To install MDF panels, simple tools are required, and even a novice master can cope with such a task.

Slopes from MDF panels for doors Decorating slopes with MDF panels is simple and quick
-
Laminate. Laminate, like MDF panels, is easy to install. This is a cheap and affordable material, but the slopes from it will not look very presentable and will not be suitable for expensive apartments.

Laminate slopes Laminate is not suitable for finishing the slopes of entrance doors in apartments with expensive interiors
-
Natural wood. This is an expensive and environmentally friendly material, but it is not difficult to fix it. This solution is suitable when the hallway is decorated in the appropriate style. The wooden surface must be periodically treated with special compounds that protect against moisture and decay.

Natural wood slopes Natural wood is suitable when the hallway is decorated in the appropriate style
-
Chipboard panels. This material has a low cost, but its service life will be small. Chipboard is afraid of moisture and at high humidity begins to exfoliate.

Chipboard slopes Chipboard panels are afraid of high humidity
- Dobory - ready-made special elements that are used for finishing the slopes of both entrance and interior doors. You can choose a material that will exactly match the door frame. The cost of add-ons is higher than panels or laminate, but they also look more attractive.
-
PVC panels. They will be cheap, any home master will be able to cope with the installation work. Plastic is not afraid of moisture, has a long service life, and is easy to care for. The disadvantage of PVC panels is their not very presentable appearance.

Slopes from PVC panels Even a beginner can trim the slopes with the help of PVC panels.
-
Natural or artificial stone. Beautiful slopes can be created from stone, which, moreover, will have a long service life and high wear resistance. The disadvantage is that laying the stone requires a certain skill and a lot of time. If the slopes are finished with natural or artificial stone, then the adjacent walls should be plastered, since wallpaper or panels are not suitable in this case.

Artificial stone slopes Artificial stone slopes have a beautiful appearance and high wear resistance
-
Mosaic and tiles. It is also a durable and durable material, but usually tiles are used in the kitchen, bathroom or toilet and many people do not perceive it on the slopes of the entrance doors. In addition, laying tiles, and even more so mosaics, takes a long time and requires special skills.

Tile slopes Not all people perceive tile slopes, since this material is usually used in the kitchen and in the bathroom
Required tools and materials
In order to independently finish the door slopes, you first need to decide on the method of their installation. Depending on whether the surface will be plastering or laying the material in a frame and frameless way, you may need:
- putty knife;
- construction trowel;
- rule;
- dishes for solution;
- construction mixer for solution preparation;
- brush;
- impact drill for mounting the lathing;
- a hammer;
- stationery knife;
- pencil;
- primer;
- painting corner;
- serpyanka;
-
metal profiles or wooden bars.

Slope Installation Tools Depending on the selected material and the method of finishing the slopes, the required set of tools may differ
The main stages of finishing the slopes of the front door
After you have decided on the method of finishing the slopes of the entrance doors and purchased the necessary materials and tools, you can proceed with the installation. Almost any home craftsman can do this work with his own hands; it is enough to perform all the stages in accordance with the developed technologies.
Preparatory work
Although different materials are used for finishing the slopes, the preparatory work in all cases is carried out in the same way:
-
Surface cleaning. It is necessary to free the doorway from the remains of the mortar and polyurethane foam.

Surface cleaning Remove residual mortar and protruding polyurethane foam
- Checking the tightness of the door frame. To do this, use a lighted candle. It must be carried along the perimeter of the opening. In those places where the flame begins to deviate, additional sealing of the cracks is carried out with a sealant or foam.
-
Protection of the leaf and door frame. With the help of film and masking tape, the surface of the door and box is closed so that the solution does not get on them.

Protection of the leaf and door frame In order not to damage the doors, they are covered with foil
Plastering
It is best to plaster the slopes of the entrance doors at the stage of apartment renovation, since a lot of dirt is formed during the work.
-
Surface priming. This step is necessary to ensure good adhesion of the mortar.

Surface priming The primer increases the adhesion of materials
-
Installation of beacons. Beacons are installed using the building level. They allow you to mark the thickness of the application of the plaster and help to distribute it evenly.

Installation of beacons Lighthouses help to apply the plaster evenly
-
Corner installation. Using the solution, the corner is fixed at the junction of the wall and the slope.

Corner installation The corner protects the joint between the wall and the slope
- Fastening the painting net. It is necessary to increase the strength of the plaster layer.
-
Solution application. A solution is thrown over the lighthouses, after which it is distributed by the rule.

Solution application After applying the solution, it is leveled with the rule
- Priming the plastered surface.
- Finishing putty application.
-
Grouting the surface. The coating is processed with a fine grater so that it is perfectly even.

Grout tool For grouting, use a special tool and a mesh
-
Painting. Usually water-based paint is used, as it dries quickly and is practically odorless.

Painted slopes To paint the slopes, use water-based paint
Video: plastering door slopes
Adhesive finish
Various materials can be glued to the slopes, including drywall, laminate, MDF or chipboard panels. This method can be used when the walls do not have serious defects. Minor deviations from the level can be corrected by applying a layer of plaster, the thickness of which should not be more than 8-10 mm.
The process of gluing panels installation consists of the following stages:
- Base primer. To do this, use special formulations that increase the adhesion of materials.
-
Measurement of slopes. Using measuring tools, the dimensions of the slopes are measured and transferred to the material used for finishing (drywall, chipboard, MDF, sandwich panels). Drywall can be installed both vertically and horizontally, since then all the seams will be putty. It is better to install MDF and chipboard panels with one canvas so that there are no joints.

Measurements Slope measurements are transferred to the material used
-
Glue application. This is done in a square-nesting way every 15-20 cm. It is not necessary to completely cover the material with glue. A film should appear on the surface of the glue, for this you need to wait a few minutes.

Glue application The glue is applied in a square-nesting manner
-
Fastening panels. They are laid starting from the upper edge and pressed with force on those places under which the glue is located. The panels can be attached to liquid nails, polyurethane glue or polyurethane foam.

Panel mounting The panels are installed in place and well pressed against the supporting surface
- Finishing finish. If drywall was used, then after installation it is necessary to apply a topcoat. Laminate or MDF boards do not require additional finishing.
Video: adhesive trim of the slope
Frame method for finishing slopes
In order to exclude the possibility of surface deformation after applying plaster or installing heavy MDF sheets, a frame method of finishing slopes is used. To create a frame, both metal profiles and wooden blocks treated with an antiseptic can be used.
Work order:
- The surface is treated with an antiseptic primer.
-
Vertical profiles are mounted. The extreme profile is set in level and fixed with dowels. The second post is set in accordance with the first and also fixed.

Installation of vertical profiles Profiles are aligned vertically and fixed with self-tapping screws
-
Horizontal profiles are fixed. They are installed around the entire perimeter every 40-50 cm.

Installation of horizontal profiles To increase the rigidity of the frame, transverse profiles are installed
- Mount the wiring and insulation. If you plan to install an electric lock, a cable is laid inside the frame to connect it. Insulation (mineral wool or foam) is also placed in the cells.
-
Carry out interior decoration. If it is MDF boards or laminate, then finishing is not needed. Plasterboard is putty and painted or pasted over with wallpaper.

Installation of finishing material Drywall or other finishing material is attached to the finished frame
Decorating slopes with artificial stone
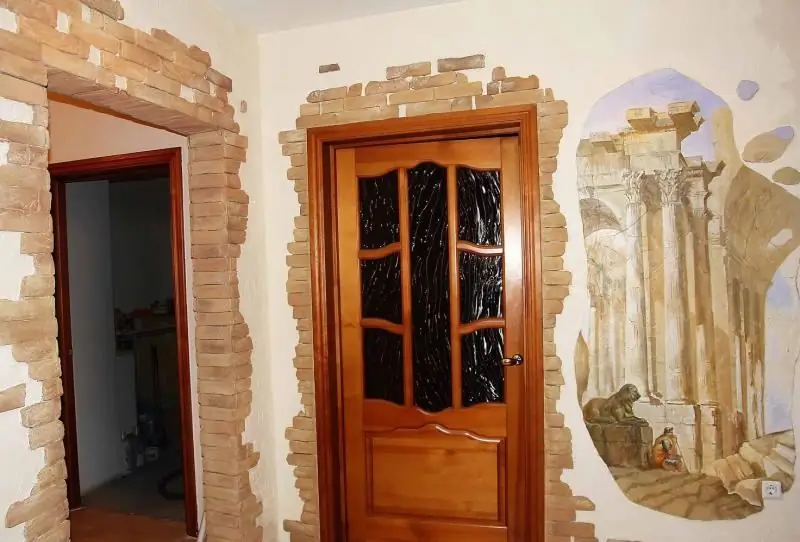
To decorate the slopes of entrance doors in an original way, they often use artificial stone or clinker tiles. In this case, the rule is followed: there is more stone at the bottom, less at the top. This solution allows you to smooth the transition to other finishing materials, and the irregularities give the slopes a more natural look.
Sequence of work:
- Level the surface (if necessary). To do this, it is plastered or a sheet of drywall is glued.
-
Stones are laid out on the floor so that you can better choose a color combination and do not get a sharp contrast.

Layout of stones A combination of the color of the stones is selected so as not to get a sharp contrast
-
The stone is being laid. The back side of artificial stone or clinker tiles is rough, which ensures good adhesion to the wall. The work starts from the bottom and gradually moves up.

Stone installation Stones are laid with irregularities along the edge - so they look more natural
- Finishing finish. To protect the artificial stone from negative external influences and give it a more beautiful appearance, a special composition is used. To make it, take water, acrylic varnish and tinting paste. After preparing the mixture, it is applied to the surface of the stone.
Video: DIY entrance door slopes
Reviews
Any materials can be used to refine the slopes of the entrance doors. Some of them are more difficult to work with, others are easier. If you figure out the order of finishing and do everything efficiently and accurately, then you can do it yourself. If you plan to trim the slopes of a new door, then the film from the door leaf and door frame should be removed only after all work is completed.
Recommended:
Sheathing (upholstery) Of Doors: The Choice Of Material For Finishing, Tools And Stages Of Work

In what cases is door trim necessary. Materials used to cover doors. A necessary tool. The procedure for self-upholstery doors
Double-leaf Doors: Entrance And Interior Doors, As Well As Their Varieties With A Description Of The Device And Installation

Double-leaf doors: types, standard sizes. Accessories for double doors. Installation stages and operation features. Reviews
MDF Doors: Entrance And Interior Doors, Their Varieties With A Description And Characteristics, Advantages And Disadvantages, As Well As Installation And Operation Features

Doors from MDF: features, characteristics, varieties. Making and installing MDF doors with your own hands. Door restoration. Reviews, photos, videos
Door Slopes: Functions And Device, As Well As Do-it-yourself Installation And Finishing Features

What is a door slope, its functions and device. What materials are used for finishing the slopes. Step-by-step instructions for plastering door slopes
Torex Doors: Entrance And Interior Models, Their Advantages And Disadvantages, As Well As Installation Features And Customer Reviews

Doors "Torex": production features, advantages and disadvantages. Model range, fittings and components. Features of installation, tips for use
