Table of contents:
- Author Bailey Albertson albertson@usefultipsdiy.com.
- Public 2023-12-17 12:53.
- Last modified 2025-01-23 12:41.
We fix the chandelier to the stretch ceiling with our own hands

Now many apartment owners are trying to install stretch ceilings in their homes. At the same time, it is very important to think over the fixing of the chandelier in a timely manner, since after installation it will be very difficult to do this. Therefore, today we will talk about the intricacies of such a process as attaching a chandelier to a suspended ceiling, from preparatory activities to the last stage.
Content
- 1 Choosing the right chandelier
- 2 Mounting options
- 3 Fastening to the mounting plate
- 4 Mounting on a cruciform bar
- 5 Decorating the attachment point
- 6 Video about installing a halogen chandelier on a stretch ceiling
Choosing the right chandelier
Lighting devices on a stretch ceiling should be installed so that they are correctly connected and securely fixed. The peculiarity of the stretch ceiling is that any violation of its integrity entails a rupture of the canvas. Therefore, the work is carried out in advance, taking into account that the final touches - connecting the chandelier - are done the first time.
In addition, not every lighting fixture is suitable for such a ceiling. It is very important to make the right choice. We will talk about this first.
- When choosing a chandelier, you need to make sure that it does not spoil the expensive ceiling covering. It is necessary to exclude lighting devices that expose the coating to strong heat.
- Pay attention first of all to the design features of the chandeliers and lamps that are used in them.
- Try to choose a chandelier with energy-saving bulbs - LED or fluorescent. They generate a small amount of heat during operation.
- The use of halogen bulbs or incandescent bulbs is acceptable. A prerequisite - they must be enclosed in plafonds and directed away from the ceiling.
- Special care is required with overhead chandeliers. The base of such a "plate" must be made of a thick metal plate, otherwise it will overheat and deform the film.
- The base of the chandelier should be smooth and free from sharp edges.
If you do decide to use incandescent bulbs, make sure that the distance between them and the surface of the ceiling is as large as possible. In any case, you should not install bulbs with a power of more than 40 watts.

Only the right choice and installation of the chandelier will provide your room with a beautiful view.
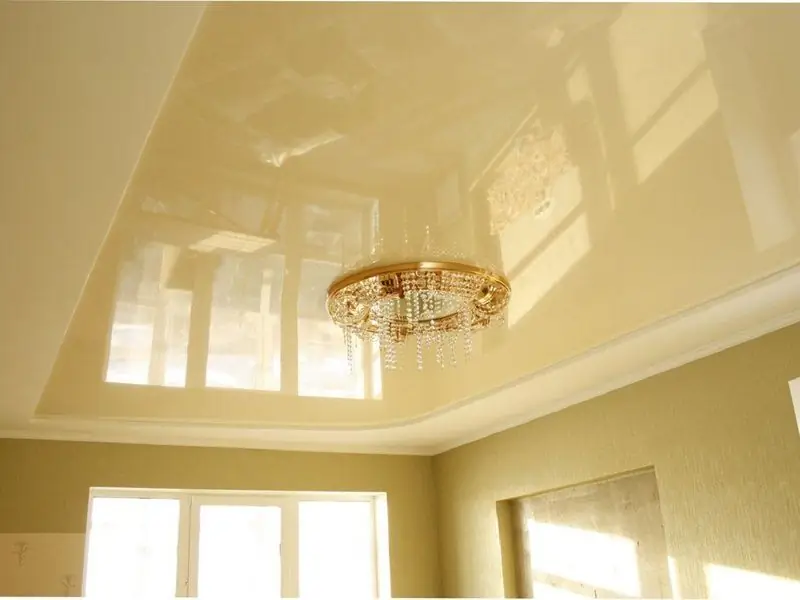
Do not forget that a chandelier can not only decorate the interior, but also ruin it. When choosing a lighting device, you need to take into account the texture of the canvas. If you have a white matte ceiling, adhere to standard lighting requirements. If the canvas is glossy, remember that it mirrors all objects, including the chandelier. That is, the number of shades and bulbs will visually double. It is better not to mount lamps with large horizontal surfaces: they collect a lot of dust, which will be noticeable on the varnish surface.
Mounting options
In order to understand the principle of attaching a chandelier to a stretch ceiling, you need to know its dimensions and design features. This is also an important reason to purchase a lighting device before starting the installation of the ceiling, otherwise installation on ready-made ceiling installation installations will not be possible in the future.
Distinguish how many of the most common and convenient ways of fixing a chandelier:
- fastening with bolts and screws;
- hook fastening;
- mounting on a bar or mounting plate;
- mounting on a cruciform bar.
In the first two cases, you must first install a mortgage - a wooden plate, which is attached to the base ceiling, located above the stretch one. Fastening is carried out using dowels.
The first option involves attaching the chandelier to the mortgage with bolts. Make a hole in the stretch ceiling (it should be marked in advance, at the place where the wires come out), and glue its edges with tape. After that, fasten the glued sheet around the chandelier with self-tapping screws.

Be sure to secure the hole for the wires with a thermal ring
To increase the reliability of the fixing of the chandelier, use a reinforcing plastic ring. Its thickness is at least 5 millimeters, and its diameter is determined by the size of the luminaire. The ring is attached to the canvas using glue that contains cyanoacrylate, for example, "Superglue-moment". Apply the glue in a continuous line, then firmly attach the ring to the canvas. After the glue dries, cut out a section of the canvas along the inner diameter of the ring. In the resulting hole, pull out the wire that goes from the main ceiling, connect it to the chandelier, and then hang it on the protruding hook.
Mounting on a mounting plate
Most chandeliers have a fastening metal profile with special pins. It is attached to the ceiling, the base of the chandelier is put on pins and screwed with decorative nuts.
When attaching such a chandelier to a stretch ceiling, a wooden block is mounted to the base ceiling. Its thickness should be a couple of millimeters less than the distance between the stretch ceiling and the main ceiling. If calculated incorrectly, the appearance of the ceiling will be spoiled.

Here you can see the result of incorrect installation of the wooden base.
The bar is attached to the ceiling with self-tapping screws and dowels. After the stretch ceiling is mounted, as in the previous version, you need to make a hole in it and reinforce it with a thermal ring. Within this hole, attach the mounting plate to the bar, install the chandelier base on it, in which the holes will align with the pins, and screw with nuts.
Crossbar mounting
If you have purchased a heavy chandelier with a wide base, a cross-shaped bar is most often used as a fastener for it. Its installation on a stretch ceiling within the mounting hole is unlikely to be possible: the holes are located at a distance from each other.
Therefore, as in the previous case, a wooden base or a supporting platform must be fixed to the base ceiling, which corresponds to the dimensions of the crematorium. … make five holes in the surface of the stretch ceiling. Reinforced with thermal rings: one large, for the output of wires and connecting the power, and 4 small. These holes must match the mounting holes on the cross bar. If you do not have thermal rings of the required diameter, reinforce the screw-in places of the self-tapping screws with pieces of plastic by gluing them to the canvas. If the cuts are not secured, the film may tear later.
After connecting the wires, slide the chandelier over the crosspiece and secure it with decorative nuts.
We decorate the attachment point
It is not enough to complete the installation of the chandelier; you also need to make the ceiling surface beautiful and neat after work. The attachment point can be decorated, and for this you can choose one of the following methods:
- use a polyurethane rosette that looks beautiful, lightweight, and is in no way inferior to a classic plaster ceiling rosette;
- using good glue, glue the material left after installing the stretch ceiling; the diameter should be slightly larger than the size of the attachment point;
- use any decorative sticker.
The most important thing in this work is accuracy and attentiveness. Skills of working with electricity will also not interfere. If you do not own them, it is better to turn to professionals for help at certain stages.

If you do not have the skills to work with electricity, it is better to contact a specialist
Avoid drilling the concrete surface of the main ceiling close to the breaker: you could damage the installed wiring.
Video about installing a halogen chandelier on a stretch ceiling
As you can see, hanging a chandelier on a stretch ceiling is not difficult, you just need to be careful and take precautions. We hope our guidelines will help you get through this process. If you have any questions on the topic of the article, ask them in the comments. Good luck!
Recommended:
How And What To Paint A Drywall Ceiling With Your Own Hands + Video

Features of painting a plasterboard ceiling with your own hands. Choosing the right paint. step by step process
How To Wash Off Whitewash From The Ceiling Quickly And Without Dirt + Video

Step-by-step recommendations for flushing old whitewash from the ceiling. Preparing rinsing agents, tips to make the process easier
How To Clean Stretch Ceilings At Home Without Streaks, Including Those With A Glossy Surface, Matte, Proper Care For Them, Video

When, how and how to wash stretch ceilings. Folk and professional products for the care of film and fabric ceilings. Care tips and what not to do
How And What To Wash A Stretch Glossy Ceiling Without Streaks, How To Care + Video

How to properly wash stretch ceilings, what means it is fashionable to use for this. Maintenance rules for such ceilings
How To Install A Stretch Ceiling Yourself: Detailed Recommendations And Advice, Video

Types of stretch ceilings. Practical tips for installing stretch ceilings, tools and materials
