Table of contents:
- Author Bailey Albertson albertson@usefultipsdiy.com.
- Public 2024-01-17 22:26.
- Last modified 2025-06-01 07:32.
How to make a pyrolysis oven with your own hands

The pyrolysis oven is optimal when it is impossible to connect to the central gas main or water heating. The device is a gas generator unit for space heating and does not require constant monitoring during operation. Pyrolysis gases increase the efficiency of the furnace several times.
Content
-
1 Features of the pyrolysis oven and its application
1.1 Advantages and disadvantages
-
2 Types of long burning stoves
- 2.1 Table: classification of pyrolysis ovens
- 2.2 Photo gallery: a variety of heating units
- 2.3 How to choose a stove option
- 2.4 Structural elements
-
3 Drawings, dimensions and calculation
- 3.1 Tools and materials
- 3.2 Preparation and site selection
- 4 Manufacturing: options, diagram, instructions
- 5 Correct use and cleaning of the oven
Features of the pyrolysis oven and its application
Pyrolysis ovens are called long burning ovens. The combustion of solid fuel in them occurs without oxygen: the volatile gases are initially saturated with fine fraction timber, and then afterburned at high temperature (450 to C), mixing with the residual air in the second chamber. Fuel and gas are burned almost completely, providing high efficiency (up to 85-95%).

The simple design of the furnace allows you to build it yourself and makes the device convenient to use
A stove of this action is installed in the garage, in the country, in your home and in any small room where long-term heating is needed. The devices are easy to operate and provide the maximum amount of heat with significant fuel savings. In this case, the solid material is processed almost completely: gas and coal are burned, therefore, smoke, soot and ash are almost not formed. This principle of operation is relevant for all models of pyrolysis ovens, but different designs may differ in characteristics, appearance and internal structure.
Advantages and disadvantages
The heating device is efficient and economical, but it also has a number of features. Knowing the pros and cons of pyrolysis ovens allows you to make the right choice. The positive features of these devices are expressed in the following:
- Efficiency up to 95%, fast heating;
- minimum percentage of smoke and soot, environmental friendliness;
- no need for constant monitoring (fuel is loaded once a day);
- the use of different types of fuel;
- the availability of assembly and installation of the oven with your own hands.

The simple operating principle makes the unit practical
The main disadvantage of operating such a stove is the need for proper storage of firewood, selecting the optimal level of their moisture content. Otherwise, the material will not be efficiently burned, because the wet vapors will not allow the gas to be processed.
When burning waste (raw wood, car tires, industrial waste) there is an unpleasant odor, therefore it is recommended to use only clean and high-quality fuel, or additionally install a ventilation system in the room. It is also worth considering that condensate forms in the chimney, for the collection of which a special accumulator is provided. The outlet pipe and chimney have a larger diameter than the accumulator, therefore correct installation of the stove is important.
Types of long burning stoves
Furnace variants of this type are classified according to material, method of operation and method of heat transfer. The designs differ in the type of thrust and the mutual arrangement of the inner chambers. Thus, furnaces are made of metal or brick.
Table: classification of pyrolysis ovens
| material | internal structure | application |
| metal | stove-stove | heating of residential and non-residential premises |
| for baths and saunas | ||
| food preparation | ||
| barbecue (outdoor) | ||
| Buleryan oven | heating of residential and non-residential premises | |
| Bubafonya oven | heating of non-residential premises | |
| waste oil oven | heating of non-residential premises | |
| brick | Kuznetsov oven | heating of living quarters |
| for bath | ||
| food preparation |
Photo gallery: a variety of heating units
-

Buleryan stove -
Invented in Canada, runs on any fuel, air-fed grates are mounted in the second chamber
-

Bubafonya stove - It is easy to make from a gas cylinder, works on sawdust, coal, wood and tree bark; the flame burns from top to bottom
-

Waste oil pyrolysis - Used in the garage for heating and as a stove, but observe safety precautions
-

Kuznetsov furnace - The structure consists of inverted domes that allow pyrolysis gases to heat it up for a long time
-

Potbelly stove for a bath - Used in a bath or sauna to increase humidity and heat water
According to the method of heat transfer, the units are divided into models:
- with a water heating circuit;
- the variability of the placement of heat exchangers (the combustion and smoldering chambers are located in a different order). If the firebox is on top, and the gas afterburner is on the bottom, then forced draft with the help of smoke exhausters and fans is necessary. If, on the contrary, the firebox is located at the bottom, then natural draft is triggered.
How to choose a stove option
First, decide:
- for what purposes the oven is needed;
- where will she stand;
- what fuel to work on.
When choosing the type of construction to create with your own hands, consider the area and type of space. Depending on the parameters of the heated room, the dimensions and power of the furnace are selected. It should be borne in mind that brick models are put in a permanent place for future use, and metal ones - almost all are mobile.

A homemade stove must meet the required characteristics and be safe to use
When making any furnace model, it is worth calculating the balance between the ratio of oxygen and gas with your own hands. Therefore, the selection and assembly of any variant of the furnace requires a careful calculation of the parameters, power and dimensions of the product.
Structural elements
High quality steel sheets are used to create rectangular metal structures. In this case, the furnace is made with double walls. The space between them is filled with sand or water (water circuit). Thick-walled metal drums can serve as a base for making a small oven.

The metal structure can be bricked from the outside (lining) or from the inside of the furnace (lining)
The pyrolysis oven has two combustion chambers. In one compartment, solid fuel is processed, and in the other, pyrolysis products are mixed with air. With the upper location of the solid fuel furnace, a grate is placed between the compartments. In metal furnaces, hollow plates serve as partitions.

Visual image of air flows during operation of a pyrolysis stove-stove with a firebox in the lower compartment
Blower fans are essential elements in structures where the gas chamber is located at the bottom. With the help of forced draft, gaseous substances move downward, where the afterburning process begins. In such products, there are also smoke exhausters on the outlet channels.

Forced draft directs gases to the second part of the furnace, where they are afterburned (with the release of a large amount of heat)
All structural elements are interconnected, ensuring efficient operation of the pyrolysis oven.
Drawings, dimensions and calculation
You can make a small stove for heating a garage or other space with your own hands using materials at hand.

A sketch plan and a drawing of a small metal stove-stove is easy to create yourself
A mandatory step is to create a drawing or diagram of a future design. To do this, you need to determine the shape and dimensions of the body, the option of the location of the cameras. After that, a calculation is made of the power sufficient to heat the room. The parameters are defined as follows:
- Let's assume that 10 kW of heat is required to heat a room at the lowest outside temperature. We determine the required power of the furnace in the normal combustion mode. It is known that in the gas generation mode the furnace power is 10-30% of that which develops in the flame combustion mode. Therefore, to obtain 10 kW with gas generation, the unit, when burning with a flame, must develop a power W = 10 / 0.3 = 33.3 kW (we take a 30 percent power ratio);
- choose the least energy consuming fuel. For example, dry beech is optimal;
- we calculate the volume of the fuel tab, which can provide the required power. A portion of firewood burns in flame mode in about 4500 s. Therefore, during this time it should give the following amount of heat: Q = 33.3 * 1000 * 4500 = 149.85 MJ. Let's calculate the required mass of fuel, taking into account that it completely burns only by 80%, and the efficiency of a home-made stove is approximately 50%: M = 149.85 / (15.5 * 0.8 * 0.5) = 24.17 kg. Knowing that the density of dry beech is 620 kg / m 3, we translate the resulting mass value into volume: V = 24.17 / 620 = 0.039 m 3 = 39 l;
- we calculate the volume of the firebox. The furnace load factor is on average 0.63. It should have a volume: VT = 39 / 0.63 = 61.9 liters.
You can make a drawing or technical drawing of the product yourself, taking into account the shape and characteristics of the furnace. The finished image of a suitable unit is taken as a basis.
Tools and materials
List of required consumables and working tools:
- sheet steel grade St20 with a thickness of 3-4 mm;
- steel equal-flange angle 4x50 mm;
- pipe with a diameter of 50-60 mm;
- steel reinforcement with a cross section of 8 mm;
- steel pipes with a diameter of 110 or 120 mm for the chimney;
- bricks in the amount of 15 pieces;
- electric welding machine and several packages of electrodes;
- drill and drills for metal, grinder with 230 mm circles;
- building level, tape measure, pencil, hammer.
Choose consumables of high quality and reliable. Not only the operation of the pyrolysis oven depends on this, but also the safety of the surrounding space during the heating process.
Preparation and site selection
The assembly of the structure is carried out directly in the room where the furnace will be installed. Cutting the sheet into blanks is best ordered from specialists in the store. This will ensure a good quality base for the product.

The space around any stove must be safe and heat-resistant, and the floors level
Prepare the place for installing the unit.
- a base of bricks or other non-combustible material is laid on the floor;
- the base area must be larger than the dimensions of the furnace;
- install the unit at a distance of at least 80 cm from the nearest walls;
- the floor within a radius of 1.2 m in front of the heating device must have a non-combustible coating (iron sheet 1.5 mm thick).
Manufacturing: options, diagram, instructions
The stove can be cylindrical or rectangular.
We make the necessary blanks: from the metal corner we cut the elements for the vertical racks (1 m), and measure the horizontal ones according to the width of the installation. The parts are welded and a frame is obtained.

You can, of course, buy a stove, but it's more interesting to create it yourself
After that we make the walls. We make two holes in the front panel: one for the firebox, the other for ash. We weld fasteners for hinged doors on them.
We attach the corners to the inner side, one on two opposite walls. And on them we mount a grate and a perforated pallet that separates the firebox and the afterburner compartment.
Further complex of works:
-
A blower with a flap must be cut into one of the side walls at the level of the top of the combustion chamber. It is made from a short piece of pipe with a diameter of 50-60 mm. Having drilled holes with a diameter of 8.5 mm in the blower, you need to insert the damper axis made of reinforcement with a diameter of 8 mm into it. On one side, the axle should protrude a sufficient length - after bending, its shank will act as a handle. It remains to weld a steel disc to the axis, the diameter of which corresponds to the inner diameter of the blower. To prevent the damper from moving spontaneously, its handle is equipped with a spring or threaded detent.

Homemade blower It is important to make all the elements correctly, based on the exact design drawing
-
We start welding parts from the bottom. Then we lay the grate with a partition and weld the lid to it. The partition separating the afterburner must have holes (with a total area of 7% of the entire area of the part). We leave a gap of a quarter of the length of the furnace between its edge and the front wall of the furnace.

Afterburner injector An injector is required for a pyrolysis oven
-
To connect the stove to the chimney, weld a branch with a diameter of 110-120 mm with a 90 degree rotation angle into the hole in the cover. It is joined by a horizontal section 0.8-1 m long (the so-called hog). It delays the exit of gases from the afterburner, allowing them to burn in full.

Furnace base All sections of the furnace must be of optimal volume, and the structure itself must be stable
- At the end of the horizontal section, we install a damper (gate), made according to the same principle as the blower damper. Only for the gate, the diameter should be less than the inner diameter of the pipe - about 90-95 mm. The slide valve is cut out sector with a central angle 90 of, that is ¼ of the disc.
This design can be complicated and turned into a convector: vertical pipes with a diameter of 60-100 mm are installed inside the firebox, 2/3 of the diameter going into the firebox. Better to use curved elements.
Correct use and cleaning of the oven
Fire up the unit for the first time with the slide gate open: put a rapidly burning solid fuel on the grate and set it on fire. After burning out, add more logs, close the door and flap, and use the blower to adjust the power. It is worth remembering that the gate has a cut that does not allow blocking the chimney.

The schemes of the device are different, but the principle of operation of pyrolysis furnaces is the same - combustion of fuel without oxygen
It is not necessary to clean long burning stoves often: the fuel burns out completely, and soot in the chimney is formed in small quantities.
Do-it-yourself regular repair of a pyrolysis oven requires timely troubleshooting. If the firebox door is deformed, this element should be corrected or replaced. If the structure diverges along the seam, then it is important to stop operation and urgently eliminate the cracks.
A stove of this type is easy to do with your own hands, but the design must be created with great accuracy, using ready-made drawings or developing them yourself. The heating system requires the use of quality materials and care in manufacturing and assembly. Only in this case will the pyrolysis oven be safe to use and effective.
Recommended:
Making A Buleryan (breneran) Stove With Your Own Hands: Advantages And Disadvantages Of The Design, A Device With Drawings, Instructions With A Video, Etc
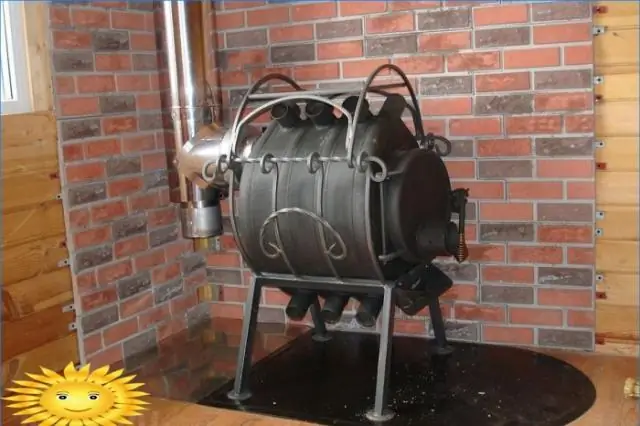
Design and principle of operation of the "Buleryan" furnace (breran). DIY recommendations with instructions and drawings. Maintenance and operation
Do-it-yourself Brick Oven: Diagrams, Masonry, Drawings With Ordering, Etc. + Video
Types of brick ovens, their design features and advantages. Calculation of a brick oven and the procedure for its construction with your own hands
How To Make A Long Burning Stove With Your Own Hands: Manufacturing Instructions With A Diagram And Drawings + Video

How to make a long burning stove with your own hands. Consumables, recommendations, diagrams, design features
Long-term Burning Stove (including Sawdust And Wood) With Your Own Hands: Diagram, Drawings, Etc. + Video
How does a long burning stove work. Production of a long-burning furnace from a gas cylinder and sheet metal. Features of operation and repair of furnaces
How To Make A Comfortable Computer Desk With Your Own Hands: Drawings, Diagram, Detailed Instructions + Video
Practical advice and recommendations for making a computer desk. Required materials and tools, step by step instructions
