Table of contents:
- Author Bailey Albertson albertson@usefultipsdiy.com.
- Public 2023-12-17 12:53.
- Last modified 2025-01-23 12:41.
How to install plastic floor skirting boards with your own hands

Greetings to all readers and subscribers of our blog
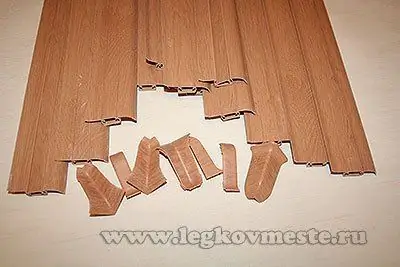
Today I want to share with you my experience on how to install a plastic skirting board. After all, you must admit how unfinished a new beautiful flooring looks like, whether it be parquet, laminate or linoleum without a spectacular transition from floor to wall. And the gap between the coating and the wall must be hidden.
A huge advantage of installing plastic skirting boards is, of course, ease of installation and a very presentable appearance of the assembled structure. If the walls are well leveled and the floor is made horizontally and evenly, then the installation work will be a pleasure and pleasure.
Modern technology for the manufacture of the skirting boards themselves and connecting fittings has reached such heights that one part fits the other with very high accuracy, forming a high-quality and beautiful joint.
The entire installation process consists of three main points:
1. Installation of a plastic skirting board on a straight wall
2. Fixing and positioning the inner corner
3. Installation and connection of the outer corner
These three main stages, from which the whole process of framing the perimeter of the room is formed, we will now consider in more detail.
1. Installation of a plastic skirting board on a straight wall
Installation work can be started from any corner of the room, but I would still recommend starting from one of the corners of the longest straight wall in the room. Starting work in this way, we use the maximum number of whole whips and one cut off piece remains, which will later be used for installation in niches, outlining short sections of the wall or supporting columns. As a result of applying this technique, by the end of the work, we will receive a minimum amount of scraps and, accordingly, save money on building material.
Step 1. Detach the decorative insert covering the inner channel of the plinth.

Step 2. We attach the inner corner to the end. It is necessary to insert the plinth into the corner piece up to the stop strip on the inside of the corner.

Step 3. We apply the resulting structure to the wall so that the transverse side of the inner corner rests against the wall perpendicular to the wall to which we attach the structure.

Step 4. Fix the plinth to the wall with screws. Insert the screw into the special holes in the channel and tighten it all the way. It is advisable to make fastenings with a pitch of 250 mm.

I attached the plinths to a plaster wall, covered with wallpaper, into which the screws went freely. If your walls are concrete or brick, then you must first make markings on the wall at the attachment points. Drill holes with a drill with a victorious soldering, insert the dowels, and only then fix the structure.
Step 5. Insert the connecting element into the opposite end of the skirting board.

The skirting board must fit up to the stop strip on the inside of the connecting piece.
Step 6. We join the next whip to the connecting element and, as in the fourth step, attach it to the wall.

Thus, we go through the entire length of the wall.
Step 7. Install the last piece of skirting board on our wall. It probably does not fit entirely, so we cut off the required length from the whole whip.

To correctly measure the size of the cut piece on the face of the connector, mark with a pencil the location of the inner stop. Perform a similar operation with the inner corner to which our cut piece will be joined. (The photo below shows how to measure the length of the skirting board between the outer and inner corners).

Place the inner docking corner in the corner of the room and measure the distance between our marked lines on the docking element and the inner corner element. This size, minus 2-3 mm for gaps, will be the length of the required piece of plinth.
Step 8. Reinstall the decorative strips that cover the cable duct and attachment points.

To facilitate this process, we proceed as follows:
- insert the bar on the right side and slide it into the connecting or corner element;
- insert the bar on the left side and fill it a little into the connecting element;
- starting from the right side and gradually moving to the left, set the plank into the grooves until it clicks, meaning that the plinth spike has entered the plinth groove;
- going to the left side, push the excess bar into the connecting element, and completely set the bar in place.
2. Fixing and positioning the inner corner
By installing the skirting boards in a straight line of the wall, from one inner corner of the room to the other, we have practically already installed two inner corners. It remains only to do the joining of our inner corner with the plinth, which will be adjacent to the perpendicular wall.

To do this, apply the plinth along the adjacent perpendicular wall and insert it into the inner corner up to the stop bar. We fix the structure with screws as described in step 4.
Sometimes it becomes necessary to make the transition immediately from the inner to the outer corner, as in the photo below.

To make such a transition, you need to do the following operations:
- on the front surfaces of the outer and inner connecting elements, we mark the location of the inner stops;
- we apply the outer and inner connecting elements to each other and measure the distance between our marks;
- cut off a piece of the skirting board according to the measured size minus 2-3 mm for the gaps on one side and the other. This piece will serve as the frame on which the corner pieces are attached:
- we install the outer and inner corner elements on the cut piece.

3. Installation and connection of the outer corner
Step 1. Approach the skirting board along the straight section of the wall to the outer corner and cut it to length so that the end of the skirting board does not reach an angle of 2 mm.

Step 2. We join the butt end to the stop with the outer corner element.

Step 3. Fix the plinth with a screw.
Step 4. Place the skirting board against the perpendicular wall and tuck one end into the outer corner piece until it stops against the inner support strip.
Step 5. We close the channel with a decorative plug.
We act in the same way if it is necessary to bypass the column, as in the photo below.

Gradually moving along the entire perimeter of the room, a plastic skirting board is installed along all straight sections and the outer and inner corners are framed.
The inner channel in the skirting board can be used for laying, for example, an antenna cable. This will allow you to bring it to the installation site of the television receiver and maintain the aesthetic appearance of the room.
I hope that now it will not be difficult for you to install the plastic skirting board. I look forward to your comments and will try to answer everyone by all means.
Recommended:
Installing A Polycarbonate Greenhouse On A Timber, How To Properly Fix The Structure, Instructions With Photos And Videos
Detailed instructions for the manufacture and installation of an arched greenhouse made of wooden beams and sheathing of the frame with polycarbonate
How To Make A Wardrobe With Your Own Hands At Home: Step-by-step Instructions For Making, Installing Filling And Doors With Drawings And Dimensions
A detailed guide to making a wardrobe with your own hands. Design, marking, installation of internal filling, installation and adjustment of doors
Installing A Boiler (water Heater) With Your Own Hands: Connection Diagram To The Water Supply System, Rules, Etc
What is a boiler, how does it work. How to independently install and connect an instantaneous and storage water heater. Safety regulations
DIY Fence Made Of Corrugated Board, Installation Of A Fence Made Of Corrugated Board
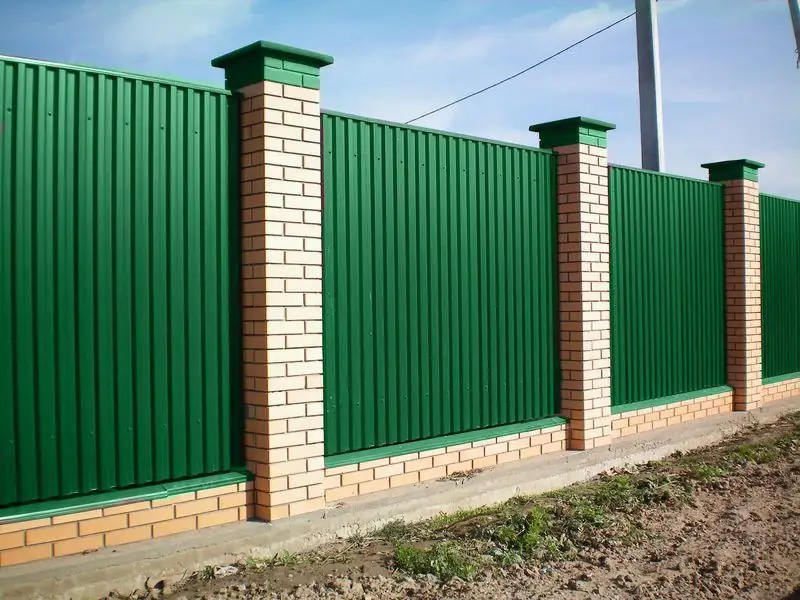
A fence made of corrugated board with your own hands on a personal plot. Step by step instructions on how to install a fence made of corrugated board with two types of pillars
Which Cutting Board Is Better: Wood, Plastic Or Glass

Types of cutting boards by materials: glass, wood, plastic. Their pros and cons. What products are wood, plastic and glass boards suitable for?
