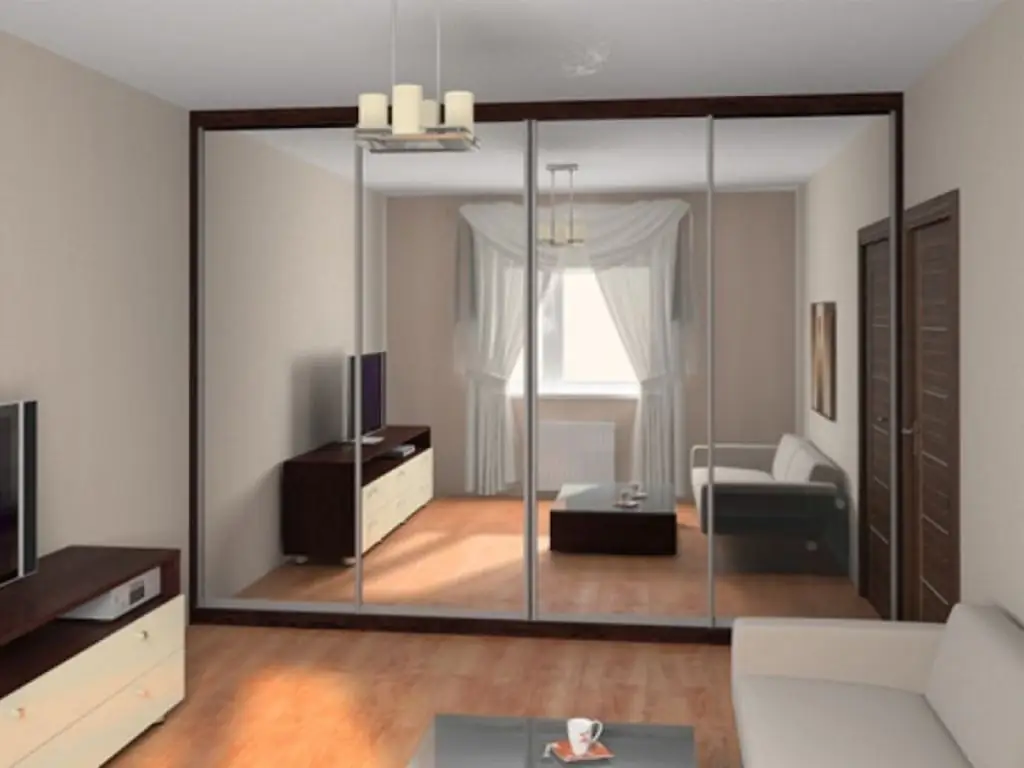
Table of contents:
- Author Bailey Albertson [email protected].
- Public 2023-12-17 12:53.
- Last modified 2025-01-23 12:41.
Do-it-yourself sliding wardrobe: a detailed guide to calculation, assembly and installation

Sliding wardrobes are in great demand. And all because they are spacious and comfortable. The use of cabinets of this kind is especially important in small apartments, since they save space. In them, you can arrange the internal compartments, shelves and rails for hangers as you like, install additional storage boxes. At first glance, the installation of a "kupeynik" may show a long and overwhelming process. But with some knowledge and skills, you can assemble it yourself as a constructor.
Content
-
1 Preparatory stage
- 1.1 Dimensional drawings and calculation of the number of parts
-
1.2 Choosing the internal filling
1.2.1 Table: details for cabinet making
- 1.3 Sawing parts
-
2 Assembling a wardrobe with your own hands - step by step instructions
- 2.1 Wall marking and fixing parts
- 2.2 Installing the rails
- 2.3 Video: installation of rails for the wardrobe
-
3 Assembly and installation of sliding doors
- 3.1 Required materials and accessories
- 3.2 Dimensioned drawing
- 3.3 Making door handles from a profile
- 3.4 Calculation and installation of door filling
- 3.5 Installation and adjustment of doors
- 3.6 Video: self-production of a wardrobe
- 3.7 Video: assembly and installation of mirror doors
- 3.8 Video: installation of cabinet fittings
Preparatory stage
When making a wardrobe, you can accomplish two tasks at once: filling an empty niche in a living room and creating a functional place for storing clothes, linen and other things.
If there is an empty niche in the room, then for sure you have already chosen a place where the built-in wardrobe will stand, that is, you already have an idea of what size the closet will be, you know its length, height and depth.
If the space for the furniture structure is not limited, then in order for the cabinet to look beautiful, it is necessary to follow the rule of the "golden section", the ratio of height to width, according to this rule, should be 1.62 or close to this ratio. Then the wardrobe will look beautiful.
Dimensional drawings and calculation of the number of parts
Here we will consider the manufacturing process of a cabinet with a depth of 520 mm, a height of 2,480 mm and a width of 1,572 mm (calculated according to the rule of the "golden section" taking into account the height of 2,480 / 1.62 = 1,531).

It is necessary to design a wardrobe according to the rule of the "golden section"
Considering that sliding doors are not recommended to be made wider than 1000 mm and the overall dimensions of the structure, in this case two shutters are provided with a coarse size of 480x785 mm. If the cabinet is planned to be made wider, then the number of doors may be larger.
It is not recommended to make the depth more than 600 mm, since at greater depth it will be very inconvenient to use the shelves, especially the upper ones - it will be difficult to get to things.
Choosing the inner filling
After deciding on the overall dimensions, depth and number of doors, you need to deal with the internal filling of the cabinet, that is, with partitions, shelves and their location.
Here it is already necessary to take into account your preferences and the location of the structure.
For example, in the closet for the hallway, you need to provide a large compartment for outerwear, which can be hung on a hanger when entering the apartment.
If the closet is planned to be placed in the living room, it would be more logical to provide for a large number of shelves for bed linen and towels. Also, for ease of use, it would be advisable to think about drawers. For beauty, you can end the butt with attached rounded shelves.
To simplify the design process and save time, use special programs.

If you have a drawing that you thought out to the smallest detail, it will be much easier to make a cabinet.
The same drawing will then be convenient to use when marking the location of shelves and partitions on the wall, assembling the cabinet at the installation site.
To carry out this operation, it will be more convenient to set the dimensions in the "chain" as in the screenshot below. This will eliminate the possibility of making mistakes when sizing parts. It is assumed that the cabinet is made of 16 mm thick particle board (chipboard).

The drawing should always be at hand
Moreover, if you are going to make a cabinet with a height from floor to ceiling, then it is advisable to add 5-8 mm to the dimensions of the parts of the vertical group (here these are parts No. 5 and 6). This must be done in order to compensate for unevenness in the floor and ceiling. When installing these parts and assembling the cabinet, it is better to slightly adjust their length in place than to get an unsightly 10 mm gap.
Of course, if you have a quality repair, with a strict horizon line of the floor and ceiling, this should not be done.
Then a table of parts is compiled with the number, dimensions and indication of the sides that will be processed with the edge. The table will come in handy when ordering sawing of all chipboard components.
Table: details for making the cabinet

A table containing information about parts will be required for sawing
Parts 12 and 13, not shown in the dimensioned drawings, are shims for the upper and lower guide rails of sliding doors. Their width (100 mm.) Is selected based on the width of the guide profiles, and the length - the inner width of the wardrobe (1572 -16 = 1556 mm)
Columns 5, 6, 7, 8 indicate the side of the part that will be processed with the edging tape, that is, all front sides are indicated.
Sawing parts
After drawing up such a table, everything is ready for placing an order for sawing parts and edging. Firms that provide such a service have software that allows you to arrange parts on the sawn chipboard sheet with minimal waste (this service is included in the cost of cutting). They also sell chipboards of various thicknesses, colors and textures along the way, and are engaged in edge processing.
Before ordering the cuts, be sure to double-check the number, size and edge position of the parts. It is, of course, easy to correct errors in some cases, but it also happens that, due to one small inaccuracy, an additional chipboard sheet may be required to manufacture a part, and this is expensive.
Do-it-yourself wardrobe assembly - step by step instructions
When all the parts are received, you can start assembling the wardrobe.
Wall marking and fixing parts
In this version, the cabinet was "tied" to the side wall on the left side, therefore it is recommended to postpone the dimensions and carry out installation from it. Gradually, assembling the structure, he moved to the right to the extreme right vertical wall of the cabinet.
-
Mark the location of the vertical partition. Set aside on the left side of the wall 1 140 mm from the bottom, near the floor, and above, under the ceiling. Connect the obtained marks with a vertical line and, applying a level to the line, check the verticality of the line drawn on the wall. Verification of verticality is necessary to eliminate errors that may result from the unevenness of the wall from which the value was deposited. This line will be the location of the left side of the vertical baffle (5).

Wall layout and installation of a vertical cabinet wall Mark the wall along the vertical partition
-
Along the drawn line with a step of 30-40 cm, screw the plastic fixing angles to the wall.

Installation of mounting angles Attach corners
- Attach the vertical partition of the first compartment to the plastic corners and fix it with screws perpendicular to the rear wall of the cabinet.
-
Align the vertical divider perpendicular to the back wall of the cabinet. This can be done by attaching the square with one side to the back wall of the cabinet, and the other to the partition (this technique is applicable if you have ideally brought out the walls of the room). The second way is to set aside the size of the width of the compartment (1 140 mm.) From the left wall to the partition from the front side of the box, top and bottom, and draw lines for the location of the partition on the ceiling and on the floor.

Installing the vertical cabinet divider Install the partition perpendicular to the back of the cabinet
- Attach plastic corners to the floor and ceiling along the lines obtained.
- Fasten the vertical partition to the plastic corners along the floor and ceiling.
- Mark the location of the upper horizontal shelf (1). To do this, set aside 2,092 mm from the floor on the rear wall of the cabinet and make two marks: on the left side (in this case, against the wall) and on the right side at the line marking the vertical cabinet partition. Connect the obtained marks with a horizontal line and control its horizontalness using a level to eliminate errors. This will be the line to which the underside of the upper horizontal shelf (1) is applied.
- Carry out the same procedure for the installation of the lower horizontal shelf (2), but instead of the size 2,092 mm, postpone the distance of the shelf from the floor - 416 mm. This will be the line to which the underside of the lower horizontal shelf (2) is applied.
-
Fasten the plastic support corners along the marked lines.

Fastening support corners Fix support corners
-
Putting the shelf on plastic corners, fix it from below with screws. To fasten the horizontal shelves to the vertical partition on the right, you can use another method of fastening - using Euro screws. This will give a stronger connection between the parts of the structure.

Fastening the shelf of the wardrobe Install and secure the shelf
-
Align the end of the shelf and the end of the vertical partition and mark the fixing points. Drill holes 5 mm in diameter and deeper than the length of the Euro screw according to the marks.

Drill and cabinet Make holes for fasteners
-
Insert the Euro screw into the drilled hole and connect the parts together.

Installation of a shelf in a wardrobe Tighten the Euro screw
- Mark the position of the vertical partition of the top shelf (3). To do this, set a distance of 562 mm on the ceiling and on the upper horizontal shelf to the left of the wall. Connect the resulting marks with a vertical line. This will be the line to which the left side of the vertical partition of the top shelf (2) is applied.
- Similarly to the previous marking, mark the location of the vertical partition of the lower shelf (4) of the first cabinet compartment.
-
Attach the vertical partitions to the shelves using Euro screws, having previously drilled holes for them. Fastening the vertical partition of the upper shelf to the ceiling and the vertical partition of the lower shelf to the floor using plastic corners.

Installation of horizontal shelves in the cabinet Screw vertical partitions to the shelves
-
Mark the position of the horizontal shelves of the second compartment (7, 8, 9, 10, 11) on the back wall of the cabinet. To do this, set aside 516 mm (distance to 1 shelf), 896 mm (distance to 2 shelves) from the floor, etc.

Layout of the second compartment of the wardrobe Make markings for the second compartment of the wardrobe
-
Mark the location of the shelves and the places for the fixing Euro screws on the right vertical wall of the compartment (6). Here you can additionally make symmetrical markings on the inside of the wall. This will make it possible to attach the shelves to the desired location when attaching the wall to the shelves.

Shelf layout Make markings for the location of the shelves of the second compartment
-
Mark the location of the shelves and the places for the fixing Euro screws on the inner partition of the cabinet (5) and fix them. If you are assembling the cabinet with an assistant, then the markings must be transferred to the back of the partition for ease of assembly of the cabinet. In this case, one applies the shelf to the partition according to the marking, the second drills holes for the fastening Euro screws on the back of the partition according to the marking. Moreover, two parts are drilled at the same time - the partition through and through and the shelf to the desired depth, depending on the length of the Euro screw. If you are doing the work alone, therefore, I approached this issue as follows: according to the marking, make holes in the partition for the mounting screw.

Drilling screw holes Make holes for screws
-
Attach the shelf to the partition and mark the location (distance from the end of the shelf) of the fixing Euro screw.

Marking for mounting holes at the end of the shelf Make markings for the mounting holes at the end of the shelf
-
Mark the middle of the chipboard at the mark.

Chipboard sheet Mark the middle on the details
-
According to the resulting markings, make holes in the shelf for Euro screws.

Mounting screw hole Drill a hole for the fixing screw
-
Fix the shelf in place.

Shelf installation and fixing with a Euro screw Fix the shelf with a Euro screw
-
Having done similar operations with all the shelves of the second compartment, we get this picture.

Installation of shelves in the second compartment of the wardrobe This is how the second compartment with shelves looks like
-
Place the rightmost cabinet panel (6) on the shelves.

Installing the far right side of the cabinet Install the right side of the cabinet
-
Aligning the shelf with the markings on the attached vertical wall, make holes for the fastening screws according to the markings on the outside. Drill the holes through the wall into the shelf to the depth of the fixing screw.

Drilling a hole in the cabinet wall Make holes in the wall for fasteners
-
Connect the vertical wall and shelf with a screw.

Screwing in a screw Fix the vertical right wall of the second compartment of the wardrobe
- Repeat steps 25 and 26 for all five shelves in the right compartment of the wardrobe.
Installation of guides
-
Place the chipboard spacer (12) under the bottom guide rail of the doors. To do this, screw in the fastening screws in a staggered manner with a step of 200-300 mm (through and through, so that the screw comes out 2-3 mm from the back side). Attach the underlay as shown in the photo below and, pushing from above, make marks for the fasteners on the floor.

Chipboard details for cabinet Install a chipboard lining under the lower guide rail of the doors
-
Using the markings, make holes in the floor for fixing dowels and fix the plank to the floor.

Preparing mounting holes Make holes in the floor for attaching the underlay
-
Fix the chipboard backing (13) on the ceiling in the same way under the upper door guide rail on the ceiling.

Fastening the top lining in the wardrobe Attach the upper door track pad to the ceiling
-
Cut off the aluminum upper door rail to the required length. The length of the guide should be equal to the inner width of the wardrobe compartment and freely enter between the outer walls of the wardrobe. In order not to damage the appearance of the guide, the tool must be applied from the side of the shelf, which will be adjacent to the ceiling.

Cutting a metal guide for a wardrobe Cut off the upper door rail
-
Cut the aluminum bottom guide rail of the doors to the same length.

Cutting the guide with an electric hacksaw Cut off the bottom door rail
-
Fix the bottom door track to the bottom chipboard lining.

Attaching the bottom rail to the lining Fix the bottom door rail
-
Attach the top door rail to the top chipboard pad.

Attaching the top rail Fix the upper door track
-
The frame and the inside of the wardrobe are assembled. All partitions and shelves are fixed in place. If necessary, attach hooks for clothes, mark and install rods for hangers and other small accessories.

Fastening the rod in the wardrobe Secure the hanger bar
Video: installation of rails for the wardrobe
Assembly and installation of sliding doors
This is the final stage in the manufacture of a wardrobe.
Required materials and accessories
- horizontal bottom bars;
- horizontal top bars;
- vertical framing (handles);
- a set of fittings for assembly (for two doors - two sets);
- filling (in this case - mirrors).
Dimensioned drawing
The total width of the cabinet, which will need to be closed with sliding doors, is 1,556 mm (1,572-16 = 1,556), 16 mm is the thickness of the right side of the cabinet against which the door will rest.
Considering that the cabinet has two doors and they must overlap at least by the width of the handle (25 mm), or better with a small margin of 50 mm, add 50 mm to this size (the width of the handle on the right side (25 mm) plus the width of the handle on the left side (25 mm), which is 1,556 + 50 = 1,606 mm.

The drawing shows the dimensions of the sliding doors
The length of two doors with overlap is 1 606 mm, respectively, one is 1 606/2 = 803 mm. We decided on the width, now we need to calculate the height of the canvas. The total overall height from floor to ceiling is 2,481 mm. Top and bottom pads for 16 mm guides. The gap between the top rail and the door is 15 mm. A similar gap at the bottom is 15 mm.
The height of the web is calculated: 2481-16-16-15-15 = 2419 mm. As a result, there will be two sliding doors 2 419 * 803 mm.
The height will be determined by the length of the handle profile. Such a profile is sold in a length of 2700 mm and for two doors you will need four whips (two handles on one door and two handles on the other).

Vertical profile for doors
The top and bottom framing profiles are sold in multiples of one meter, and we need two meters of the upper profile and two meters of the lower profile.

Top and bottom horizontal profile
Making door handles from a profile
-
Purchase the required amount of material for the manufacture of the frame, two sets of fittings for assembly, and proceed with the construction of the frame. The assembly kit includes:
- two support wheels for positioning the door in the lower guide profile;
- two bolts for fastening support wheels;
- four tightening screws (self-tapping screws) to connect horizontal and vertical profiles;
- two positioning supports for the door in the upper guide rail.
-
Mark and cut to the required length (in my example, this length is 2,419 mm - the height of the door) vertical profile (handle profile).

Cutting profile for wardrobe door Cut off the vertical profile for sliding wardrobe doors
- There should be four such segments (two handles, right and left on each canvas). The profile is protected with plastic wrap, which prevents damage during transportation and cutting.
-
Mark and cut off the upper and lower horizontal profile of the sliding doors of the wardrobe.

Cutting profile for door Cut off the upper horizontal profile of the frame of the sliding wardrobe doors
-
When calculating the length of the profiles, see the diagram below. Total width - 803 mm, of which 25 mm on the right is the right vertical handle, 25 mm on the left is the left vertical handle.

Bottom horizontal profile for door Length of the lower horizontal profile of the wardrobe door frame
-
In the vertical profiles (handles), a groove is provided for positioning horizontal framing profiles with a depth of 1 mm, i.e. the horizontal profile enters the vertical one by 1 mm on the left and 1 mm on the right. Hence the calculation of the length of the horizontal profiles: 803-25-25 + 1 + 1 = 755 mm. Make two 755 mm segments of the lower frame profile and two segments of the same length for the upper frame.

Connecting vertical and horizontal profile Connection of the vertical and horizontal profile of the door frame
-
Mark places for drilling holes in vertical profiles for fastening screws for the upper horizontal profile.

Marking the mounting holes Mark places for mounting holes in vertical profiles
- Measure the distance from the end of the profile to the middle of the hole for the fastening screw (7.5 mm) and transfer it to the vertical profile. On the vertical profile, mark the place where the hole is removed from the profile end and mark the center of the hole.
-
A similar marking procedure should be done in the vertical profile (handle) on the other side of the whip for drilling holes for the fasteners of the lower horizontal profile.

Marking the place of attachment of the profile Mark the attachment points of the lower horizontal profile
-
On the same side of the vertical profile, mark the holes for the support wheels. To do this, measure the distance from the end to the middle of the mounting hole of the block with the support wheel. Transfer this dimension to the vertical profile.

Wheel mounting markings Mark the attachment point for the support wheels
-
Drill 5 mm holes for self-tapping screws in all the marked holes in the vertical profiles. Drill the holes through the two strips (outer and inner). In total, three holes are obtained in each vertical profile (one at the top for the upper horizontal profile, the second at the bottom for the lower horizontal profile and the third at the bottom for fastening the support wheels).

Drilling a hole in the profile Drill mounting holes in vertical profiles (handles)
-
Drill holes in the outer plank of vertical profiles to a diameter of 8 mm, as in the photo below. This must be done so that the head of the self-tapping screw passes through the upper bar (the clamp will be carried out to the lower bar). This completes all the preparatory stages with structural elements, you can proceed to assembly.

Outer strip holes Drill the hole in the outer strip to a diameter of 8 mm
-
Connect the upper horizontal bar to the right vertical bar (handle). To do this, align the drilled holes in the vertical profile with the hole in the horizontal upper profile and tighten the parts together by inserting a self-tapping screw.

Assembling the door frame Connect the upper horizontal and right vertical slats of the wardrobe door
-
Before final tightening, insert (as shown in the photo below) the positioning support in the upper guide rail. Carry out a similar procedure on the other side, connecting the left vertical bar (handle) with the upper horizontal bar.

Support fixing Insert support for positioning the door in the upper guide rail
-
Connect and pull off the lower horizontal strip with the right and left vertical strips (handles).

Connecting profiles Connect the bottom horizontal and left vertical profile
-
Insert the support wheel into the lower horizontal profile on the left side and align the mounting holes.

Installation of support wheels Insert the lower support wheels of the wardrobe door
-
Tighten the bolt as in the photo below and secure the support wheel in place. Do not screw in the bolt deep enough for it to come out of the bar by 1-2 mm. In the future, by screwing or unscrewing this bolt, we will adjust the location of the structure on the lower guide support. Carry out a similar procedure for installing the support wheel on the right side. Assemble the second door in the same way.

Fixing castors Fix the lower support wheels of the wardrobe door
Calculation and installation of door filling
As a filling, you can painted fiberboard, fiberboard for matting, photo panels, mirrors.
-
Measure the distance between the lower and upper horizontal strips. In the photo, for clarity, the strips are close to each other to show how the door frame was installed in a vertical section. The length of the filling is 2360 mm.

Two guide profiles Measure the length of the door filling sheet
-
Measure the distance between the left and right handles. Filling width 767 mm.

Wardrobe door handles We measure the width of the door filling sheet
In order for the filling to enter the frame without problems, it is necessary to leave a gap of 1 mm on each side. The size of the filling is obtained: 2 358 * 765 mm. Any filling can be ordered according to these dimensions, except for mirrors and glasses. In order to insert the mirrors, a sealing rubber tape is used, which also has its own thickness, under which a gap of 1 mm must also be left along the entire perimeter. The size of the mirror in our case for the cutting order will be 2,356 * 763 mm.
-
If these are mirrors, first put on a sealing rubber around the entire perimeter of the mirror.

Attaching the sealing rubber to the mirror Fasten the sealing rubber around the perimeter of the mirror
-
Disassemble the frame structure, unscrew the tightening screws. The support lower wheels do not need to be unscrewed.

Door framing Disassemble the frame of the wardrobe door
-
Insert the filling into the top and bottom bar.

Installation of door filling Insert filling into top and bottom planks
-
Putting the structure on the edge, attach a vertical guide and insert the fastening screws into the upper and lower horizontal strips. Pull off the structure using a hexagon.

Door filling installation Connect the vertical and horizontal strips of the door frame
-
Turning the door over and placing it on the already fixed handle, insert the second vertical handle into the filling and pull it off with self-tapping screws. Do not forget to insert support rollers under the fastening screws of the upper horizontal bar to position the structure in the upper guide. Similarly, collect the second door.

Fastening the profile and filling Tighten the fastening connecting screws
Installation and adjustment of doors
It remains to install the assembled structures in place. The upper rail has two slots for the upper positioning supports - near and far. The lower one has two grooves - near and far, for the lower support wheels. The far rail on top and the far groove on the bottom are used to mount one structure, and the near rail on top and the near groove on the bottom are used to mount the second structure.
-
Insert the top of the door into the far upper guide and, lifting the structure, install the lower support wheels into the far groove.

Installing the wardrobe door Install the door in the top rail
-
Pressing the spring-loaded lower wheels, sink upward into the body of the lower horizontal bar of the frame of the structure. While lifting the structure, install the support lower wheels in the far groove of the lower support bar.

Installing the wardrobe door Insert the lower support wheel into the lower guide groove
-
A similar installation is made for the door of the wardrobe compartment in the near guides. Install the second structure using the near top groove and the near bottom guide groove for its installation. Adjust the verticality of the door. By screwing or unscrewing the bolt securing the support lower wheels on the right and left sides of the structure, you need to achieve a vertical position and no skew.

Adjustment of the wardrobe Adjust doors
Video: self-production of a wardrobe
Video: assembly and installation of mirror doors
Recommended:
Making A Buleryan (breneran) Stove With Your Own Hands: Advantages And Disadvantages Of The Design, A Device With Drawings, Instructions With A Video, Etc
Design and principle of operation of the "Buleryan" furnace (breran). DIY recommendations with instructions and drawings. Maintenance and operation
How To Make A Kite With Your Own Hands At Home: Options With Drawings And Sizes + Photos And Videos
DIY kite: the necessary materials, diagrams, drawings, manufacturing steps. How to make a kite of different shapes. Secrets of a Successful Launch
Making Metal Doors With Your Own Hands: Technology, Drawings, Equipment, As Well As How To Make Heat And Noise Insulation Correctly
Metal door manufacturing technology. Tools and equipment for self-production of metal doors. Warming and finishing
Making Interior Doors With Your Own Hands, As Well As How To Choose Material And Make Calculations
Tools and materials for the manufacture of interior doors. Manufacturing technologies for interior doors. Varieties of internal wooden doors
Making Wooden Doors With Your Own Hands, Including How To Choose The Right Material And Make Calculations
Wooden door manufacturing technology. Required tools and materials. Calculations, drawings and instructions for self-manufacturing doors
