Table of contents:
- Author Bailey Albertson albertson@usefultipsdiy.com.
- Public 2023-12-17 12:53.
- Last modified 2025-06-01 07:32.
DIY instructions for making interior doors

Making interior doors in a home workshop is a fun and creative process. If you have the necessary tools and materials, the simplest door is assembled in two to three hours. More complex structures, combining practicality with design sophistication, are assembled in two or three days. Doors decorated with artistic carvings, stained glass windows or forging elements can only be done by the most diligent and patient.
Content
-
1 Manufacturing technology of interior doors
1.1 Video: production technology of interior doors
-
2 Calculations and drawings for the manufacture of interior doors
2.1 Video: DIY door frame assembly
-
3 Step-by-step instructions for making an interior door
- 3.1 Equipment and tools
- 3.2 Materials
- 3.3 Do-it-yourself wood door
- 3.4 Do-it-yourself plywood door
-
4 How to make a frame for an interior door
4.1 Video: making a door frame
-
5 Finishing the slopes of interior doors
-
5.1 Plastering slopes
5.1.1 Video: how to plaster the slopes in the interior opening
-
5.2 MDF paneling
5.2.1 Video: installation of door accessories, the most detailed description
-
5.3 Plasterboard slopes
5.3.1 Video: making slopes from gypsum plasterboard
-
5.4 Installing a casing for an interior door
5.4.1 Video: do-it-yourself installation of platbands on interior doors
-
Manufacturing technology of interior doors
The production of doors on an industrial scale is put on the conveyor. The programmed robotic assembly machines are capable of producing several high quality products per minute. In fact, such units are prototypes of narrow-focus 3D printers. Door blocks are stamped from any material and can be of any required size. Large industrial associations integrate several wood processing industries. This is partly due to the low price of the final product.
But if you disassemble the technological process into its component parts, it turns out that it is quite possible to recreate it at home. The main share of financial costs and labor falls on the installation of the door leaf and only 5-8% - on the assembly of the door frame. Some handcrafted doors are superior to factory-made doors, especially when inlaid with artistic finishes. Until now, masters have survived who produce real masterpieces in small private workshops. Their doors are distinguished by their sophistication and durability.
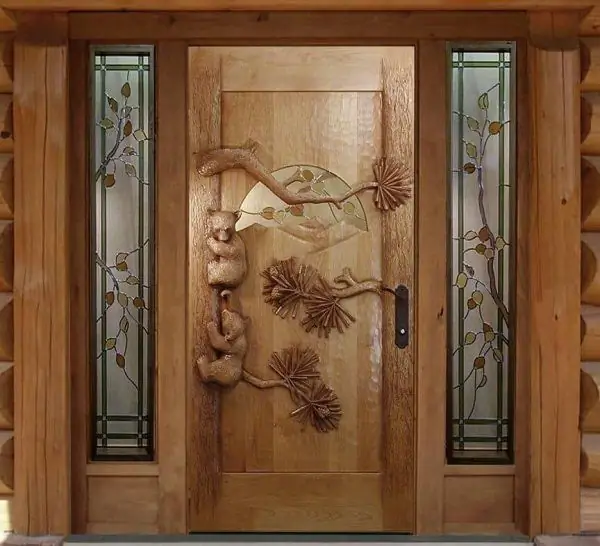
Despite the high cost, handmade doors are in great demand.
The only requirement for this is the use of quality materials. It is quite difficult to get them at home. This primarily concerns drying. The moisture content of the wood should not exceed 10-12%, which cannot be achieved without a special dryer.
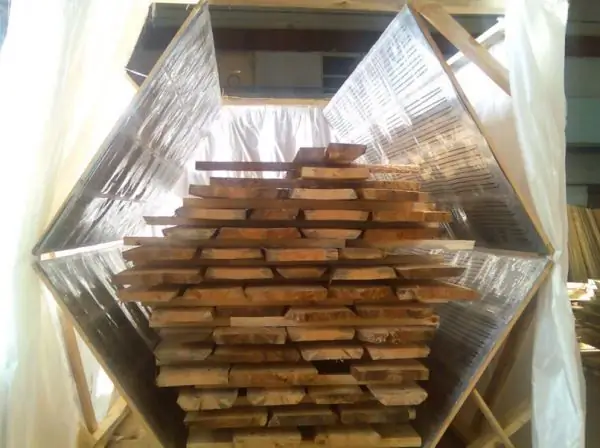
Achieve wood moisture content in the range of 8-12% is possible only under factory conditions
Glued laminated timber has proven itself very well, which, due to its design features, is practically not subject to deformation or cracking when the temperature and humidity of the environment change.
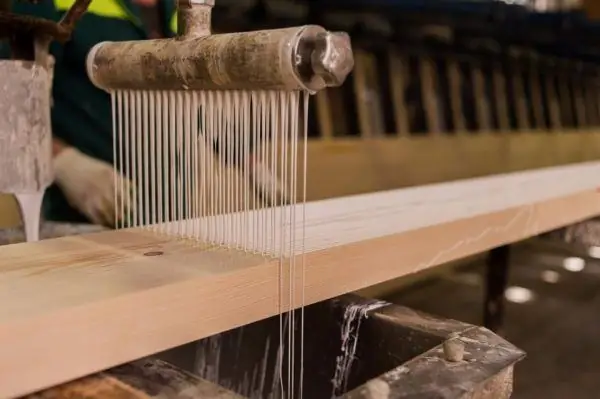
The bar is connected with glue and internal mini-tenons
Self-production of a door block consists of several stages.
-
Drafting a project that meets specific conditions. It reflects the dimensions of the doorway, the design of the door (swing, sliding or pendulum), the material available, door hardware.

Door drawing The detailed drawing shows the door unit in several projections, indicating all dimensions and decorative elements
- Manufacturing of a door leaf. It is necessary to decide and prepare the required amount of the selected material - wooden boards, plywood or MDF.
- Door frame manufacturing. As a rule, at home, a door frame is made of a wooden bar.
-
Selection of fasteners for assembly. Confirmants, screws, wood glue, dowels (wooden nails), etc. To enhance the rigidity of the structure, it is possible to use additional elements - metal brackets, corners and similar parts.

Fastening materials for wood The dimensions and shape of the fasteners are selected based on the tasks
Video: production technology of interior doors
youtube.com/watch?v=Z-vE_LnHJnw
Calculations and drawings for the manufacture of interior doors
Before preparing the necessary materials, the door area is calculated. The total area of the door leaf is the product of height and width: S = a b, where S is the area, a is the width, b is the height of the door. For convenience, a drawing is drawn up on a reduced scale. The real dimensions of the doorway are applied to the plan, and the dimensions of the door block are calculated taking into account the technological gaps around the sash perimeter.
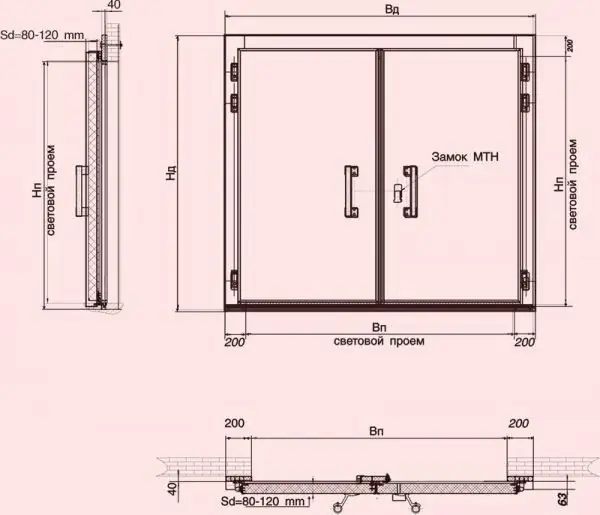
When drawing up a working drawing, any convenient scale is used
It should be borne in mind that a minimum of 2.5-3 cm of free space is required between the frame and the wall. It is thanks to this gap that the door can be aligned inside the opening in the horizontal and vertical plane.
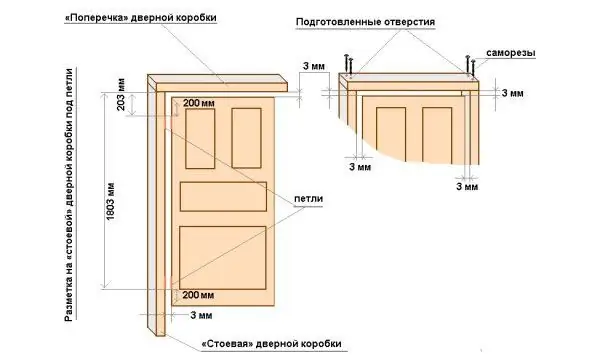
The thicker the door leaf, the more gaps need to be left
For example, if the hole in the wall is 1 m in width and 2.05 m in height, the dimensions of the door block at the extreme points will be:
- width 100 - 6 = 94 cm;
- height 205 - 6 = 199 cm.
If we take into account that the frame is assembled from a bar, then to determine the dimensions of the canvas, it is necessary to subtract the thickness of the bar plus 6 mm (3 mm on each side). Let's say that the door frame is a 60 mm wide bar. This means that the width of the door leaf will be 94 - 2 6 - 2 · 0.3 = 94 - 12 - 0.6 = 81.4 cm.
The vertical size is calculated in the same way. The only amendment is the height of the door leaf above the floor. It can be made from 3-4 to 10 mm. The air ventilation between rooms is regulated with the help of the lower gap.
Video: DIY door frame assembly
Step-by-step instructions for making an interior door
The paneled door consists of a frame made of solid wood. The inner plane is replaced by some kind of decorative finishing material (but it can also be natural). Fastening is carried out using spikes and grooves, but sometimes installation using glazing beads is also practiced.
Equipment and tools
Today, a hand-held electric tool is in the arsenal of any master. Therefore, door assembly is not difficult. If any of the devices listed below are not available, you can always rent it for a few days. This will save money and have a positive effect on the quality of the final product.
-
Manual router with a set of router bits. With its help, grooves are milled for installing hinges and locks. It is desirable to have several small-diameter cutters for cutting smoothly rounded recesses and a long cutter for the key slot. When making a panel door, using a milling cutter, grooves are cut out for installing the panel, and decorative elements are also made.

Router with a set of cutters A set of standard cutters allows you to make a selection of grooves for fittings
-
Circular saw with a disc for cutting wood. Cutting of materials is carried out using a special ruler included in the kit.

Circular saw with ruler The ruler allows you to make even cuts according to the specified dimensions
- Electric drill with a set of drills of various diameters. If additional attachments are available, the drill functions as a screwdriver.
-
Grinder (angle grinder) and grinding wheels. To polish and grind parts, you need three types of sandpaper: grades 40, 80 and 120. Processing begins with a rough "peeling" and ends with a fine selection of wood texture.

Grinder with grinding attachment Sandpaper is attached to the work table with Velcro
- Measuring tools. Tape measure or ruler, square, caliper, hydraulic level or building level for installing the door, pencil, marker.
In addition, common hand tools are required:
- hammer, mallet, hand saw with fine teeth;
- vice, clamps;
- files of different grain size;
- pliers, screwdrivers;
-
paint brushes, etc.

Carpentry tools set The presence of a versatile tool speeds up the process of assembling interior doors
Materials
At the disposal of craftsmen today a huge variety of materials, the price of which is quite affordable. You can choose them for every taste and color, from the simplest waterproof plywood or laminated fiberboard to natural oak or mahogany boards.
Here we will consider an example of making an interior paneled door with a swing structure. This is the most time consuming option in terms of preparation of component parts. Having figured out the principle of assembling such a door, you can easily install door blocks from other materials without any difficulties.
When preparing material, you should pay attention to the following points.
- Lumber moisture. Even well-dried wood, in a humid environment, absorbs moisture. Store materials in a dry, ventilated area at room temperature.
- When exposed to sunlight, the surface quickly darkens and becomes gray. It is advisable to protect the workpieces from direct exposure to ultraviolet radiation.
- Under mechanical stress, chips and dents are formed on the surface of the wood, which are difficult to sand. Boards prepared for the door leaf must be protected from impacts and bends.
For a door with a door leaf width of 70-80 cm, you will need such materials.
-
6 running meters of dry boards with a thickness of 35 to 40 mm, preferably grooved, without a lot of knots, resin pockets and cracks. Healthy knots no more than one per 30-40 cm are acceptable. Signs of wood defects are blue or pink spots on the front or end surface, such boards are rejected. The optimal width is 10-15 cm.

Grooved boards Grooved boards are sold with a planed surface, which greatly facilitates their processing
-
Laminated chipboard for the manufacture of panels. The color is selected according to the texture of the wood, but other options are possible depending on taste preferences. Some artists use different shades to create a certain contrast. Chipboard thickness - 16-18 mm. The area of the panel is calculated in advance according to the design drawings. Sometimes, waste from cladding panels of the desired size is used.

Laminated chipboard A wide range of colors of laminated chipboard simplifies the decoration of the door leaf
-
PVA glue.

PVA glue When dry, PVA glue becomes transparent, which is why it is widely used in furniture production.
-
Euroscrew, confirmant, or one-piece screed.

Euroshurup Thanks to the shape of the screw thread, the one-piece tie-rod firmly connects the wood parts
-
Varnish or water-based paint for finishing.

Wood varnish The quality of the varnish is determined by its resistance to external influences
Do-it-yourself wood door
At the first stage, preparatory work is carried out.
-
Processing of boards. Gross defects are removed from the surface. Planed boards are sanded with emery No. 40 or 80, depending on their condition. Grinding with a grinder attachment will not take much time. However, this work is dusty, so to ensure safety, it is better to use a respirator and a vacuum cleaner or go outside.

Grinding boards with a grinder Grinding boards with a grinder is best done outdoors, in an open space
- The details of the frame of the door leaf are cut. These include two vertical and three horizontal posts. To do this, use a circular saw. All cuts are kept strictly under 90 °, then carefully chamfer the outer edges. If the compound of the diagonal corners, pillars and beams are cut at an angle of 45 to.
-
Cut out the panel details. Dimensions are taken from the drawing. A square is used for proper cutting.

Panel door details All parts are cut in accordance with the calculated dimensions in the drawing
Then milling work is performed.
-
On the inner ends of the boards, grooves with a depth of 20 mm are cut. A margin of a few millimeters will provide the ability to adjust the position of the panel. The recess is located strictly in the middle of the end of the frame. Width - across the thickness of the laminated chipboard with an allowable play of 0.5 mm.

Cutting the groove with a router The groove is taken out by a cutter with a large working diameter
- Hinge and lock grooves are selected. To evenly distribute the load, the hinges are usually placed at a distance of 20-25 cm from the corners of the door. The lock is cut in at a height of 90-110 cm from the floor (if, of course, it is provided). A cylindrical cutter makes a through hole for installing the door handle (100-110 cm from the floor).
-
Small chamfers are removed at the ends of the panels. This will make it easy to assemble the structure into a single whole.

Chamfering The chamfer is removed in the form of a smooth rounding
- When all the parts are ready, preliminary assembly is carried out. In this case, a mallet is used, but without strong blows - in such a way that the door will have to be disassembled again. The "tight" places are determined. Where necessary, adjustment is made with a file or a sharp chisel. It is important to respect the geometry of the door leaf. After assembly, the parameters are carefully measured: length, width and diagonals of the rectangle. Throughout the entire canvas, they should have the same values. Right angles are controlled with a square.
- The door leaf is disassembled, the parts are sanded. It is necessary to achieve uniform texture, smoothness and color.
-
Final assembly is in progress. The panel is set on PVA glue, which is applied to the grooves. The corners of the door frame are fastened with confirms. It is necessary to maintain a certain time for the glue to dry. For this period, it is advisable to tighten the entire structure with clamps.

Panel door assembly The clamps will fix the shape of the door while the glue dries
After that, you need to give the doors the planned appearance. Most often, such structures are coated with water-based varnish. However, you can use various stains to give the wood the desired color.
-
The door is placed in a horizontal position, convenient for painting.

Door painting To prevent drips from forming, the door is painted horizontally.
- Remove glue residues, wood dust. Places of screeds of the frame with screws are putty with acrylic sealant mixed with sawdust or epoxy two-component composition.
- Several coats of varnish or paint are applied evenly. In this case, it is necessary to withstand the time intervals for drying the coating (see the instructions for use).
The insert made of laminated chipboard significantly saves money and at the same time decorates the door. The outer surface, covered with a waterproof film, washes well, does not collect dust. The material copes well with the task of sound and thermal insulation of the room.
DIY plywood door
If the manufacture of a paneled door seems difficult to you, there are simpler options for self-assembly of interior doors. For example, it can be made from moisture resistant plywood. For this, a wooden beam (preferably glued) with dimensions of 0.5 x 0.25 cm is used. Plywood is selected with a thickness of 0.5-0.7 mm.
The assembly is carried out as follows.
-
The frame of the door leaf is mounted from wooden bars. In the inner part, to increase the rigidity of the sash, one to four transverse bars are added.

Assembling a plywood door The frame of the canvas is a regular rectangle with stiffening ribs
- A sheet is cut from a whole piece of plywood in the shape of a frame. You can sew up the canvas in pieces, but for this you need to place the inner crossbars at the junction of the sheets.
-
The space inside the doors is filled with insulation or sound-absorbing material. In this role, you can use mineral wool, styrofoam, foam rubber, or even dry filling of foam balls. In order for the filler to be evenly distributed over the cavity of the canvas, the door is placed in a horizontal position.

Door insulation Scraps of mineral wool can serve as a filler for an interior door
- Sew up the other side of the sash in the same way. Plywood is fastened with nails or screws. To prevent the formation of cracks around the perimeter, the door is coated with glue.
-
Finish the canvas. In this capacity, all kinds of self-adhesive films, paints and varnishes or sheets of decorative veneer are used.

Plywood door trim When finishing an interior door made of plywood with a flooring laminate, the perimeter of the door is reinforced with screws or rivets
Fittings are cut in as usual.
The only thing that should not be forgotten is that all components are attached to a "solid" base, that is, to the transverse elements of the door frame
The hinges are mounted in recesses made in plywood.
How to make a box for an interior door
The dimensions of the door frame are influenced by the dimensions:
-
doorway;

Doorway dimensions Correct measurement of the doorway is a guarantee of a successfully assembled interior door
- canvases;
- blanks (source material).
All three parameters must be combined in such a way that the frame is freely, with a margin of 2.5-3 cm, located inside the opening. And at the same time, the door leaf located inside the frame must have a gap of 2.5 to 4 mm. The calculation, as a rule, is done based on the dimensions of the canvas, if it is already ready. A board with a thickness of 35 to 60 mm is selected. Naturally, the thicker the door frame, the stronger and more reliable it is.
Let's consider a concrete example. Let's say the width of the door leaf is 80 cm.
- To determine the inner size of the box, you need to add another 6 mm (2-3 mm) to 80 cm - you get 806 mm.
- Taking into account the thickness of the board, we calculate the outer dimensions of the door frame. For a workpiece with a thickness of 50 mm, add 4 cm, since 1 cm will be spent on making a quarter. We get 806 + 40 = 846 mm.
The thickness of the frame is usually tied to the depth of the doorway (wall thickness). In practice, this value ranges from 70 mm to 125 mm (brick thickness).
Having finished with the calculations, we proceed to making the box.
- The workpiece is planed from the front side, ground and polished.
-
The shape of the groove is marked, in which the door leaf will be in the closed position. The depth is equal to the thickness of the door leaf. The reference plane is made with a width of 10 to 12 mm.

Door frame manufacturing If you plan to equip the frame with a rubber seal, an additional groove is cut out for its installation
-
A quarter is cut out. To do this, you need to adjust the depth of cut in the circular saw. First, a deep cut is made, then a shallow one. A smooth passage is carried out using a ruler attached to the end of the circular to the desired width.

Cutting a quarter with a circular A quarter is selected with a circular saw
- A quarter is sanded and leveled with a chisel to perfect condition for painting.
-
A U-shaped frame is assembled. The connection is made either with screws or by cutting a spike on the top bar and sidewalls. In the latter case, additional brackets are used to increase the rigidity of the connection.

Assembling the door frame Studded frame connection requires precise fit of parts
The frame is ready. You can install it in a doorway.
Video: making a door frame
Finishing the slopes of interior doors
Slopes are the plane of the wall of the doorway, which cannot be closed with platbands. Many ways have been invented to refine this wall gap. The most common ones are:
- plastering with cement-sand mortar;
- cladding with MDF panel extensions;
- plasterboard finishing.
Plastering of slopes
Plastering is, of course, the most time consuming method. In addition, it takes time to prepare the wall and dry the mortar. But such slopes have one indisputable advantage - they are durable, not afraid of blows and well strengthen the door frame. For those who value the strength and reliability of the doorway, we list the stages of the formation of slopes.
-
Support beacons and corners are installed. As a rule, ready-made metal products are used, which are today in every hardware store. The price for them is quite affordable. The outdoor corner is slightly more expensive, but also within reach. Beacons are mounted along the perimeter of the door frame, metal corners are mounted along the perimeter of the wall. You can fix them with alabaster or a stapler.

Installation of beacons under door slopes Plaster screed is carried out by a rule or an even plank of wood
-
The surface of the wall is treated with a primer based on PVA glue (such as "Betonkontakt" or "Knauf").

"Betonkontakt" The primer increases the adhesion of the plaster to the wall
- A solution is being prepared. The dry mixture is poured into a mixing container (bucket, trough, etc.) and thoroughly mixed with a mixer. The final state of the solution is the consistency of thick sour cream.
-
With a trowel, throw the solution onto the surface of the wall and level it. When the volume is completely filled, a rule or a wide spatula is pulled along the beacons. Thus, the plane of the slope is formed. Work begins on the side surfaces, the vertical plane is filled in last. Mix the top bar solution thicker so that it does not run down.

Plaster door slopes A paint corner with a grid is used to level the plaster
- After the mixture has hardened (about 24 hours), a fine-consistency finishing putty is applied to the surface. To do this, use spatulas. As a result, the surface is brought out to an even and smooth state.
-
The installation of the slopes is completed by grinding and painting. Emery paper, fixed on a flat bar, removes all irregularities and roughness. The paint is applied in several layers. Before painting, the slopes are covered with a primer.

Putty of door slopes To protect the surface of the doors when plastering the slopes, use a polyethylene film
Video: how to plaster the slopes in the interior opening
MDF paneling
Another way to decorate the slopes is to install MDF panels. This is the fastest "dry" option. For its implementation, ready-made panels are needed, matched to the color of the door frame and door leaf. You can fix them in various ways, the easiest way is to install them in the grooves of the frame. But since we are considering the option of making doors on our own, there will be no grooves in it. In this case, the installation on:
- glue;
- wooden or metal frame;
- dowels.
Let's make a reservation right away that the adhesive is, again, polyurethane foam, which has universal properties. The frame is constructed on rare occasions when the opening is much thicker (or wider) than the door frame. Dowels, on the other hand, are a universal option, but in need of additional decorative revision. The screw caps must either be hidden in a secret, or closed with plastic plugs.
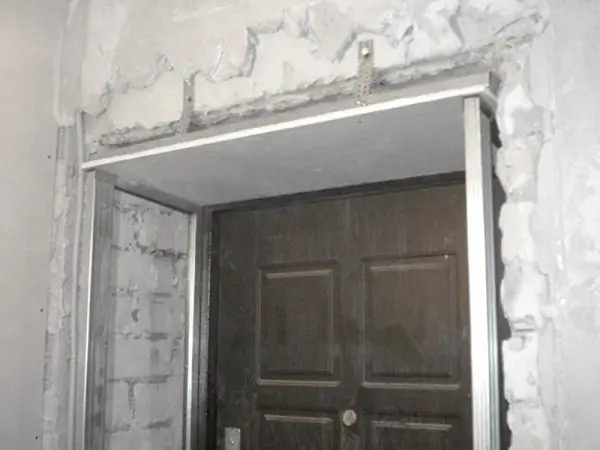
When facing slopes with docks on the frame, metal profiles for drywall are used
Let us explain with an example and describe the installation of extensions on polyurethane foam. The order of work is as follows.
- The width of the surface to be covered is measured. The distance is taken from the edge of the door frame to the edge of the wall. If the door is installed correctly, the vertical width of the extension will be the same everywhere. But for insurance, you need to measure the wall at several points.
- The height is measured from the floor to the top of the doorway.
- The panel is cut to the desired size. The same is repeated for the other side of the door.
-
When the panels are ready, they are put in place and the polyurethane foam is blown in from the back. Spacers are used to fix in a certain position. They can be made from scraps of boards or the same add-ons.

Supplements on slopes A combined mounting option is often used - on foam and wooden blocks.
- After a day, when the foam has dried well, the spacers are removed, and the excess foam is cut off with a knife. The upper bar is being prepared. Its shape is an isosceles trapezoid. In order not to make mistakes when cutting, you need to carefully measure all the elements of the part.
- The top bar snaps into place. The same method of filling the gaps with polyurethane foam is used. Fix the bar with tape and vertical spacers.
- At the final stage, the panels are joined with acrylic sealant. The color is matched to the tone of the panel. Platbands are installed, fastening them to the ends of the extrusions with nails.
Video: installation of door accessories, the most detailed description
Plasterboard slopes
The course of facing the doorway with plasterboard is similar to the installation of additional panels. The only difference is that instead of polyurethane foam, a special glue for gypsum board is used. The dry mixture is diluted to a thick consistency and applied to the wall in islands after 15-20 cm. A sheet of moisture-resistant drywall, cut to size in advance, is glued to the wall. After the glue dries, the surface of the gypsum board is putty, security metal corners are installed in the corners.
Video: making slopes from gypsum plasterboard
Installation of casing for an interior door
There are several ways to install platbands, depending on the design. The most progressive is the fastening in the grooves. But for this it is necessary that a corresponding recess be cut on the box itself. When making a door yourself, this is an additional and time-consuming operation. Therefore, the platband is more often attached to glue (foam) or invisible nails.
In addition to fasteners, it is necessary to choose a method of connecting the vertical posts with the horizontal bar. There are two options here:
-
connection at an angle of 90 o;

Installation of door frames at right angles 90 degree joining of platbands simplifies assembly
-
connection at an angle of 45 about.

Assembly of door trims with a diagonal cut When connecting diagonally, a miter box or a miter saw must be used
It is believed that the first method is easier, and the second is more aesthetic.
For the installation of platbands, craftsmen use a miter box - a device that allows you to make cuts at right and acute angles. Since the shape of the clypeus can be quite complex (from a flat to a convex-concave surface), one cannot do without a miter box.
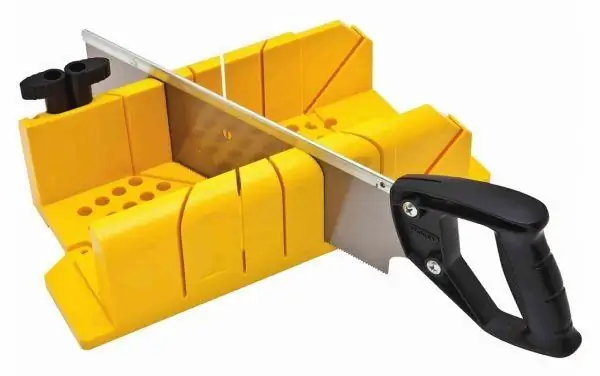
The miter box allows you to cut even corners when preparing platbands
The procedure is usually as follows.
- Two side posts are cut out. The top end is trimmed at 90 or 45 degrees.
- Platbands are attached to the frame with nails without caps. The distance between them is from 50 to 70 cm.
- The size of the top bar is measured. The required workpiece is cut out.
- The head rail is fastened above the door to the frame with two or three nails.
-
Using a gun with an acrylic sealant to match the platbands, errors that occur at the joints are retouched.

Fixation of platbands "Invisible nails" have very small heads, so they are almost invisible
Video: do-it-yourself installation of platbands on interior doors
When making an interior door with your own hands, remember the basic safety standards. The use of a high-speed power tool always carries the risk of injury. To avoid electric shock, it is strongly recommended to work only with functional electrical appliances. Use protective goggles and a respirator when covering doors with varnish or paint.
Recommended:
How To Make A Wardrobe With Your Own Hands At Home: Step-by-step Instructions For Making, Installing Filling And Doors With Drawings And Dimensions
A detailed guide to making a wardrobe with your own hands. Design, marking, installation of internal filling, installation and adjustment of doors
How To Make A Fence With Your Own Hands From Scrap Materials: Step-by-step Instructions For Making And Decorating From Plastic Bottles, Tires And Other Things, With Photos And Vide

How to make a hedge with your own hands. Choice of material, pros and cons. Required instructions and tools. Tips for finishing. Video and photo
How To Build A Gate From Corrugated Board With Your Own Hands: Step-by-step Instructions With Calculations And Drawings, How To Make Swing, Sliding And Others With Photos, Videos
Advantages and disadvantages of corrugated board. The procedure for the manufacture of gates from corrugated board. A step-by-step guide to assembling and sheathing the frame
Making Metal Doors With Your Own Hands: Technology, Drawings, Equipment, As Well As How To Make Heat And Noise Insulation Correctly
Metal door manufacturing technology. Tools and equipment for self-production of metal doors. Warming and finishing
Making Wooden Doors With Your Own Hands, Including How To Choose The Right Material And Make Calculations
Wooden door manufacturing technology. Required tools and materials. Calculations, drawings and instructions for self-manufacturing doors
