Table of contents:
- Author Bailey Albertson [email protected].
- Public 2023-12-17 12:53.
- Last modified 2025-06-01 07:32.
DIY wooden door
A door is a device that allows people to walk through walls. The design includes two main elements. The first is a canvas that, when closed, imitates an "insurmountable" wall, the second is a mechanism by which the doorway opens. By connecting the canvas with the suspension mechanism, adjusting their well-coordinated work, everyone can confidently declare that they made the door.
Content
-
1 Manufacturing technology of wooden doors
- 1.1 Video: manufacturing doors in a factory
- 1.2 Video: are doors divided into panel and panel doors today (expert opinion)
- 2 Equipment and tools
-
3 Calculations and drawings
3.1 Video: Making a Simple Panel Door
-
4 Step by step instructions
- 4.1 Video: making an entrance wooden door with your own hands
-
4.2 Do-it-yourself barn door
4.2.1 Video: Barn Doors
- 5 Reviews
Wooden door manufacturing technology
Making a wooden door is very simple. It all depends on the materials that are available. If this is a door for a hut, then with the help of a rope, a knife and sticks of the same thickness in a matter of minutes, you can tie them into an even, flat cloth, and use the same string instead of loops. But if the task is to make a door to a house or apartment, then you will need special woodworking tools - a saw, a plane, a sander.
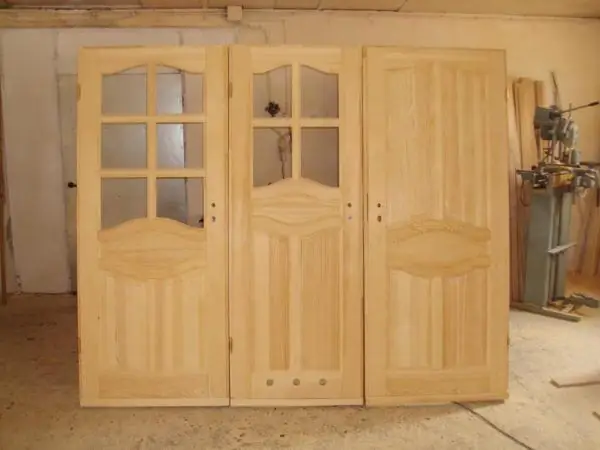
You can make doors of any complexity with your own hands, the main thing is to have a desire and carpentry skills
Video: production of doors in a factory
In today's world, almost every home has a set of tools and devices that allows you to make an uncomplicated door for your own use. Materials are available and often the only task is to assemble and fit correctly.
The most common are two types of doors, fundamentally different in design:
-
Frame (panel) construction. The frame of the future door is made from the array, consisting of two racks and crossbars. The internal space is sewn up with panel material such as plywood, chipboard or fiberboard. The resulting cavity is filled with "honeycomb" or soundproofing material. As a rule, this is a rectangular canvas. There are no restrictions on dimensions, but the well-established shape of the doorway is 2 meters in height and 0.5-0.8 m in width. In rare cases, larger doors are made. For example, 2.2 m high and 90 cm wide. But at the same time, more powerful hinges must be used, since the sash mass increases.

Panel door A panel door made of wooden slats fits well with country style
-
Paneled construction. In this case, the door is completely made of natural wood. At the same time, its mass and strength increase. It is clear that a solid piece of wood measuring 2x0.6 m will be very expensive. Therefore, the canvas is made from component parts, connecting them into a single plane. By definition, a panel is a thin board or plywood inserted inside a wooden frame. Moreover, it can be replaceable.

Insert on a paneled door A paneled solid wood door can be decorated with artistic carvings
With current technologies for the production of doors, a clear division of the leaf structure into frame and panel has been somewhat erased. The doors are combined, combining elements of both panels and a shield.
Video: are doors divided into paneled and panel doors today (expert opinion)
The industrial production of wooden doors includes the following steps:
- Harvesting of wood material.
- Additional processing and preparation of the array (drying, gluing and impregnation).
- Manufacturing of parts of the canvas and frame.
- Assembling the structure.
- Finishing work (painting, varnishing, laminating, etc.).
When self-manufacturing doors, all stages are reproduced at home.
Equipment and tools
Different tools are needed to make different types of doors. A simple panel board is constructed using a wood saw (with a fine furniture tooth), a hammer or a screwdriver, if fastened with self-tapping screws. A more "advanced" door is assembled using electrical devices:
-
Manual electric router. With its help, the details of the panel are milled and shaped into a profile. Groove joints involve sampling wood, which is also done using a milling machine.

Manual electric router The set of the router includes a set of cutters with different lengths and configurations of the cutting edge
-
Screwdriver or drill. Needed for sash assembly. Please note that when using a drill, a tool with an adjustable speed is required. Too fast starting rotation will not allow control of the fastener sinking process.

Furniture screwdriver with adjustable speed and power A screwdriver with adjustable speed and power of rotation will allow correct installation of fasteners
-
A circular saw. Manual or stationary. With her help, wooden boards are cut into pieces. Cutting accuracy is important, so the saw needs to be well adjusted. An unbalanced blade will cut unevenly and chipped.

Hand-held circular saw A built-in circular ruler allows you to cut boards to a given size
-
Grinder with a set of grinding attachments. The power and high rpm of an angle grinder are welcome in this situation.

angle grinder Polishing of a wooden plane is carried out with special attachments
- Measuring tools - tape measure or carpenter's meter, marker, straight rail, straight square.
-
Carpentry hand tools set: hammer, mallet, chisels, clamps, etc.

Hand tool set A variety of hand tools greatly speed up the door assembly process
It is advisable to assemble on a workbench or workbench - it is much more convenient and faster
As for the material for doors, the design and shape of the leaf are of great importance. The inserts can be made of MDF, chipboard, OSB or just plywood. The choice of material depends on the purpose of the doors. For entrance materials, materials with high strength are used, for interior ones - lighter, decorative types of wood.
The door frame is made from solid wood blocks. You will need two bars a little more than 2 m long for the racks and two meter bars of the same section for the crossbars. On one side, a quarter is selected equal to the thickness of the door leaf. However, a prefabricated frame structure is also possible, in which the supporting surface is created by building up thin rails.
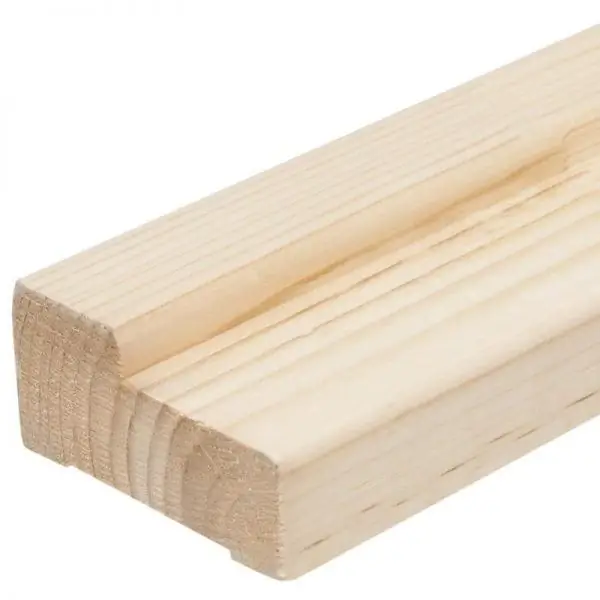
The blank for the door frame is made taking into account the thickness of the door leaf
The most affordable material is pine and spruce boards. Spruce lumber is more durable, but pine has a nicer texture and fewer knots. Soft-leaved wood species - birch, linden, poplar - are practically not used for the manufacture of doors. Massive oak is very popular. Its structure is strong and durable. However, oak procurement is an expensive process, which naturally affects the final price.
For simple doors with an insert made of laminated chipboard you will need:
-
edged boards 40-60 mm thick and 100-150 mm wide, with a total length of 6 m;

Calibrated boards High quality boards are calibrated on all four planes
-
a sheet of laminated chipboard, with a total area of no more than 2 m 2;

Laminated chipboard sheets Chipboard cutting to specified dimensions can be ordered from the supplier upon purchase
-
PVA glue;

PVA glue The glue is used to reinforce the fastening of wooden door elements
- varnish or paint;
-
confirmations from 25 to 35 mm long.

Installing confirmations in connections Color-matched plastic plugs make connections virtually invisible
Confirmates are special screws with a smoothed end and an "invisible" head. They are used in the assembly of furniture and other joinery. A distinctive feature is the wide pitch of the thread, which makes it possible to securely fasten both fibrous wood and pressed chipboard sheets. Confirmation slots come in different configurations - from conventional cross to hex and star. Accordingly, a suitable attachment is selected for the screwdriver.
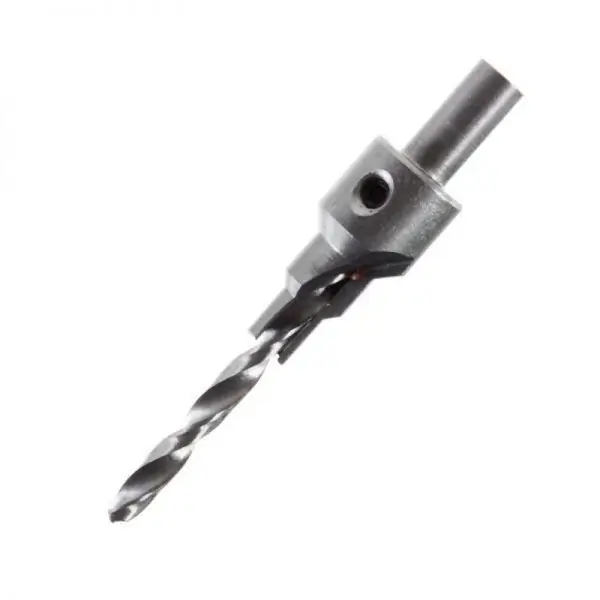
To install the confirmation, a special drill with an extension in the upper part is used
Calculations and drawings
A well-drawn drawing will allow you to avoid mistakes and waste of materials in the manufacture of doors. A sketch and detailing is made on a sheet of paper, indicating the exact dimensions of each component of the canvas.
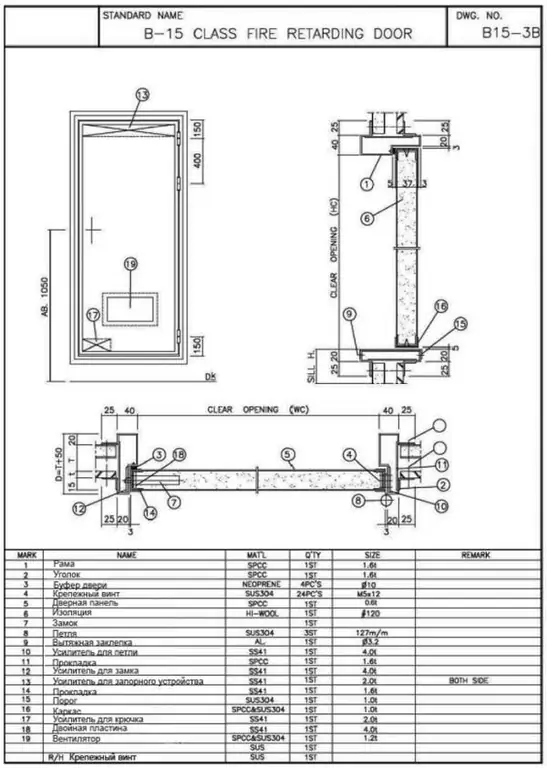
The drawing shows all the design features of the doors
In accordance with building GOSTs, the following parameters are adopted when installing doors:
-
The distance from the corner to the hinges from below and from above is the same and amounts to 15-25 cm.

Buttonhole settings During installation, the technological clearances must be observed
-
The door handle is installed at a height of 80-90 cm from the floor. The position of the locking device on the sash is determined by the lock device. The strike plate is located on the frame and recessed into the wood so that its plane coincides with the plane of the door frame.

Installing the door handle and lock The handle and the lock are installed on the door last.
- The viewing window is located at eye level - 150-160 cm from the bottom edge of the door leaf.
-
If a ventilation grill is provided in the door leaf, it is fixed in the middle of the door leaf, at a distance of 15-20 cm from the floor.

Installation of a door ventilation grill The ventilation grill can be equipped with a built-in electric fan
You should also pay attention to the seal, which is mounted around the frame perimeter. The shapes of rubber seals are different and, depending on this, the geometry of the door frame profile is formed. Some types of seals require additional recess for installation.
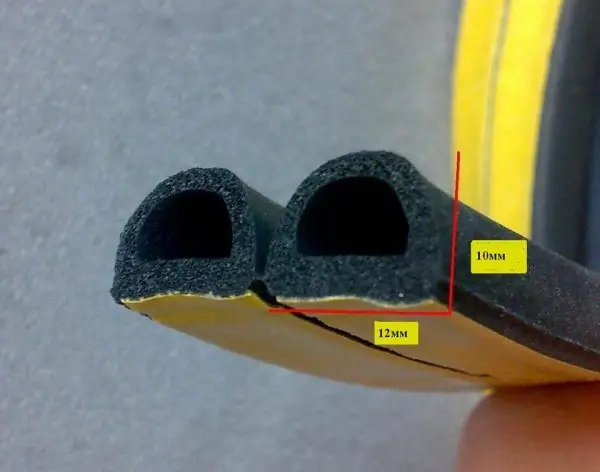
Remove the protective film before installing the self-adhesive door seal
And finally, the door sill. Most often, there is no threshold in interior doors. This saves materials and reduces assembly time. But entrance doors without a threshold are too vulnerable and allow cold air to pass through. Therefore, it is advisable to reinforce this part of the door frame with a metal trim.
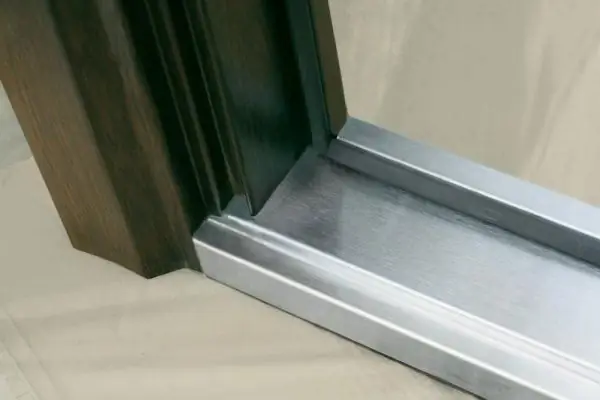
Metal trim increases the strength of the door sill
Video: making a simple paneled door
Step by step instructions
Consider the technology of self-manufacturing a wooden door:
-
Preparatory stage. The prepared boards are carefully processed to a polished surface using a grinding attachment on a grinder. To do this, it is necessary to use three types of emery: coarse (No. 40), then medium-grained (No. 80) and fine-grained (No. 120). If the boards are planed, then they start immediately with a medium-grained sheet. The ultimate goal of polishing is a completely smooth surface with well-defined wood grain lines. It should be borne in mind that different rocks have different hardness. Processing pine, birch and linden will not take much time and effort. Above an oak or ash tree will have to work hard.

Vibration sander Vibration sanders are used for wood polishing
-
Next, you need to milling the parts in accordance with the conceived door design. With the help of a router and a set of shaped cutters, the ends are given the desired configuration. Each insert is individually adjusted to its groove. In addition, a deep groove must be made along the inner perimeter of the frame. A sheet of chipboard is subsequently inserted into it. The size of the groove is selected in accordance with the thickness of the chipboard - a tolerance of 1 mm is made for grinding. The standard thickness of the chipboard used for doors is 16 mm. This means that the groove width is 17 mm. The depth is chosen from 15 to 20 mm, this is enough to securely fix the insert into the canvas frame. It should be remembered that in the interests of long-term operation, the depth of the groove is made 1.5-2 mm larger than the size of the spike. Another option is also possible, when laminated chipboard is attached to the frame of the canvas with glazing beads. Then, instead of a groove on the side racks, it is enough to choose a quarter.

Quarter sampling It is advisable to sample a quarter on a firmly fixed canvas
-
Cutting the ends of the boards at an angle of 45 °. If it is possible to use an end circular, the process is significantly accelerated. But if it is not there, the markings are carried out with a simple protractor, and the cut will be performed with an ordinary circular or hand saw. It is important to accurately maintain the size to be measured along the long side of the door frame.

Miter saw The miter saw allows you to make a quality cut at any angle
- Cut out the panels, in our case a chipboard sheet. The size of the height and width is calculated based on the depth of the groove. The width of the two prepared boards (upper and lower) is subtracted from the total height of the doors and the depth of the groove is added. For example, with a door height of 2 m, a width of the upper and lower crossbar of 15 cm and a groove depth of 20 mm, we have: 2000- (150x2) + (20x2) = 174 cm. The same calculations are carried out for the width.
- Primary installation. It is carried out for the final adjustment of all parts into a single design. Everything is assembled on a workbench (or on the floor), cracks and gaps are checked, the general geometry of the canvas. If "inconsistencies" are found, the canvas is disassembled and adjusted. If there are no deviations, the door can be fastened with confirms. To do this, first, holes are drilled for the diameter of the cap, then the screw is screwed in with the head immersed “flush”.
-
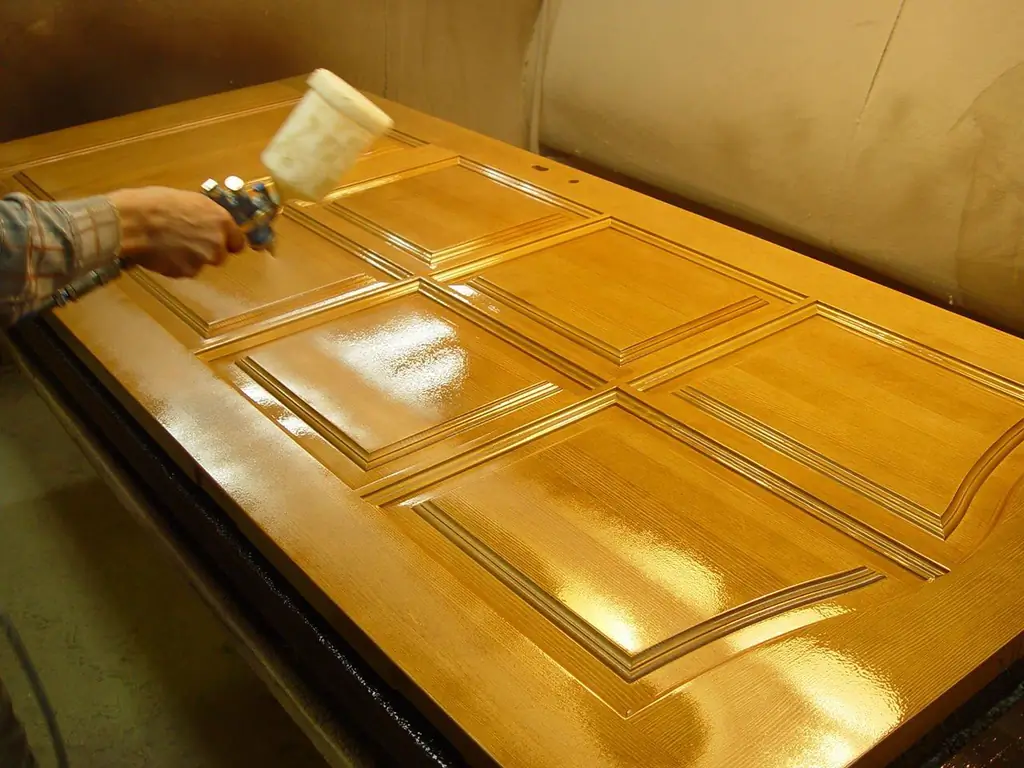
Door leaf decoration. Of the types available at home, painting and varnishing are the most acceptable. It will not work well to glue decorative foil or veneer on rounded surfaces. A spray gun can be a good help when applying the paint layer. It can be used to achieve a uniform coating on the door surface. However, this requires certain experience and skills. Many experts believe that decorating is the most important and difficult stage in the manufacture of doors.

Painting the door leaf Doors are varnished in a well-ventilated and well-lit room
-
Installation of fittings. Produced last when the product is already installed in the doorway. Prepare technological holes in advance for inserting the lock and handle. Recesses for awnings are cut with a chisel based on the size of the loops. The only exception is the rubber seal. If its configuration involves deepening into the massif, the groove is cut out at the preparation stage.

Castle insert The shape of the holes is determined by the configuration of the door hardware
Video: making an entrance wooden door with your own hands
Do-it-yourself barn door
For simple household needs, it is not necessary to assemble a paneled door with complex structural elements. A panel-type door, consisting of a prefabricated door leaf and a plank door frame, is quite suitable for a utility room or a shed. Doors made of lining or tongue-and-groove boards are very convenient in this respect. This lumber is sold with grooves already cut and a smooth surface.
The manufacturing process is very simple:
- Mark the prepared boards and cut them into pieces of the required length.
- Arrange the boards on the table so that the image of the annual rings is directed in one direction.
- Assemble the grooved boards into a single canvas, fastening them together with a thorn-groove lock connection. For additional fixation, the elements are glued together with wood glue.
- Carefully cut the spike from the outer board of the shield and process the butt end.
- Squeeze the canvas with clamps and leave to dry completely. The backboard must be located on a flat surface.
- After drying, grind the surface of the blade and grind it.
-
Fasten the canvas with a strapping consisting of two or three crossbars.

Possible options for timber door trim Strapping boards are fastened with screws or glue
Video: barn doors
Reviews
During self-manufacturing of doors, you should adhere to safety standards. Operations with high-speed electric tools are carried out with protective gloves and goggles. The ingress of shavings and sawdust into the respiratory tract is fraught with dangerous diseases. It is not recommended to start work without a respirator. The use of a respirator is also necessary when painting products with varnish and alkyd dyes. Long-term inhalation of vapors of acetone and gasoline solvents causes toxicity and slows down the reaction.
Recommended:
How To Make A Wardrobe With Your Own Hands At Home: Step-by-step Instructions For Making, Installing Filling And Doors With Drawings And Dimensions
A detailed guide to making a wardrobe with your own hands. Design, marking, installation of internal filling, installation and adjustment of doors
How To Make A Fence With Your Own Hands From Scrap Materials: Step-by-step Instructions For Making And Decorating From Plastic Bottles, Tires And Other Things, With Photos And Vide
How to make a hedge with your own hands. Choice of material, pros and cons. Required instructions and tools. Tips for finishing. Video and photo
How To Build A Gate From Corrugated Board With Your Own Hands: Step-by-step Instructions With Calculations And Drawings, How To Make Swing, Sliding And Others With Photos, Videos
Advantages and disadvantages of corrugated board. The procedure for the manufacture of gates from corrugated board. A step-by-step guide to assembling and sheathing the frame
Making Metal Doors With Your Own Hands: Technology, Drawings, Equipment, As Well As How To Make Heat And Noise Insulation Correctly
Metal door manufacturing technology. Tools and equipment for self-production of metal doors. Warming and finishing
Making Interior Doors With Your Own Hands, As Well As How To Choose Material And Make Calculations
Tools and materials for the manufacture of interior doors. Manufacturing technologies for interior doors. Varieties of internal wooden doors
