Table of contents:
- Do-it-yourself gates made of corrugated board: we do it efficiently and beautifully
- Characteristics of corrugated board - advantages and disadvantages
- The choice of corrugated board
- Manufacturing of gates from corrugated board
- Step-by-step guide to installing a professional sheet gate
- Video: making swing gates from corrugated board
- Author Bailey Albertson [email protected].
- Public 2024-01-17 22:26.
- Last modified 2025-06-01 07:32.
Do-it-yourself gates made of corrugated board: we do it efficiently and beautifully

The range of materials for the manufacture of gates is unusually wide, but individual developers prefer corrugated board. The choice is due to the qualities of this material. It is strong, durable, lightweight, decorative, inexpensive and easy to install. To make a gate from corrugated board with your own hands, a minimum number of tools and accessories and a few free days are enough.
Content
- 1 Characteristics of corrugated board - advantages and disadvantages
-
2 The choice of corrugated board
2.1 Photo gallery: options for gates made of corrugated board
-
3 Manufacturing of gates from corrugated board
- 3.1 Drawings and calculation of the door size
- 3.2 Preparation of tools for the manufacture of gates
-
3.3 Assembling the frame
- 3.3.1 Video: assembling the door frame from corrugated board
- 3.3.2 Video: assembling the door frame from corrugated board with a built-in wicket
- 3.4 Frame plating
- 3.5 Installing hinges
- 3.6 Insert locks
- 4 Step-by-step guide for installing a door from a professional sheet
- 5 Video: making swing gates from corrugated board
Characteristics of corrugated board - advantages and disadvantages
Profiled sheets are produced at the factory using cold rolled steel sheet technology. The sheet is galvanized on both sides, and this protects it from external factors and corrosion. For decorative purposes and additional protection, the corrugated board is also covered with a thin layer of polymer of various colors.

Gates made of corrugated board can be decorated with forged elements
The professional sheet has a variety of advantages:
- durability. The quality of the material ensures a service life of up to 50 years;
- appearance. Products from corrugated board look thoroughly and attractively, go well with any material. Thanks to a wide range of textures and colors, you can experiment with product design;
- low weight and, accordingly, low load on the supports. This feature facilitates material delivery and installation. Moreover, lightweight cladding does not require massive support pillars, which reduces costs;
- ease of care and operation. Doors made of profiled sheet do not need painting, do not fade or tarnish from the effects of weather factors;
- affordable price. Taking into account the above characteristics, the cost of the material in comparison with others is captivating.
The disadvantages are:
- the need for free space for opening;
- the likelihood of hitting a car with a sash;
- increased wind load in regions with difficult weather conditions.
In addition to the profiled sheet, you will need a profiled rectangular pipe to create a gate. The structure is a rectangular frame made of a profile, to which the sash made of profiled sheet is attached. The size of the flaps determines the mode of transport that will pass through the gate. If it is a passenger car, then a total width of 3-4 m is sufficient. For a truck, the doorway must be at least 5 m.
The choice of corrugated board
Profiled sheets differ among themselves in thickness, degree of strength and rib height.
- "C" - lightweight and durable galvanized wall sheet with low thickness and height of the rib. The most common choice;
- "NS" - a denser profiled sheet with a greater rib height, but also heavier;
- "N" is a massive load-bearing profiled sheet used for roofs of a huge area. It is not suitable for gates due to its heavy weight and high cost.

Depending on the type and size, corrugated board is used for roofing, formwork, walls, fences
The best choice would be a C8 or C10 profiled sheet. The number indicates the height of the wave in centimeters. The sheet thickness of this brand is from 0.4 to 0.8 mm. Sashes made of C grade profiled sheet will weigh from 25 to 40 kg, so they can be easily hung together, without the use of special lifting equipment. Due to the fact that one profiled sheet per sash will not be enough, the size is calculated based on the width of the material.
Photo gallery: options for gates made of corrugated board
-

Colored profiled sheet gates - Colored profiled sheet gates look beautiful due to the combination of colors
-

Combined gates - The combination of profiled sheet with forging adds originality to the gate
-

Gates made of profiled sheet under a tree -
Profiled sheet for wood cannot be distinguished from natural materials
-

Gate with forging elements - A gate decorated with gold decor will look rich
-

Light gate - Light-colored profiled sheet doors can be impractical as they get dirty easily
-

Gate with flower decoration - A gate with a floral decor will decorate any building
-

Luxury wrought iron gates - The more forging on the gate, the more luxurious they look
-

Wrought iron gates with a profiled sheet base - The corrugated board can be used as the first layer for forging, this will increase the strength of the gate
-

Gate with wooden elements - Wooden decor on the gates made of profiled sheet creates an original look
-

Gates made of profiled sheet with openwork forging - Openwork forging gives airiness to the gates made of ordinary profiled sheet
-

Profiled sheet gates with lattice - The lattice on the gate made of profiled sheet allows you to see those who come into the house
-

Gates made of red profiled sheet - The combination of red corrugated board and black forged elements makes the gate unique
Manufacturing of gates from corrugated board
The procedure for making gates from corrugated board is determined by the logic of construction.
Drawings and calculation of the size of the gate
The most widespread are two types of gates made of profiled sheet - hinged and sliding. But if it is difficult to make a sliding gate at home, then it is quite possible to assemble a swing structure consisting of two identical parts. Swing gate leaves can be opened outward or inward. The wicket can either be embedded in one of the leaves, or installed separately to the side of the gate. It depends on the availability of free space. Before assembling and installing the gate, it is necessary to draw a drawing, which will indicate the exact dimensions of the product.

A drawing of a swing gate frame with measurements will help you make them yourself
The diagram should include:
- opening width;
- the number of racks and their section;
- the depth of digging in the supports;
- frame drawing showing all lengths;
- position of the wicket and its dimensions;
- place for hinges;
- place for the castle;
- place for the bolt;
- reinforcement elements and their length.
Gates from corrugated board can be made without a wicket, but then they will be inconvenient to use.

If the gate is small and lightweight, you can do without a wicket
More often, gates are made of corrugated board with a separate or built-in wicket.

Bulky and heavy gates imply the mandatory construction of a wicket
To create a swing gate from two leaves with a wicket made of a profiled sheet measuring 3 × 2 m, you will need the following materials:
- profile pipe made of metal 20 × 20 × 3 mm with a square section for forming the inner frame of the gate leaves and the base of the wicket;
- square tube for supports - 60 × 60 × 3 mm; for the sash frame - 60 × 40 × 3 mm;
- a pipe with a square section of 40 × 40 × 2 mm for the frame stiffening ribs;
- wall corrugated board with a wave of 15-21 mm. You can take either just galvanized C8 or a sheet with a polymer colored coating - it depends on the budget; it is better to cut the sheets in the workshop, since with handicraft cutting, corrosion can occur along the edges;
- corners and ebb;
- hinges - two for each leaf and two for the gate;
- self-tapping screws for metal roofing, galvanized or matching the color of the corrugated board;
- self-tapping screws for fastening sheets or hexagon screws;
- rivets;
- electrodes for welding with a diameter of 2-3 mm;
- primer for metal products;
- decor (if necessary).
Preparation of tools for making gates
To build a gate from corrugated board you will need:
- drill;
- welding inverter;
- Bulgarian;
- screwdriver;
- laser or any other level;
- plumb line;
- scissors for metal;
- spray gun or brushes.
Assembling the frame
Since the frame bears all the wind load and the torsional rigidity of the corrugated board is not high, it is important to make the frame as reliable as possible. The gate frame is assembled on a flat surface the size of at least one gate wing. To get right angles, use special precise squares.
- First, workpieces are made of metal at an angle of 45 °.
-
Each workpiece is cleaned of rust and dirt with a brush - a drill bit.

Drill bit Using a special drill attachment, workpieces are cleaned of rust and dirt
-
A carefully measured frame from a profile pipe is first baited, and then welded in the form of a rectangle, and the corners are reinforced with steel corners for additional rigidity.

Profile tube frame The frame made of a shaped tube is reinforced with steel corners
-
The long side of the sash is divided into three parts and jumpers are welded in these places, which are also reinforced with corners, and then the gate hinges are welded to the lintels. The frame is not completely welded, in order to adjust it in level in case of skew. The bolt is welded at the stage of the frame assembly. Welding is carried out with tacks with a step of 20 to 40 cm. A continuous seam is not allowed, as this can lead to deformation of the metal during heating. The upper corners are cut obliquely with a cut to avoid corrosion, and the lower corners - at a right angle, butt, for ventilation.

Gate hinges Hinges for gates made of corrugated board may not be too large, since the gates are not heavy
-
Weld seams are cleaned.

Cleaning welded seams Weld seams are cleaned of slag, which helps to adhere to the paint
-
The frame is degreased with gasoline or solvent.

Degreasing solvent Before painting, the frame must be degreased.
- The frame is painted in the desired color.
The ground clearance should be at least 5 cm for asphalt and 15-30 cm for unpaved ones. If the gap turned out to be too large, then a removable bar can be installed on it, which is removed in winter.
Video: assembling the gate frame from corrugated board
If a wicket is planned in the sash, then the frame is assembled differently:
-
In the desired sash, a wicket frame with a size of 180 × 80 cm is created.

Gate frame with a wicket in the wing The width of the wicket in the gate leaf is no more than two thirds of the leaf width
-
The hinges move towards the edges of the gate.

Hinges at the edge of the gate If a corrugated wicket gate is located in the gate leaf, strong hinges are required that can support double the weight
- The assembly principle is the same, only the profiles are smaller.
-
The sash into which the gate will be cut is additionally strengthened.

Gate with embedded wicket The door leaf with a built-in wicket is reinforced with an additional profile pipe
Video: assembling the door frame from corrugated board with a built-in wicket
Frame trim
The frame cladding is carried out immediately after the frame is assembled. The professional sheet can be fixed in several ways - screw it with hex screws or self-tapping screws. The joints are additionally fixed with rivets or self-tapping screws. Self-tapping screws are preferable, since they exclude the ingress of water into the attachment point. The professional sheet can be mounted on one or both sides of the frame. The professional sheet must also be fixed on the jumpers.
You can decorate the cladding with forged elements that are welded or screwed to the profiled sheet in accordance with the drawing.
Installation of hinges
Since the gates from the profiled sheet are pretty sailing, it is better to choose expensive hinges, preferably on bearings. First, the hinges are welded to the frame, and then to the support post, but vice versa. For heavy gates, at least 3 hinges are used. The position of the hinge affects the position of the sash in the open state. If it is necessary that the sashes open in both directions, the loop is butt welded to the support. If in one, then they put a loop on the frame.
Insert locks
The locks are cut in after the sashes are hung. They differ according to the installation rules and types:
-
hinged. For them, you need to provide special loops even at the stage of welding the frame;

Gate padlock A padlock on a corrugated board gate is convenient in areas with heaving soil
-
waybills. For a padlock, a special sheet of metal or an additional frame element is welded or screwed on. For the installation of locks, welding is not used, since they sometimes need to be repaired or replaced;

Surface mounted gate lock made of corrugated board An additional frame element is installed on the inside to mount the surface lock on the gate
-
mortise. They cut into the plane of the pipe in a special metal pocket.

Mortise lock The mortise lock can be locked with a key or with a special filling built into the handle
Be sure to weld the pipe for the gate retainer from the reinforcement from the wind and to redistribute the load from the lock. You can also install a latch or lock.
Step-by-step guide to installing a professional sheet gate
- The first step is to mark the space for the gate.
-
Next, pits are dug for pillars with a depth of at least one meter. Before digging in, the supports are treated with an anti-corrosion primer.

Pole pits Pole pits can be dug manually or using a drill
- The pillars are set according to the level and fixed with rubble (broken bricks or stones).
-
Concrete is poured into the pits in a ratio of 5: 3: 1 (sand, gravel, cement) and 25% water. The solution must be well tamped so that it fills all cavities.

Solution for strengthening pillars The solution for strengthening the pillars must be well tamped
-
Wait until the concrete hardens (about 7 days). The upper part of the support is protected from rain.

Roofing material for covering concrete For covering uncured concrete from rain, roofing material is convenient - a common inexpensive material
-
Fitting ready-made sashes to the uprights. For this, special supports are constructed from bricks, blocks or wooden blocks. The sash itself is exposed strictly along the plane. A place is marked on the stand for the lower part of the hinge, which is welded immediately.

Fitting the finished sashes to the uprights To keep the gate level, before installation, you need to set the sash and place a stone or brick under it
-
Fittings are installed.

Installation of accessories for corrugated gates Locks, decorations, forged elements are installed on corrugated board gates last.
The professional sheet is good because it does not require painting. But you can buy ready-made material, stylized as wood or stone. You can decorate the gate with forged elements or other decor - from above or along the leaf. To decorate the gate, you can figuratively cut the upper edge, but then it must be protected with a profile.
If desired, the profiled sheet can be painted with special paints that are resistant to external influences.
You can freely use the gate only a month after installation.
Video: making swing gates from corrugated board
Thus, using detailed manufacturing instructions, making a gate from a profiled sheet is not as difficult as it seems. They will not only decorate the entrance group, but they will conscientiously serve for more than a dozen years.
Recommended:
How To Make A Children's Swing In The Country With Your Own Hands (made Of Wood Or Metal, Drawings, Photos And Videos)
Step-by-step instructions for the construction and installation of a swing at a summer cottage. Material selection, tools, model drawings
How To Make A Veranda With Your Own Hands To The House - Instructions, Projects, Drawings, Photos And Videos

The article describes how to build a veranda close to the house with your own hands
How To Choose And Build A Foundation For A Bath With Your Own Hands - 4x6, 3x4 And Other Sizes, Tips, Instructions, Photos And Videos
How to make a foundation for a bath with your own hands. Types and features of foundations. The choice of materials and technology, installation rules and step-by-step instructions
DIY Fence Made Of Corrugated Board, Installation Of A Fence Made Of Corrugated Board
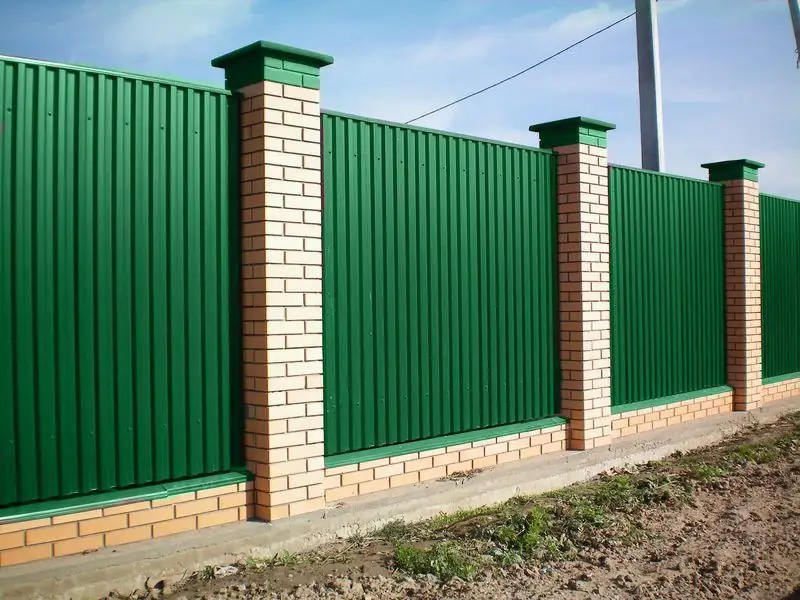
A fence made of corrugated board with your own hands on a personal plot. Step by step instructions on how to install a fence made of corrugated board with two types of pillars
Making Interior Doors With Your Own Hands, As Well As How To Choose Material And Make Calculations
Tools and materials for the manufacture of interior doors. Manufacturing technologies for interior doors. Varieties of internal wooden doors
