Table of contents:
- Author Bailey Albertson [email protected].
- Public 2024-01-17 22:26.
- Last modified 2025-06-01 07:32.
An arch instead of a boring door: features of an arched opening
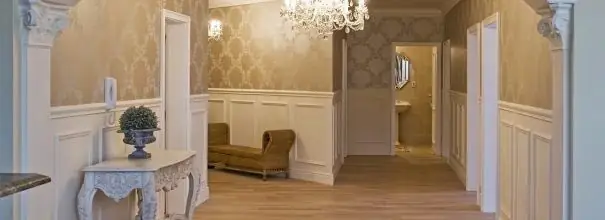
The doorway, designed in the form of an arch, divides the apartment into separate zones, no worse than doors. But often it is created for a different reason: the old architectural element gives the modern interior a special chic.
Content
-
1 Varieties of arches
-
1.1 Classification by shape
- 1.1.1 Semicircular
- 1.1.2 Segment
- 1.1.3 Three-center
- 1.1.4 Elliptical
- 1.1.5 Parabolic
- 1.1.6 Horseshoe
- 1.1.7 Lancet
- 1.1.8 Freeform Arches
-
1.2 Types of arches by material of manufacture
- 1.2.1 Stone
- 1.2.2 Metallic
- 1.2.3 Wooden
- 1.2.4 From chipboard and fiberboard
- 1.2.5 Plasterboard
- 1.2.6 Made of MDF
- 1.2.7 Brick
- 1.3 Photo gallery: how arches decorate a room
-
-
2 Self-made arch
2.1 Video: an example of making a drywall arch
- 3 Tips for the care of arched structures
Varieties of arches
Finding the ideal version of an arched opening is extremely easy, since there are no restrictions on the shape of its arch. The same applies to the choice of material: both flexible drywall and durable stone can turn an ordinary doorway into an arch.
Classification by shape
The shape of the interior arch can be not only round. The usual and the traditional are often abandoned if they want to maintain a certain style in interior decoration.
Semicircular
The classic representative of the curved ceiling of the opening in the wall is a semicircular or Florentine arch. Its vault has the shape of half a circle, and the radius of curvature is equal to half the width of the passage.
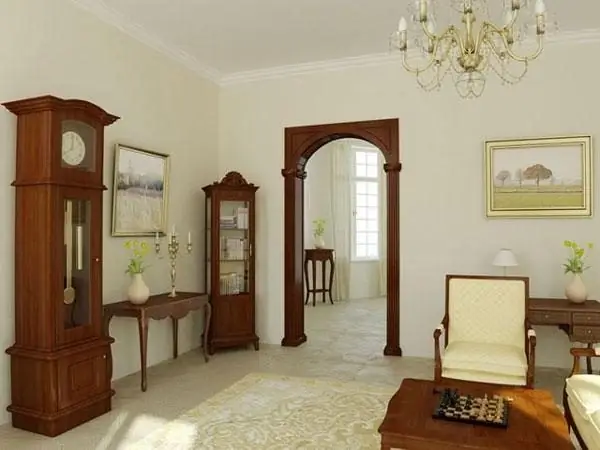
The Florentine arch has a semicircular vault and looks traditional
Segmental
A segmented arch is obtained when the radius of curvature exceeds half the width of the wall passage. Often, such an architectural element becomes a real boon for apartment owners who cannot increase the height of the doorway. The arch of the segment arch is formed by rounding the corners.
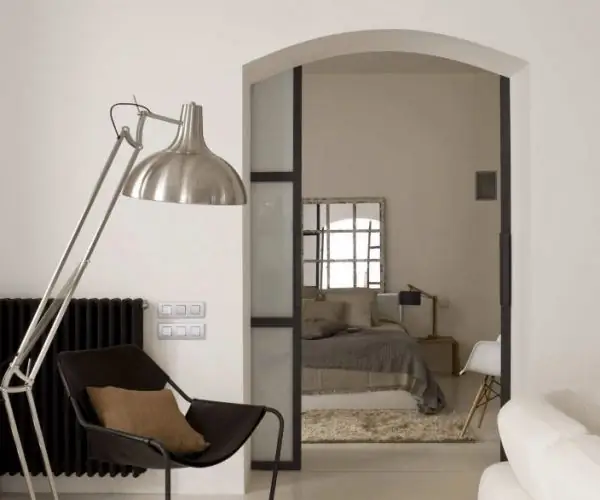
The segmented arch is slightly rounded, so it is perfect for a room with a low ceiling
Three-center
A distinctive feature of a three-centered arch is three dominant rounding (in the middle and on the sides of the arch). In section, such an overlap in the wall resembles a semi-oval, because it is formed as a result of combining three circles, the centers of which are located at different heights. It is more expedient to make three-center arches where more people pass. They expand the opening in the wall, so they will be an excellent portal to the dining room or living room.
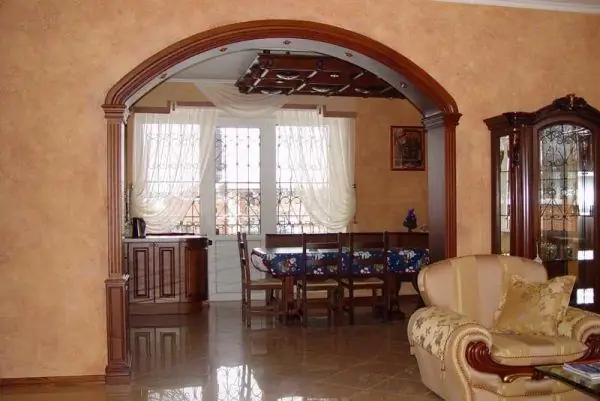
The three-center arch is devoid of sharp corners, which is why it pushes the opening and harmoniously fits into those rooms where many people can be at the same time
Elliptical
The shape of the elliptical arch is inspired by the Art Nouveau style with a flattened upper oval. The vault, which resembles an ellipse, is comparable to the arcuate overlap of a segmented arch, but at the corners it is slightly more rounded. An elliptical arch can appear in a place where it would seem impossible to make a doorway. It does not create a sharp boundary between two areas of the room, even if its width is almost equal to the width of the room.
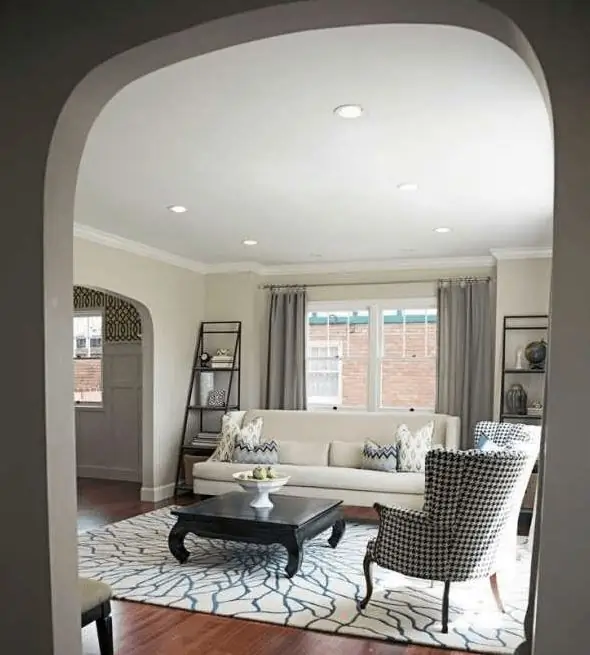
An elliptical arch allows for a fuzzy border between two rooms
Parabolic
A parabolic interior arch is the opposite of a three-center one, as it stretches upward. The pronounced narrowing of the vault at the top point will not leave indifferent fans of the East. True, if the house has low ceilings, then you will have to forget about the parabolic arch.
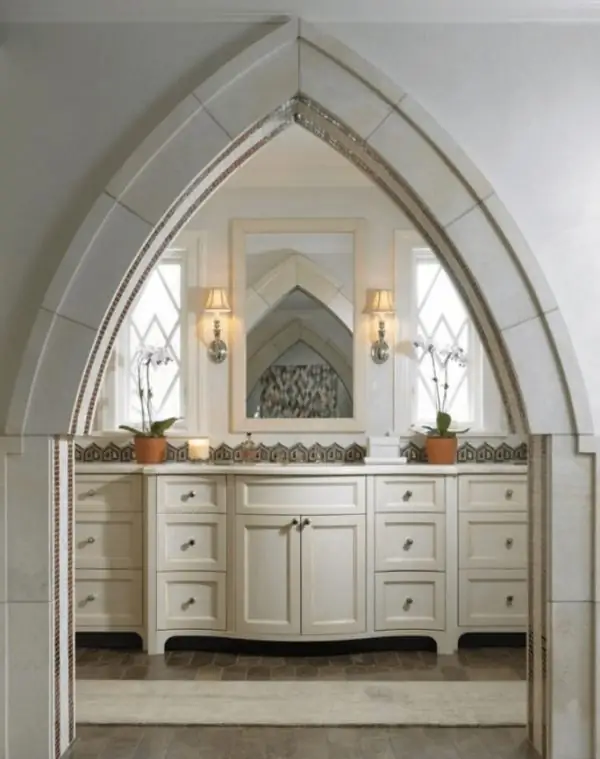
The parabolic arch is pointed, which creates an intimate atmosphere and becomes an ideal passage to a relaxation area or a ladies' room
Horseshoe
The horseshoe arch, unlike all the others, is characterized by a minimum width in the support area and expansion in the middle and in the area of the arch. This form originated in the 6th-7th centuries and is a symbol of Muslim architecture. Horseshoe-shaped arches often decorate the exit to the balcony or loggia.
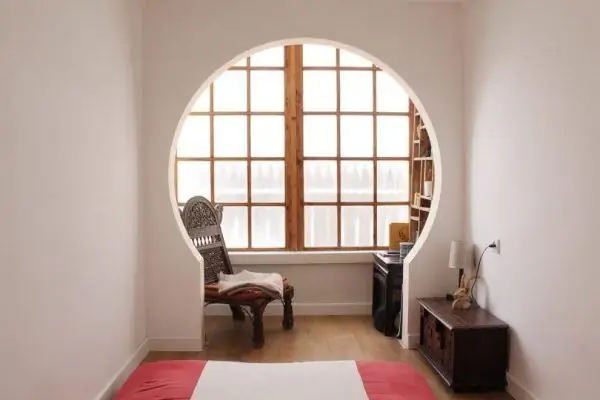
A horseshoe arch often serves as a passage to a balcony or loggia
Lancet
The pointed arch is notable for the fact that at the top it ends with an angular reinforcing element - a ridge. A doorway that pierces the ceiling is suitable for rooms with high heights. But so that it does not cause the effect of excessive lengthening of the room, it must be limited by a solid transom, filling the excess space at the top of the wall passage with glass, wood or other material.
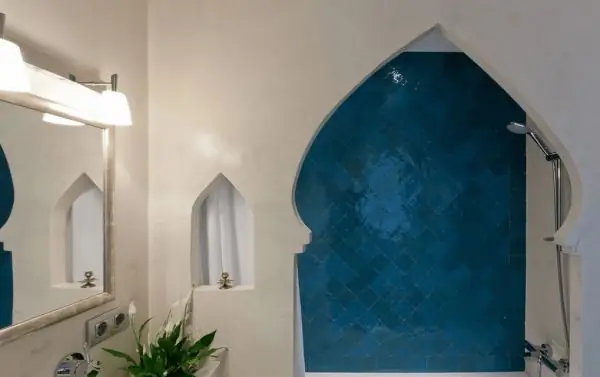
Pointed arch is suitable for rooms where the ceiling is high above the head
Freeform arches
The shape of such an arch depends only on the imagination and capabilities of the owners of the house. A free-form arched opening always looks spectacular and pretentious. But it is important to skillfully fit it into the interior: without combination with the main style of the room, the arch can deprive the house of comfort.
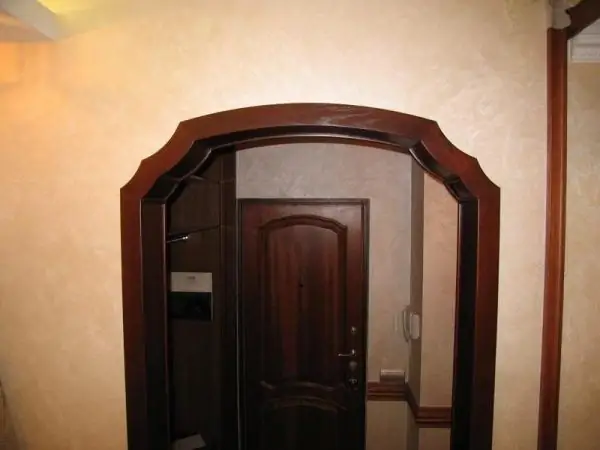
The rocker arch fits well with classic interiors and is often used to create an ambience of luxury
Types of arches by material of manufacture
The choice of material for the construction of the arch is influenced by the style of the room. For example, the classic interior is created from wood, the English one is made of stone, the Mediterranean one is made of plaster, ceramics or stone, and the loft is made of brick.
Stone
A house with stone doorways is massive, but at the same time it is associated with the reliability of the structure and even with the fortress. Lovers of the interior in a rural spirit prefer to make a stone passage to the room, because it seems to bring you closer to nature, as well as the owners of a country house. For a stone arch to appear in the house, gypsum decorative stone is most often used, but special originals can leave a part of the wall without plaster, thereby exposing the natural material of the walls.
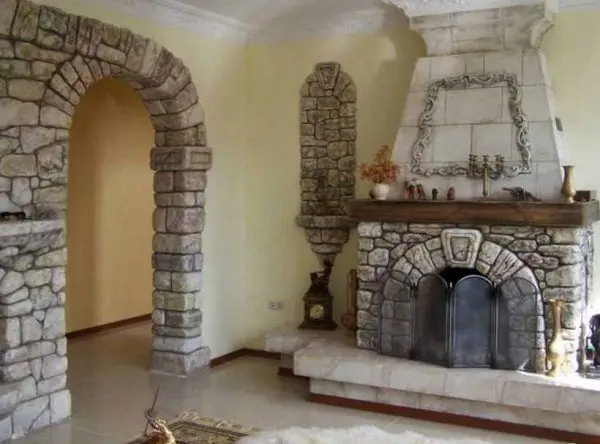
Suburban home owners often use stone arches to create the atmosphere of a medieval fortress
Metal
In terms of elegance and originality, metal arches have no equal, but they are difficult to fit into the interior, which is why this option is rarely used. Another important reason to abandon the metal interior arch is the high construction costs. It is better to decorate the doorway with stainless steel elements, which costs a lot of money. It is inappropriate to use inexpensive galvanized iron: it looks unpresentable in an arched structure.
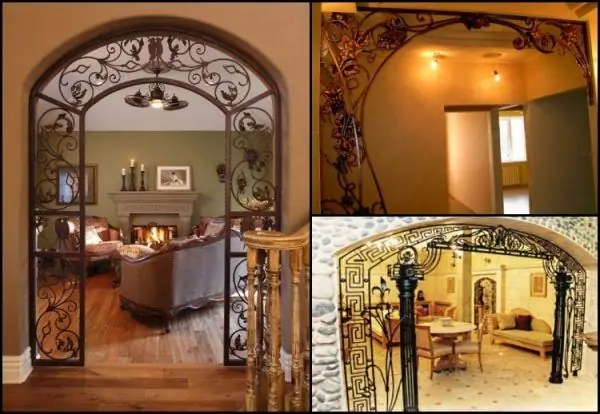
Wrought iron arches give the interior the effect of monumentality, but it is quite expensive
Wooden
There is no doubt about aesthetics, nobility, safety and the ability of a wooden arch to become a part of any interior. But unfortunately, it has many shortcomings:
- deformed due to temperature changes;
- burns out under the influence of ultraviolet radiation;
- dries at low humidity;
- swells if the room is damp.
And yet, in a wooden arch, the flaws are not as pronounced as in a drywall construction. The latter is so impractical that it becomes covered with cracks as soon as the cold in the house is replaced by warmth, and vice versa. In addition, for wood, in contrast to drywall, there are special protective compounds.
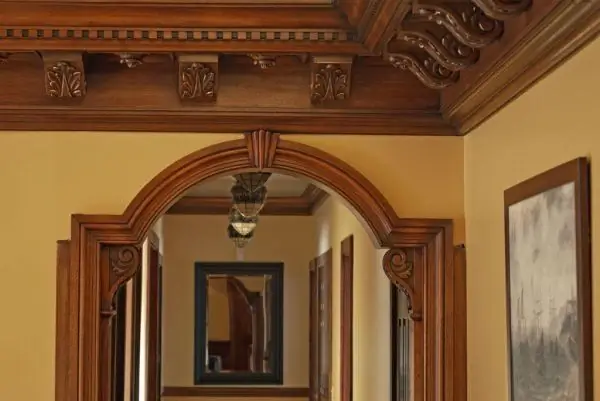
A carved wooden arch gives the impression of a noble and graceful architectural element
From chipboard and fiberboard
Interior arches can even be created from lightweight particle board or fiberboard. This material is an excellent replacement for expensive solid wood. Fiberboard and chipboard must be securely fixed in the opening. Otherwise, the decorative elements will deform and move away from the frame in just 2-3 days.
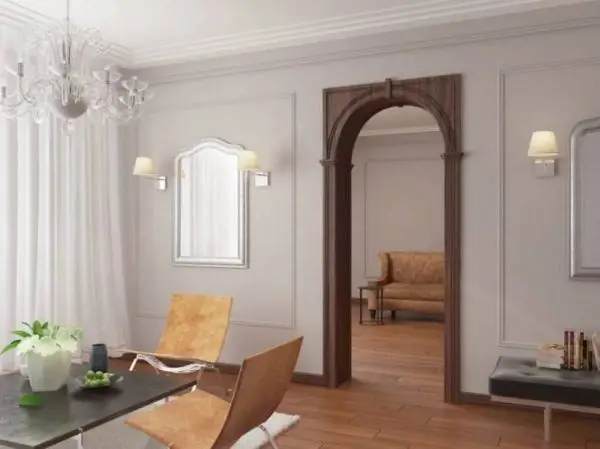
A chipboard arch is considered a good alternative to solid wood construction
Plasterboard
In most cases, the interior arch is trimmed with plasterboard. The popularity of this material was provided by the following advantages:
- the ability to take any shape due to the ability to bend;
- ease of installation work (can be cut);
- relative strength (if you choose the optimal thickness);
- tolerance to ultraviolet radiation, high humidity and sudden temperature fluctuations;
-
the ability to serve as a base for decorative finishes.

Drywall arch Drywall arches are popular, as they can have any shape
The necessary shape of the drywall is given by moistening it, and the fixing of the created figure is achieved with the help of high-quality drying of the material
Made of MDF
Medium Density Fiberboard (MDF) arches are somewhat more popular than wooden structures. Less money is spent on their creation, they do not rot or crack. MDF arches can be laminated or veneered. Lamination allows the structure to resemble a wooden arched passage in the wall and provides protection against mechanical stress and moisture. And veneering guarantees only one thing: an absolute match in appearance to a wood product.
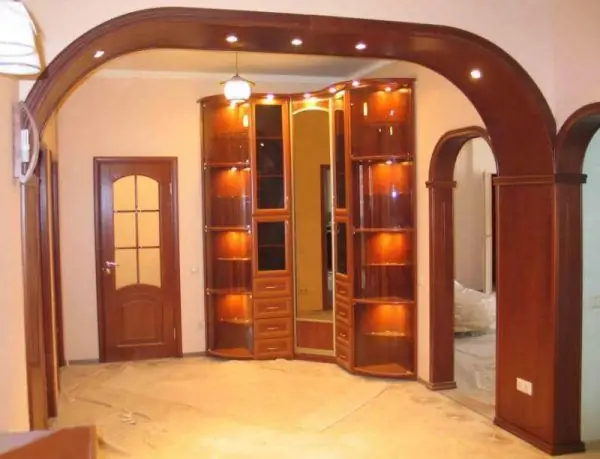
An MDF arch, when veneered or laminated, looks great and therefore competes with timber
Brick
Brick arches look no less chic than stone arches, although clay material is cheaper. The main plus of bricks as raw materials for the construction of an interior arch is simple installation. And the most noticeable disadvantages of this material are:
- visual narrowing of the passage in the wall;
- not compatible with any interior;
- mediocre appearance.
The last disadvantage of a brick arch can be fought. The design will look more elegant if you use not ordinary, but special facing bricks to create it. Decorative clay blocks have different textures and colors.

A brick arch, like a stone arch, creates a special style in the house.
Brickwork in an arched doorway does not need to be decorated with finishing materials. It will look decent even after a simple treatment with a protective spray, varnish or paint.
Photo gallery: how arches decorate a room
-

Light classic arch - In a classic arch, you can make niches for small interior items
-

Figured arched vault in a narrow opening - The arch vault can be made original curly, and not simple round
-

Light oval arch - Oval shape with side shelves makes the arch multifunctional
-

Half-arch - The semi-arch is used to separate the hallway area in the apartment
-

Round arch with portal - Inside the circle of the arch is a portal with frosted glass
-

Wide arched passage - A wide arched passage is often constructed between the living room and the kitchen to create an open atmosphere in the room.
-

Arch in the bathroom - White furniture and plumbing look especially stylish against the background of the dark contours of the arch.
-

Arch at the entrance to the kitchen - The arch at the entrance to the kitchen is most often wide, since it allows you to fit in the room with convenience
Self-made arch
Consider the construction of an interior arch using the example of a drywall construction erected in an opening 1 meter wide:
-
We remove the door leaf and box. We clean the bare inner surface of the walls with a grinder. We seal the pits with putty. We make a perfectly smooth passage in the wall with plaster.

Opening preparation The door is removed from the opening, and the irregularities are eliminated with a grinder
- We measure the height and width of the opening with a tape measure. If the passage in the wall does not reach at least 2 m in height, then we refuse to make an arch. We do the same when we find that the ceiling does not rise 2.5 m above the floor level.
- To make sure that, having lost 10-15 cm of height, the doorway will look normal and the arch can enter it, we will conduct a test: we will fix the blank cut out of cardboard at the top of the passage. If necessary, reduce the radius of the arc or decide to create small bends only at the edges of the arch. For low openings, it is better to choose a classic or segmental shape; in high portals, you can fit almost any version of arches, including parabolic and pointed ones.
- On a sheet of drywall, draw the front details of the structure. At the same time, we make sure that the drawn parts of the arch do not differ from each other in size. To do this, it is better to use the following marking method: divide the width of the opening by 2, getting the radius of a semicircle, and draw a rectangle on the drywall sheet, the height of which is 10-15 cm more than the obtained value, and the width fully corresponds to the width of the opening. In our case, the width of the opening is 1 m, so on drywall we draw a figure 65 cm high (100 cm / 2 + 15 cm = 65 cm). The extra 15 cm is the interval between the top points of the doorway and the future arch.
- We draw an arched vault. To do this, find the middle on the lower side of the rectangle. From it we draw an even semicircle with a radius equal to half the width of the passage in the wall - we have it 50 cm. To make the figure even, we use a homemade compass, rope and crayon or a simple pencil. We cut out the parts of the arch with an electric jigsaw or a clerical knife.
-
We construct an arch frame from metal profiles. Cut the upper parts (two guides) so that they are equal to the width of the opening, and mount them parallel to each other in the upper area of the slope. To give the metal parts the desired shape, we cut them with metal scissors. When the arch is built in a concrete or brick wall, we fix the metal frame with dowels. And if we are dealing with a wooden house, then we use ordinary screws.

Rounding off metal profiles In order for the metal profile to bend, it must be trimmed every 5-10 cm with metal scissors
-
From the metal profile we cut 4 side elements of the same length as the drywall blanks. We shorten the lower corners of the parts with a knife so that they do not go beyond the limits of the drywall blanks tapering downward. We fix the metal elements at the top of the opening, always in one direction. At the same time, we retreat 1.5-2 cm from the edge of the passage, otherwise, in combination with plasterboard sheets and a layer of putty, the structure will go beyond the wall level.

Fastening metal parts Metal parts are attached to the wall, stepping back from it a few centimeters
-
We attach the plasterboard parts to the frame every 15 cm, deepening the screws by 1-2 mm into the front surface. This is necessary in order to get a flat plane when plastering and hide the fasteners. We fix the front parts of the arch first. In order for the drywall to adhere tightly to the metal elements, we wipe it with a damp cloth and mount it on the frame only after it becomes flexible.

Installation of drywall on a metal frame The front parts of the arch are attached first to the metal frame
-
We connect the end part of the arch with the front plasterboard parts with self-tapping screws with a press washer. In order to align the corners of the structure on both sides of the arch, we attach metal or plastic corners.

Arch vault formation Before attaching the vaulted part of the arch, the material is moistened with water, otherwise it will not take the required shape
-
We cover the assembled arch with starting and then finishing plaster, which is smeared with a wide spatula. First, we apply the composition to the inner area of the arch, and then, when it dries, to the side walls. We cover the joint areas with a masking net, which is glued together with the putty.

Arch plastering The plasterboard arch is plastered using a wide trowel
- We leave the arch to dry for 12 hours. Then we process the structure with a primer, level it with a putty and grind it with a piece of sandpaper.
- We decorate the arch with stone. We will make the surface for the installation of decorative elements rough using notches. We finish the structure from the area of its connection with the wall. To make the decor stick well to the arch, use a mixture of lime, cement, sand and glue. A day later, remove the excess of a special composition with a rubber spatula.
Video: an example of making a drywall arch
Tips for maintaining arched structures
How exactly you need to care for the arch depends on the material from which it was made and the place of its installation. For example, a structure that separates the kitchen and the hallway will attract dirt from the street and grease from cooking. This means that it will have to be constantly cleaned.
Unfortunately, not all materials are capable of withstanding wet cleaning. For example, a wooden arch from frequent exposure to moisture can begin to rot, so its service life will be significantly reduced. A wooden structure should be protected from dirt and wiped off only with a semi-dry cloth.

The polish will help clean the arch material and avoid re-contamination.
It is recommended to protect interior arches from impacts. Drywall, if it is not thick enough, can easily break under any mechanical stress, and wood does not tolerate rough touches. Even a small scratch on this material is a big problem.
It was not possible to protect the arch from damage - no need to panic: there are still ways to mask scratches in the construction material. I recommend shading a barely noticeable defect first with a marker of the desired color, and then with paint, the excess of which can be removed from the area of the defect with a damp cloth. I advise you to seal deep scratches with a special sealant and when it hardens, cover it up with paint.

A stationery marker will help mask defects on the arch
Having studied the theory of arch construction, you can try your hand at practice. The process will seem easy if you know how to use a hacksaw, hammer and drill.
Recommended:
Do-it-yourself Metal Stove: Options From A Pipe And A Cast-iron Bath, Including A Diagram, Step-by-step Instructions With Photos And Videos
Types of metal furnaces, their advantages and disadvantages. Selection and calculation of material. DIY step-by-step instructions for building. Brick lining, chimney
Do-it-yourself Antique Doors: Methods Of Aging And Step-by-step Instructions For Working With A Photo
Door aging methods. Brushing, patination, thermal and chemical treatment, cracking, etc. Step-by-step instructions and designer tips
Design Of A White-purple Kitchen In The Interior: Options For Combinations, Photo-ideas Of Original Design Examples
Choice of style, materials and furniture for a white and purple kitchen. Organization of lighting and decor options for the kitchen. What colors to complement white and purple
Kitchen Curtains On One Side: An Overview Of Options With A Photo
One-sided curtains in the kitchen: pros, cons, suitable interior styles, material, color, pattern, tie-backs and lambrequins. How to hang curtains to one side
Wallpaper In Modern Kitchen Design 2019, Interior Design Options, Photo Ideas
Pros and cons of photo wallpaper for the kitchen. What material is right. Recommendations for selection and gluing. Interesting kitchen design ideas. Reviews
