Table of contents:
- Author Bailey Albertson [email protected].
- Public 2023-12-17 12:53.
- Last modified 2025-01-23 12:41.
How to glue wallpaper with your own hands - instructions

Greetings, dear readers of our blog "Do it yourself with us."
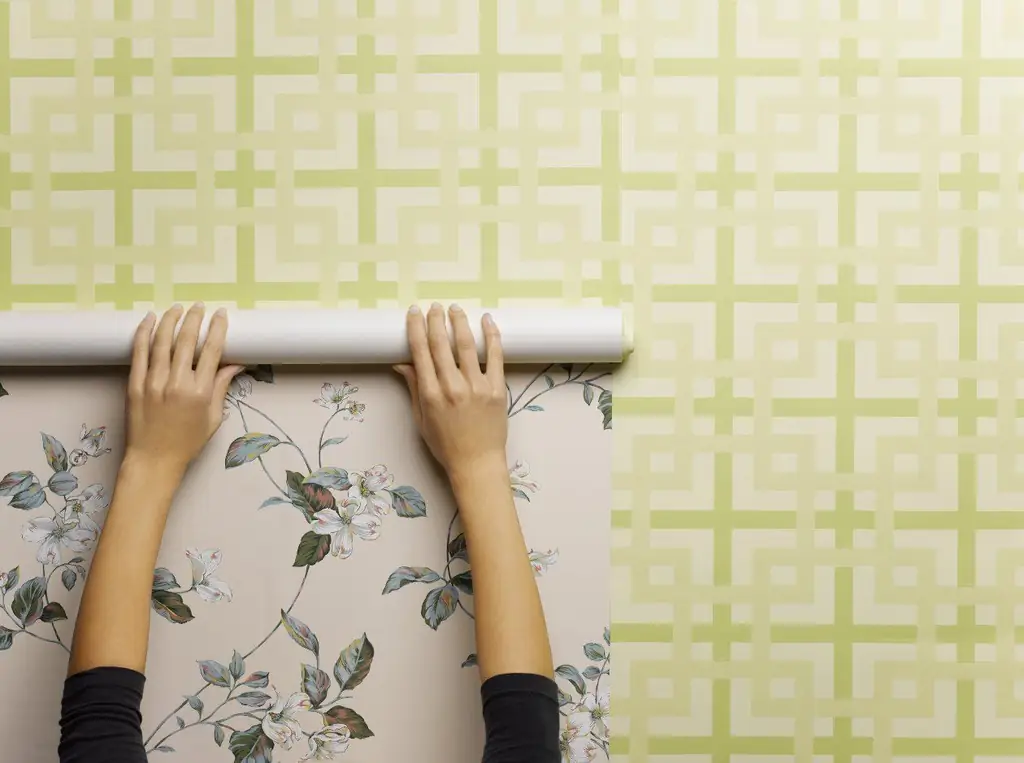
Continuing the theme of the overhaul of the apartment today, I want to describe in detail the process of how to properly glue wallpaper on the walls with my own hands. Where should you start? What nuances and features to take into account in the work? What questions should you pay special attention to? It would seem that the question is not very difficult, but how many misunderstandings, disputes and disagreements arise when we start the process itself.
Content
- 1 Preparing the walls
- 2 Nicely glue wallpaper along a straight wall in any room of the apartment
- 3 How to properly glue the wallpaper in the corners with your own hands: instructions with a photo
- 4 Video: how to stick vinyl wallpaper yourself
Preparing the walls
First, let me congratulate you! How with what? With the fact that if you are interested in the issue of wallpapering, then the dirtiest, hardest work in the repair has already been completed. And you did it !!! Hundreds of kilometers reeled in shopping trips in search of wallpaper are already behind us. And here they are, the most beautiful in the world, coiled up in tight rolls, neatly against the wall!
But do not rush, you have everything ready, and someone only needs to re-paste the wallpaper, without affecting everything else. Therefore, we begin the process by removing all the old wallpaper. To do this, carefully tear them off the wall, if the glue on which they stick is weak, the work will go like clockwork, but if the wallpaper is glued well, you have to work hard.

Correct gluing of wallpaper - scheme
If old ordinary paper wallpaper is not removed well, then we moisten it with water, simply rolling it up with a wet roller or brush. Leave it on for 10-15 minutes and then carefully remove it. Well, the most difficult case is when the wallpaper is covered on top with a waterproof film, the so-called "washable" wallpaper. Only a mechanical method of removal will help here - with a spatula. We remove them by prying with a spatula, trying to touch the wall as little as possible.
The wallpaper has been removed, it is necessary to remove all the plaster, which does not hold well and practically falls out by itself, to cut the cracked and falling out seams. All emerging places of depressions, depressions and irregularities must be putty and subsequently primed after cleaning.
If you decide to level your walls, then after applying the finishing layer, do not forget to prime it. It is very important! Otherwise, when wallpapering, the walls will dust and crumble, which will lead to poor adhesion of the wallpaper to the wall. Worse, the plaster can begin to roll off when the glue is applied to the wall. For this, use special mixtures sold in stores. And if you want to save money, you can use simple PVA glue, 2 glasses of glue per bucket of water (from personal experience, it primes well).
The whole point of preparation comes down to making the walls as smooth and even as possible. Take the time to inspect your walls. Remove all adhering specks and other small debris, as after the wallpaper is pasted, they will appear and will be ugly. You should be especially careful in this regard when sticking thin wallpaper.
Walls must be strong, clean and dry.
We dilute the glue in accordance with the instructions on the package. I used Quelyd Spec-Vinyl glue for vinyl and textile wallpapers.

It is divorced: 1 pack for 4-4.5 liters of water and is designed for 6 rolls. For dilution, we use a suitable container, measure the required amount of liquid into it and, stirring continuously, introduce dry glue.

We let it disperse a little, for 15 minutes, then stir it well again and you can glue the wallpaper.
Beautifully gluing wallpaper on a straight wall in any room of the apartment
Step 1. We close all windows and doors to prevent drafts.
Step 2. We calculate how many vertical stripes we will fit on one wall. To do this, measure the length of the wall and divide the resulting size by the width of the wallpaper.
My wall length was 3.7 m. (3700 mm.), And the width of the wallpaper was 0.54 m. (540 mm.) Total 3700/540 = 6.85. Thus, 6 whole strips and one with an undercut were placed on my wall.
We cut 7 strips to the size of the room height plus 50 mm. for trimming at the top and bottom.

Similar calculations can be made for the other three walls and the wallpaper can be cut to the entire room at once.
Step 3. We mark the vertical line for the correct orientation of the first strip.

We retreat from the edge of the wall (I walked from the aisle, you may have from the corner) 500 mm (the distance is slightly less than the width of the strip, so that later, if the corner of the room is a little "overwhelmed", you can trim the first strip) and set a mark. To mark the line of verticality of the sticker of the stripes, we use a plumb line (you can simply use a thread with a load attached to it) or a building level.

We apply a plumb line to the wall and align it with our mark made earlier. Mark out a vertical line and connect the points with a straight line. Thus, we got a line from which we will begin to glue the second strip. We do not touch the first strip (at the aisles or in the corners) yet, we leave the extreme strips of one wall for last. I used the same marking technology when laying tiles on the wall in the bathroom.
Step 4. Apply glue to the wall to the width of the strip and to the strip of wallpaper, evenly distributing it over the surface with a brush or roller.

Step 5. We glue 1 strip (or rather, from the edge of the wall or corner, it will be the second for us, but we do not glue the first one yet). To do this, starting from the top, carefully apply the strip to the wall. We combine the edge of the strip with the drawn line of verticality and, using a wide roller, carefully roll the strip against the wall, squeezing out the air trapped between the wall and the strip.

Step 6. We mark the extra strip length.

We tear off the strip a little from the wall and carefully cut off the excess.

This operation can be done without tearing off the strip, but using a clerical knife, cut off the excess. In the end, we get this picture.

In the future, the joint between the wall and the floor will be closed with a plinth. How to install a plastic skirting board with your own hands can be read in detail here.
Step 7. We repeat all procedures for applying glue to the wallpaper and wall, and glue the second strip. Only now we join the edge of the strip to the already glued first strip.

Sometimes there are situations that the ceiling is not brought out perfectly evenly, you have to cut the top of the strip a little. To do this, we release the glued strip slightly upward, creating an overlap on the ceiling.

Using a roller, we roll the strip, and using a clerical knife or scissors, cut off the excess wallpaper so that the upper edge of the strip is exactly in the corner.

Cut off the excess at the bottom, finally roll up the glued strip, rolling it with a wide roller with movements from top to bottom and towards the edge of the strip, as if drawing a Christmas tree with a trunk in the middle of the strip. Using a narrow roller, roll the seam between the strips and the top and bottom of the strip adjacent to the ceiling and floor.

We get this picture.

Step 8. Similarly, we glue all whole strips to the end of the wall.
If you come across sockets or switches on the way, we first de-energize them by turning off the machine, glue the strip and carefully cut the opening under them.

Step 9. We glue the extreme stripes at the aisle and in the corners and get this picture.

How to properly glue the wallpaper in the corners with your own hands: instructions with a photo
Now we will consider the question of how to glue wallpaper in the corners of the room and we will consider the most difficult option, next to the corner is a window.

Step 1. We have already cut two strips in height, we smear the wall between the window and the corner, at the same time we apply glue to the glued strip.

Step 2. Starting from the top, we glue our strip from the ceiling to the window sill with a slight overlap (20-30 mm) on the adjoining wall.

Step 3. We cut out the window sill.

Step 4. We put the wallpaper behind the battery and cut the strip, if necessary, to the pipes.

Step 5. Roll up the glued strip with a roller, smooth out all the folds until the strip adheres completely to the wall.

Step 6. Exactly along the corner we mark a vertical line and cut off the extra strip that overlaps the adjacent wall.

To do this, we apply a guide ruler to the corner and, drawing along it with a clerical knife, remove the excess.
Step 7. We cut out a window opening with a clerical knife.

Step 8. We glue the mating strip of the corner. Starting from the top, we adjust it in height to the ceiling and join with the adjacent strip. Carefully roll the strip against the wall, leave the overlap on the adjacent wall in a free state.

Step 9. We apply a guide ruler vertically to the corner so that our strip overlaps the strip of the adjacent wall by 3-5 mm. Using a clerical knife, cut off the excess part of it and remove it.

Step 10. Finally, with the help of a wide roller, we roll the strip, and with the help of a narrow joint between the strips, the corner itself.

Ultimately, we get a completely finished corner.

On the main area of the walls, our wallpaper is glued. It remains to complete the process by pasting wallpaper above the window, behind the batteries and above the arch. Above the window and behind the batteries, the technology is the same as for straight walls, the only difficulty is that it is not very convenient behind the batteries. The best option is to temporarily remove them (if the connection system allows, for example, if the batteries are connected through the "American" taps). If there is no such connection system, carefully slip the strips over the batteries and cut them off at the points where the battery is attached to the wall.
We glued the wallpaper without a pattern, so there was no need to adjust the stripes according to the pattern between ourselves. If your wallpaper is with a pattern, we accordingly increase the length of the stripes by a step of the pattern and align the pattern when joining the strips.

Step-by-step instructions for the correct work with wallpaper
Video: how to stick vinyl wallpaper yourself
Thanks to everyone who read the article to the end. I draw your attention to the fact that here I completely described the whole process of how to glue the wallpaper with my own hands in accordance with my experience and ideas of this process. Surely there are people who have devoted more time to this, have tremendous experience and professional skills. Please write about your little tricks, secrets and features of how to glue the wallpaper correctly in the comments. Help people who want to gain knowledge in this matter. After all, as they say, the more you give in this life, the more you get in return.
That's all for me. See you on the pages of our site " Do it yourself with us." In the near future we are planning to publish many interesting and useful articles, do not switch.
Recommended:
Master Class For A Cat Lover: How To Make A Collar For A Pet With Your Own Hands

Cats have long and firmly entered our life as pets. These cute animals cheer us up, keep us company and even treat! And we also love to please them with something special. Pets, like humans, have their own fashion, and a collar is a must. Today we will tell you how to make a collar with your own hands []
How To Choose And Build A Foundation For A Bath With Your Own Hands - 4x6, 3x4 And Other Sizes, Tips, Instructions, Photos And Videos

How to make a foundation for a bath with your own hands. Types and features of foundations. The choice of materials and technology, installation rules and step-by-step instructions
How To Make A Slime At Home With Your Own Hands - Without Sodium Tetraborate And Glue, From Hand Cream, Shaving Foam And Other Ingredients, Recipes With Photos And Videos

Is it possible to make a slime at home. Types of slimes and recipes for their manufacture, depending on the desired properties. Toy care features
How To Make Soap At Home With Your Own Hands: Making Solid, Liquid, From A Soap Base And Not Only, Master Classes With Photos

Making soap at home with your own hands. What can be done, what components are required, step-by-step master classes with photos
How To Make A Door With Your Own Hands, What Material And Tools Are Best To Use, And Also How To Correctly Calculate

Features of self-production of doors of various types. Calculation of the structure. What are the best materials and tools to use
