Table of contents:
- Author Bailey Albertson [email protected].
- Public 2024-01-17 22:26.
- Last modified 2025-06-01 07:32.
DIY doors of different designs

When starting repairs in an apartment, I want not only to update the wallpaper on the walls, but also to completely change the interior of the rooms. Therefore, there is often a desire to change all the doors that are in the house. And to put something unusual, comfortable and beautiful. Many go to the store and buy ready-made doors, but the most interesting thing is to make them yourself. Any home craftsman can engage in self-production, for this you need to decide on their design, choose the material and purchase the necessary tools.
Content
- 1 How to correctly calculate the doors
- 2 Required tools
-
3 Material selection
- 3.1 Gallery: doors made of different materials
- 3.2 Video: characteristics of doors made of different materials
-
4 How to make a door with your own hands
- 4.1 Video: a simple do-it-yourself side door
- 4.2 Do-it-yourself steam room door
- 4.3 Sliding doors
- 4.4 Pencil door
- 4.5 Double-leaf door
-
4.6 Barn door
4.6.1 Video: barn machinery
-
4.7 Roto door
- 4.7.1 Video: installation of the roto-mechanism (1 part)
- 4.7.2 Video: installation of the roto-mechanism (part 2)
- 5 Reviews
How to correctly calculate the doors
All work on self-production begins with calculations. First, you need to measure the doorway into which the doors will be installed. Opening measurements are carried out sequentially:
- Measurement of the height of the opening (H). It is carried out in the corners and in the center of the opening: the difference should not exceed 10-15 mm. And if it is impossible to trim the top of the opening, then the height will be equal to the smallest value.
- Measuring the opening width (L). Performed at the top, bottom and center: the difference can be 15-20 mm. The lower value is taken.
- Measuring the depth of the opening. This indicator is only important for the door frame. It is measured in several places, the highest value is chosen.
- Checking the slope of the floor. If the horizontal surface is skewed, the sliding doors will constantly open.
-
Measurement of the level of the ceiling and walls. Diagonal measurements are made with a building level or a vertical plumb line. The walls are leveled if necessary.

Door opening measurements Correct measurements include measuring the height, width and thickness of the opening in millimeters
There are standard sizes of door leaves: 60, 70, 80, 90 cm wide and up to 2 m high.

Sliding doors are easy to use: they do not take up space when opened
It is recommended to install doors of different widths for different rooms:
- for the kitchen - 70 cm;
- for a bathroom - 60 cm;
- for a living room - 80 cm;
-
for the living room - a 120 cm wide double door with canvases of the same or different width.

Dimensions of standard doors The standard sizes of door leaves depend on the openings in the room, so it is easy to find the right door in the store
When calculating the box, you need to decide whether to make a threshold or not. Usually thresholds are installed in the bathroom and kitchen, but it all depends on the preferences of the owner. It is also determined in advance with the design of the door - on one or both sides - the number of platbands depends on this, if the door is thought of with inserts.

The more inserts made of glass or other materials in the door, the more platbands will be required to fix them
Additionally, the required number of handles, hinges or other fasteners is taken into account based on the opening design, as well as locking and fixing devices, if necessary.
Required tools
To make doors yourself, you will need the following tools:
- manual milling machine - for making groove joints;
- circular or hand saw - for cutting materials;
- grinder with a grinding attachment - for surface treatment;
- screwdriver and drill - for installation work;
- hand tools: chisel, mallet, hammer, plane;
- measuring instruments: tape measure and building level;
-
connecting parts: wood glue, self-tapping screws and other fasteners.

Tool for making doors For the manufacture of doors, both manual and electric tools are used.
If there is a threshold, then the door leaf is made on all sides 2-3 mm smaller than the door frame, and if it is absent, a gap of 5-10 mm is left from below, so that the floor covering will not be damaged when opening the doors
Material selection
It is important to decide: what to make the door from and what material to use for external decoration.
The following materials can be the basis for an interior door:
- natural wood - it is easy to work with it, the doors are strong, beautiful and durable. Disadvantages: heavy doors, wood absorbs moisture. Often only a frame is made of wood, and other materials are used for cladding;
- MDF plate - the door can consist entirely of plates, but if it is sheathed along the frame, then corrugated cardboard or other filler is placed inside. This is a cheaper material, is not afraid of moisture;
- Chipboard - consists of compressed shavings glued with synthetic resins;
- plastic, glass, aluminum or stainless steel are usually used in production, but at home it is difficult to make a door out of them.
Gallery: doors made of different materials
-

Glass double door - Double-leaf glass doors are made of tempered glass and decorated with designs
-

Glass and plastic door - Two halves of a double-leaf plastic door with colored glass can be decorated in different ways, if one of them is rarely used
-

Barn plastic door - The barn door made of matte plastic is perfect for a bathroom or dressing room
-

Sliding door made of aluminum and colored plastic - Sliding door made of aluminum frame and colored plastic is beautiful, lightweight and easy to use
-

Paneled doors made of wood and glass - Ordinary paneled doors can be made with a glass insert and stand out in the interior with a bright color
-

Arched door with trim - An arched door with decorative trim will become an independent decoration of a large room
-

Deaf wooden door with MDF inserts - A blind wooden door with inserts of thin MDF sheets will harmoniously fit into a classic-style room
Most often, do-it-yourself interior doors are made of wood, so you need to determine which wood is best to choose. Consider different breeds:
- pine - easy to handle, but dries up over time; differs in low cost;
- alder - more porous and softer wood, easy to process, but not resistant to decay;
- birch is a dense and viscous wood with a beautiful structure, but short-lived;
- oak - durable and resistant to mechanical damage, but difficult to work with, as it cracks along the fibers;
- beech - durable, but afraid of temperature and humidity changes;
- larch - with a beautiful structure, easy to process, durable;
- walnut - with a homogeneous structure, strong and durable;
- maple - resistant to moisture, easy to process and polish.
For the decorative facing of the door leaf and frame, the following materials are used:
-
natural veneer - thinly cut sheets or strips of wood that are glued to any substrate. Veneer allows you to imitate solid wood;

Natural veneer Natural veneer has a textured surface, can be easily glued to wood and can be restored
- eco-veneer - pressed products consisting of glued wood fibers. Eco-veneer is similar to natural, but costs less;
-
laminate - a film of several layers of paper. A high-quality laminate looks beautiful and lasts a long time, and a low-quality one - peels off over time;

Vinyl laminate Vinyl laminate is durable, suitable for all surfaces, but will fade in direct sunlight
- plastic - sheets of synthetic polymers. Plastic is moisture resistant and is not afraid of temperature changes, but with strong heating it releases harmful substances;
- paint - acrylic, alkyd, nitro paint;
- varnish - allows you to keep the structure of the wood from moisture.
The choice of materials depends on the preferences of the owners and the design of the doors.
Video: characteristics of doors made of different materials
How to make a door with your own hands
Usually they make swing doors with their own hands, so let's consider the manufacturing sequence using their example. For self-production of an interior door, you will need:
- board: 40 mm thick and 100 mm wide, no more than 6 m;
- Chipboard: will be used to insert inside the door leaf. Instead, you can take, for example, glass;
- self-tapping screws (or wooden confirmation pins), glue, varnish or paint.
The manufacturing technology of such a door is simple. The work is carried out in several stages:
-
Preparing the board. According to the exact dimensions, the board is cut into 4 parts: the top, bottom and sides of the door leaf. The grinder's grinding disc is used to polish wide surfaces. The ends need not be processed.

Preparing the boards Boards are first cut to size and then sanded
-
Milling. The ends of the boards are rounded off with a hand mill. At one of the ends, a groove is made for installing chipboard. The groove must match the thickness of this sheet. It is usually made 16 mm wide and 15-20 mm deep.

Manual frezer The hand router is used to machine the ends of boards and cut grooves
-
Trimming the ends. With a circular or hand saw, the ends of the boards are trimmed at an angle of 45 degrees. At the extreme points of the racks, the length should be equal to the height of the door leaf, and at the extreme points of the upper and lower boards - its width.

Cutting boards at an angle of 45 degrees on a miter box It is necessary to cut the boards at an angle of 45 degrees so that the parts of the door leaf are connected to each other evenly, without gaps
-
Open chipboard. Calculation of the width of the sheet: from the width of the door leaf, subtract the width of the two pillars and add the depth of the two grooves. The sheet length is calculated in the same way. For a door 80 × 200 cm, it turns out - width: 800-100x2 + 20x2 = 640 mm, length: 2000-150x2 + 2x20 = 1740 mm.

Open chipboard You can cut the chipboard yourself or order a finished sheet according to your size
- Pre-assembly. Knocking with a rubber mallet, boards are carefully put on the chipboard sheet. The tightness of the fasteners is checked. Then the boards are removed, holes are drilled in the corners for self-tapping screws. But you can also attach such a door to wooden confirmation pins.
-
Insert of locks, latches and awnings. It is better to put them on the disassembled door so as not to accidentally damage the insert grooves by pressing.

Insertion of awnings It is better to attach the hinges, handle and lock to the door disassembled so as not to damage the insert
- Painting and assembly. After painting and varnishing the boards, the door leaf is reassembled and fixed. The boards are fixed with grooves on the chipboard. If wooden pins are used instead of self-tapping screws, they are greased with glue and inserted into the prepared holes.
Decorating the door is an important step. If, instead of painting, veneer or laminate is chosen, then it is better to entrust this process to specialists.
Video: a simple do-it-yourself side door
Do-it-yourself steam room door
For a steam room, you can independently make a door from solid wood. The work is performed in the following sequence:
- Open the boards. You will need tongue-and-groove boards and beams 30 mm thick. To calculate the number of boards, you need to know their dimensions and the size of the door leaf. If the door is 2 m high, then the boards are sawn to length: 2000-2x30 = 1940 mm.
-
Assembly of boards. The boards are laid out in a row, leveled and glued together with furniture glue. Hit tightly with a mallet and squeeze with clamps until the glue dries.

Bonding grooved boards The boards are connected using grooves, which are coated with glue
- Preparation and fixation of the timber. A bar, sawn into two long and two short blanks, is attached to the self-tapping screws along the perimeter of the canvas.
-
Strengthening the door. To strengthen the structure, two transverse strips are installed on top of the boards.

Crossbars on the door To strengthen the door leaf, transverse strips are installed: they are attached with self-tapping screws or glue
- Fittings. Hinges and handles are attached. For the steam room, wooden handles are selected, since metal handles are very hot.
-
Treatment. Transparent deep impregnation compounds are used, which reliably protect the tree and do not emit harmful substances.

Finish coating It is dangerous to use varnish or paint to cover the steam room doors
Sliding doors
The main assembly of the sliding door is a sliding mechanism, it can be purchased at any hardware store. You will also need special sliding door fittings. The design consists of an upper rail or complemented by a lower one.

Sliding doors save space
The length of the guide strip must be twice the width of the door frame, otherwise the door will not open completely
Manufacturing process:
- Creating a door leaf. It is made of solid wood with inserts, but in a lightweight version so that the weight of the door does not interfere with the operation of the movable mechanism.
- Creates a groove for the guide. A groove is made in the lower end of the door for the lower guide. It is cut in the center of the door leaf end to a depth of 3 mm.
-
Rollers are screwed to the upper end of the blade.

Rollers in the upper runner for a sliding door The bottom lock prevents the door from jumping out of the rail
- Installation of fittings. The lock is cut in and the handles are placed.
-
Fastening the guide profile. A guide is horizontally attached to the wall above the doorway. On the one hand, it should protrude 5 cm, and on the other, the width of the canvas.

Installing the upper door rail The upper guide is horizontally positioned: the accuracy is checked by the building level
- Fixing the stop. A lower guide or stop is attached to the floor, along which the door will ride.
- Door assembly. The door rollers are inserted into the upper guide and closed with stops, and the door is put on the lower stop with a cut groove.
Pencil door
The pencil case door is similar in design to a sliding or sliding option. Its difference is that the door leaf is hidden in the wall.

The door leaf is hidden in the wall - this is convenient in small apartments
Stages of creating a pencil case door:
- Creating a door leaf. You can do it yourself or purchase a ready-made one.
-
Plasterboard false wall construction. First, a frame is created from metal profiles, and space is left for the door inside. The niche should be 20 mm wider than the canvas so that the door does not scratch and moves freely.

False wall The frame of the false wall is assembled from metal profiles or from a wooden bar
- Fixing the guide. The upper rail is fixed inside the false wall, the door leaf is hung on it.
- Door stroke adjustment. Free travel of the door leaf is regulated: it should not touch the frame and reach the floor.
-
Frame sheathing. After adjusting the door, the pencil case frame is sewn on both sides with plasterboard, chipboard, OSB, etc.

Frame sheathing Sheathing of the frame is carried out only after installing and adjusting the course of the door leaf
When creating a pencil case frame, it is recommended to insert wooden bars into the profiles to strengthen the structure.
Double doors
The design of a two-leaf door is no different from a single-leaf door. Only its overall size is larger, and the lock connects the sashes to each other.

The double-leaf plastic accordion door is convenient for the kitchen: it is rarely used, so it will last a long time
The width of a double-leaf door is usually in the range of 130-190 cm, this allows you to design wide openings.

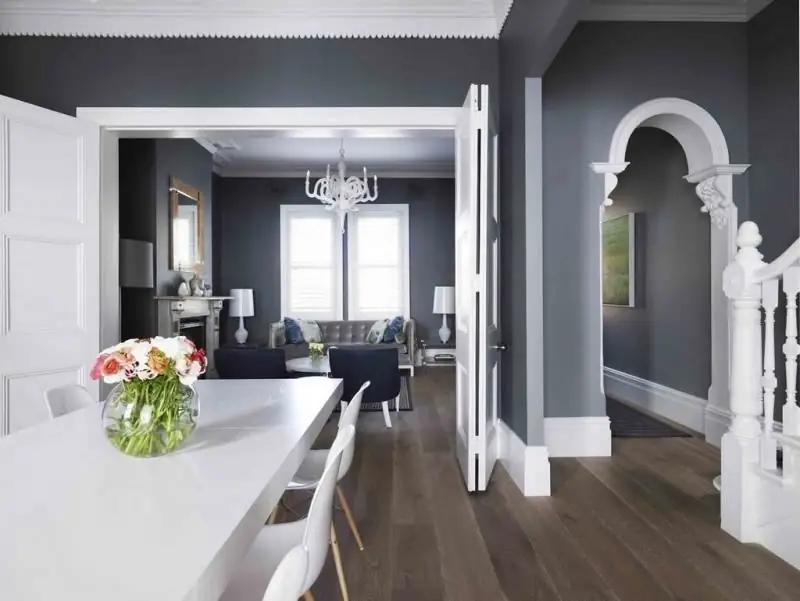
The double door fits perfectly into the large hall and is convenient for receiving guests
Features and sequence of installation of a double-leaf door:
-
Choice of sashes - for this design, wood, plastic, glass, metal and other canvases are used. They can be purchased ready-made or made yourself. The main condition is to determine the size of the door frame and divide it in half (or into 4 parts if the door is folding).

Four-leaf folding double door A double folding door made of four leaves perfectly complements a rustic interior
-
If the door is with a lock - in the classical style of execution, a decorative element is installed on it, bridging the gap between the leaves.

Sliding plastic doors Sliding doors are made without a lock, so they do not need an additional element covering the central slot.
- Installation - mounting the door frame and hanging canvases is no different from a single-leaf structure. But it is advisable to install a double door with a partner.
- Installation of fittings - inserting locks and handles is carried out after hanging and adjusting the doors.
Barn door
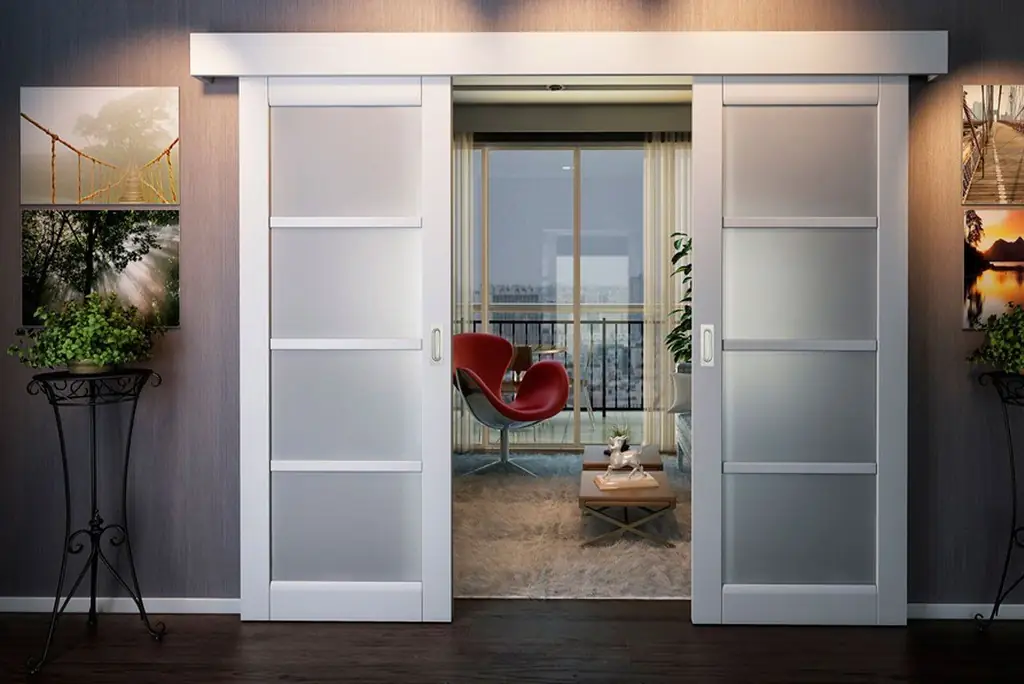
Barn doors help to decorate the premises semi-antique, are convenient to use.

The barn door is easy to install, takes up little space and is easy to operate
They got their name due to the fact that earlier similar sliding structures were used on barns and wagons with grain. Modern door leaves come in a variety of styles.

The barn double-leaf wooden door in a classic style is suitable even for small apartments
Such doors are mounted both on sliding mechanisms and on rails or butterflies.

Barn door fasteners are made in different stylistic designs so that you can choose them for your interior style
The barn door is beautiful in any design.

The transparent double-leaf barn door looks weightless and fills the apartment with light
Sliding barn doors gained their popularity due to the following advantages:
- they take care of the place: the canvas goes to the side along the wall;
- beautiful: often the barn door is the main element of the interior;
- fashionable: moving doors are installed in modern homes;
- ample opportunities: barn mounts are able to withstand heavy weight; you can expand the doorway by increasing the open space; or to separate the wardrobe from the room with doors. And in studio apartments, such a door will also serve as a mobile partition.

A barn door with translucent canvases is good to use as cabinet doors or a built-in wardrobe room
It is easiest to make a barn door with your own hands from solid wood. The manufacturing process will be the same as for assembling the steam room door. But the difference is that the room door can be varnished or painted.

The barn door can be painted to match the color of the walls, and it will create a calm atmosphere in the home
Video: barn mechanisms
Roto door
The roto-door combines a swing and a sliding design.

The roto-door is convenient in the layout of small apartments and walk-through adjacent rooms
For a roto door, you can make your own door leaf or buy a ready-made one. Since there is a complex opening mechanism here, you will have to purchase it in the store, you cannot do it yourself.

The roto-door combines a sliding and hinged structure, which allows you to open it and move it towards the door jamb
Disadvantages of rotary doors: high cost, the opening mechanism does not support heavy weight. Therefore, the door is used for beauty and has no protective function.

The large roto door is made of plastic so that the opening mechanism does not deform under the weight
The rotating door is installed by professionals, but you can do it yourself if you follow the recommendations for the process. Roto doors are usually purchased during a major overhaul, since a doorway must be formed for them. During the installation of a rotating door, the following nuances must be taken into account:
- Measurement accuracy. The structure between the box and the canvas should have a gap of no more than 5 mm, so it is important to make the right measurements.
- Correct installation. During the installation of the door frame, it is necessary to strictly observe the level of verticality and horizontality, otherwise the mechanism will jam, the door will not move well.
- Partition. Its thickness along the entire length must be the same, otherwise the door will not work.
- Adjustment. An important process: carried out in all directions of movement of the door leaf. After adjustment, it should move easily and close tightly.
If you decide to install the roto-door yourself, you must follow the technology for performing the work, but it is better to entrust the assembly of the rotary mechanism to specialists.
Video: installation of the roto mechanism (part 1)
Video: installation of the roto mechanism (part 2)
Reviews
If you decide to make doors of any design with your own hands, then to obtain a high-quality result, you will need not only desire and time, but also all the necessary tools. You will need both hand and power tools and skills to use them. You need to decide on the type of door at the stage of building a house or during repairs, since the choice of skirting boards, furniture and other elements of room decoration depends on this. The easiest way is to make wooden doors on your own, and if you try, you can create any designs that are in no way inferior to those purchased in the store.
Recommended:
How To Make A Door In The Bath With Your Own Hands - Step By Step Instructions With Photos, Drawings And Video

Details of the requirements for materials and construction of doors for the bath, depending on the location. DIY step-by-step making
How To Make A Partition In A Room With Your Own Hands: Selection Of Material And Instructions For Performing Work

Types of interior partitions and materials used to create them. The sequence of manufacturing partitions from plasterboard, aerated blocks and wood
Decorating The Arch With Your Own Hands: Material, Tools, As Well As Stages Of Work

What materials are used to decorate the arch. The sequence of work when finishing with different materials. Wall finishing options around the arch
Making Metal Doors With Your Own Hands: Technology, Drawings, Equipment, As Well As How To Make Heat And Noise Insulation Correctly

Metal door manufacturing technology. Tools and equipment for self-production of metal doors. Warming and finishing
Decorating The Gable Of The House With Siding With Your Own Hands: How To Calculate And Sheathe Correctly + Video

Finishing the gable with siding: device, material calculation, preparation for work and all the nuances of panel installation. Reviews of siding as a material for the pediment
