Table of contents:
- Author Bailey Albertson albertson@usefultipsdiy.com.
- Public 2023-12-17 12:53.
- Last modified 2025-06-01 07:32.
We turn the house into "candy": trim the pediment with siding

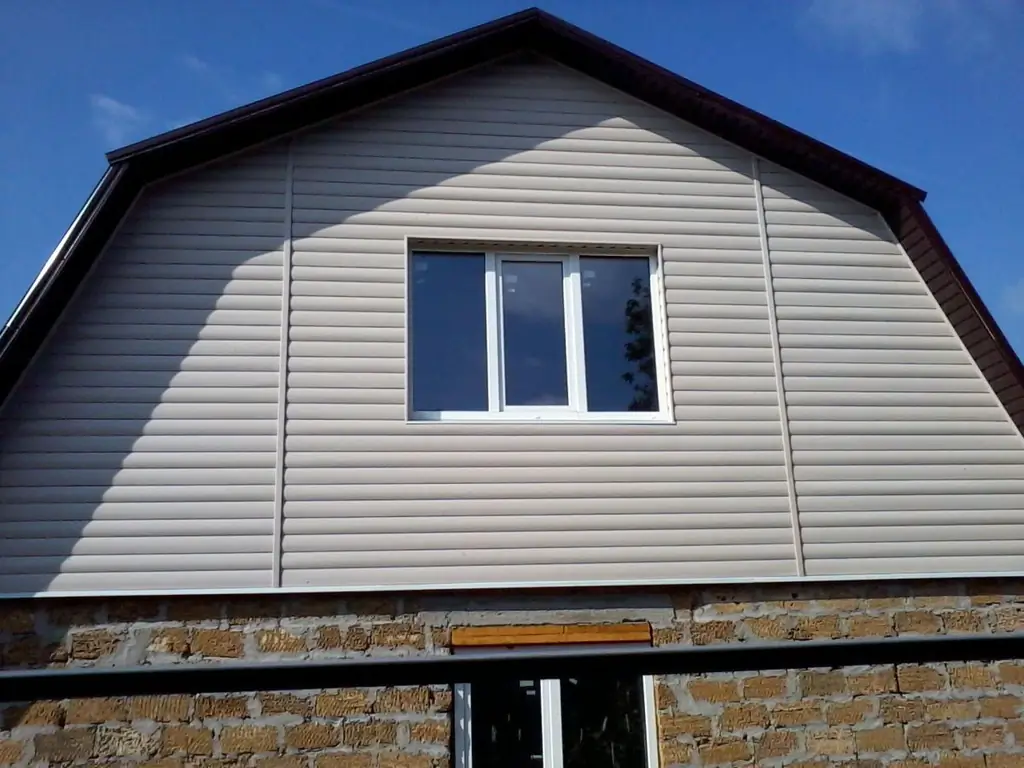
Decorating the gables of a house is just as important as building a roof. To achieve this goal, they suggest using various materials, but most often they point to siding. The increased interest in this construction raw material is caused by its reasonable price, unparalleled practicality and ease of installation.
Content
- 1 Description of the siding gable
-
2 Correct calculation of panels
- 2.1 Triangular pediment
- 2.2 Trapezoidal pediment
-
3 DIY sheathing
- 3.1 Required fittings
- 3.2 Tools
- 3.3 Rules for securing siding
-
3.4 Instructions for arranging a siding gable
3.4.1 Video: Secrets of Siding Installation
- 4 Reviews of siding gable
Description of the siding gable
A gable is a section of a roof that forms between several roof slopes. The height of the end area of the roof varies between 70 and 250 cm. The size of the pediment is influenced by whether it is decided to make the attic a utility or living room.
The shape of the pediment can most often be:
- semicircular;
- stepped;
- triangular;
- trapezoidal;
- broken lines.

Since the pediment is a structural part of pitched roofs, its shape directly depends on the type of roof
The most simple in terms of construction are considered triangular, trapezoidal and broken pediment. The last two options are chosen by those wishing to increase the space under the roof. Still, a triangle-shaped roof makes the attic space uncomfortable and cramped.
The pediment is decorated with siding, trying to "put an end" in the appearance of the building's facade. The panels fit perfectly into the overall ensemble, regardless of what material was used in the construction of the walls.

The pediment is closed with siding, practically not paying attention to the material from which the walls of the building are made
Siding is actively used when it is necessary to sheathe the pediment, because this material is highlighted by the following advantages:
- wide range of colors;
- invulnerability to dampness;
- stability of performance;
- lack of interest from rodents;
- elementary installation steps;
- the ability to serve impeccably without much maintenance.

Siding, which is a panel with oval holes, is available in various colors
Correct calculation of panels
The amount of material required for finishing the gable is determined by taking into account the shape of the roof, which is usually triangular or trapezoidal. Also, when calculating siding, they pay attention to how much space on the pediment is occupied by the windows and doors of the attic.

Calculation of the gable area depends on the shape of the roof end area
Triangular pediment
In most cases, the material is calculated for the pediment in the shape of a triangle. It is formed by a simple roof with two identical straight slopes and is therefore used especially often.
The calculation of the siding for a triangular pediment is based on the similarity of the structure with an isosceles triangle, the sides of which differ in the same lengths

A triangular pediment is similar to an isosceles triangle, which affects the design of the sheathing material
The amount of material (in square meters) for the end area of the roof with two slopes is calculated in several steps:
- Multiplying the sum of the height and length of the base of the triangle by 1/2, find the area of the pediment (S f = 0.5 × (2 + 6) = 4 m2, while the height of the triangle is 2 m, and the width is 6 m).
- Determine the area of the available window openings, which is subtracted from the total area of the pediment.
- When the roof forms two gables, the figure obtained in the previous step is doubled (S 2ph = 4 × 2 = 8 m²).
- Determine the area of one rectangular siding panel, that is, the width of one material element is multiplied by the length (for example, 0.2 m × 4 m = 0.8 m 2).
- Finding the amount of material, by performing area division on the gable area of one siding panel (8 m² / 0.8 m 2 = 10 pieces).
Trapezoidal pediment
The problem of calculating the amount of siding for sheathing a pediment in the form of a trapezoid is solved differently:
- According to the formula for the area of the trapezoid, the area of the pediment is determined (S = 0.5 × (a + b) × h = 0.5 × (6 + 8) × 2 = 14 m2, while the lengths of the two bases of the figure are taken as a and b, and for h - its height).
- Find out what is the area of one or more windows in the end area of the roof. The result of multiplying the length of the window opening by its width is subtracted from the total area of the pediment.
- To find the area of the two gable roofs, the number obtained in the previous step, double (14 m 2 × 2 = 28 m²).
- Determine what is the area of one panel of material, multiplying its length by width (for example, 0.2 m × 4 m = 0.8 m 2).
- Find out how many need to buy building materials, ie gables area divided by the area of the siding panel (28 m² / 0,8 m 2 = 35 pieces).

The trapezoidal pediment repeats the outlines of the trapezoid, therefore, the amount of cladding material is found out after calculating the area of the geometric figure
The amount of siding for a gable of a more complex shape is calculated after conditionally dividing the end area of the roof into rectangles and triangles.
DIY sheathing
You need to prepare well for finishing work: find the necessary accessories and tools, as well as familiarize yourself with the strictly observed rules for installing siding.
Necessary fittings
To fix the siding panels on the gable, you will need:
-
H-shaped profile for fastening panels;

H-shaped profile An H-shaped profile is needed to connect several panels
- external and internal corners as auxiliary elements for fastening material along the perimeter of the pediment;
-
universal J-shaped profile;

J-shaped profile J-shaped profile is used when you need to close the cut end of the end of another mounting element
- wind, initial and final slats;
-
soffit panels (for covering various horizontal surfaces facing downward);

Soffit panel Soffit panels cover mounting elements facing downwards
- a strip for windows (not needed if the window openings are cut at the same level with the wall of the pediment);
- galvanized stainless steel hangers, screws and dowels.
Before installing the siding, it is wiser to purchase original fasteners, which are provided complete with finishing construction materials. Self-tapping screws purchased from one manufacturer are definitely not suitable as fasteners for panels from another manufacturer, since they will not be able to securely fix the material.
Tools
Siding of the gable is performed using tools such as:
- hydraulic level;
- yardstick;
- stationery knife;
-
scissors for metal;

Metal scissors To work with siding, you need metal scissors with small teeth
- a hammer;
- metal square;
- pliers;
- drill;
- screwdriver;
- plumb line.
Before construction work, you must definitely take care of safety - find scaffolding and high ladders to climb to the roof.

Scaffolding will make the gable cladding work safe
Siding fixing rules
Fastening the siding will not seem like a difficult task and will be done efficiently if you install the panels in accordance with the following rules:
- the surface for fastening the siding must be cleaned of dust or old finishes and carefully plaster if cracks or other defects are found;
- panels are allowed to be fixed only on a flat base, which can be achieved with plaster capable of eliminating pits and bumps larger than 2 mm;
-
the wooden surface for siding must be covered with a primer in order to prevent rotting;

Wooden pediment It is recommended to treat the wooden base for siding against rotting
- it is forbidden to fix the panels with an overlap, because this will entail the appearance of cracks, where moisture and debris will get into - real pests for the cladding material;
- it is more reasonable to make the frame for siding from galvanized metal, for example, from aluminum profiles, which, unlike wood, do not rot and put much less pressure on the walls of the house;
- the lathing for facing building raw materials should be made of new material, and not scraps of boards left on the farm after any work;
-
siding elements should not be placed close to the fittings, because they will become cramped when expanding under the influence of temperature, which will entail deformation of the product;

Siding fixing scheme The panel should not be brought closer to the wall of the H-shaped profile closer than 5 mm
-
under normal conditions of installation work, 2 mm of free space is left between the two elements of the cladding material, and when arranging the gable in winter, when the temperature has dropped below 5 degrees, the clearance is increased to 1.2 cm.

Gap between siding panels The gap between siding panels can be from 2 to 12 mm
Instructions for arranging a siding pediment
To decorate the pediment with siding, take the following steps:
- Decide which - metal or wooden - to build a frame for finishing material. Metal profiles are fixed on the pediment with galvanized suspensions and placed every half a meter or 60 cm. And wooden elements (bars with a diameter of 25 to 30 cm and a moisture content of no more than 20%) are mounted, leaving gaps of 40-50 cm between them.
- Around the windows, the siding frame is created from a flexible J-shaped profile. In the areas where the lighting fixtures are attached, several additional elements of the crate are fixed.
-
The cells of the manufactured frame are filled with insulation (mineral wool) and covered with a waterproofing film, fixed with self-tapping screws and laid on the sides of the structure with an overlap of 15 cm.

Gable waterproofing process Frame profiles are attached to the pediment only after waterproofing work
- Fittings are mounted on the pediment. The first step is to attach the outer and inner corners to the frame. Following them, H-profiles are installed. The process is controlled using a level and a plumb line. Vertically, the fittings are fixed on self-tapping screws, which in no case are immersed too tightly in the material. For fastening horizontal parts, nails are used, the heads of which are left at a distance of 2 mm from the surface of the material.
-
At the bottom of the pediment, the first siding strips are attached. At the same time, gaps are necessarily left between the elements. The panel, mounted at the very top of the structure, is fixed by means of a finishing strip. The fastening of any element is carried out every 40 cm. The nail, self-tapping screw or bracket is inserted strictly into the middle of the hole on the panel mounting flange. Otherwise, the product will not be able to move within the boundaries of the fastening grooves when the material contracts or expands. Excessive pulling of the siding to the frame will lead to the same consequences.

Siding fastening scheme for self-tapping screws A self-tapping screw that serves as a fastener for siding should protrude from the material by 1-2 mm
-
A pre-made template is attached to the pediment. Excess siding is trimmed along its edges.

Siding installation process It is recommended to fasten the siding to the profiles with two people.
The main thing when installing siding is to prevent the panels from being too tightly attached to the crate. If this rule is neglected, the slats of the material will not be able to move freely in summer and winter, which will cause them to be twisted or even tore apart. Therefore, after installing the panels, it is recommended to slightly loosen the fastening. To do this, the screws should be unscrewed literally half a turn.

Installation of vertical siding begins from the central part of the pediment
After the sheathing of the attic with siding is completed, soffit strips are mounted on the roof protrusions.
Video: the secrets of installing siding
Reviews of the siding pediment
Those who decide to sheathe the pediment with siding speak out about the installation, appearance and durability of the material.
How to trim the pediment with siding is a question that interests more and more home craftsmen. They come to the conclusion that installation of panels is an easy process, and the material itself is durable.
Recommended:
Gazebo With Barbecue And Barbecue With Your Own Hands - Step By Step Instructions With Photos, Drawings And Video
Brazier, grill or barbecue: how to choose an outdoor cooking device and build a suitable gazebo for it on your site
How To Make A Florarium For Succulents And Other Plants With Your Own Hands: Step-by-step Instructions With Photo And Video Master Classes

What is a florarium and what are its benefits? How to decorate the interior with it by doing it yourself?
Lathing For Metal Tiles: What Needs To Be Considered During Installation And How To Correctly Calculate The Amount Of Material + Diagram And Video
What is better to make a crate for a metal tile. What is the lathing step. How to calculate lumber. Errors in the installation of battens and metal tiles
Figured Ceiling Made Of Plasterboard With Your Own Hands, Wave, Oval And Circle + Photo And Video
Step-by-step instructions for installing plasterboard ceilings using various curly elements. Materials, tools, tips, design options
How To Make A Septic Tank For A Private House With Your Own Hands - Step By Step Instructions With Photos, Drawings And Video
Design, principle of operation and features of installation and operation of septic tanks. DIY design and manufacture of concrete treatment facilities
