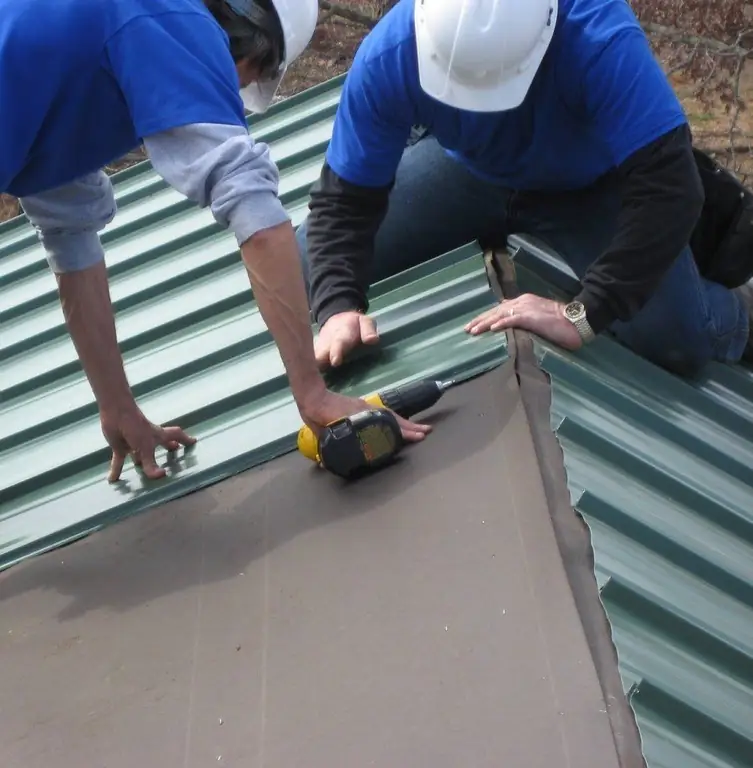
Table of contents:
- Author Bailey Albertson [email protected].
- Public 2023-12-17 12:53.
- Last modified 2025-06-01 07:32.
How to properly fix the profiled sheet on the roof

Roofing type corrugated board provides reliable protection of the roof from bad weather and comfort in the house. It is important for this purpose to properly fix the material on the roof, following the correct technology and using high-quality fasteners.
Content
-
1 The best fasteners for corrugated roofing
1.1 Video: overview of a set of roofing screws
-
2 How to fix profiled sheets on the roof
- 2.1 Preliminary work
- 2.2 Methods and features of fastening profiled sheets
- 2.3 Spacing between fasteners of profiled sheets
- 2.4 Installation diagram of corrugated board
-
2.5 Phased laying of corrugated board
2.5.1 Video: installation of profiled sheets on the roof
- 3 Possible errors when installing profiled sheets on the roof
The best fasteners for corrugated roofing
Profiled metal sheets are convenient for installation as a roof covering, since they do not require complex actions. For the correct fixing of the coating, you should choose a reliable fastener option. This is necessary to ensure the resistance of the material to strong wind and snow load, as well as to prevent roof leaks.

With proper fastening, the corrugated board on the roof will last about 30 years
When laying a covering, holes have to be created in each sheet through which moisture can enter the under-roof space, leading to metal corrosion, mold and mildew. Therefore, during installation, only special fasteners are used, which have a well-thought-out design to eliminate such consequences. To ensure maximum strength and durability of the roof, galvanized self-tapping screws are used with a wide head larger than that of a conventional self-tapping screw. Additionally, the craftsmen install rubber seals in the form of rings, which protect the structure from moisture penetration under the coating.

Roofing screws provide the highest quality fastening of profiled sheets
Self-tapping screws equipped with a polyurethane or rubber press washer prevent moisture penetration in the places of the fastening holes. The element caps can be painted in different colors, which makes it possible to match parts to match the roof covering. With the help of such fasteners, you can firmly fix metal sheets without damaging the protective layer, cracking and holes. The length of the self-tapping screws for the roof should be in the range from 25 to 250 mm, and the thickness - 6.3 or 5.5 mm.

The color of the visible part of the roofing screws can be matched to the main coating
Nails, ordinary self-tapping screws, welding and other similar methods should never be used when installing profiled sheets on the roof. This will significantly shorten the life of the coating and lead to leaks.
Video: overview of a set of roofing screws
How to fix profiled sheets on the roof
Simple installation makes profiled sheets popular for roofing applications. However, there are several rules governing this process. Before work, you should consider the following features:
- if the slope of the slopes does not exceed 14 °, then the laying is carried out with an overlap of 20 cm;
- with a slope of 15-30 °, the overlap of the sheets on each other is 15-20 cm;
- for steep slopes with an inclination of 30 °, an overlap of 10-15 cm is created;
- the cornice should be even and strictly horizontal, since the sheets of the covering are laid parallel to it;
-
the size of the projection of the sheet over the edge of the cornice is selected based on the type of gutters used and usually ranges from 5 to 10 cm.

Eaves overhang of corrugated board Sheets of corrugated board are aligned along the edge of the cornice with a projection of 5-10 cm beyond its border
Preliminary work
Under the metal roofing, moisture accumulates in the form of condensation, which leads to rotting of the structure. Therefore, before creating an external coating, preparatory work should be carried out:
-
Installation of vapor barrier. A protective layer that prevents the release of moist air vapors from the room is equipped from the inside under the roof. To do this, the vapor barrier membrane is carefully placed in each corner and fixed with a construction stapler and staples. On top of the membrane, the interior decoration of the room is mounted.

Roof vapor barrier The vapor barrier membrane is attached to the rafters from the side of the room
-
Roof insulation. Insulation, for example, mineral wool, is placed above the vapor barrier. Plates of material are placed tightly between the rafters. Sometimes it is more convenient to first lay the insulation, and only then fix the vapor barrier film.

Insulation of the roof from the inside Insulation plates fit tightly into the joints between the rafters without any fasteners
-
Counter-lattice device. Outside, a crate and a waterproofing film are mounted on the insulation, protecting the attic space from moisture. A counter-lattice should be installed on top of the waterproofing, providing a ventilation hole through which excess moisture is removed.

Pitched roof waterproofing The waterproofing film is laid along the rafters and fixed with transverse bars of the counter lattice
-
Installation of battens. The main crate is attached to the bars laid along the rafters, on which the sheets of corrugated board will be laid.

Lathing The presence of an additional layer of counter-lattice bars allows you to obtain a ventilation gap under the metal sheets, which will help remove condensate in the cold season
Methods and features of fastening profiled sheets
The fixing of profiled sheets on the roof is carried out according to a general technology, some points of which can be adjusted depending on the individual characteristics of the roof. The main points of working with corrugated board are expressed in the following:
- for covering the roof, solid sheets are used, the length of which is about 5-10 cm longer than the length of the slope. If it is impossible to order material of this size, then the elements are joined along the length with an overlap of 100 to 250 mm, depending on the angle of inclination of the roof;
- when installing on a roof with a zero or very low slope, the elements are positioned with an overlap of 200 mm and using a seal that prevents moisture from entering under the sheets;
- from the bottom and from the top of the crate, the profiled sheets are fastened in every second wave, and in the middle of the roof, the fasteners are installed after two or three waves;
- in longitudinal joints, self-tapping screws are installed in increments of no more than 50 cm;
- the average number of self-tapping screws for each 1 m 2 should be 6-8 pieces.
Step between fasteners of profiled sheets
When installing sheets, it is important to take into account not only their location, but also the step between the fasteners. This parameter affects the quality of the coverage. For example, an excess of self-tapping screws, located very often, will lead to deformation of the sheets. As a result, the appearance of the roof deteriorates, its operational characteristics are violated. Therefore, self-tapping screws are screwed only into the lower part of the wave, which is in contact with the crate.

Self-tapping screws are installed strictly perpendicular to the crate at the bottom of the sheet wave
When distributing fasteners over the sheet, it should be borne in mind that the maximum step between the screws should be 50 cm. At the same time, in the central part of the sheet, fasteners can be installed in a staggered manner, observing a distance of 50 cm. If the corrugated board requires more reliable fixation, then it is permissible edges into each lower wave. At the ends, you need to mount self-tapping screws in each line of the crate to ensure the strength of the coating.
Installation diagram of corrugated board
In order to avoid mistakes in work, professional craftsmen advise not only to take into account the basic rules, but also to study the layout of the screws on each sheet. This allows you to exclude a serious violation of the tightness of the coating as a result of using too much fasteners or screwing in an insufficient number of elements.

Self-tapping screws cannot be screwed in too hard and unevenly
For sheets less than 0.7 mm thick, lathing with a pitch of about 50 cm is suitable. If a thicker corrugated board is used, then the distance between the rows can be increased to 1 m. This approach allows you to create a reliable base and ensure the strength of the roofing. In this case, the general rules for the location of fasteners are observed.

At the joints of the sheets, self-tapping screws are screwed into each wave, in the upper and lower parts of the slope - through the wave, and in other places at the rate of 8 self-tapping screws per square meter of coverage
Phased laying of corrugated board
Decking is easy to mount on a simple gable roof, but if the roof has many inclined planes, then the sheets are carefully cut with special scissors. It is strictly forbidden to use a grinder or a saw, as this will lead to the formation of uneven edges and damage to the protective layer of the metal. Then the following actions are taken:
-
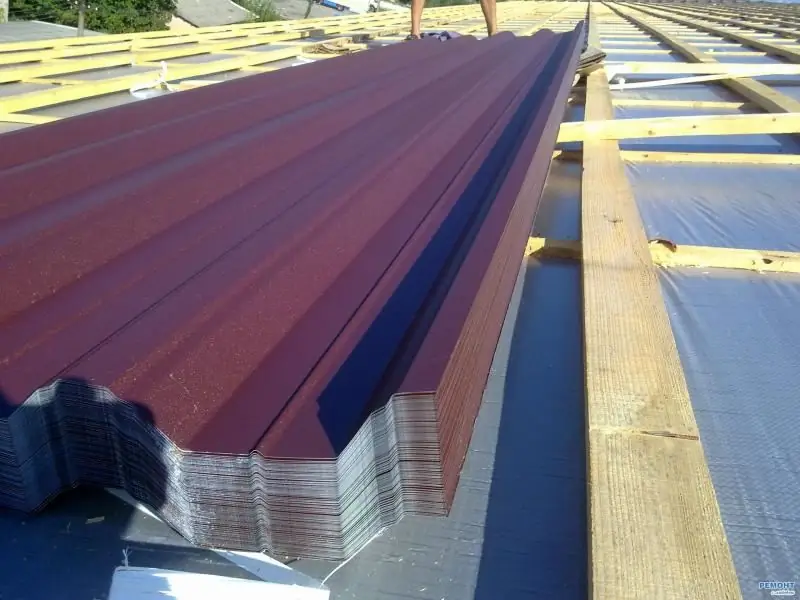
The first sheet is laid in the lower end area with a pre-calculated projection over the edge of the cornice (5-10 cm). In this way, the entire bottom row is mounted, while the self-tapping screws are installed along the bottom through the wave, and along the edges - every 30-40 cm.

The scheme of laying corrugated board on the roof The first row is aligned along the line of the cornice and fixed with a small ledge on its edge
-
The sheets of the upper row are fastened with an overlap on the lower one. If the slope angle is less than 15 °, then the joints must be treated with a sealant and the sealant is fixed. Each sheet element is attached to the extreme rails, to which the sheet reaches, and the rest of the fasteners are installed in a checkerboard pattern in the middle. Self-tapping screws are fixed to the bottom of the wave and must always observe perpendicularity with respect to the crate.

Fastening the roof sheeting Sheets of corrugated board are installed from the bottom up, gradually moving from one pediment to another
-
At the ends of hip roofs or roofs of complex shapes, the sheets are cut to the required shape and fixed to the crate with self-tapping screws. Upon completion of the work, components are mounted, for example, an end plate, a valley, a drip, etc.

Fastening the end plate to the corrugated board If a gable overhang is not provided at the end of the roof, then it is closed with an end plate
Video: installation of profiled sheets on the roof
Possible errors when installing profiled sheets on the roof
Arrangement of the roof with profiled sheets is simple and affordable even for inexperienced craftsmen. Metal fixation technology does not require complex actions, however, in the process of carrying out work, the basic rules should be taken into account. In this case, the following situations and errors can often arise, which can be easily avoided:
- corrugated board flew off or detached from the edge of the roof. This may be due to the use of nails or small head screws. In this case, replace the damaged sheets and fasteners with suitable ones;
- deformation of the metal after processing. It may be caused by incorrect cutting of sheets. Longitudinal cutting is carried out with scissors for metal, and transverse - with a jigsaw;
-
depressions or bulges in the area of the fastener. Such defects are often caused by too strong or weak screwing in screws. Fixation should be carried out perpendicular to the crate and always at the bottom of the wave.

Correct fastening of self-tapping screws Self-tapping screws can be screwed into the top of the wave only at the junction of two sheets
Fastening of profiled sheets is simple, but only careful observance of the technology will provide the roof covering with durability and reliability under any load.
Recommended:
The Welded Roof, Including The Features Of Its Construction, Operation And Repair, As Well As How To Avoid Mistakes During Installation
The main features and characteristics of the overlaid roof. Materials and tools required for the job. Installation, operation and repair of the overlaid roof
Membrane Roof, Including The Features Of Its Design, Operation And Repair, As Well As How To Avoid Mistakes During Installation
Technical characteristics, advantages and disadvantages of membrane roofing. Features of installation. Rules for the operation, maintenance and repair of a membrane roof
How To Correctly Calculate The Consumption Of Self-tapping Screws For 1m2 Of Profiled Sheet For The Roof, Fastening Scheme

How to fix the roofing profiled sheet - with screws or rivets? Features of mounting corrugated board on self-tapping screws. Consumption of fasteners per 1 m²
Roofing From A Profiled Sheet, Including The Features Of Its Design And Operation, Repair, As Well As How To Avoid Mistakes During Installation
What kind of profiled sheet can be used for the roof. DIY cold and insulated roof device. What mistakes are possible. Features of operation and repair
Roofing Profiled Sheet, Including Its Types With Description, Characteristics And Reviews, As Well As Processing And Use Features
Using a profiled sheet to cover the roof. Classification, features of work and operation of corrugated board. How to cut a profiled sheet into fragments of the desired size
