Table of contents:
- We build a wooden porch together and step by step
- What is a porch for?
- Choosing a porch to your liking
- Preparatory stage before starting construction
- Making steps: basic rules and work procedure
- Installation of the platform (wooden porch floor)
- Video about building a wooden porch with your own hands
- Author Bailey Albertson albertson@usefultipsdiy.com.
- Public 2023-12-17 12:53.
- Last modified 2025-06-01 07:32.
We build a wooden porch together and step by step

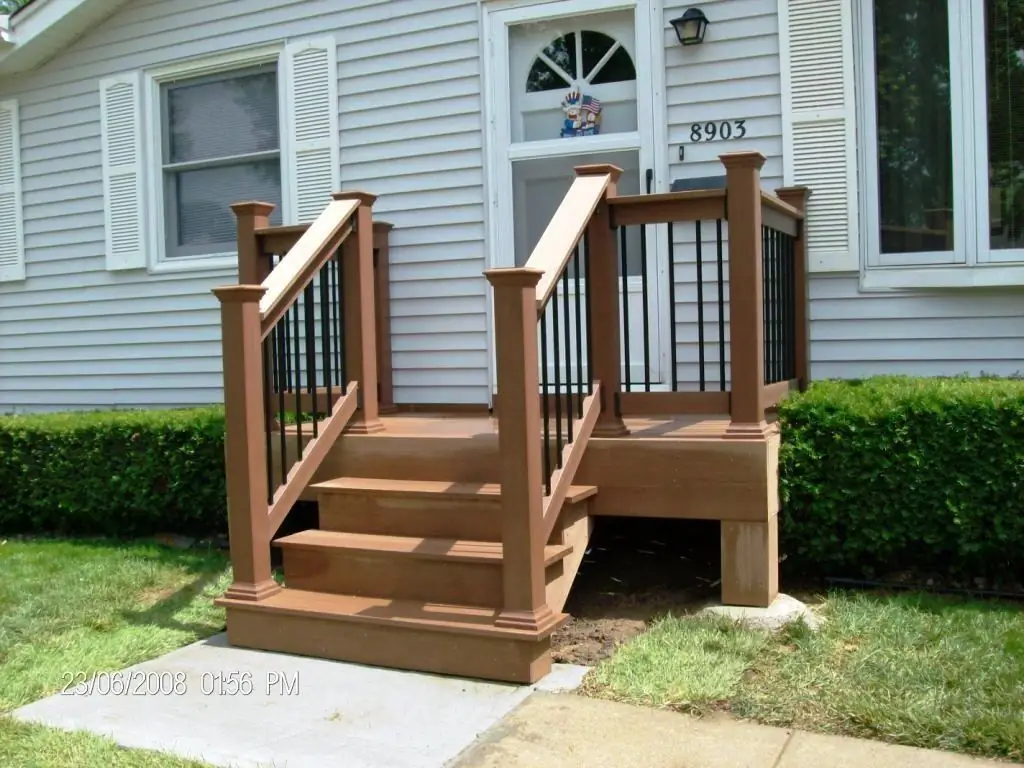
When you're building a solid holiday home, you can't do without a nice wooden porch. After all, it is so pleasant to sit on it on a warm summer evening! In addition, it will also perform economic functions. Therefore, today we will talk about how to build a wooden porch with our own hands so that the cottage looks finished and cozy.
Content
- 1 What is a porch for?
- 2 Choosing a porch to your liking
- 3 Preparatory stage before starting construction
- 4 Making steps: basic rules and work procedure
- 5 Installation of the platform (wooden porch floor)
- 6 Video about building a wooden porch with your own hands
What is a porch for?
First of all, this structure has an aesthetic purpose and serves as a decoration for the facade. But it also has very important practical functions. In winter, the porch will save the front door from skidding, as well as serve as additional thermal insulation. In the summer, it will perform much more tasks: the porch can be used as an impromptu gazebo, leaving shoes and household items on it, for example, buckets.
There are three main types of wooden porch:
- simplified;
- built-in;
- attached.
If you want a more original and multifunctional design, you can build a porch-patio, which is fashionable in Western Europe, resembling an outdoor terrace.

Porch patio
Typically, a wooden porch consists of elements such as a foundation, supports, steps with railings (or without railings) and a canopy.
Now let's talk about the mistakes that construction beginners who want to build a wooden porch with their own hands often make. This will help us avoid our own flaws in the process.
- The most common mistake is buying materials that are either of inappropriate quality, or in quantities larger than necessary. This will lead to unacceptable financial costs. It is imperative to fully plan out the entire workflow and calculate the amount of materials.
- Often people without experience in construction exaggerate the real complexity of the task. You should not choose a very complex, textured design if it is not necessary. Moreover, a simple porch will surely fit into the building with taste.
- If you think that a wooden porch does not need a foundation, then you are wrong. A solid foundation will protect the structure from premature destruction.
Now let's take a closer look at all the stages of work on the construction of a wooden porch.
Choosing a porch to your liking


Preparatory stage before starting construction
So, first of all, we need to draw up a plan for the future porch. When creating it, be guided by the following guidelines:
- consider factors such as the general appearance and size of the site, as well as the size of the flights of stairs;
- think over the structure so that it is subject only to operational loads;
- constant influence of the external environment (weather conditions, wind, soil movement) is also important;
- the area should be large enough so that the elements of the porch do not interfere with the freedom of movement and use of the door.
Now select the material you want. In our latitudes, pine is most often used for the construction of a wooden porch, as a common, inexpensive, wear-resistant and easy-to-use material. You will need:
- pine timber 100 X 200 mm or logs for rafters and floor beams;
- canopy boards 50 X 150 mm or 50 X 200 mm thick;
- boards for the landing, steps, railings, side posts.

Use pine logs or beams for the foundation
Having purchased the necessary materials and drawing up a drawing of the future construction, proceed with the foundation. The best option for a porch would be a pile type of foundation, it is simple to perform and inexpensive.
- Before making the foundation, treat the timber or logs for support with antiseptic agents. While work is underway, the wood will have time to soak and dry.
- Constantly referring to the drawings, dig holes for the supports. The depth must be at least 80 cm.
- Submerge the supports in the pits, fill the gaps with earth and tamp.
- If you want to give more reliability to the platform and supports, fill them with cement. In this case, you will have to wait until the solution is completely dry, and only then proceed to the next stage.
- With the supports fully installed, check that their heights are equal. Trim them if necessary. After that, you can prepare the cuts by removing excess wood.
- Hollow out the nests in the prepared logs and put thorns on them. Errors and irregularities can be corrected with small blocks.
- One of the support pillars of the structure can be attached to the wall with nails or self-tapping screws to give greater reliability.
The foundation is completely ready, and now you can proceed to the step-by-step creation of the porch itself.
Making steps: basic rules and work procedure
First of all, we need to make a so-called bowstring, or kosuor. It can be of two types - with cut-out ledges or cut-in steps. The first option is much simpler, so we will rely on it.
To make a bowstring you will need:
- saw;
- board of the correct size and thickness;
- triangular pattern.
The template will be required to determine the size of the step recesses. The sides of the pattern must correspond to the tread - the horizontal part of the steps and the riser - to the vertical part.

General view of all elements of a wooden staircase
The dimensions of the steps and their number are also determined according to some rules. For example, the number must be odd. The most comfortable, and therefore the constant width of the steps is 37-45 centimeters, the height is a maximum of 20 centimeters. The optimal width of the porch itself is one and a half the width of the front door.
After you have completed all the required calculations, mark the profile of the future bowstrings on the board. One edge of the support must be securely connected to the logs that are installed on the porch floor. For this, thorns are cut in the stringers or bowstrings.
If you decide to build a patio porch, then you will need to make an additional two braids and two bowstrings. The dimensions of all these elements must be the same. After installing them, measure the structure again to identify possible errors and correct them at this stage.
In order to connect bowstrings and stringers with floor logs, use the simplest “thorn-groove” option. To do this, attach the grooved board to the platform beam. The thorns of bowstrings and stringers need to be inserted into the grooves of the board. For greater reliability, the resulting structure can be additionally reinforced with steel brackets or metal strips. This is the last step in preparing the frame of the lower part of the porch - stairs and landing.
Installation of the platform (wooden porch floor)
This stage of building a wooden porch is quite simple.
After some time, the boards from which the flooring is made dry out, which is why gaps are formed between them, sometimes very wide. This not only does not look aesthetically pleasing, but can also be traumatic. To avoid this, stack the boards as tightly as possible to each other.
When the flooring is almost ready, and the stringers and bowstrings are securely fastened to the logs, we proceed to the next stage - installing risers and treads. These elements are also connected by the “thorn-groove” method and attached to the string.

Options for attaching stairs to the foundation
That's it, your porch is ready. Compliance with building codes will ensure that it will last you long and reliably. But do not forget that it is not only the quality of joinery and carpentry that matters here. The durability of any structure made of wood largely depends on how correctly the wood was prepared and processed.
Here are some tips to help you:
- Do not place an attached staircase too close to the front door. In winter, the frozen ground will raise the stairs, making it difficult for the door to move or even jam it.
- The foundation for the porch must be deep enough. It will not be superfluous to make waterproofing so that subsequently moisture does not lead to swelling and rotting of the wood.
- Make sure the wood has been well dried. Be sure to treat it with an antiseptic.
The simple yet stable and functional frame of the wooden porch is ready. If you wish, you can decorate it to your liking: install a railing, make a canopy, a visor, add decorative elements.
Video about building a wooden porch with your own hands
We have offered you the simplest version of a wooden porch device. This work does not require professionalism and construction skills from you at all, on the contrary, even beginners can do it. We hope that our tips will help you make your cottage even more comfortable. Ask in the comments any questions you have or share your experience. Good luck!
Recommended:
How To Build A Fence Made Of Wood (pallets, Boards And Other Materials) With Your Own Hands - Step By Step Instructions With Photos, Videos And Drawings

Building a wooden fence with your own hands will save you from uninvited guests and create an atmosphere of genuine home comfort on the site
How To Build A Sun Lounger With Your Own Hands From Wood And Other Materials - Step By Step Instructions With Photos, Videos, Drawings, Work Progress And Dimensions

How to make a sun lounger with your own hands for a summer vacation. Selection of materials, types of structures and drawing up a drawing of the selected type with further assembly
How To Build A Greenhouse According To Mitlider With Your Own Hands: Step-by-step Instructions With Calculations And Drawings, Photos And Videos

Description of the greenhouse according to Mitlider, selection and calculation of materials for construction with your own hands. Step-by-step instructions with drawings
How To Build A Polycarbonate Greenhouse With Your Own Hands: Step-by-step Instructions For Assembly And Installation With Photos, Videos And Drawings

Types of polycarbonate greenhouse structures, recommendations for the choice of materials, schemes. Step-by-step instructions for making your own hands, photos and videos
How To Choose And Build A Foundation For A Bath With Your Own Hands - 4x6, 3x4 And Other Sizes, Tips, Instructions, Photos And Videos

How to make a foundation for a bath with your own hands. Types and features of foundations. The choice of materials and technology, installation rules and step-by-step instructions
