Table of contents:
- How to choose a comfortable and beautiful LED lighting for a kitchen set
- LED lighting headset in the kitchen: pros and cons
- Lighting options for kitchen furniture
- How to arrange additional furniture lighting
- LED strip-based lighting: a quick guide and lighting features
- Recommendations of experts for creating a kitchen backlight
- Author Bailey Albertson [email protected].
- Public 2024-01-17 22:26.
- Last modified 2025-06-01 07:32.
How to choose a comfortable and beautiful LED lighting for a kitchen set

The kitchen set is an important part of the cooking space. Furniture here can be of any color and design, but bright lighting is always necessary. To do this, you can organize the LED headset backlight. To do this, you need to know the features of the lighting fixtures, as well as choose and install them correctly.
Content
- 1 LED lighting headset in the kitchen: pros and cons
-
2 Lighting options for kitchen furniture
- 2.1 LED strip
- 2.2 Surface mounted luminaires
- 2.3 Recessed lighting devices with LEDs
- 3 How to arrange additional furniture lighting
-
4 LED strip-based lighting: quick guide and lighting features
4.1 Video: features of creating LED backlight
-
5 Recommendations of experts for the creation of kitchen lighting
5.1 Photo gallery: examples of lighting arrangement
LED lighting headset in the kitchen: pros and cons
LED lighting for kitchen furniture consists of additional light sources that are located in the work area, under cabinets and in other places where bright lighting is needed. Such a system is created using convenient and compact devices.

LED kitchen work area illumination provides convenience when preparing food
A compact lighting system provides the following benefits:
- beautiful and stylish kitchen design;
- visual separation of space;
- additional lighting;
- safety;
- wide angle of radiation of devices.
Designers often use LED lighting when developing kitchen projects. When organizing such lighting, you need to take into account its main disadvantage - a higher cost compared to halogen lamps. But these costs will pay off quite quickly in the future - low power consumption is one of the main arguments in favor of using LEDs. It should also be borne in mind the need to lay the cable and protect it from moisture and damage.
Lighting options for kitchen furniture
Thanks to the variety of types of LED lighting for kitchen units, it is possible to create a unique interior in which every detail will be as functional and aesthetic as possible. To do this, you need to select the appropriate option for the additional lighting system.
LED Strip Light
The simplest type of additional lighting is an LED strip, which is a flexible printed circuit board on which LEDs are equidistant from each other. This distributes the flow evenly. In conventional models, the LEDs are located openly, so it is necessary to take measures to protect them from moisture. There are special waterproof modifications, which are filled with a sealed silicone shell, but they are more expensive and the brightness of their glow is lower.
The ribbons differ in the number of LEDs and the color of the glow. They operate on direct current with a voltage of 12 V, less often 24 V. The fastening of open tapes is carried out on a sticky layer, moisture-proof models are fixed on clips.

LED strip provides uniform illumination in areas of any length and shape
Advantages of LED strip for lighting kitchen furniture:
- simple installation technology;
- reliability and service life up to 50,000 hours;
- the ability to implement original design ideas;
- a large selection of colored or monochrome ribbons;
- low power consumption.
Of the disadvantages, it is important to take into account that with the same luminous flux power, the cost of the tape is higher than that of a halogen lamp or other common lighting devices. A negative feature of inexpensive models is insufficiently good color reproduction.
Surface mounted luminaires
Surface-mounted luminaires are easy to install and beautiful in appearance. They can have a different number of diodes, which determines the power of the light flux. The LEDs are enclosed in an aesthetic and protective housing. There are holes on the body for mounting on the cabinet surface, walls, countertops and other places.
Traditional types of luminaires provide diffused light flux. They are appropriate over the table, cabinets. Point sources create a directed flow of energy and illuminate well the working area of the table, sink, stove.

Surface-mounted lamps are convenient to use to illuminate the working area
Positive qualities of surface-mounted luminaires with LEDs:
- low power consumption compared to incandescent lamps;
- the ability to organize spot lighting of the desired areas;
- additional interior decoration;
- easy lamp replacement.
Surface-mounted luminaires require precise determination of installation locations, in contrast to LED strips, which provide illumination along their entire length. They also take up more space. They should be protected from moisture or immediately purchase products in a sealed case.
Recessed lighting fixtures with LEDs
Luminaires that are built into furniture and other surfaces are popular for furnishing kitchens. Such products consist of several LEDs enclosed in a simple package. It is placed in a hole prepared in furniture or other support. Outside, there is often a protective glass and a decorative ring or panel that performs an aesthetic function. The layout of such devices is developed at the kitchen design stage. This is due to the fact that the power wires must be hidden behind furniture and protected from moisture.

Recessed lights are compact and look nice on furniture
Pros of built-in LED kitchen lighting:
- small size;
- directional lighting;
- beautiful appearance and variety of options;
- low power consumption.
Embedded sources require holes to be created in the surfaces where they are attached. This may become a disadvantage of this lighting option if the furniture is made of expensive material, and the installation of built-in appliances was not foreseen in advance.
How to arrange additional furniture lighting
The main light sources are often located on the ceiling. This is not always convenient, because the flow reaching the working surface is not intense enough. Therefore, it is important to determine the location of the additional illumination of the kitchen set.
You can place devices in different places:
-
you can illuminate the work surface on which food is prepared using LED strips or overhead lamps. These devices can be easily attached to the wall or under cabinets to illuminate the desired area. If spotlights are used, then the flow should be directed to the middle of the working area. The tape with diodes provides uniform illumination of the space;

Illumination of the kitchen working area with overhead lamps Illuminated work surface makes the kitchen convenient for cooking
-
the location of the lamps above the upper cabinets allows you to conveniently get out dishes, food and other things from there. In this case, the luminous flux partially illuminates the working surface. For this, overhead or built-in lamps are used, which are mounted on a panel hanging over the cabinets;

Illumination above kitchen cabinets Lighting above cabinets is a popular headset design option.
-
Installing lights under wall cabinets is a good way to illuminate your work area, sink, stove, and other surfaces. For this purpose, both overhead and built-in devices or tapes are convenient. It is best to place them close to the wall to avoid accidental damage to the wires and provide good lighting;

Lighting under the cupboards of the kitchen set LED strips provide uniform illumination of the space under the cabinets
-
the presence of lighting devices inside cabinets and drawers gives additional convenience when using furniture and provides a stylish design for the kitchen. Light sources are located on the side walls or on the top inside the cabinets. It is important to carefully determine the position of the wires in order to avoid kinking them as a result of closing the door. Overhead appliances inside the cabinets will take up a lot of space, so tapes and built-in lamps are more appropriate;

Kitchen drawer lighting The lighting inside the cabinets looks impressive, but requires proper organization of the wiring
-
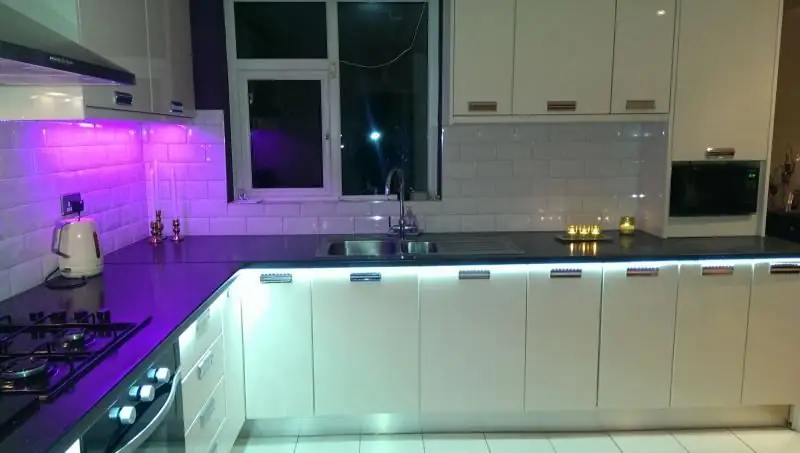
illumination of a tabletop or skinal can be presented in the form of a strip or lamps with LEDs. Such elements are placed around the perimeter of the countertop or furniture facades. This backlighting option is often brought to life with colored LED strips that create beautiful kitchen designs.

Kitchen countertop lighting Countertop lighting looks original in any interior
-
the illumination of the lower part of the cabinets serves an exclusively decorative function. To obtain the effect of furniture floating in the air, an LED strip is laid along the bottom of the cabinets. Overhead or flush-mounted devices will not work, because they will not be able to provide an even flow of light around the entire perimeter of the headset.

Lighting of the kitchen unit around the perimeter The unusual effect of furniture floating in the air is provided by the bottom lighting of the kitchen set
LED strip-based lighting: a quick guide and lighting features
It is not difficult to create a beautiful and effective illumination of a kitchen set with your own hands. To do this, you need to do the following:
-
Determining the appropriate type of LED strip. For this purpose, you can use models based on diodes SMD 3528, SMD 5050, SMD 5630 or SMD 5730. The first option has a lower cost, and the rest - increased power in ascending order. The density of the LED installation also plays an important role. One meter of tape can contain 30, 60 or 120 elements, the brightness of its glow depends on this. This parameter is selected depending on the installation location: strips with 60 or 120 diodes per 1 m are suitable for bright illumination of the working surface, and a density of 30 pcs / m is sufficient for decorative lighting. It is worth deciding on the performance class for moisture resistance - it is better to install models IP44 - IP65 in the kitchen.

Sealed LED strip In the kitchen, there is often a high content of moisture and steam, so it is better to install waterproof tapes in a silicone sheath.
-
Calculation of the power supply unit. To do this, the length of the area to be illuminated is multiplied by the power consumption of one meter of tape. A stock of 20% is added to the result.

LED strip power supply The power supply must match the power consumption of the LED strip along its entire length
-
Cutting the LED strip into pieces of the required length. Cut only in places marked by the manufacturer. The monochrome tape is connected, observing the polarity; for a multi-colored tape, the sections of the same name should be soldered, having the letter designation V +, R, G, B. If the total length of the sections to be connected does not exceed five meters, they can be connected in series. If you want to build up a standard 5-meter strip, this can only be done by parallel connection.

LED strip connection diagram Five-meter pieces of LED strip can only be connected in parallel
-
Placing the tape at the selected location. You need to install the LED strip in a metal profile, previously fixed on self-tapping screws. This is especially true for tapes of increased power (SMD 5050 and higher) and sealed models. If this is not done, the life of the LEDs will be significantly reduced due to poor heat dissipation. The power cord is connected to the L and N terminals of the power supply, to which the tape is then connected, observing the polarity. If an RGB tape is used, a controller is installed between it and the power supply, and the tape is connected to it via four wires.

RGB LED strip connection diagram Multi-color RGB tape connects to the power supply through a dedicated controller
Video: features of creating LED backlight
Recommendations of experts for creating a kitchen backlight
When organizing additional lighting with your own hands, it is worth considering the advice of professional craftsmen and designers. This will avoid mistakes and create a safe source of additional lighting.
When planning and installing the system, it is important to consider the following:
- white light does not distort shades and is close to natural light, which is important for a workspace;
- the countertop should be illuminated from at least three sides to avoid shadows;
- well-lit glossy or mirror surfaces visually increase the space;
- a large number of lamps should not be placed in the kitchen, since this will no longer make the room cozy at home;
- the stream of light should not be directed towards the face of kitchen users.
Photo gallery: examples of lighting organization
-

LED lighting of the working area of the kitchen set - Lighting under the cabinets illuminates the work area well
-

Simple backlight headset - You can place a lamp, tape or lamps under the cabinets
-

Lamps under cupboards in the kitchen - The bottom lighting of the kitchen unit visually raises it above the floor
-

Backlight skinal headset in the kitchen - Skin highlighting emphasizes the contours of the workspace
-

Lighting and wall decoration under kitchen cabinets - Linear lights can be placed on the walls under the cabinets
-

Colored cabinet lighting - Colored lamps to match the main finish highlight the unique interior of the kitchen
-

Bottom illumination of the kitchen unit - Lighting on the bottom of the cabinets is used for decorative purposes
You can organize additional lighting in the kitchen with your own hands using LED appliances. To do this, you need to choose the right devices and determine their location. With the right choice and qualified installation, the kitchen will become more functional and comfortable.
Recommended:
Ceiling Lamps For The Kitchen: Varieties, Photo
Ceiling lamps for the kitchen: types and features. How to choose a lamp for the size and style of the kitchen interior. Location and installation tips
Pendant Lamps For The Kitchen: Selection And Installation Features, Photo
How to choose pendant lamps for the kitchen, their types and features. Recommendations for location and installation. Use cases in modern interiors
Neighbors From Above Roll And Drop Metal Balls: Why This Sound Occurs

Why is there a sound as if the neighbors from above are rolling and dropping metal balls?
Kitchen With Patina On The Kitchen Set And Furniture: What It Is, Interior Design Features, Photo
What is patina. Advantages and disadvantages of patination. Kitchen design with patina: colors, styles and interior features
Working Life Hacks For The Hostess In The Kitchen

Life hacks for storing and using food to help every housewife
