Table of contents:
- Author Bailey Albertson [email protected].
- Public 2024-01-17 22:26.
- Last modified 2025-06-01 07:32.
Secrets of Good Lighting: Pendant Lights for the Kitchen
For a kitchen to become stylish and comfortable, it is not enough to choose reliable appliances, spectacular finishes and beautiful furniture. Ceiling lighting also plays an important role. To make it practical, of high quality and at the same time decorative, various types of pendant lights are often used.
Content
-
1 Varieties of pendant lights
- 1.1 Chandeliers
- 1.2 Luminaires on ropes
- 1.3 Suspension luminaires
- 1.4 Photo gallery: a variety of pendant lights
-
2 We plan general light in the kitchen
-
2.1 Determining the required number of luminaires
- 2.1.1 Table: power of LED lamps depending on the luminous flux
- 2.1.2 Video: calculating the number of fixtures with an online calculator
-
-
3 An important area in the kitchen: choosing a lamp above the countertop
3.1 Photo gallery: options for placing pendant lamps in interiors of different styles
-
4 How to hang a lamp with your own hands
-
4.1 How to connect a chandelier
4.1.1 Video: connecting a chandelier - how to connect the wires correctly
-
Varieties of pendant lights
In modern design, pendant lights are the best way to divide your kitchen into functional areas and illuminate every corner. At the same time, they use a variety of devices - from classic chandeliers to exotic loft-style lamps. The number of shades, their shape and method of placement can be absolutely varied.
Chandeliers
This is the most famous, widespread and long-used type of lighting structures. Most often they use a single chandelier, which is hung in the center of a small kitchen or used to illuminate a dining table. But you can combine a couple or even several chandeliers, if space permits. You just need to take into account that chandeliers, especially classic ones, take up a lot of space, so you need to correlate them with the size of the room and with the general style of the interior.
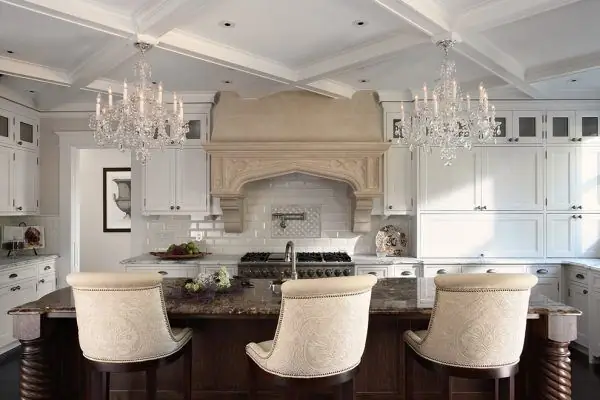
Instead of pendant lamps, two crystal chandeliers are used, which gives the kitchen a solemn look
Modern manufacturers produce pendant and ceiling chandeliers. The first are lampshades of various types and styles, suspended from cables, cords or chains. The second is a flat plafond located under the ceiling and suitable for small kitchens.
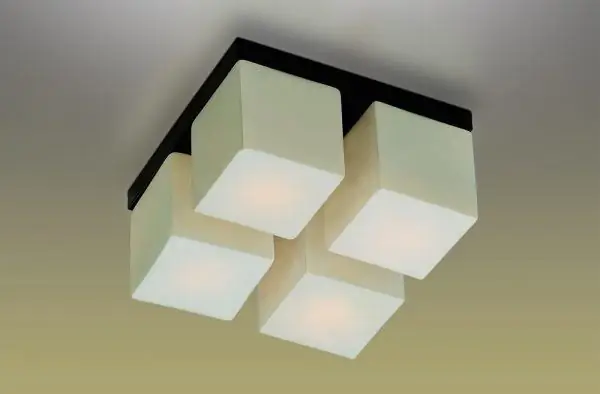
A ceiling chandelier will be the best option for low ceilings
Luminaires on ropes
The idea of hanging a lamp on a cable dates back to the Middle Ages and has recently been actively used in design. The cable is pulled between the walls, cables and additional suspensions for the shades are attached to it. This design requires a significant area, therefore it is more often used in shopping centers or country houses. Rough rope fixtures look great in modern interiors such as loft or hi-tech.
Rope systems can be placed vertically or horizontally. The vertical type of suspension visually reduces the ceiling, but it is lighter and more practical in comparison with the fastening on chains of heavy forged chandeliers. The advantage is that the cables allow you to lower and raise the cover to the desired distance. It is recommended to use LED lamps.
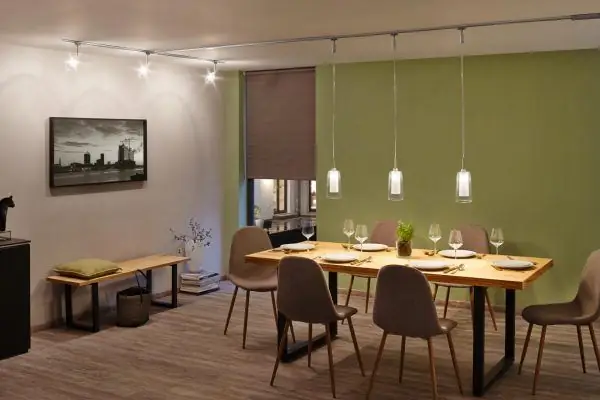
Luminaires on cables zoning the space well and highlight a certain area
Horizontal cable systems are also called string systems. To accommodate them, a ceiling height of at least 2.7 m is required. The strings can be attached to walls, ceilings or special floor stands. Halogen or LED bulbs are used as light sources. The plafonds are easy to move along the strings, turn, changing the direction of the light beam.
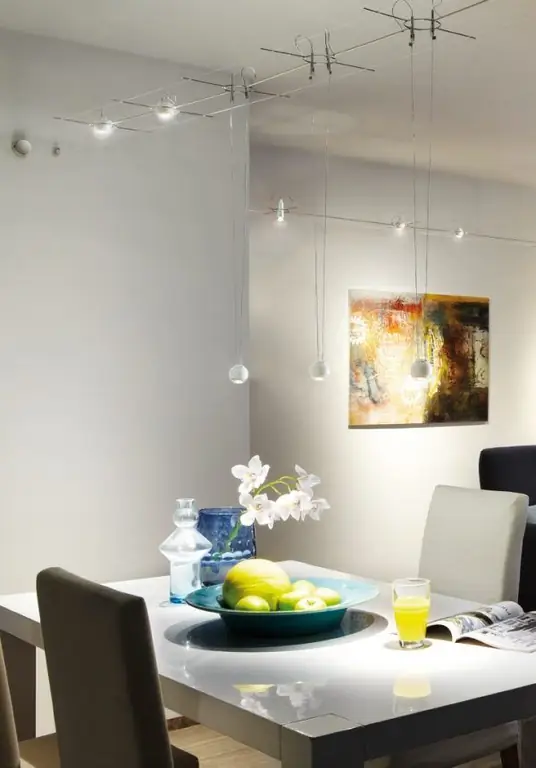
Lamps can be moved on strings
Suspension luminaires
In modern kitchen interiors, these devices act as an alternative to a chandelier and are most often placed above the countertop or in the center of the room. A fashionable solution was to make a bar counter in the kitchen, over which the hanging group will look more than appropriate. Such lamps divide the room well into functional spaces, especially if the kitchen is combined with the living room or dining room.
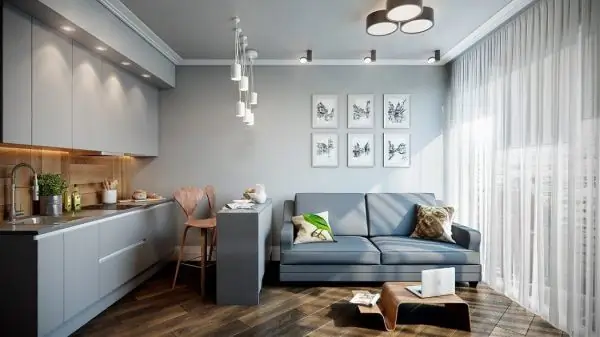
In the small kitchen, combined with the living room, the lamps above the bar immediately divided the space into zones
Suspensions can be single, double, triple or have more shades. A linear composition looks impressive above the large dining table, when the plafonds are located strictly in one line. Pendant lights are especially relevant in tall rooms and go well with any style of interior.
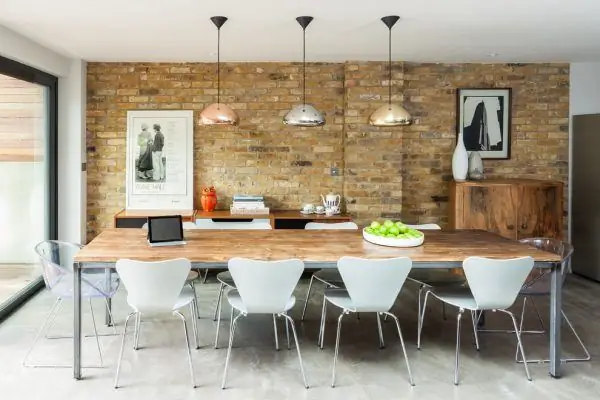
A group of several suspension lamps, located in one line, allows you to effectively illuminate a large dining table
Lampshades are most often made of glass or textiles. Depending on the form, they are:
- spherical;
- trapezoidal;
- drop-shaped;
- rectangular;
- square;
- triangular, etc.
Photo gallery: a variety of pendant lights
-

Chandelier with multiple shades - A chandelier with several rounded shades fits perfectly into the design of the kitchen
-

String lighting system - String systems are relevant in spacious loft-style kitchens
-

Track lighting system - Track lights allow you to highlight the desired area
-

Bus system - Suspended lamps illuminate the dining table, and swivel lamps illuminate the working area
-

Hanging lamps - Lamps on suspensions of various shapes and heights zone the space well
-

Transparent chandeliers on pendants with round shades - Simple and at the same time unusual design of transparent chandeliers gives the kitchen originality
-

Single chandelier of unusual shape - Shades can be of a wide variety of shapes
-

Busbar system with black cables - Black wiring on the white ceiling acts as an additional decor
We plan general lighting in the kitchen
Choosing the main lighting in the kitchen, everyone would like not only to highlight the nooks well, but also to save energy. The basic principle of placing kitchen lighting fixtures is dividing the room into zones and multi-level. A single chandelier located the old fashioned way in the center of the room will not give the desired effect, since in most kitchens there is free space in the middle, and all work areas are located near walls and in corners where light does not enter.
The overall lighting should be such that it does not create shadows, but at the same time, so that the light is not blinding. In low kitchens, it is better to install a flat ceiling lamp. For general lighting, several evenly spaced suspended structures are also suitable, but the space should not be "overloaded", especially if the area is small. Therefore, it is better to concentrate them over important areas - dining, work, bar.
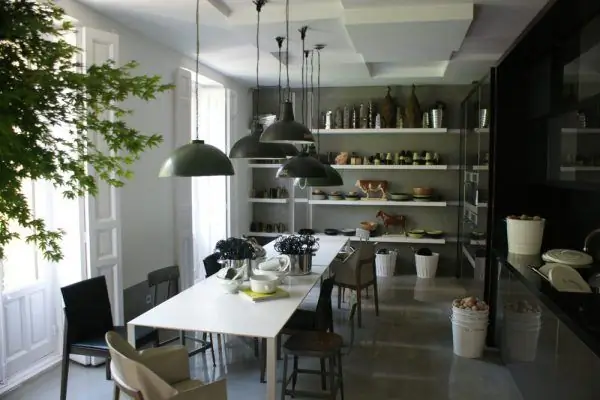
Different heights of pendant lights allow better illumination of the overall space, and in this case, spot lighting can be used for the working area
When choosing light sources, it is better to give preference to a neutral or warm spectrum. Cold-light fluorescent lamps, although brighter, paint the surrounding space a lifeless bluish color, and food in this spectrum looks completely unappetizing. The labeling on the packaging will help you choose the right lamp: a value from 2700 to 3300 K indicates warm light, from 3300 to 5300 K - neutral white.
It is necessary not to forget about the colors of the room decoration. Dark colors of kitchen units and finishes absorb light more than light colors.
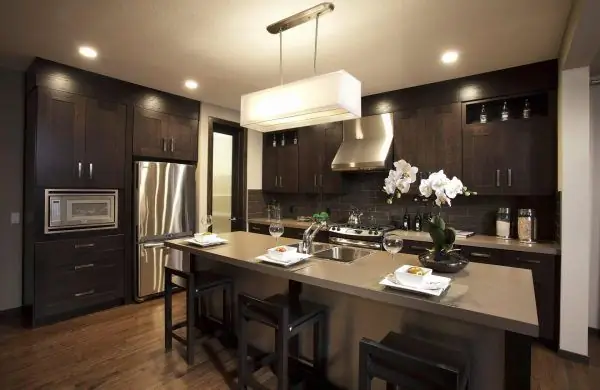
Darker finishes absorb light more, which means the kitchen needs better lighting.
One of the important nuances is also the ability to adjust the brightness of the light, which will not only reduce energy consumption, but also create a certain mood - for example, use brighter lights for cooking and dimmed ones for a romantic dinner. This requires a dimmer.
Determination of the required number of lamps
The main criterion for choosing the number of lighting devices is the kitchen area. According to the standards, each 1 m 2 of the kitchen should be illuminated with a power of 15-20 W (for incandescent lamps). This means that the total power of all lighting devices will be equal to the product of this number by the area. For typical kitchens, the power value is in the region of 100 W (excluding additional working lights).
The luminous flux required for a room is calculated as the product of the illumination rate (X) by the area (Y) and by the coefficient of the ceiling height (Z), that is, X x Y x Z. The Z coefficient is:
- 1 - for ceilings with a height of 2.5-2.7 m;
- 1.2 - for ceilings with a height of 3-3.5 m;
- 2 - for a height of 3.5-4 m.
Knowing the value of the total luminous flux, you can determine the required number of lamps and their power. Sometimes they are set by the type of lamps, their power and luminous flux, and the required number is calculated from them. Sometimes they do the opposite - they determine the installation points of the lamps and, accordingly, their number and calculate the luminous flux of one lamp, dividing the total luminous flux by the number of lamps.
For example, let's calculate how many LED lamps are needed for a kitchen with an area of 10 m 2 with a ceiling of 2.7 m. The illumination rate, according to SNiP, for kitchens is 150 Lx. The Z coefficient for the ceiling of our height will be 1. This means that the luminous flux is equal to: 150 (X) x 10 (Y) x 1 (Z) = 1500 lm. You can choose lamps according to the power and luminous flux correspondence table for LED lamps. For example, if you use 4 W bulbs with a luminous flux of 300 lm, you will need 1500/300 = 5 LED lamps.
Table: power of LED lamps depending on the luminous flux
| LED lamp power, W | Luminous flux, Lm |
| 3-4 | 250-300 |
| 4-6 | 300-450 |
| 6-8 | 450-600 |
| 8-10 | 600-900 |
| 10-12 | 900-1100 |
| 12-14 | 1100-1250 |
| 14-16 | 1250-1400 |
You can also use the online calculator to calculate the number of fixtures you need.
Video: calculating the number of fixtures with an online calculator
An important area in the kitchen: choosing a lamp above the countertop
The eating area is the most critical part of the kitchen, which simply has to be well lit. A common option, universal in interiors of various styles, is a large chandelier with a beautiful lampshade or a lamp with one or more shades directly above the center of the dining table. In this case, the appliance will become not only a light source, but also a spectacular decoration that draws attention to the center of the kitchen. It is best to purchase a model whose suspension length can be adjusted.
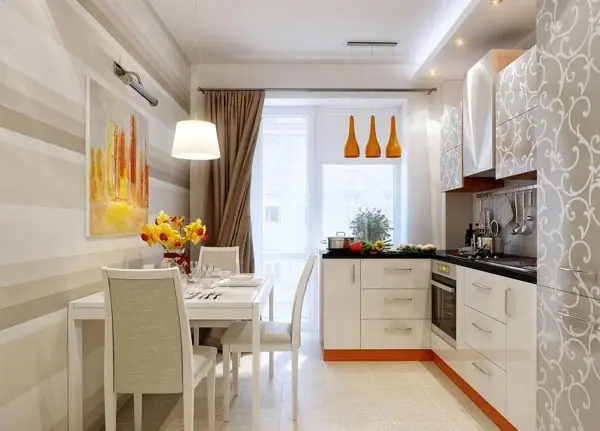
A chandelier with a beautiful lampshade above the dining table - a versatile solution for different styles
The recommended height from the light bulb to the table top is approximately 1.5 meters. Raising the lamp, we get bright lighting for a festive dinner, lowering it down - a cozy dim light for an intimate dinner. The height of the chandelier must be adjusted so that it does not shine directly in the face of those at the table, but at the same time, everyone must see each other well, without unattractive shadows on their faces. For soft and diffused illumination of the dining table, lamps equipped with frosted glass shades are well suited.
When choosing a lampshade, do not forget to pay attention to the material from which it is made. In some modern styles, it is becoming fashionable to use bright designer woven lampshades, but it must be borne in mind that even if your kitchen is equipped with a powerful hood, such material is more susceptible to dirt, and it is more difficult to clean it than simple and practical lampshades made of glass or plastic.
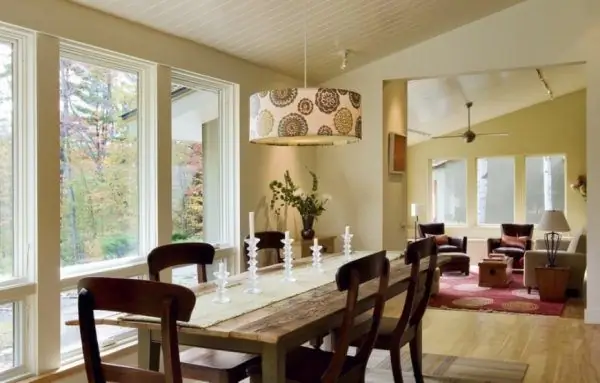
Fabric lampshades are very beautiful, but keep in mind that cleaning them will be problematic
If the kitchen is small and large chandelier looks too bulky, several lamps with small shades of one or different shapes will be elegantly and stylishly placed above the table. To illuminate a standard tabletop, two or three devices are enough, located in a group or in a row at the same distance above the center.
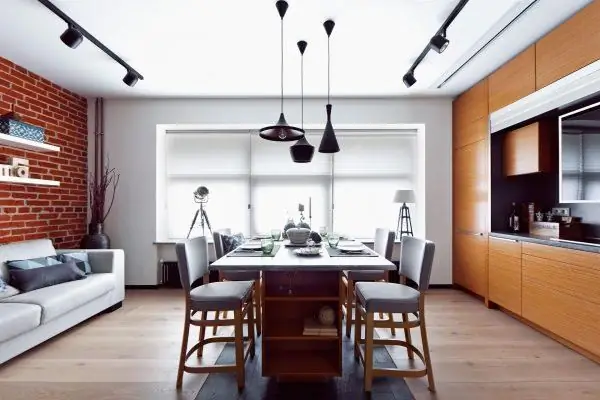
The group of lamps attracts attention due to the different shape of the shades
A single lamp looks good over a regular round or square table, but if the table is large and elongated, you will need several pendants placed in one line to evenly illuminate it. The same option is appropriate above the bar. In modern styles, bus systems are often used, which give the kitchen a stylish and unusual look and illuminate a long table or bar counter well.
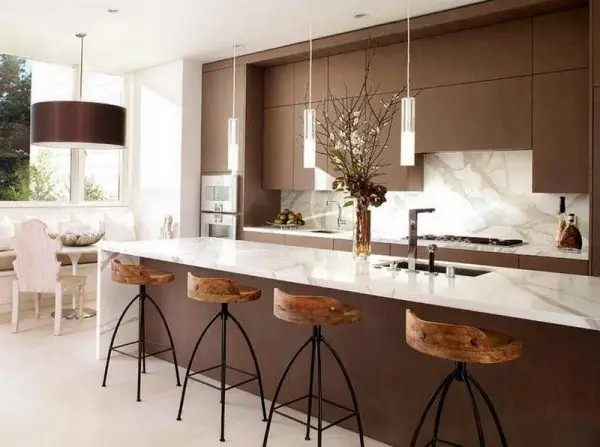
To illuminate a long table or bar counter use pendant lamps located in one line
A typical dining table with chairs is often a simple, uncomplicated arrangement. A non-standard designer lampshade will help to give this group an original look.
Photo gallery: options for placing pendant lamps in interiors of different styles
-

Scandinavian style kitchen chandelier - A single crystal chandelier above the dining table fits well with the Scandinavian style
-

Hanging system above the table - Low-set dining table lighting creates a cozy atmosphere
-

Art Nouveau kitchen with chandelier - Globe-shaped lampshade fits effectively into the unusual style of kitchen decoration
-

Classic kitchen with crystal chandelier - Classic style never goes out of style
-

Group of black pendant lights in a white kitchen - Matte black lampshades of a strict form set off well the minimalistic white finish
-

Provence style kitchen - A wrought iron chandelier above the dining table looks spectacular in a Provencal style kitchen
-

Lamp in the kitchen with a small table - A single luminaire with an adjustable suspension is ideal for lighting a small table with a simple shape.
-

Loft style lamps - Large industrial loft-style lighting fixtures give the kitchen a unique look
-

Eco-style kitchen lamps - For an eco-style kitchen, lamps with lampshades made of natural materials are suitable
I, like many, would like to create a fashionable and stylish interior at home, but here, unfortunately, I had to face the harsh reality of the Soviet Khrushchev, especially when you want to make repairs as economical as possible and certainly not resort to redevelopment. Before the renovation, in the very center of our tiny Khrushchev kitchen with low ceilings, there was proudly an old chandelier on a rather long suspension. People of tall stature, who came to visit, and everyone else constantly ran into her, it was enough to inadvertently raise a hand. The main goal of the renovation in the kitchen was to save space as much as possible, so there was no place for the pendant lamps even above the dining table. But for parents in their home with 4-meter ceilings, a large chandelier above the table in the living room looks simply gorgeous.
How to hang a lamp with your own hands
You can hang the ceiling lamp in the kitchen yourself without calling an electrician, if you follow the installation instructions and safety rules. There are several ways of fixing the luminaire to the ceiling, the most common being a hook suspension. To hang the lamp, you will need:
- ladder;
-
voltage indicator;

Voltage indicator The presence of voltage is determined using an indicator
- pliers;
- thin screwdriver;
-
mounting block with terminals for wires;

Connection terminal block The wires are inserted into the terminal block and clamped with a screwdriver
- nippers.
Sometimes there is already a hole in the center of the room, from which cables come out, and a metal hook built into the ceiling. If there is no hook, you can install it yourself. To do this:
- We drill a hole in the ceiling with a puncher or an impact drill near the place where the wires are output.
- We drive a plastic dowel into the hole.
-
We screw the hook into it and insulate it with two layers of electrical tape. The hook must not come into contact with the metal parts of the chandelier.

Mounting hook with dowel In order to hang the chandelier from the ceiling, it is enough to fix the mounting hook on it
After that, we assemble the lamp according to the attached instructions and hang it on a hook. The attachment point is masked with decorative overlays.
How to connect a chandelier
The chandelier usually has contacts for connecting to electrical wiring, indicated by Latin letters:
- L - phase;
- N - neutral wire;
-
PE - yellow-green grounding conductor.

Wire designation The grounding conductor is always green-yellow insulation
In modern lamps with metal fittings, there is a yellow-green ground wire, designated by the letters PE. If the apartment has grounding (the wire must be yellow-green, but sometimes it is of a different color - black or white), then it must be connected to the terminal along with the yellow-green wire of the lamp. In the wiring located in the apartments of old houses, most often there is no ground wire. Chandeliers of the old production or with plastic fittings also lack grounding. In such cases, it simply won't connect. This does not affect the operation of the luminaire in any way, since the ground wire performs only a protective function.
Before connecting the lamp, the electricity must be turned off. The wiring is de-energized by the corresponding automatic switch in the switchboard, after which the absence of current is checked by the phase indicator. The circuits according to which the lamps are connected can be as follows:
-
The simplest one consists of a luminaire with one lamp and a one-button switch. To connect such a structure, you need two wires coming out of the ceiling to be connected to the wires of the chandelier through the connecting terminal block. It is recommended to comply with the PUE requirements, according to which the phase wire in the electric cartridge is connected to the central contact, and the switch is switched so that it opens the phase wire. This will increase the safety of the luminaire. If there are several horns on the chandelier, and there are only two wires, the connection diagram will be similar.

Diagram of connecting a chandelier to a one-button switch The zero wire must come directly to the chandelier, and the phase wire through the switch
-
There are two wires coming out of the ceiling, and several from the chandelier. In this case, all the bulbs on the chandelier will be lit at the same time, regardless of the number of wires coming out of it. To connect, all neutral wires from the chandelier sockets are connected in parallel and fastened to the zero of the ceiling wiring. Do the same with phase wires.

Chandelier connection diagram to two ceiling wires Several lamps will be lit by one switch
-
Three wires emerge from the ceiling and two from the chandelier. First, using an indicator, you need to understand the types of cables that come out of the ceiling. Two of them will be phase, and the third will be zero or ground. Two phases usually involve a switch with two keys. But since the luminaire is equipped with only two wires, a single-button switch will be enough. To determine the phase and neutral wires, you need to turn on both keys on the switch and consistently touch each wire with a probe indicator. The indicator light will glow when the phase is touched, there will be no glow on the neutral wire. Further, the zero and any of the phase ceiling wires are clamped in a terminal with similar chandelier wires. The second phase of the ceiling is insulated.

Chandelier connection diagram with two wires The second phase ceiling wire is insulated
-
Several wires on the lamp and three on the ceiling. In this case, the lamps of the multi-track chandelier can be turned on in turn. The switch is installed with a two-key. larisochkaivanovna: 2018-14-08, 15:51
In one of the sources such designations are written, in the other - that the neutral wire is blue, and the phase ones can be brown and red. In any case, it further indicates that the colors may be different, so the wires need to be checked with an indicator. Ceiling wiring.
"> The marking of the ceiling wires is as follows: phase - L1 (orange), phase - L2 (yellow) and zero - N (blue). Due to the fact that cable manufacturers do not always indicate designations, and electricians do not always indicate may not adhere to the standards of the color scheme, before connecting the wires, it is better to independently double-check their purpose with a screwdriver-indicator. The connection of a chandelier with several cords is carried out in a certain sequence. First, the wires from the bulbs must be divided into two groups, each of which will be turned on by a specific switch key. the group is connected to its phase wire, and then all sections are combined by a zero.

Connection diagram for multi-track chandelier When the first key is turned on, one group of lamps will light up, when the second is turned on, another
-
Connection of several lamps to one switch. In this situation, all lighting fixtures are connected in parallel.

Connection of several luminaires to one switch Devices are connected to one switch in parallel
Video: connecting a chandelier - how to connect the wires correctly
It is not so difficult to equip comfortable and safe lighting in the kitchen. Thanks to their variety, pendant lights are perfect for this. It is enough just to correctly select and place them, guided by general recommendations and coordinating with the peculiarities of your kitchen, and with the proper skills, and hang them yourself without resorting to the help of professionals.
Recommended:
Lighting For The Kitchen Under The Cabinets And Above The Working Area: LED Strip And Surface-mounted Lamps To Illuminate The Surface Of The Kitchen Set
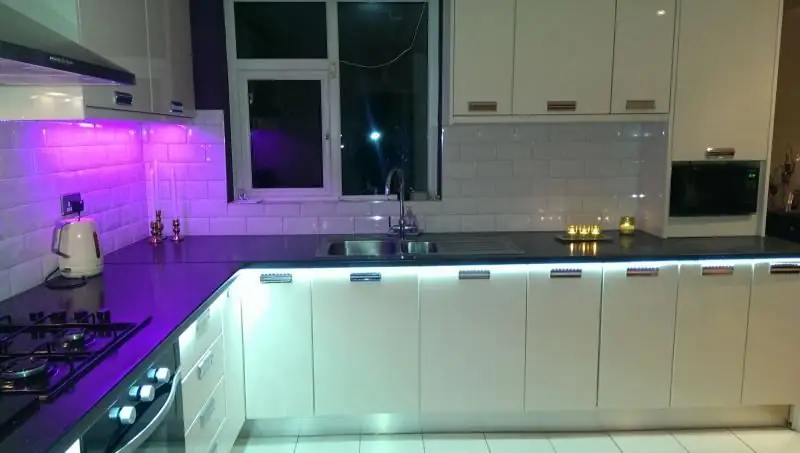
Types of LED backlighting, their pros and cons. Options for placing the backlight of the kitchen set. Installation of LED strip and expert advice
Ceiling Lamps For The Kitchen: Varieties, Photo
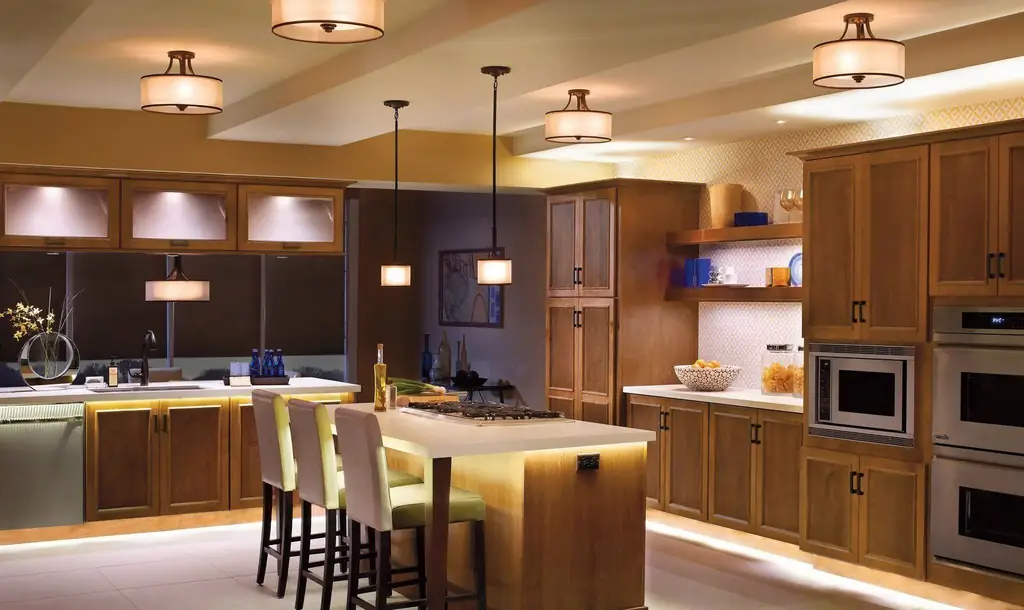
Ceiling lamps for the kitchen: types and features. How to choose a lamp for the size and style of the kitchen interior. Location and installation tips
Doors For The Kitchen And Their Varieties With A Description And Characteristics, As Well As Features Of The Device And Operation
What are the types of doors to the kitchen and how to determine the dimensions of the structure. Rules for self-installation and maintenance of kitchen doors
Warm Floor In The Kitchen Under The Tiles: Features, Advantages And Disadvantages, Installation, Photo
What is underfloor heating and its types. Recommendations for choosing a coating for underfloor heating. The sequence of work on the installation of a warm floor
Kitchen With Patina On The Kitchen Set And Furniture: What It Is, Interior Design Features, Photo
What is patina. Advantages and disadvantages of patination. Kitchen design with patina: colors, styles and interior features
