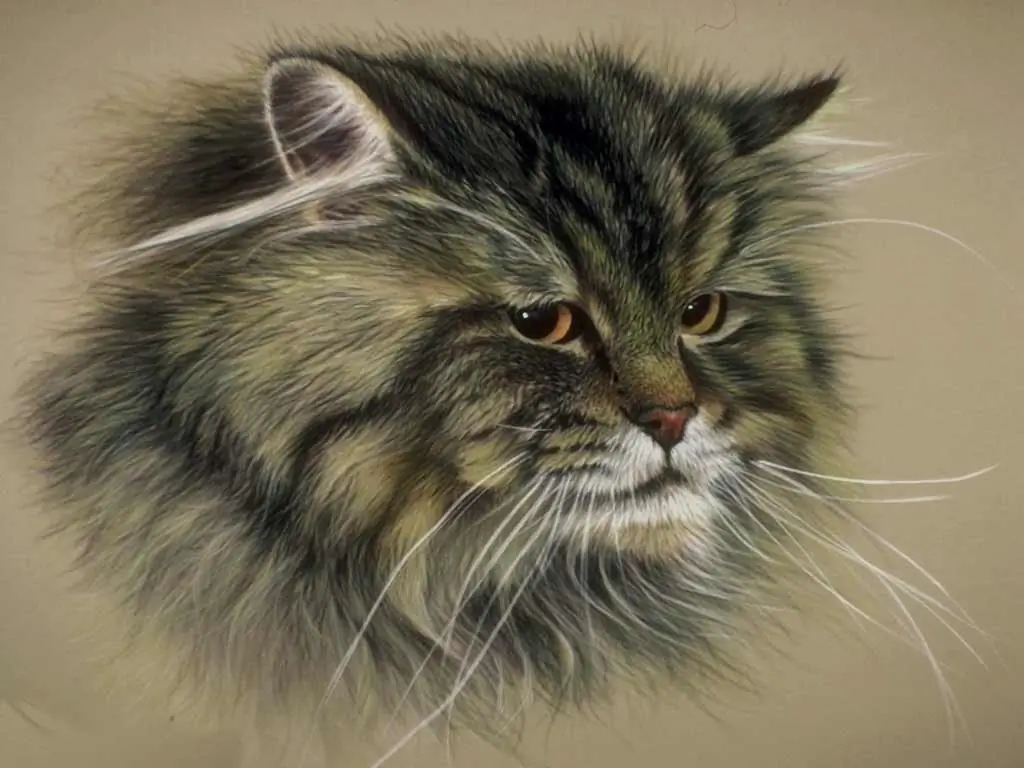
Table of contents:
- How to draw a cat, cat or kitten step by step
- Is it difficult to draw a cat
- What technique can you use to draw cats
- What you need to work
- What kind of cat can be drawn, the choice of the plot
- How to draw a cat in stages
- Features of children's drawings depending on the age group
- Video: how to draw a cat (lesson)
- Author Bailey Albertson albertson@usefultipsdiy.com.
- Public 2023-12-17 12:53.
- Last modified 2025-01-23 12:41.
How to draw a cat, cat or kitten step by step
Many people adore cats. Therefore, sometimes I really want to portray one of these cute creatures on paper. Make the cat funny, cartoony or similar to the real one. Not everyone has the talent of an artist, but everyone who wants to master the step-by-step drawing technique and depict an animal they like is quite capable of.
Content
- 1 Is it difficult to draw a cat
-
2 In what technique can you draw cats
- 2.1 Pencil drawing
- 2.2 Watercolor
- 2.3 Gouache
- 2.4 Acrylic paints
- 2.5 Oil
- 2.6 Unconventional technique
- 2.7 Other alternative methods
-
3 What you need for work
-
3.1 Selecting drawing tools
- 3.1.1 Correct paper
- 3.1.2 Pencils
- 3.1.3 Which brush to choose
- 3.1.4 Charcoal for drawing
- 3.1.5 Feather tools
-
- 4 What kind of cat can be drawn, the choice of the plot
-
5 How to draw a cat in stages
- 5.1 How to draw a cat from circles
- 5.2 Profile picture
- 5.3 Full face
- 5.4 The cat turned its head
- 5.5 Cat with short or fluffy hair
- 5.6 Animated cat
- 5.7 Sleeping pussy
- 6 Features of children's drawings, depending on the age group
- 7 Video: how to draw a cat (lesson)
Is it difficult to draw a cat
It is not difficult to depict a cat on paper. Any drawing is based on simple geometric shapes in the form of:
- circle;
- oval;
- square;
- rectangle;
- triangle.
Therefore, before drawing a cat, you need to be able to correctly depict the named geometric shapes on paper. The main body parts of a cat are:
- head (slightly flattened circle);
- torso (oval);
- ears (triangles with rounded ends);
- legs and tail (elongated ovals).
All shapes are connected to each other when drawing. This is done smoothly, as when sculpting plasticine figures. If the animal's face is half turned, the contour of the far ear is made thinner so that the inner side of the ear is hardly visible.
The image of convex parts and curves on the body of the cat will give credibility to the picture. When drawing, focus on how the sizes of certain parts of the cat's body are related to each other. For example, the size of the head should not be larger than the size of the body. Start with the cat's head. The task can be made easier by imagining a head devoid of hair and ears. At the same time, try to determine the ratio of the sizes of the main parts of the cat's body.
What technique can you use to draw cats
You can draw a cat, a cat, a kitten with oil, pencil, watercolors and using other visual means. There are also non-standard ways of depicting this graceful animal. Keep in mind that whichever technique you choose, the result will be determined by the individual artist's ability.
Pencil drawing
Anyone who first decided to engage in such creativity should start drawing with the use of the simplest object - a pencil. It can be easily erased if a mistake is made while drawing. The process of drawing a cat with a simple pencil is fascinating and informative. During the work, the basics of drawing this cute animal are mastered, the necessary skills are acquired. With the help of a simple tool, you can learn how to depict the fur of a cat, convey volume, light, shadow.
Over time, you can move on to more complex means of fine art. When the technique of pencil drawing is mastered, it will be easier and faster to depict any representative of the cat family with watercolor, gouache, and other materials.
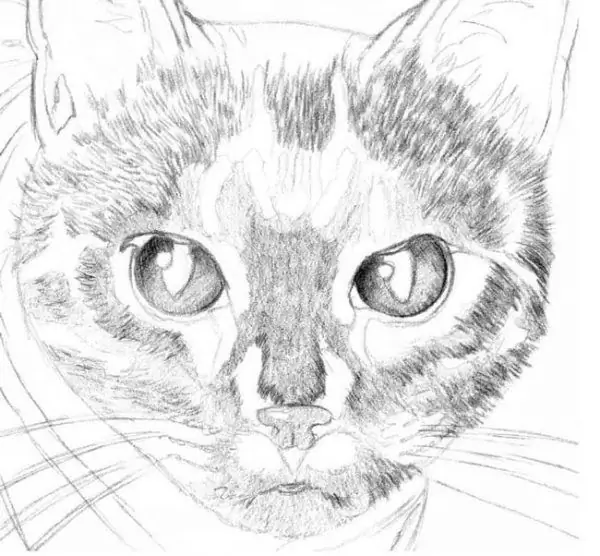
Drawing with a simple pencil is a good way to learn how to display volume, shadow and light on a sheet.
Watercolor
With the help of watercolors, you can get a beautiful image of a cat in color. This is quite difficult, because in addition to the outlines of the cat, shades should be correctly applied, the play of wool should be depicted. It is better to draw on watercolor paper. Previously, it is worth making a pencil sketch with light movements of the hand. It should not protrude from the layers of paint.
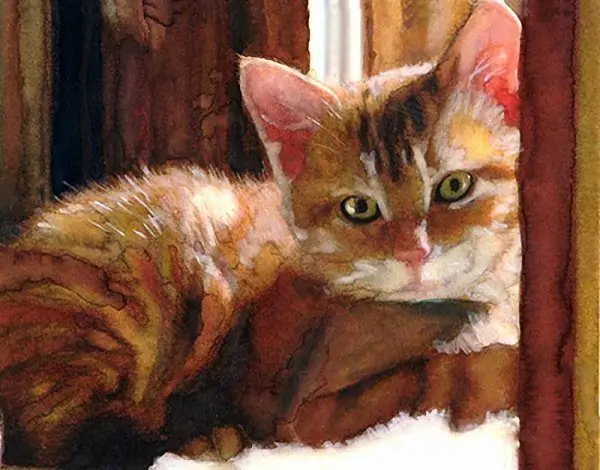
The main difficulty when painting with watercolor is to correctly apply shades and combine them.
Gouache
To create a gouache drawing, you need a certain skill. You can first make a sketch with a simple pencil. And accuracy is also needed in order to correctly convey all the color shades of the animal.
Acrylic paints
These paints are a handy drawing material that many people like. Even experienced artists use them. Acrylic is like oil, it is odorless and dries quickly. Paintings created with acrylics are bright and rich. Representatives of the mustachioed-striped ones turn out to be cheerful and mischievous on them.
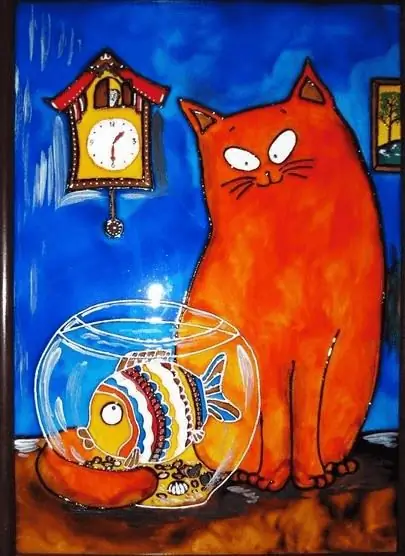
The image of a cat with acrylic paints is rich and bright
Oil
The technique of painting with oil is one of the oldest and most universal in painting. It is simple and popular to this day. The technique has great possibilities for transferring color, volume, surrounding atmosphere, lighting effects.
Educational workshops on creating an oil painting of a cat will help turn such painting into a useful and exciting hobby. Usually in master classes, a technique is used that includes right-brain drawing. It activates a holistic artistic vision, creative thinking.
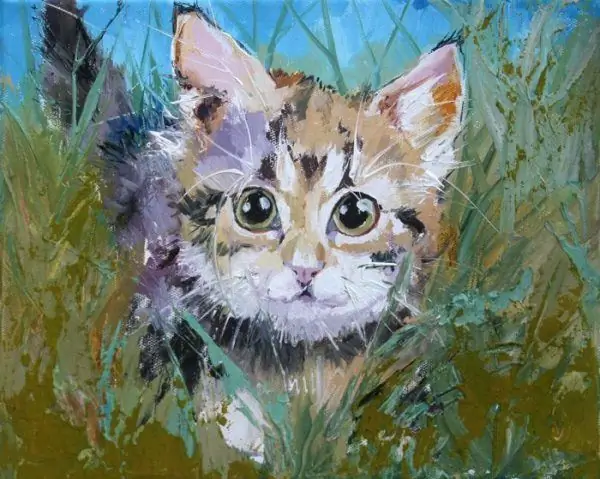
Oil painting techniques are not as difficult as they seem
Unconventional technique
A cat can be depicted using the scratching technique, which when translated from the French word gratter means to scratch, scratch. In Russian, the technique can be called gratography, waxography, and in simpler terms - the technique of scratching, which is easier for children to remember. For it, pre-painted thick paper, cardboard is used. The procedure is as follows:
- Cover the sheet with multi-colored watercolor paint or wax crayons (thick layer). Don't use a dark tone: black, gray, brown.
- Wait for the leaf to dry.
- Then rub it thoroughly with a candle or dip it in hot, melted paraffin. At the end of the process, a paper sheet with a thick paraffin wax layer is obtained.
- Then dilute black ink with a small amount of liquid soap. It allows you to lay the paint layer evenly.
- Apply the resulting paint to the paraffin surface of the paper sheet and let it dry. It is possible that a high-quality drawing will require several layers of ink.
- Then scratch the image of the cat on the sheet with a sharp object. This can be done with the back of a brush, a knitting needle, or a toothpick. Draw carefully along the outlined contours, as mascara can sometimes peel off.
In terms of the resulting image, you can dream up. To do this, you should experiment in drawing with light and shadow solutions. For example, make a light shape on a dark background, or leave a dark shape and make the background light.
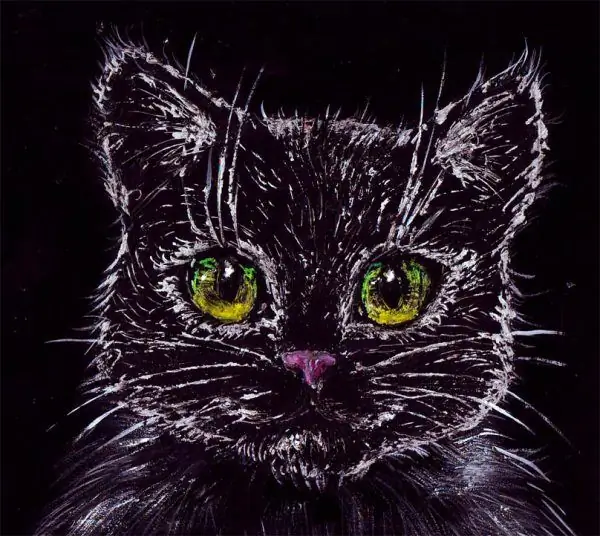
A beautiful cat can be drawn using the scratchboard technique
Other alternative ways
You can develop your artistic skills by using other alternative methods in drawing. Among them:
- Drawing with fingers. It is suitable for small children. An original drawing can be obtained by dipping one or more fingers into the selected paint, and then leaving a print in the desired place on the drawing. If you draw a line with your finger, you can, for example, depict the face of a cat.
- Drawing with palms. A cam or palm is completely dipped in the paint, the print made is transferred to paper. Paint can be applied to the palm in different colors with a brush. All details drawn on the palm will be printed on the sheet. In this way, you can get an image of a cat in different ways.
- Drawing with a hard brush poke. With this method, you can depict the fluffy fur of a cat. This painting technique is as follows: a dry brush is dipped in paint. Then, holding the brush vertically, hit it on a sheet of paper. In this way, the drawing that is depicted on paper is painted. The main thing is that the entire surface of the drawing is painted evenly.
- The use of cotton swabs. This method is one of the easiest to draw. Cotton swabs are dipped in the desired paint and then an imprint is left on a sheet of paper.
In addition to these methods, there are many others. They are also used to create the image of a cat. These methods include: drawing with wax crayons with watercolors, crumpled paper, using a spray of paint, and others.
What you need to work
Depending on the chosen painting technique, certain materials are used. These include:
- well-sharpened simple and colored pencils;
- wax crayons;
- felt-tip pens, they can outline the contours and emphasize certain parts of the body;
- gouache;
- watercolor, acrylic or oil paints;
- soft eraser;
- thick A4 paper (watercolor paper, sketchbook);
- colored cardboard (for drawing with gouache);
- coal;
- natural brushes (synthetic);
- paraffin (ready-made paraffin candle);
- black ink;
- shading kit;
- a jar for washing brushes;
- ruler, compass for drawing circles, pencil sharpener;
- detergent (liquid soap, shampoo).
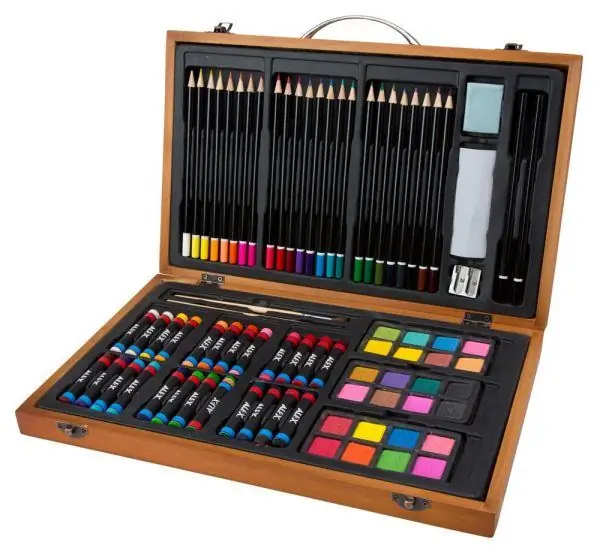
A drawing kit with a variety of tools will come in handy for a novice artist
Choosing painting tools
The work on the image itself and the result obtained depend on the choice of materials for drawing. Follow these guidelines:
- Do not buy essential items at the lowest or very high cost. Cheap pencils, crayons can often break, draw poorly, and thin paper can be difficult to handle. All this will slow down the drawing process. As for expensive materials, the drawing of a cat as a result may turn out to be completely different from what one wanted. It will be a pity if too good paper was bought for this, expensive pencils and paints were used.
- Give preference to quality tools to make the drawing process enjoyable.
- When choosing a particular thing, consult with the seller. He will tell you what is best to buy for each specific case.
Correct paper
The paper should be thick enough to match the pencils and paints you choose. To create realistic drawings, sheets with a satin (satin) surface are preferred. For beginner artists, large format white sheets are suitable for creating volumetric figures.
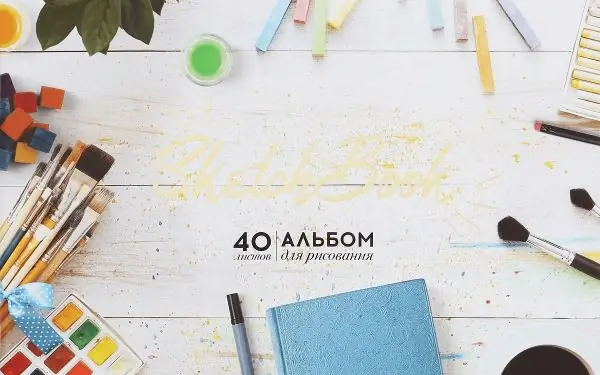
You need to choose the right paper for drawing, as the final result depends on this.
The pencils
It is the main drawing tool after paper. With its help, sketches are made, the basics of drawing are comprehended. Consider the following when choosing them:
- Pencils can be regular or mechanical. The latter do not need to be sharpened. Spare leads are sold for them (12 pcs.).
- Pencils are distinguished by their rigidity (hardness). Pencils with a hardness (H) from 2 to 4 are suitable for creating drawings in light colors, sketches; pencils HB - in medium tones, 5B and 6B are used for the dark parts of the drawing, shading, giving depth of shade to the created drawing. It is not worth constantly changing pencils depending on the hardness. You can use an HB pencil (medium hard) and try more or less pressure as you work.
- The resulting drawing depends on the quality of the pencil.
- The selected tool should fit comfortably in your hand.
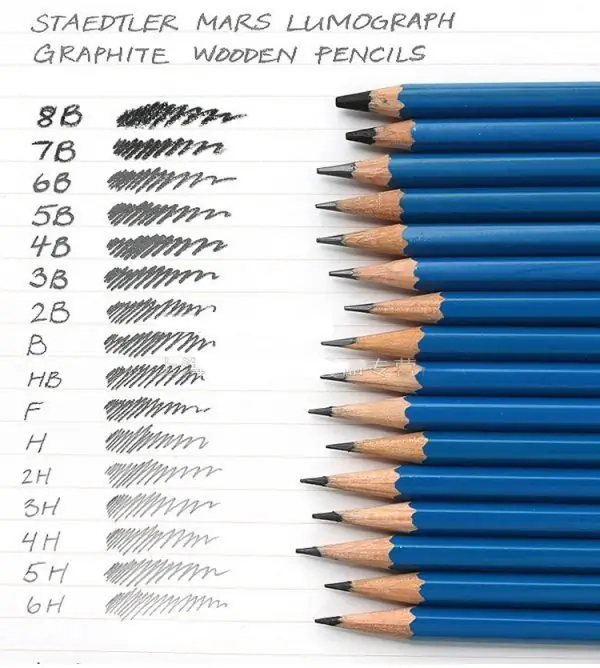
The hardness of pencils affects the quality of the drawing.
Which brush to choose
Use a brush to color large and small areas of the drawing. She can also draw a gentle or contrasting line. The brush serves as an extension of the hand to create your own masterpieces on the canvas. The convenience of this tool does not depend on the price, but on the artist himself. In this case, it is important to make the right choice. Each brush has its own display style, so you need to know which cat or cat you want to portray.
The tools differ from each other not only in price, but also in their thickness. The brush is selected according to the following criteria:
- the wide tool is used to paint over a large area of the sheet;
- paint the background with a flat brush;
- using a round brush with a sharp tip, accurate drawing of details is performed;
- a round thin brush is used to detail the smallest parts of the picture.
For those who are taking their first steps in painting, it is better to have a large, medium and small brush. The best material for brush bristles is the hair of the kolinka, an animal that is a cross between a ferret, marten and mink. Such tools are strong, durable, high quality. The disadvantage is their high price. Squirrel brushes, from the bristle of other animals, made from synthetic (nylon, polyester) materials are less expensive, but they can also create high quality drawings.
The following brushes are used depending on the type of paint chosen:
-
for oil paints:
- from bristle,
- synthetics,
- badger.
-
for gouache:
- synthetic,
- proteins,
- bristles,
- column.
-
for watercolor:
- squirrels,
- core,
- synthetic,
- imitating natural.
-
for acrylic:
- synthetic,
- column,
- proteins.
A quality brush made of any material is distinguished by:
- distinct form;
- large capacity;
- uniformity of application;
- ability to retain fluid;
- elasticity.
It is difficult to judge the quality of a brush by color, since the brush can be colored. A quality product has glossy hairs, clean and healthy-looking, without spots, damage or bends. The ends of the brushes can be slightly darker than the main part. The handle of the brush should not be too thin or thick, it should fit comfortably in the hand. In order for the brushes to retain their elasticity and serve longer, after the end of the work they are washed and stored in an upright state.
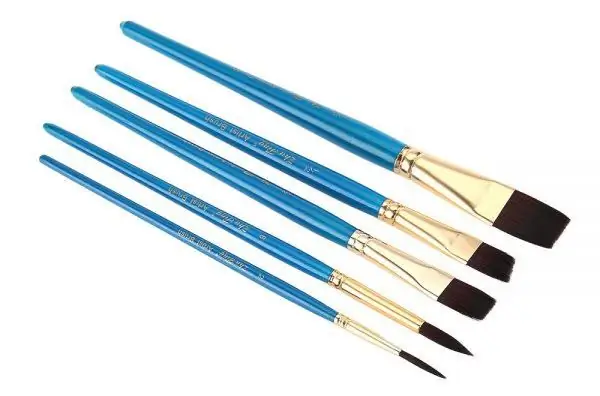
Nylon brushes are widely used in painting
Charcoal for drawing
Charcoal pencils make the surface of the drawing blacker than graphite pencils, but at the same time they are easier to smear and more abrasive. Sepia white pencils are used in two-tone techniques.
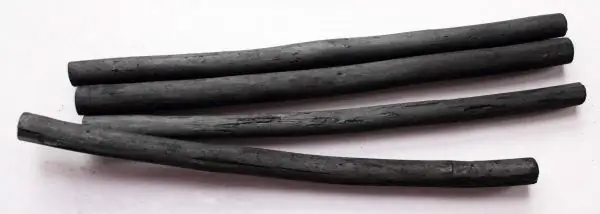
Charcoal paint a bright black color
Feathering tools
Chopsticks made of durable cardboard with sharp edges at the ends can create halftones, gradations. Sharpened sticks made of curled paper are used to soften lines.
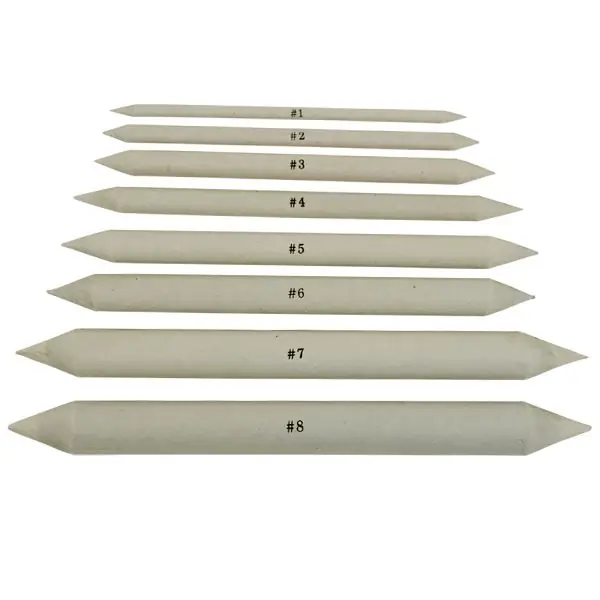
Feathering is needed to create tones, halftones, soften lines
What kind of cat can be drawn, the choice of the plot
Using the techniques of phased drawing, even without being an artist, you can depict a four-legged friend on paper. It is better to start with creating the simplest image - a funny cartoon cat. Then you can portray an adult cat, a small kitten.
Next, you should draw more intricate images and plots, for example, depict a realistic cat sleeping, sitting or jumping. The cat can be playful or brooding, fluffy, smooth-haired or completely hairless. You can choose any subject for the drawing, depending on your imagination and practical skills.
How to draw a cat in stages
To depict a pet, an interesting cartoon character on paper, will help the application of the step-by-step drawing method. How to draw the image of a four-legged friend - with simple, colored pencils or watercolors, oil paints - a novice artist must decide for himself, using his personal idea of the future drawing and his skills. Even with a simple pencil, you can create an interesting image of a cat or cat. Coloring the picture at the last stage of the work makes the picture lively and vivid.
Those who wish to draw can start their creativity with the simplest animated cat. His images are easy to create, because here it is not necessary that the proportions of body parts be exactly observed, the similarity with the original is often superficial. Such cartoon cats have few small details.
Drawing begins with drawing the main outlines, to which simple details (ears, eyes) are drawn. After that, they begin to add the necessary strokes, detailing the image. All lines on it should be smooth, with rounded corners. If you adhere to the sequential stages of the image, then it is quite possible to master such an uncomplicated creative process.
How to draw a cat from circles
This drawing method is perhaps one of the simplest. It is as follows:
-
Draw two circles, the diameter of one is 2 times greater than that of the other.

Phased image of a cat from circles A simple drawing of a cat can be done using circles
- You can do this in two ways, that is, draw a small circle on top of a large one, or place one circle inside the second (down).
- Draw ears, ponytail. In the second version, depict the details of the face.
- You can paint the cat or make it striped.
Profile picture
It is not difficult to draw a cat sitting in stages. In this position, animals are not too often, because they like to lie or sleep more:
- Start drawing from the top of the face and ear.
- Then the cat's head is completed. There should be a small curved line from it, representing the neck.
- Then this line continues downward to form the back of the animal. It should be finished where the cat's tail begins.
- To complete the head line, draw a curved outline from the muzzle downward so that the cat has a chest. At the bottom, you can mark the paw with a line in the form of a half circle.
- At the end of the drawing, the tail, the second ear, and the eyes are drawn. To make the image look three-dimensional, a shadow is added. The cat can be colored with pencils or paints.
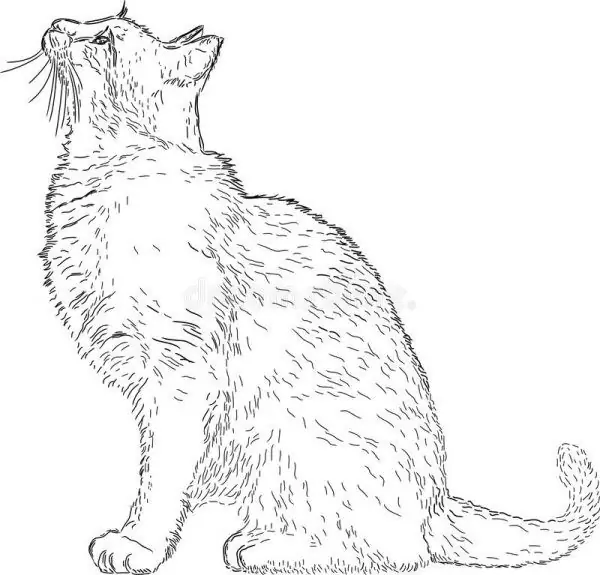
With a simple pencil you can draw a cat in profile
Full face
To draw a seated cat full face, first of all, draw a circle. He will be the head of an animal. The torso shape will be displayed as an oval. When drawing, the following proportions and recommendations must be observed:
- the size of the horizontal part of the body should be slightly more than twice the diameter of the cat's head;
- vertically, the size is slightly less than twice the diameter of the head;
- it is necessary to draw so that the circle representing the head overlaps the oval of the body;
- at the next stage, ears and paws are added to the cat; for their correct display, the vertical line of the oval serves as a reference point;
- the final step in drawing will be to display the mouth, nose, whiskers, cat's eyes.
The cat turned its head
Such a scheme is somewhat more complicated, but a novice artist is able to draw an animal in such a pose.
- They begin drawing with an oval for the head, the body is depicted in the form of a circle.
- Additional lines (vertical and horizontal) are drawn in the middle of the oval, as well as horizontal - in the center of the circle, the ears-triangles are drawn.
- Following the proportions, they depict eyes in black circles on the horizontal (auxiliary) line of the oval, and just below the center on the vertical line, draw a triangular nose with rounded corners, and a line for the mouth is drawn slightly down from it, rounding it in different directions.
- The ears are softened slightly by drawing a curved line around the ear.
- Go to the image of the animal's fur and draw a broken curved line over the oval of the head.
- Draw the front left cat's paw, the line of the back, neck. In this case, they are guided by the auxiliary lines.
- Draw the cat's front (right) and hind paws, draw the tail.
- They depict the paw pads to the animal, erase the auxiliary contours, and outline the main contours of the image.
Color the drawing with paints or colored pencils.
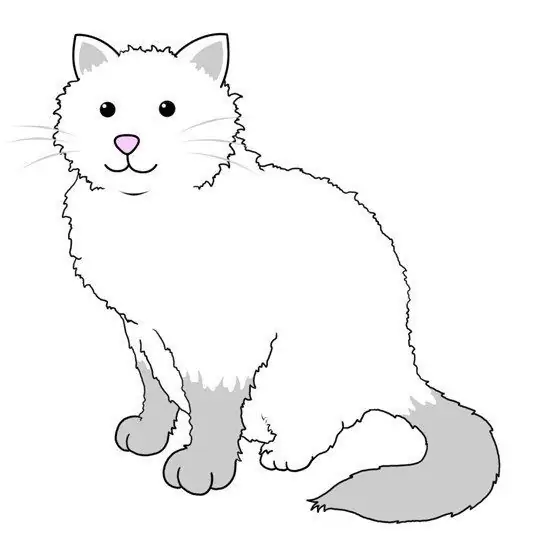
A cat with a turned head is harder to draw
A cat with short or fluffy hair
You can easily depict a smooth-haired or fluffy cat by drawing in this case its portrait. To do this, draw a circle. Further steps will be as follows:
- Auxiliary lines are marked in it in the form of a diameter passing through the center from top to bottom, and two parallel lines symmetrical to the horizontal axis. The upper one shows where the ears begin, the central line is for the eyes, and the nose is drawn on the lower line.
- Further, paying attention to the additional lines, in proportion from the center, draw narrow pupils in the cat with highlights around them.
- Above the eyes, hairs, vibrissae are depicted, giving charm to the cat's eyes.
- Draw a nose in the shape of a heart, focusing on the auxiliary lines.
- Small arcs represent the cheeks of the animal, on the sides of the circle, up and down from the central line. Draw a mouth under the cheeks.
- Then the corners of the eyes are set off. Outline the cat's head using rounded, triangular shapes.
- Shading cat ears. Outline the neck of the animal.
- Do not forget about the mustache. In fact, a cat has 12 hairs on each side of the cheeks. When drawing, their number can be reduced.
The cat's muzzle can be made smooth or fluffy depending on the amount of hair added. The shape of the animal's head will depend on the amount of fur applied. The hairless head looks like a triangle. The addition of short hair softens the contours. Long hair makes the cat's head round, and with very long fur, it looks like a trapezoid.
In the final step, the drawing can be made brighter and more colorful with colored pencils or paints. To add volume to the image, shadows are additionally applied.
Animated cat
You can depict a sitting funny kitten with a huge head and an expressive look as follows:
- Determine the position of the created silhouette of the cat on the sheet. Draw two ovals with smooth thin lines: first the head, under it the body is smaller.
- The oval at the top is divided vertically and horizontally into 4 parts through the center.
- They make a smooth shape of the head, draw ears, cheeks that have sharp corners.
- For the further formation of the muzzle, the contours of the large eyes are drawn in its lower part, the mouth is depicted on the auxiliary horizontal line. You need to draw eyebrows above the eyes.
- Further work continues with the lower torso. Thin lines outline the contours of the front legs. The body is rounded, a tail is added to it.
- The drawing of the kitten is almost complete. You should erase the extra lines with an eraser, then you can proceed to toning and coloring the resulting image.
You can similarly create images that differ in appearance and character.
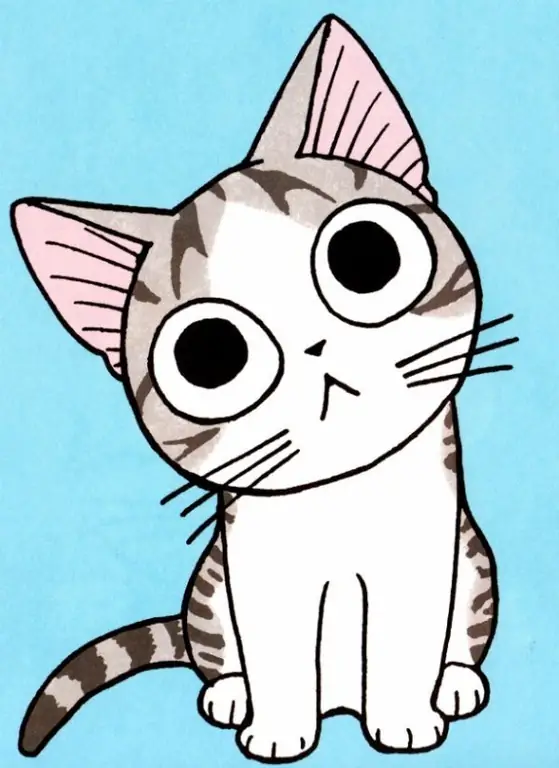
It is easy to draw a kitten in the style of anime according to the step-by-step instructions
Sleeping pussy
It is not at all difficult to depict sleeping cats. Step by step instructions will help to draw a shaggy friend:
- They begin to draw with an image of a circle.
- Inside it, two lines are drawn perpendicularly. A vertical line will split the circle in half, a horizontal line is drawn below the center, and cat's eyes will be on it.
- Draw with two pointed lines the eyes of a dormant cat, then a button-nose with barely noticeable nostrils. A mouth is drawn, similar to the inverted image of the number "3".
- Use the top of the drawn circle to represent the head of the animal. First, the ears and fluffy cheeks of the cat are displayed. At the top of the head, several strands of wool are drawn.
- The contours of the body and tail are depicted. Since in the chosen plot the animal is located in a ball, the muzzle should be covered with a tail. It is necessary to designate the foot, it will be noticeable in this position, add a few strands of wool.
- Additional details are applied in the form of eyebrows.
At the end of the work, you need to erase all the extra auxiliary lines of the circle; to create a more expressive image, you should add minor strokes. It turned out to be a cute sleeping kitty.
A drawing of a sleeping cat, made using the step-by-step drawing technique, even a beginner can create. It is very convenient to make such sketches on squared paper.
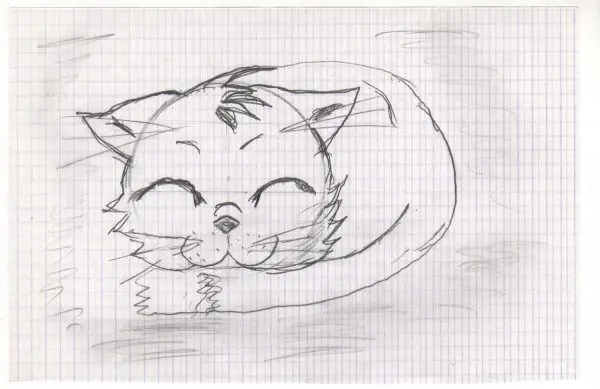
You can draw a sleeping cat in 5 minutes on a sheet of paper
Features of children's drawings depending on the age group
Children adore cats and love to draw them themselves or ask their parents about it. Even if the baby or his mom and dad do not have artistic talent, master classes in stage drawing of four-legged friends will come to their aid. Even a 5-year-old child will master sequential schemes. It is from this age that one should begin to teach him drawing. At the age of 5, children can already create a believable image of an animal.
A young artist should take a good look at a live cat. If this is not possible, a cat figurine made of ceramics, a soft toy that looks like a real cat, will do. The child's attention should be paid to the proportionality of the torso, the ratio of its size to the size of the head, the location of the eyes on the muzzle, nose, and ears.
Since preschool children are not yet very well aware of proportions, you can first draw cartoon cats with bright colors, a very large head, a funny smiling face with a tongue hanging out, and huge eyes.
Primary school students and older can portray more complex options, for example, realistic cats, cartoon characters. At this age, children already understand that cats cannot have a very large or too small head, and their tail is long, almost the entire height of the animal.
Adults need to look through photographs with a schoolchild in which tetrapods take all sorts of poses: sleeping, sitting, jumping. You should pay attention to how the legs, the tail are folded at this time, the back arches. Images of cartoon cats should be made more emotional. Adults need to teach children to give the cat a mood with the help of a wide open mouth, sadness (drooping corners of the mouth), fear (wide-open eyes), thoughtfulness (displacement of the pupils to the side). You can think of many of these options.
Video: how to draw a cat (lesson)
The problem of how to draw a cat, cat or kitten is very easy to solve. You just need to choose in which technique to complete the conceived drawing, and step by step with the help of simple tools to implement your creative idea.
Recommended:
Door Upholstery With Dermantine: Choice Of Material, Tools And Stages Of Work
What is leatherette, its features, advantages and disadvantages. How to choose a material. Different methods of upholstering the door with leatherette and the order of work
Sheathing (upholstery) Of Doors: The Choice Of Material For Finishing, Tools And Stages Of Work
In what cases is door trim necessary. Materials used to cover doors. A necessary tool. The procedure for self-upholstery doors
Decorating The Arch With Your Own Hands: Material, Tools, As Well As Stages Of Work

What materials are used to decorate the arch. The sequence of work when finishing with different materials. Wall finishing options around the arch
Step-by-step Instructions For Replacing The Lock Cylinder: Tools And Stages Of Work, Advice And Recommendations From Specialists
Varieties of larvae depending on the type of castle. In what cases the larva is changed. Stages of work, required tools. Specialist tips for lock maintenance
Roofing Tools, Including Manual Tools, And How You Can Make It Yourself
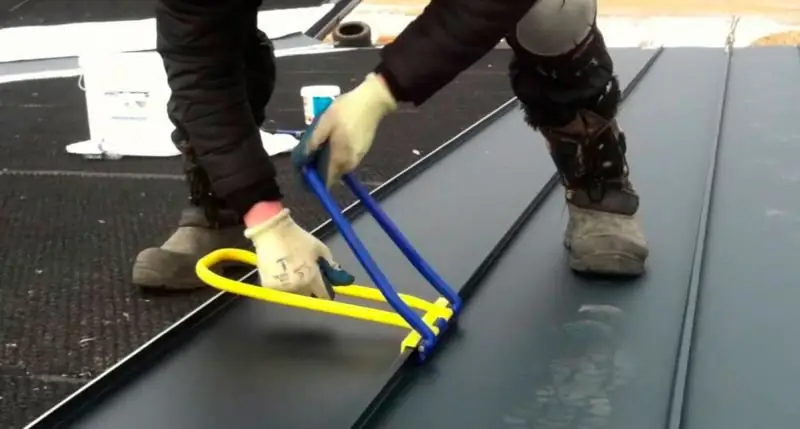
Types of roofing tools: manual, semi-automatic, automatic. Features of choice. How can you make your own roofing tools
