Table of contents:
- Author Bailey Albertson albertson@usefultipsdiy.com.
- Public 2023-12-17 12:53.
- Last modified 2025-01-23 12:41.
What to do if your internet connection is lost on your Windows 7 or 10 computer

The next time the laptop or stationary PC is started, the user may find that a red cross or yellow exclamation mark appears on the network icon in the lower right corner of the screen. In this case, on the panel itself with a list of networks, it will be written that there are currently no connections or that the network has limited access. In either case, there will be no Internet on the computer. What steps can I take to get online again?
Content
- 1 What may cause a problem with the internet connection
-
2 What to do if there is no Internet on Windows 7 or 10
- 2.1 Hardware check and reboot
- 2.2 Checking the balance or calling the provider
- 2.3 Automatic fault diagnosis
- 2.4 Running network commands
- 2.5 Updating drivers or rolling them back to a previous version
- 2.6 Setting automatic IP address detection
-
2.7 Changing the IP address of the router
2.7.1 Video: How to Change the IP Address of TP-Link Router
- 2.8 Changing the Maximum Allowed MTU Packet Size
-
2.9 Reset network parameters
2.9.1 Video: how to reset network settings in the top ten
What can cause a problem with the internet connection
On devices running Windows, in most cases, the Internet disappears for the following reasons:
- Failure of network equipment (router, modem, cable, etc.) or its physical breakdown. For example, a router may not have time to update data, which is why the Internet connection is disrupted. In this case, restarting it will help.
-
Insufficient amount of funds in the account. If a certain amount is not credited to the account on the required day, the provider has the right to block access.

Notice of insufficient funds on the Rostelecom account If there are not enough funds on the account, Internet access will be suspended, and a corresponding warning will appear in your personal account
- Malfunctions on the line of the provider or technical work for preventive purposes.
- Non-updated network card drivers or, conversely, the presence of drivers incompatible with your device. In the latter case, you need to rollback if the connection error occurred after the next update of the adapter driver.
- Incorrect network connection settings.
- The presence of malicious codes on the PC. Check all hard drives for viruses using a special program - antivirus, for example, the standard Windows Defender.
What to do if there is no Internet on Windows 7 or 10
When problems with the Internet connection appear, you need to act consistently, excluding reason after reason, since it is impossible to immediately determine what caused this situation.
Hardware check and reboot
If you are using a Wi-Fi router, check that other devices, such as a mobile phone, can access the network. If nothing boots on it either, then the problem is not with the PC. In this case, do the following:
-
Unplug the router's power cord from the outlet. It is important to turn off the network device in this way - to stop supplying electricity for a while. A simple restart using the power button on your router may not work.

Unplugged router Unplug the power cord from the outlet to turn off the router
- Wait 10-15 seconds, then plug the power cord into an outlet. The router will take some time to boot up - as a result, almost all the lights (indicators) should light up.
- Check your internet access. It may not appear immediately, but 10 seconds after the router restarts.
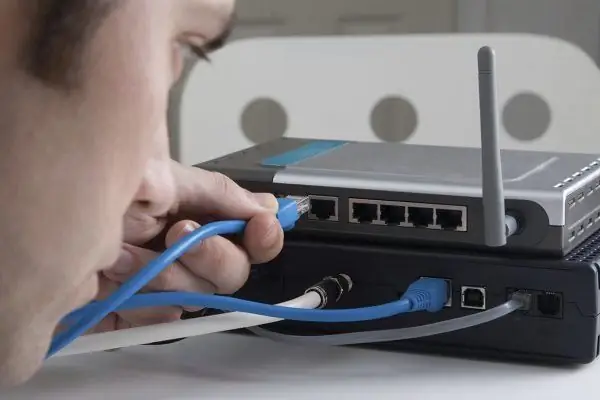
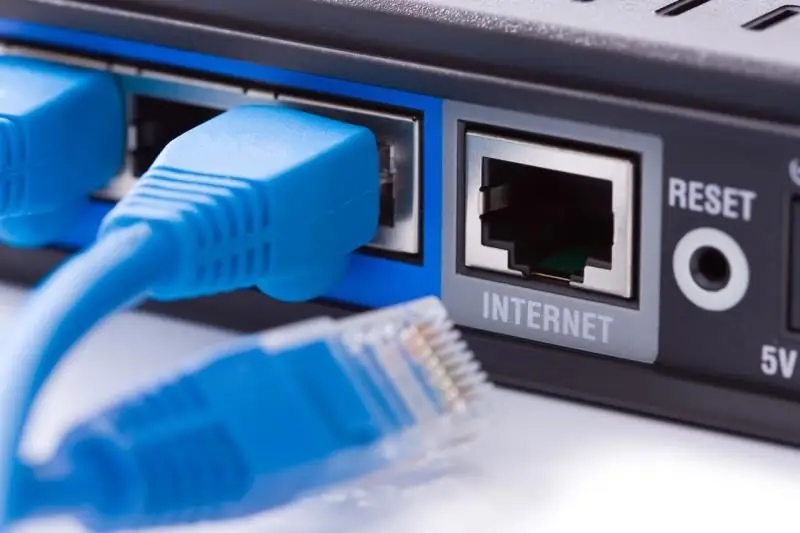
If a LAN cable is connected to your PC, remove it, also wait about 15 seconds, and then insert it back until it clicks and wait while the system detects the device and tries to create a connection. If nothing changes, check all the wires for damage: the cable may be very bent, there may be some piece of furniture on it, etc. Make sure that the cable is firmly connected to the router: remove it and reconnect it (it should be a click is heard).

Insert the network cable into the desired connector on the back of the router until it clicks
Balance check or call to provider
If you have a yellow exclamation mark on your network icon and you suspect that insufficient funds on your account are the reason for the lack of the Internet (for example, do not remember which day you need to pay), call the technical service of your provider. The phone number must be indicated in the contract. You will be asked to name a unique identifier for your connection and will be told if you are in arrears and how much.

Call your provider to find out about possible reasons for the lack of internet on your computer
You can also ask if there are any problems with the Internet on the side of the provider, and if there are any, in what time frame they will be fixed. The operator can also give recommendations on how to solve the problem, even if you have everything in order with the balance and there are no problems on the provider's side.
If you are unable to make a call, go to your personal account and check your balance there. Despite the fact that access to the Internet is limited, if it's only a matter of payment, the provider's website will still load:
-
Launch any browser. If the Internet is not available due to lack of funds, you will see a corresponding message with a link to the authorization page. If there is no message from the provider (only a notification from the browser that there is no Internet), start typing the name of your provider in the address bar. If you have previously entered your personal account, the browser will show you a list of pages - select the one you need.

Provider address Enter the name of the provider company or its website address in the browser line
-
Enter your username and password in two fields. Usually, a unique number is used as a login, by which you replenish the Internet. Click on the "Login" button.

Login to your personal account Enter your login and password from your personal account on the provider's website
-
On the main page there should be an item "Current balance" (the interface of the personal account differs depending on the provider - we consider the steps on the example of the provider "Sevstar"). If it is negative, you need to top it up.

"Sevstar" personal account interface Look at the current balance - if it is negative, you need to replenish your account
-
Go to the section with your tariff plan or payments and find the amount with which you replenish your account every month, and then swipe it through the nearest terminal - after the funds are credited, the Internet will appear automatically.

Accruals and payments In the section "Payments and charges" learn about the amount of the monthly payment for Internet access
Automatic troubleshooting
In each version of Windows, including the "ten" and "seven", the developers have built a special module that can independently solve many problems with connecting to the Internet:
-
On the "Notification panel" (where the clock and date are located), right-click on the network connection icon with an exclamation mark or a cross. A menu will immediately appear on the display - in it, click on "Troubleshooting".

Network connection icon context menu In the context menu of the network icon, click on the item "Troubleshooting"
-
On the "Desktop", both the tool and the search for problems on the PC will start simultaneously.

Detecting problems Wait until the search for problems with connecting your computer to the network finishes
- At the end of the check, the module will tell you what problem was found and suggest a solution. Click on "Apply this fix", the tool will begin to fix the problem.
-
The tool can detect that it still has access to the internet despite its restricted status. In this case, we click on the item "I have another problem."

Choosing the type of network problem Click on the link "I have another problem" if it turned out that you still have an Internet connection on your PC
-
In the next window, click on the option "Use a specific network adapter".

Choosing a problem for diagnosis Click on the link "Using a specific network adapter"
-
In the list that appears, select your adapter. If you have a wired connection, click on the Ethernet line. The system will start checking your network adapter.

List of adapters Select your adapter from the list depending on the type of connection
- If the tool detects any problems with the selected adapter, it will try to correct the situation and still gain access to the network. You will see the results of scanning and corrections in the report. Unfortunately, the utility cannot solve all problems. If the problem persists, you can run the module again. If the attempt fails again, proceed to the next step.
Running network commands
If the automatic troubleshooter is not helpful in your situation, follow these steps:
-
In the search box on the Taskbar, type cmd, right-click on Command Prompt, and then select Run as Administrator. Then click "Yes" to allow the operating system to change anything on the PC.

Run command line as administrator Select "Run as administrator" from the context menu
-
In the editor, run the following commands in sequence (after each command, press the Enter key):
- netsh winsock reset;
- netsh int ip reset;
- ipconfig / release;
- ipconfig / renew;
- ipconfig / flushdns.
- Check if this resolved the connection issue.
Updating or rolling back drivers to a previous version
To solve the problem of Internet access, you may need to check the status of the drivers for the network adapters and, if necessary, update or roll back them in the "Device Manager" system window. The search for updates is carried out when the Internet is available, so you need to connect to a different network before performing this procedure.
First you need to enter the device manager. This is done a little differently depending on the version of Windows:
-
If you have a "seven", click on the "My Computer" icon "Desktop" and call the "Properties" window.

Item "Properties" In the menu of the "My Computer" icon, click on the "Properties" line
-
In the left column, click on the Device Manager link.

Device Manager link Click on the "Device Manager" link
-
If you have "ten", click in the lower left corner of the screen on the "Start" button and select the appropriate item in the menu that appears.

Start button context menu In the context menu "Start" select "Device Manager"
Then follow these steps:
- In the list of PC hardware, double-click on the "Network adapters" section. Depending on the type of your network, select an adapter: if the Internet is wired, right-click on the Family Controller, and if wireless - on the item Wireless or Wi-Fi. In the small menu that appears, click on the first item to open the tool for updating the adapter driver.
-
Click first on the line "Automatic search".

Automatic driver search Click on the link "Automatic driver search"
-
Wait a few seconds while the scan is in progress.

Finding Drivers Online Wait until the end of the driver search process
-
As a result, the module either downloads updated drivers and installs them on its own, or displays a message stating that the current drivers are already installed on the computer. Click on the "Close" button.

Message about the availability of current drivers If the current drivers are already installed for your adapter, click the "Close" button
-
Try to manually search for drivers on your PC. Click on the "Update driver" button again, and then in a new window - on the "Search" link. On the next page, click on "Select a driver from the list of available".

Manual search for drivers on PC Click on the link "Select a driver from the list of available"
-
The list will contain all driver versions that were once installed. Try to select the previous version and click "Next". You can also install the driver from a disk or other drive, if you have previously downloaded it through another device with Internet access.

List of driver versions Select the previous version of the driver and click "Next"
-
Wait for the driver to install.

Installing the driver manually Wait for the system to finish installing the driver
-
A successful installation message appears. Click Close and restart your PC. If the method did not work, return the new driver to its place through manual search on the PC in the same module.

Successful driver update Click "Close" to hide the module window for updating
- If the rollback did not work, try to get rid of the driver for a while - select the "Uninstall" function in the context menu.
-
After that, put everything back in place - in the Action menu, select the option to update the configuration.

Configuration update In the "Action" menu, select "Update hardware configuration"
If there is an exclamation mark next to the adapter description, then it definitely needs to be updated. If the icon does not disappear after installing new drivers, you may need to check the network card for operability or replace it. You can also try to install a suitable driver from the official developer site of your network card or the PC itself. It is important to choose the correct device model here.
Setting up automatic IP address detection
Changing the type of determining the IP address is suitable if the Internet appears directly through the cable, but not through the router. This may be due to a conflict of IP addresses or incorrect values. To fix it, do the following:
- In Windows 7, open the context menu by clicking on the connection icon and select "Network and Sharing Center".
-
In the top ten, the path to the window will be longer: select "Network and Internet settings" from the menu, and in the new large window in the Ethernet or Wi-Fi tab, click on the "Network and Sharing Center" link.

Wi-Fi tab On the Wi-Fi tab, click on the link "Network and Sharing Center"
-
In the column on the left, click the "Change adapter settings" link.

Network and Sharing Center Go to creating and configuring a new connection by clicking on the link "Changing adapter parameters"
-
On the system pane with available connections, select your adapter with the right button and click on the "Properties" item in the list of options, or open the settings window by double-clicking the left button.

Adapter context menu Select "Properties" from the context menu of the adapter
-
Now, in the list of network components, find the item "IP version 4", select it with the left button and click on the "Properties" button located directly below the list.

Network tab In the "Network" tab, find the item "IP version 4" and open a window with its properties
-
In the new window, check the box for automatically obtaining the IP address and DNS server, if the item for manual data entry was previously selected. If automatic receipt was set, on the contrary, put the manual one and carefully enter the necessary numbers (they must be in the agreement with the provider). Then save your changes and close all windows. Check the connection.

Obtain an IP address automatically Change the way you get the parameters for the IP address and DNS server
Changing the IP address of the router
Each router has its own IP, which has nothing to do with the connection IP address. It is only used to connect to the local network. Changing it can also help solve the problem with the lack of internet. Let's describe the procedure using the example of a device from the manufacturer TP-Link:
-
We type 192.168.1.1 in any browser. A page for entering your username and password should open. If it does not appear, your model may have a different internal address - see it on the back of the device. Enter the same word as the name and password - admin, if you have not previously set other data for authorization.

Login to your router account Log in to your router account using the word admin twice
-
On the left side of the page with the list of sections, go directly to the "Network" tab, and then to the LAN block. and change the value of the IP address. It is recommended that you simply replace the last two digits. Be sure to remember, or better write down the new address, since in the future you will go to the router's page only by it.

LAN tab In the LAN tab, change the value of the IP address of the router
- Click "Save" or "Apply" depending on the router model.
- Reboot the device and check the connection.
Video: how to change the IP address of a TP-Link router
Changing the maximum allowable MTU packet size
The MTU (Maximum Transmission Unit) parameter allows you to increase the speed of the Internet by reducing the time for data transmission. However, in some cases, an incorrect value can cause connection problems. In this case, you need to adjust the packet size:
-
Bring up the "Command Line" console on the display. If you have Windows 7, open the "Start" menu and find this module in the directory with standard utilities. You can use the Run panel (a combination of Win and R) - enter the cmd code in the line and run the command.

Cmd command In the Run window enter cmd command and click OK
-
If you have the tenth version of the operating system, you can call a separate search bar - also write cmd or "Command Prompt" and open the module.

Cmd code in Windows 10 search bar Write in the search bar cmd and open the classic app
-
In the console, enter ifconfig fddiO 172.16.16.1 netmask 255.255.255.0 mtu 2000. The number 2000 represents the maximum allowable package size. Press Enter, wait for the command to complete and check if a connection appears.

Executing a command in the console Paste the command ifconfig fddiO 172.16.16.1 netmask 255.255.255.0 mtu 2000 and press Enter
Resetting network parameters
The last resort to solve the problem with the lack of internet is to reset all network adapters. Use it if all other methods are ineffective. The procedure can be performed if you have version of "ten" 1607:
- Press and hold Win and I on the keyboard - a panel with Windows options will open. You can also launch it via "Start" (gear icon).
-
Go to the "Network and Internet" section.

Windows settings Click on the "Network and Internet" tile
-
In the "Status" block, scroll down the page and click on the "Reset network" link.

Status tab In the "Status" tab, follow the link "Network reset"
-
On the new page, click on the only Reset Now button. Your computer will restart. When it turns on, all network adapters will be reinstalled, and all their parameters will get the initial values that were immediately after the installation of Windows.

Reset Now button Click on the "Reset Now" button
Video: how to reset network settings in the top ten
Before troubleshooting network errors, first of all, you need to make sure that you have no debt to the provider. If you are sure that the account has sufficient funds, check all network equipment for integrity and restart it - in most cases this solves the problem. The problems may not be with your equipment, but on the side of the provider - call technical support and find out the reason for the lack of Internet. If there is no outage on the line, run a standard Windows tool to fix various types of network errors. Also check your network settings (automatic or manual detection of IP address and DNS server) and change the maximum allowable MTU packet size. If all else fails, reset the parameters of the network adapters to the initial ones.
Recommended:
A Laptop Or Computer Does Not See A WiFi Network: What To Do, How To Solve The Problem With Wi-Fi Connection

Why does the system not display your Wi-Fi access point? What to do if only your network is not visible or if the list of connections is completely empty
Why The Computer Does Not See The USB Flash Drive And What To Do To Solve The Problem

Why the PC does not see the USB flash drive. Ten reasons and solutions to the problem with step-by-step instructions
Error While Allowing Internet Connection Sharing (null): Causes And Solutions

Because of which, "Error while allowing Internet Connection Sharing (null)" may occur. How to solve the problem: Turn on Windows Firewall
How To Set Up An Internet Connection On A Computer: Setting Up A Network And Automatic Connection At System Startup

How to set up an Internet connection on a PC with Windows XP, 7, 8 and 10, as well as Linux and Ubuntu. Automatic internet connection when Windows starts
What To Do If Pages With Sites Do Not Open In The Browser, But The Internet Is Working At The Same Time - We Solve The Problem In Different Ways

How to eliminate the inoperability of sites in the browser when the Internet is running. Correcting errors in the registry, changing DNS settings, removing plugins, etc
