Table of contents:
- How to build a warm chicken coop with your own hands
- Is it really necessary to build a warm chicken coop
- Material selection
- Preparatory work
- Video: tricks in the construction and arrangement of a winter chicken coop
- Self-made chicken coop: step by step instructions
- Tips for arranging a chicken coop in cellars or basements
- Care after winter: how to treat walls
- Author Bailey Albertson albertson@usefultipsdiy.com.
- Public 2023-12-17 12:53.
- Last modified 2025-06-01 07:32.
How to build a warm chicken coop with your own hands

For many, it is no secret that the comfort of keeping affects the health of chickens, especially in winter. Comfort in the chicken coop is created by proper lighting, ventilation, sufficient walking space, convenient location of nests, feeders and drinking bowls. All this together allows the birds to lay eggs in larger quantities. Therefore, for the cold period, it is necessary to build a warm room for chickens, the independent construction of which will not be difficult.
Content
-
1 Is it really necessary to build a warm chicken coop
- 1.1 Options for warm chicken coops for the winter
- 1.2 Video: Fully self-contained, warm pile house (bottom-range)
-
2 Material selection
2.1 Video: do-it-yourself warm chicken coop in 4 days
- 3 Preparatory work
- 4 Video: tricks in the construction and arrangement of a winter chicken coop
-
5 Self-made chicken coop: step by step instructions
- 5.1 Foundation
- 5.2 Gender
- 5.3 Frame
- 5.4 Roof
- 5.5 Wall and floor insulation
- 5.6 Lighting
- 5.7 Ventilation
- 5.8 Making roosts
- 5.9 Video: do-it-yourself warm chicken coop
- 6 Tips for arranging a chicken coop in cellars or basements
- 7 Care after winter: how to treat walls
Is it really necessary to build a warm chicken coop
From the end of autumn to the first month of spring unfavorable conditions for chickens come, which creates difficulties for poultry owners.
If in the spring and summer period the chicken is active: it moves, rummages in the ground, bathes in the water, then in winter, due to many factors, its activity decreases.

Summer chicken coop does not need additional insulation and lighting
When the temperature drops and the daylight hours are shortened, the ability to lay eggs in birds decreases, or even stops completely. Therefore, it is so important to make a chicken coop, which in winter will provide:
- a temperature level of at least 12 degrees and low humidity;
- artificial lighting - to increase daylight hours;
- the presence of low perches and egg-laying sites;
- internal area of the premises - 1 m 2 for 1-7 individuals (depending on the breed).
Meeting these requirements will allow poultry to spend the winter comfortably without losing weight and laying eggs daily.

A properly built chicken coop can significantly increase the egg production of birds.
Options for warm chicken coops for the winter
The standard chicken coop is a utility room, next to which there is a place for walking birds.
The winter chicken coop is built on a foundation, on which a thick wooden floor is laid, and the walking area is covered with a roof
Given the number of individuals, the following types of chicken coops are used:
-
From 10 to 15 individuals - a mini-chicken coop up to 10 m 2 with a walking area of 4 m 2. Such an area will provide free movement of both adult birds and young animals in case of breeding chicks. It must also be equipped with a window and a ventilation grill.

Winter mini chicken coop The mini-chicken coop is equipped with a covered walk and a box for collecting eggs
-
From 20 to 30 individuals - a full-fledged room up to 20 m 2, 1.8 m high and a walking area of 6 m 2. These dimensions allow you to build a perch in several tiers and install up to 7 nests. If the area of the personal plot is sufficient, then it is better to build a chicken coop with a vestibule: it will provide the required temperature in the main room in winter.

Chicken coop with a vestibule It is advisable to build a winter chicken coop with a vestibule to protect chickens from drafts
-
More than 50 individuals - a room of about 40 2, up to 2 meters high and a walking area of 12 m 2. Such a chicken coop requires additional thermal insulation, ventilation and installation of heating equipment. It is better to place the perches opposite the windows, and the nests (up to 10 pieces) - in the back of the room.

Winter big chicken coop Large chicken coops are erected on high piles, and the walking area is made under the premises
If the area of the personal plot allows, then the chicken coop is equipped in a completely closed room, inside which there will be a walking area, which will prevent overcooling of the bird and ensure its free movement even at low air temperatures in winter.

The winter house can be completely enclosed by providing the chickens with a warm place to walk
When a chicken coop is required with minimal costs, there is an option for building like a dugout. The height of the walls in it does not exceed 0.5 m, and for insulation they are covered with earth. The roof is also insulated. The southern wall is equipped with multi-layer glass panes. And the fallen snow additionally provides thermal insulation.
In winter, in the chicken coop, it is mandatory to regulate the humidity level, which is ensured by installing ventilation.
Video: fully autonomous warm poultry house on piles (with bottom range)
Material selection
The best option for a warm house is wood. In frame construction, the timber is sheathed with dense rows of OSB sheets, hiding the cracks. When construction is carried out using bricks or cinder blocks, good thermal insulation is necessary, since the brick has a high level of thermal conductivity. What material will be used for the chicken coop depends on preferences and financial capabilities.
An insufficiently insulated roof will become a source of heat loss and high humidity in the room, and the cost of heating the chicken coop will increase. For insulation, it is recommended to sheathe it from the inside with foam or felt. A capital roof is made over the area for winter walking - an extension of the roof of the chicken coop itself.

For the winter period, a hen house with a gable roof is preferable so that snow does not accumulate on it
Wood is often used in the construction of the walls of the poultry house because of its environmental friendliness and low thermal conductivity. Even if the frame is being erected metal, then it is better to use plank cladding.

The metal frame is always sheathed with wood to maintain the desired temperature balance indoors in winter
To facilitate constant cleaning inside the chicken coop, its floor is made by pouring concrete. The service life of such a floor is long, but it needs good thermal insulation so that the birds do not freeze. In winter, the wooden floor is additionally treated with special moisture-resistant compounds, and the top is covered with a thick layer of straw and hay litter.

The floor in the hen house can be made with concrete, but be sure to cover it with a thick layer of straw
To give the entire structure of the chicken coop rigidity and strength, in order to avoid distortions of the walls and the appearance of gaps, as well as to raise the walls themselves above the ground, a light strip foundation is made. It also keeps you warm during the winter.
The following materials are used to build a capital wall:
-
Shell rock is a porous limestone of natural origin with a low level of thermal conductivity. Most suitable for the construction of a chicken coop for 25-30 individuals. The standard block size is 18x18x38 cm. It is laid according to the technology of laying a foam block or cinder block.

Shell rock Shell rock walls are built quickly and perfectly retain heat
-
Foam concrete is a common material that is harmless to health. There are no restrictions on the size of the building. Optimal for the construction of walls is D400 foam concrete, the block size of which is 20x30x60 centimeters. The thickness of the masonry is determined by the local climate.

Foam concrete You can build a chicken coop from foam concrete very quickly, observing the masonry technology
-
Brick is a building material with a low level of thermal conductivity and is durable. It is optimal to build large chicken coops from bricks. The brick can be either solid or hollow.

Brick chicken coop The brick walls of the hen house can be sheathed from the inside with a board
Taking into account the service life of the chicken coop, the material from which the walls will be erected is determined. For a beginner poultry farmer, wood and plywood are the best choices. Over time, you can dismantle the structure or, conversely, add additional space. And if you are breeding a large number of poultry and build a chicken coop for a long time, then it is better to choose brick or foam concrete. Thermal insulation is also required - foam sheets, rolls of mineral wool or other modern material.
For the purpose of thermal insulation of the structure, natural insulation materials are also used: the walls are insulated with straw and hay, and the floor and ceiling are insulated with coarse expanded clay. There is only one negative side of the use of such heaters in comparison with modern materials - these heaters have high thermal conductivity, which requires them to be used in large quantities. And this is difficult when building a poultry house.
Detailed characteristics of modern building materials for thermal insulation:
-
Polyfoam is a material with good insulating properties. Has a honeycomb structure. Thermal conductivity is only 0.047 W / mK, which is lower than that of foam concrete, brick and wool. Sold in sheets of various sizes. Easy to attach. The main disadvantage is that it is prone to spoilage by rodents. To solve this problem, the foam is sheathed with sheets of plywood or OSB.

Styrofoam sheets Styrofoam has good thermal insulation characteristics and is often used as a wall insulation
-
Mineral wool - has heat and sound insulation properties. Has a fibrous structure. Thermal conductivity is slightly higher than that of polystyrene, but it is not susceptible to damage by rodents. Recommended to be used in conjunction with waterproof and windproof films.

Mineral wool Mineral wool is resistant to rodent damage, but absorbs moisture from the environment
-
Extruded polystyrene foam is a material with a closed cellular structure, made by foaming polystyrene. It has a long service life and excellent insulating characteristics. Its properties are superior to almost all existing heat-insulating materials.

Expanded polystyrene Expanded polystyrene has a long service life, but with prolonged use indoors, it is harmful to health through the respiratory system
-
Stizol is a foamed polyethylene. It has high thermal and sound insulation properties, is not affected by moisture, durable. Produced on the basis of metallized film, foil or non-woven fabric. The optimum application thickness is about 1 mm.

Styzol Styzol is used in construction as a sheet insulation
When choosing a heater, it is important to consider what area it will cover. If the building is small, use styzol or any polyethylene foam material. For structures that can accommodate 50 or more birds, it is advisable to combine materials: if the wall is insulated with expanded polystyrene, then the floors are insulated with expanded clay. And when minimum construction costs are required, polystyrene and mineral wool are used.
Video: do-it-yourself warm chicken coop in 4 days
Preparatory work
The width of the foundation to be laid should slightly exceed the thickness of the future wall. In this case, the wall is installed exactly in the center of the foundation. A concrete foundation will additionally provide thermal insulation and provide protection against:
- the effects of moisture on structural elements made of wood, increasing the service life of the building;
- access to the chicken coop of predators and rodents, for which it is easy to dig a hole under the ground.
There are other ways to protect against penetration of uninvited predators:
- make a foundation up to 30 cm high;
- put the structure on concrete pillars, raising the floor to a height of 25 cm from the ground;
- perform wall cladding with metal sheets, burying one edge of the sheet to a depth of 35 cm.

On a schematic image of a chicken coop, you need to indicate the location of all parts of the building and internal equipment
During construction, it is imperative to complete several windows on the south side of the chicken coop for natural light. But they shouldn't be a source of draft.
For the winter inside the hen house, it is recommended to make a vestibule between the front door and the main bird room, providing additional protection from low temperatures and drafts.

The size of the chicken coop depends on the number of birds
For independent construction of a warm chicken coop, you will need the following:
- poultry house project with precise drawings and dimensions;
- building materials for the installation of formwork and foundation pouring;
- locksmith and construction tools;
- building materials for the construction of a house for birds.
Video: tricks in the construction and arrangement of a winter chicken coop
Self-made chicken coop: step by step instructions
At the very beginning of construction, marking is performed for the foundation (base) of the chicken coop using wooden pegs and a rope stretched between them. The foundation of the fencing of the walking area is carried out at the same time as the foundation of the chicken coop.
Base
Work order:
-
A trench is being dug under the foundation. The structure of the chicken coop does not have a large mass, therefore, the foundation is made strip or columnar to a depth of no more than 45 cm. However, the use of a columnar foundation will lead to high costs for floor insulation.

Foundation trench The foundation for the chicken coop can be tape and columnar
- At the bottom of the trench, first crushed stone is poured and compacted, and then sand, creating a so-called pillow (the thickness of the common layer should not exceed 5-10 cm).
-
Formwork is being mounted for pouring the foundation. The height of the formwork is equal to the height of the foundation. The upper edge of the formwork serves to level the poured concrete.

Formwork for the foundation It is necessary to make the foundation according to all the rules so that it does not warp and crack after drying
- Reinforcement is laid inside the formwork and tied with steel wire at the corners.
- Concrete is poured into the formwork, smoothed over the surface until the formation of cement laitance and covered with a film. For a week, it must be watered daily with water to prevent cracks.
After 20-28 days, when the foundation has gained the required strength, you can start building the chicken coop structure. A layer of waterproofing is laid on top of the foundation to protect the structure from moisture.
Floor
From the place above which the floor of the chicken coop will be located, the top layer of soil is removed, then sand is poured into and tamped there, and a layer of expanded clay is laid as a heater. A mesh is rolled out on top of the expanded clay and a screed is made using cement mortar. The thickness of the floor screed must be at least 2 cm. For several days, while the screed hardens, it must be watered. It is recommended to perform the screed with a slope of several degrees, which will provide free drainage of water when cleaning inside the chicken coop.

For a comfortable stay of chickens, the floors in the hen house are covered with boards
The arrangement of the walking area is carried out in different ways: either it is poured with concrete, or sheathed with a board.
Another option for arranging a walking area is to preserve natural soil, which will allow the bird to look for insects, seeds and stones in the future.

You need to think in advance what floor will be in the place for walking birds
Frame
The sequence of work is as follows:
- Before erecting the frame, it is necessary to decide what kind of structure the roof will be. Often, to reduce labor costs, the roof is made shed. Then one of the walls is erected with a greater height, and the upper crown of the side walls is made in accordance with the angle of inclination of the roof. After determining the height of the chicken coop and the slope of the roof, a frame is erected. Its construction begins with laying a beam (with a cross section of at least 10x15 cm) on the surface of the foundation. The bar is attached to the foundation with anchor bolts, and the bars are connected to each other using corners or metal plates.
- In the corners, a beam is vertically installed and attached to the lower belt using the same corners or plates.
-
The upper horizontal belt is attached to the vertical beams in the same way. On the outside of the frame, a crate is made of wooden planks or small slats, on which the thermal insulation material will be laid. The lathing is fastened with horizontal stripes on corners or nails.

Erection of a chicken coop frame Frame construction is the simplest: such a chicken coop is easy to build alone
- With the help of the same bar, openings are formed for windows, entrance doors and miniature doors for the exit of the bird.
- Roof rafters are laid on the upper horizontal belt made of timber. The pitch of the rafters is equal to the size of the roll or sheet of insulation material.
Roof
A crate of unedged boards or sheets of plywood is nailed to the rafters. A special vapor barrier film or polyethylene is laid and attached to the crate. The film is laid in overlapping layers, and the seams are sealed with adhesive tape. A heat-insulating material (mineral wool plate) is laid on it, and on top it is covered with waterproofing.

Most often, the roof of the chicken coop is made single-pitched due to the simplicity of its construction.
Further, through the waterproofing, transverse strips are nailed to the rafters with the necessary step, which depends on the type and size of the roofing material. If a soft roof is used, then plywood or OSB sheets must be laid on top of the planks, on which roofing material is spread. If slate is used, then wood sheathing is not needed.
After the completion of the roofing work, the frame is insulated with the inner wall cladding.
Insulation of walls and floors
The work is carried out in the following sequence:
-
On the crate installed on the outside of the frame from the inside of the building, a heat-insulating material is laid - mineral wool or expanded polystyrene sheets (the gaps between the sheets are filled with polyurethane foam). On top of the mineral wool, a film with vapor barrier and windproof properties is laid. It is attached with a construction stapler to the timber.

Insulation on the walls of the chicken coop In the winter chicken coop, the walls, floor and ceiling must be insulated
- The horizontal crate is placed again, but already on the inside of the frame, so that the insulation layer is inside the wall. The lathing is fixed in increments of 4-5 cm less than the roll width.
- Edged board, plywood or OSB are nailed to the crate on both sides of the room, bypassing door and window openings.
- The ceiling is cladding: plywood sheets are attached to the rafters from the inside of the structure.
Also, polyurethane foam is sometimes used as a thermal insulation material. But for its installation, specialists with equipment are involved, with the help of which this insulation is applied to the surface of the walls. The use of polyurethane foam is expensive, but the application process is not labor intensive and provides maximum protection from the cold.

It is possible to sheathe a winter chicken coop from the outside with an edged board or other facade material, except for plastic, since it does not tolerate severe frosts
A concrete floor, even with a cushion made of expanded clay, does not ensure the preservation of heat inside the chicken coop in winter. For this, the floors are additionally insulated.
You can lay an infrared film on the floor and screed it with cement mortar. Such a heating system works both periodically and regularly, providing the desired temperature in the chicken coop. Or you can use a less expensive option: cover the floor with wooden boards. These shields are boards that fit tightly to each other, attached to the logs. In winter, plant litter up to 15 cm thick is laid on them to increase floor insulation, and in summer they are removed from the chicken coop, cleaned and disinfected.

The arrangement of the chicken coop should be such that the birds are comfortable both in winter and in summer.
Sometimes electric heating devices are placed on the walls inside the chicken coop, and the installation sites are protected with heat-resistant material. But more often infrared lamps are suspended from the ceiling.
Lighting
There must be windows in the construction of the house. Despite the fact that they are a source of heat loss, they cannot be abandoned, since the intake of sunlight is required to maintain the health of birds. Therefore, a triple glass unit is built into the windows, and a mesh is installed on the glass for the safety of birds.
In winter, it is imperative to ensure that daylight hours are at least 14 hours. This is done using artificial lighting. And when installing an automatic on / off system, you get rid of unnecessary care hassle, although you will spend additional funds on it.

Lighting devices can act as heating, but must be safe for birds
First, individual individuals will settle for the night directly on the floor. It is not dangerous if the floor is insulated and covered with shavings or hay. Over time, the birds will get used to it and with the onset of darkness they will begin to move to the roost. But you can do it differently: wake the birds early in the morning, turning on the lighting for this, and when the sun goes down, let them fall asleep.
Ventilation
In a warm chicken coop, a ventilation device is required so that excess moisture is eroded. To do this, a piece of plastic pipeline is installed in the ceiling, which rises 1 meter above the roof. So ventilation will be carried out naturally due to the existing pressure drop. If the air flow is weak, then additionally at the floor level (far from the nests), another channel is made, which is necessarily closed with a grill. A damper installed on it will allow you to adjust the ventilation speed. You can also install an electric fan in the wall.
The ideal humidity level is 65%. A decrease or increase in this indicator negatively affects the activity and health of the bird. To increase the humidity, it is enough to install a container with water, and to decrease it, install a hood and hang an infrared lamp: it dries surfaces well.

The chicken coop must be equipped with ventilation so that the birds do not catch colds from increased humidity
Making roosts
The perch is made from a bar with a section of approximately 4x4 cm or 6x4 cm.
If several perches are installed, then the distance between adjacent slats should be about 30 cm in width and 20 cm in height. A small ladder is attached to the lower perch for convenience.

The perches are fixed either between two walls, or in the form of a ladder installed across the room
To install perches, you must:
- Determine the location and height of the perch installation - attach one or several planks near the window at a height of 0.5-0.7 m from the floor level.
- Measure the width of the chicken coop and cut off the required amount of timber.
- On opposite walls, nail 0.5 m pieces of board with cut grooves for perches.
- Install perches in the grooves and fix them with self-tapping screws.
Nests for laying eggs are made in the form of a half-open box, assembled from a bar, planks or plywood. And sometimes ready-made plastic boxes are used as nests. If the nests rise to a certain height, then they are mounted on supports.

A ladder is brought to the nests for ease of movement of birds
Video: do-it-yourself warm chicken coop
Tips for arranging a chicken coop in cellars or basements
There are some features of arranging a chicken coop in the basement:
- Use of bedding - sawdust or hay is used. Replacement of litter from sawdust occurs once every 6-7 days, from hay - once every 3-4 days.
- Lighting - an electric lamp with LEDs with a power of more than 5 watts is mounted. The lamp provides the required length of daylight hours: the longer it is, the more chickens will lay eggs.
- Insulation - cotton wool or any rolled insulation with a thickness of at least 5 cm is used. The use of a waterproofing film is mandatory.
- Ventilation - supply and exhaust ducts are installed. Direct ventilation of the premises is carried out periodically.
- Internal arrangement - the nests are made of plywood sheathed timber. One nest is used for several chickens and is approximately 40x40 cm. The roosts are fixed at a height of at least 50 centimeters. It is allowed to connect the perch and nest by placing a board between them.

There are certain rules for arranging a winter chicken coop that must be followed.
Care after winter: how to treat walls
The sanitary treatment of the poultry house is carried out annually with the onset of warm weather. This prevents the spread of infectious diseases among chickens.
During disinfection, the following is carried out:
- Cleaning - all surfaces of walls, ceiling, floor, perches and nests are cleaned of dirt with a hard brush and a broom, and then washed with a solution of soda ash in hot water.
- Surface treatment - special means are used (2% sodium hydroxide solution or 4% xylonaphtha emulsion). When preparing solutions, you should strictly adhere to the recipe and be sure to use personal protective equipment.
After processing, let the chicken coop dry completely for 5-6 hours, thoroughly ventilating the room.

There is always an opportunity to work on decorating the chicken coop
The construction of a chicken coop is a simple task and can be completely solved independently, without the involvement of third-party specialists. You just need to study this instruction well, as well as read the advice of other people involved in breeding poultry.
Recommended:
How To Build A Wooden Porch With Your Own Hands: In Stages, Photos And Videos
Detailed description of the construction of a wooden porch. Materials used, work procedure step by step
How To Make A Bar Stool With Your Own Hands From Wood, Metal And Other Materials + Drawings, Photos And Videos
Bar stools manufacturing options. Required tools, materials used. Step-by-step description of the manufacturing process with a photo
How To Make And How To Paint A Concrete Fence With Your Own Hands - A Step-by-step Guide With Photos And Videos

Advantages and disadvantages of concrete barriers. Instructions and tips on how to make a concrete fence with your own hands
How To Make A Slime At Home With Your Own Hands - Without Sodium Tetraborate And Glue, From Hand Cream, Shaving Foam And Other Ingredients, Recipes With Photos And Videos

Is it possible to make a slime at home. Types of slimes and recipes for their manufacture, depending on the desired properties. Toy care features
Correct Arrangement Of The Chicken Coop Inside With Your Own Hands, Video And Photo
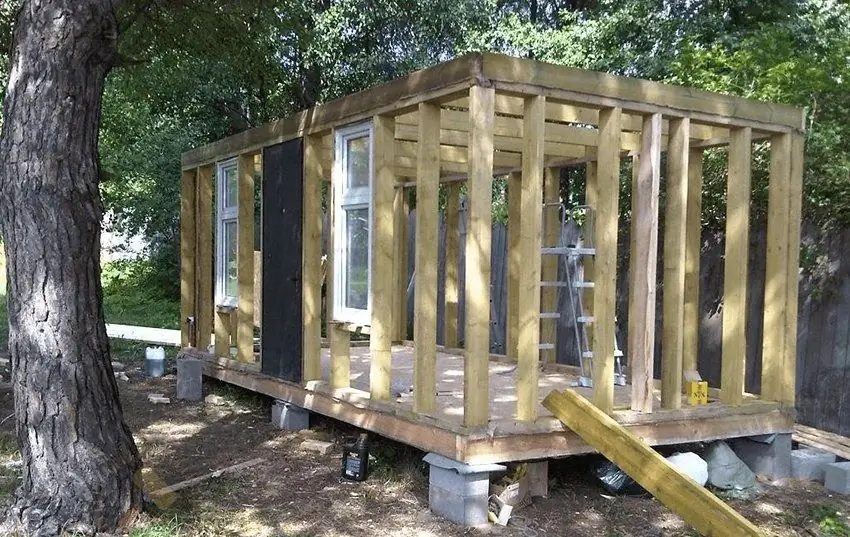
Arrangement of the chicken coop from the inside: practical advice, choice of materials, arrangement of a pen and roost
