Table of contents:
- Author Bailey Albertson albertson@usefultipsdiy.com.
- Public 2023-12-17 12:53.
- Last modified 2025-01-23 12:41.
Do-it-yourself concrete foundation

When starting the construction of any building or structure, the first step is to pay attention to the foundation, support of the future structure. The strength and integrity of the entire structure under construction depends on how efficiently and competently the work on the installation of the formwork for the foundation, the installation of metal reinforcement and the work on pouring concrete will be performed.
In this article, I will not touch upon the issues of calculating the width of the foundation, its height, the number and thickness of reinforcement. To calculate all these parameters, there are special programs in which it is necessary to put all the initial parameters - the number of storeys of the structure, the material of the walls, the depth of freezing, the nature of the soil, etc.
Let us consider in detail the whole process of how to pour the foundation, starting from marking for the future structure, digging a trench, installing formwork and reinforcement, and ending with the very process of pouring concrete with our own hands into the prepared structure.
Any construction starts with a project. Regardless of whether you are building a huge house, a small garage or just a shed, a preliminary plan should be required before starting work.
The designs, of course, may differ. If it is enough to sketch drawings by hand for the garage, then for the construction of a house it is imperative to make a project with clear calculations and drawings of all stages of construction. Having all these documents in hand, you can proceed to the first stage of how to make the foundation.
A step-by-step guide to pouring a foundation
Step 1. We mark, according to the project, the overall dimensions of our future base for the building. For these purposes, it is convenient to use wooden stakes and twine.
All geometrical dimensions must correspond to the design drawings. If the foundation will be filled with a square or rectangular shape, do not forget to measure the linear dimensions from corner to corner - diagonally. The length of the diagonals must be equal, otherwise, there is a chance to get a rhombus instead of a square or rectangle.
Step 2. If you are making a concrete base for a large building and its deepening is provided in the design drawings, then at this stage it is necessary to dig a trench according to the dimensions marked in step 1.
There are two ways here - to dig a trench by hand or to hire an excavator. When carrying out work by hand - the trench will be neat, with clear and even edges, completely ready for pouring concrete. When using an excavator, the work will be done much faster and cheaper, but the edges of the trench will be "torn", suggesting the installation of the formwork in the trench. Therefore, it is necessary to count here. What is more profitable, it is cheaper to pay for the equipment and pay more for auxiliary work on the arrangement of the formwork and the excess amount of concrete, or pay a little more for manual labor. However, sometimes there are conditions when the equipment cannot fit, and it is not difficult to dig a trench for a small structure on your own.
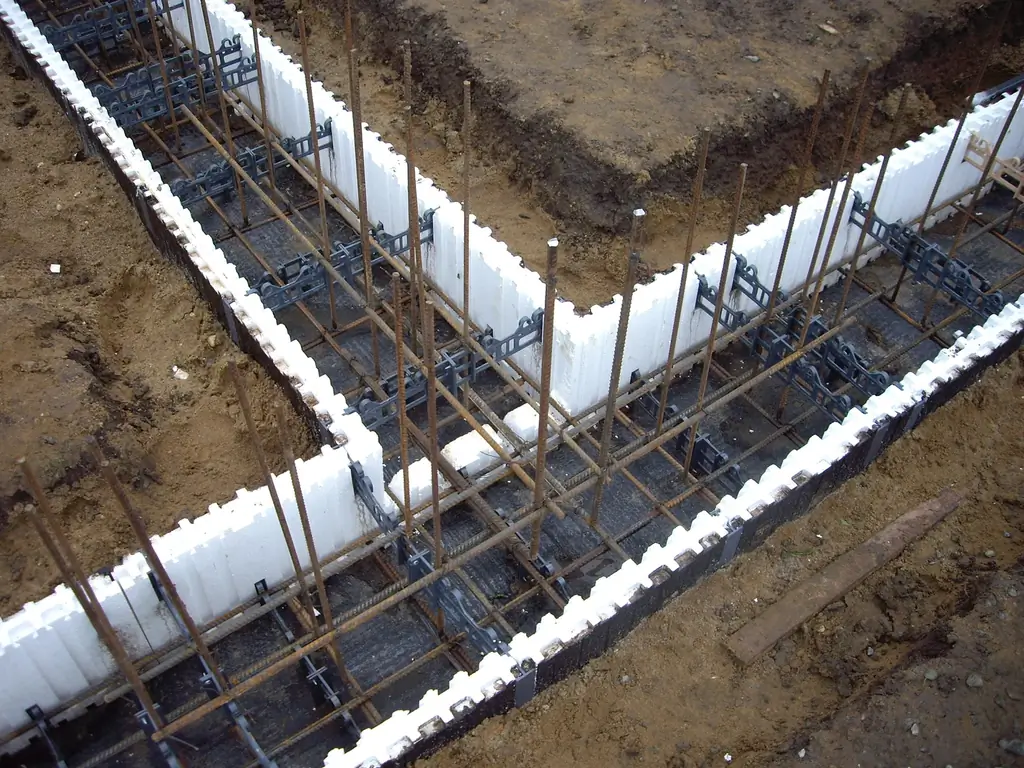
Step 3. At this stage it is necessary to put the formwork for the foundation. If the building is "lightweight" and the base of the building does not sink into the ground, the formwork can be placed according to the markings made in step 1. Formwork for the foundation is shields of the required height, placed vertically and making it possible to keep the liquid concrete in the shape we need until it solidifies when pouring and forming concrete …

If the foundation is buried in the ground, then here the formwork should, as it were, continue the width of the trench in the ground and bring it to the required height above the earth's horizon.
Concrete is known to consist of crushed stone, sand, water and cement. All its constituent components are heavy and, as a result, the mass of the concrete itself is large. To keep the entire poured mass in the desired shape, the formwork must be unfastened.
Wire ties can be used to maintain the desired width at the bottom.

The formwork rests against the existing cast foundation, or a spacer is installed between the walls of the formwork, holes are drilled and wire is passed through them, as in the photo below. Using a lever, we twist the wire and tighten the formwork panels.
To prevent the shields from diverging in the upper part when pouring, we knock them together by putting a jumper from the board as in the photo below.

To maintain the shape of the formwork in the upper part with a non-linear shape of the cast base for the structure, you can apply the technique as in the photo below.

Between the vertical posts supporting the formwork, above the level of the concrete being poured, we install spacers in width equal to the width of the cast foundation. Using a wire, we pull together the support posts.
If necessary, additional stops can be placed on the outside from the rack to the ground. This will add even more strength to our structure.
Step 4. We fasten the reinforcement, which will later be filled with concrete. Reinforcement of the entire structure with metal reinforcement is done for the sole purpose of increasing the strength of the base of the structure. By itself, hardened concrete can withstand very high compressive loads, but it has one drawback - it does not hold the fracture load very well, as a result of which the foundation can crack and break. To eliminate this particular problem, steel ribbed reinforcement is used. It is she who, poured in concrete, allows you to withstand fracture loads and get a monolithic, durable structure.

When casting a foundation of a rectangular or square cross-section, it is advisable to run four longitudinal reinforcement threads, fastened together with a thick wire capable of forming a frame so that the reinforcement threads are at the corners of the cross-section of the foundation, as in the photo below.

Each reinforcement strand is secured with wire cage. We run the frame wire as needed every 1.5-2 meters, depending on the thickness of the metal reinforcement.

For the correct orientation of the reinforcement frame in height, the entire structure is suspended on lintels connecting the formwork panels.

The extension of the length of the reinforcement is made by overlapping two threads and attaching them to each other with a wire.

Similarly, reinforcement is fixed when two threads intersect in the corners of the foundation for the future structure.

After carrying out all operations to unfasten the reinforcement, a rigid frame system of metal unfastened rods should be obtained. When pouring concrete, the system should not change its position or shift.
Step 5. Pouring concrete.
Before pouring the foundation, it is necessary to pour a thin layer of sand on the bottom of the trench so that the concrete does not mix with the ground during the pouring process. There are two ways to fill, depending on the size of the foundation. The first is to order ready-made concrete, which will be delivered by concrete trucks and poured into the prepared structure from the formwork. This method can be rationally applied for a large foundation and a significant amount of concrete.
And, secondly, if the need for concrete is small, it is more rational to knead concrete with your own hands, since they are unlikely to undertake to deliver concrete when ordering one or two cubic meters.
But, whatever concrete you take, it is advisable to do all the work at a time and "vibrate" the liquid mass of concrete to remove air bubbles. Filling the foundation in parts (the first part has already hardened, and the second has not yet been delivered), seam joints are formed, which in the future can lead to cracks and breakdown of the foundation.
After the concrete has hardened, the formwork can be removed. The foundation will gain maximum strength in 20 days, after the final crystallization of the cement. It is advisable not to let the foundation dry up for the first five days and occasionally moisten it with water for better crystallization.
Ultimately, we get a ready-made foundation for our future building.

The next step is already to start the construction of the building itself.
Now you also know how to make a foundation with your own hands. I will gladly answer all your questions in the comments.
Recommended:
How To Make A Reservoir In The Garden With Your Own Hands, Photos, Simple And Affordable Options

Practical recommendations for creating a decorative reservoir in the garden. Necessary materials and tools, stage-by-stage performance of work
Apple Wine Recipe: How To Make This Drink With Your Own Hands (with Video)

A step-by-step recipe for making apple wine at home. Necessary products, tools. Features of making wine, recommendations
How To Make A Garden Fountain With Your Own Hands In The Country: Photo, Video, Step By Step Instructions

A step-by-step description of the process of building and installing a fountain from improvised means in the country with your own hands Required materials and tools
How To Choose And Build A Foundation For A Bath With Your Own Hands - 4x6, 3x4 And Other Sizes, Tips, Instructions, Photos And Videos

How to make a foundation for a bath with your own hands. Types and features of foundations. The choice of materials and technology, installation rules and step-by-step instructions
How To Make A Barn With Your Own Hands From Boards Without A Foundation - Instructions With Photos And Videos

A shed of boards without a foundation: advantages and disadvantages. Selection of materials and tools. Preparation for construction and step-by-step instructions for construction
