Table of contents:
- Author Bailey Albertson [email protected].
- Public 2023-12-17 12:53.
- Last modified 2025-01-23 12:41.
Ways to Install Windows on Mac

Many people who are used to working with Windows find it quite difficult to switch to a new operating system after purchasing a computer from Apple. In addition to non-standard controls and many functional differences, they are also not satisfied with the fact that the number of programs, games and various utilities developed for macOS is significantly less. For this reason, some users install Windows on Mac.
Content
-
1 Is it possible to put Windows on computers from Apple
1.1 How to install Microsoft OS on Mac
-
2 What you need to install Windows on a Mac
-
2.1 Installation using Boot Camp
- 2.1.1 Windows 7 or earlier
- 2.1.2 Video: installing Windows 7 on Mac as a second OS
- 2.1.3 Windows 8
- 2.1.4 Video: How to Install Windows 8 on Mac as a Second OS via BootCamp
- 2.2 Features of installing Windows using a USB flash drive
-
2.3 Virtualizing Windows on Mac
2.3.1 Video: How to Install Windows XP on VirtualBox
- 2.4 Combining Boot Camp and Virtualization
- 2.5 Pros and Cons of Using Boot Camp and Virtualization
-
Is it possible to install Windows on Apple computers
Typically, the question of whether Windows can be installed on a Mac computer appears in the first few days after purchasing it. Few people are interested in this issue before buying. But the habits left over from the days of using Windows, and the tangible shortage of software, force us to think about the possibility of using a more familiar and familiar operating system.
Fortunately, there is such an opportunity. Apple computer owners can install almost any Windows operating system, and without the help of qualified specialists.
How to install Microsoft OS on Mac
Boot Camp is most commonly used to install Windows on Mac devices; virtualization software is used less frequently. But first you need to choose the appropriate version of the OS and upgrade macOS, if required. Many users do not attach much importance to the issue of choice, which creates additional difficulties for themselves both at the stage of installing an additional OS and after it.
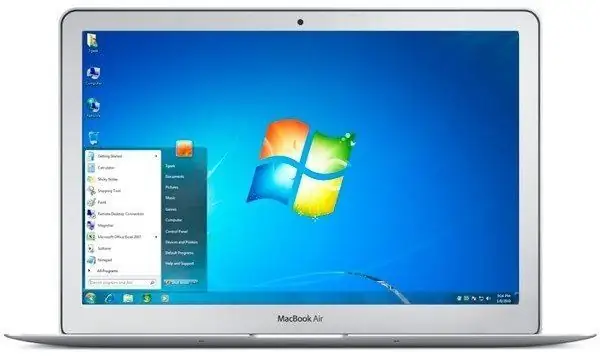
On an Apple computer, the Windows operating system runs as an independent program
For example, Windows 10 cannot be installed on Macs manufactured before 2012. This is due to higher system requirements and other features of the program. If you don't follow this rule, you will simply waste your time. Here's a list of Mac computers that support Windows 10:
- the entire MacBook Pro lineup since mid-2012, including the 13 and 15-inch versions;
- two 12-inch MacBooks sold in early 2015 and 2016;
- All 11-inch and 13-inch MacBook Airs marketed after mid-2012
- Mac Pro released in late 2013
- Mac mini 2012 and 2014, including the Mac mini Server model introduced in late 2012;
- all iMacs from Late 2012 onwards.
Earlier versions of Windows can also be installed on Macs manufactured before 2012, but there are also some limitations. Here is a small list of operating systems supported by Apple devices, indicating the appropriate version of Boot Camp:
- Windows 7 Home Premium, Professional, or Ultimate (Boot Camp 4 or 1)
- Windows Vista Home Basic, Home Premium, Business, or Ultimate Service Pack 1 or later (Boot Camp 3)
- Windows XP Home Edition or Professional with Service Pack 2 or 3 (Boot Camp 3).
Before buying an operating system, make sure it is right for your computer
What you need to install Windows on a Mac
In terms of installation requirements, all Windows OS releases can be divided into three categories:
- Windows 7 and earlier.
- Windows 8.
- Windows 10.
Requirements for the first category:
- licensed installation CD or DVD, flash drive or virtual ISO image with Windows XP, Vista or Windows 7;
- a laptop or PC from Apple that supports the selected OS;
- Internet connection;
- at least 35 GB of free hard disk space in case of initial installation of an additional OS. If you need to update the version of the program, you need about 40 GB;
- at least 2 GB of RAM;
- XP and Vista versions require a working Mac OS X v10.5 Leopard or Mac OS X v10.10 Yosemite to successfully install and work properly. Assemblies released between the releases of these versions are also suitable;
-
any OS from Apple released after the build of Mac OS X v10.5 Yosemite is suitable for installing Windows 7. You will also need an external data storage device (flash drive or CD) with a capacity of more than 16 GB. It is needed for drivers downloaded from the official Apple website. Other versions of Windows do not require a USB stick or disk.

Installing Windows 7 on a MacBook Most modern Apple computers will work with Windows 7, such as the two 12-inch MacBooks that went on sale in 2015-16
Requirements for the second category (Windows 8):
- original image of the required OS version (flash drive, DVD or ISO image);
- Internet connection;
- at least 40 GB of free space;
- one of the Mac computers with the specifications that meet the system requirements of Windows 8;
- installed Mac OS X of a suitable version.
If all requirements are met, Boot Camp will automatically install additional software to adapt Windows 8 to your Mac's technical needs.
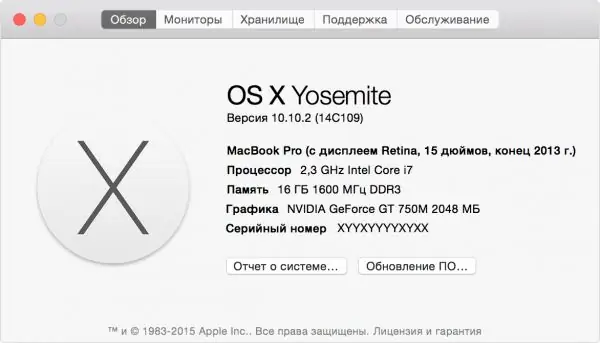
You can find out your macOS version from the About This Mac menu, which is accessible by pressing the Apple logo button on your keyboard
The requirements for the third category are similar, except for one condition: the version of the operating system used must be Mac OS X Yosemite or higher
Installing with Boot Camp
Due to the differences between different Windows operating systems, we will describe the installation instructions for each category separately.
Windows 7 or earlier
To install Windows XP, Vista or Windows 7 on an Apple computer, you must:
- Connect the external storage device and do not remove it until the installation is complete.
-
Create a virtual image of the boot disk. To do this, you can use programs such as Daemon Tools or Nero Burning Rom. The image is required to work with Boot Camp.

Creating a boot disk image You can create a Windows boot disk image using Nero Express
- Start the Boot Camp program. It can be found in the Utilities folder. If you cannot find the folder you are looking for, use the search.
-
The installer will appear, where you need to check the box next to "Create a Windows 7 installation disk". After that we press the "Continue" button.

Boot Camp window In the window that appears, put a checkmark in front of the item "Create a Windows 7 installation disk"
- We insert the disk with the new OS or mount the image into the virtual disk drive and press "Continue" again.
-
After a few seconds, a message will appear indicating that it is possible to download the appropriate software from the official Apple website. We confirm the action. Boot Camp will automatically download the required software. If this does not happen, you need to download the archive with the drivers yourself, choosing the model of the Mac computer and the version of Windows on the official website.

Choosing steps to install Windows 7 Confirming Downloading Latest Windows Support Software From Apple Website
- After downloading additional software, you need to unpack it on an external drive (USB-stick). The system will offer to copy files with replacement, confirm this action.
- Once again, go to Boot Camp and select "Install Windows".
-
The program will offer to divide the memory allocated for the additional OS into disks, after which it will reboot and begin the installation.

Add Disk for Windows on Mac Set the required virtual disk size for Windows
Further actions should be performed based on the prompts of the installer program.
Video: installing Windows 7 on Mac as a second OS
Windows 8
Installing Windows 8 is easier and faster than earlier versions of operating systems:
- Start your Mac in standard mode.
- Make sure Mac OS X and Boot Camp are not up to date and match the OS you are installing.
-
Install a disk or flash drive with the original OS.

Installing Windows 8 on Mac Launch Boot Camp and follow its instructions at each step of the installation
- Start Boot Camp.
- Follow the prompts in the installer, and when the process is complete, restart your Mac.
Boot Camp will automatically install the necessary software and drivers. No external USB storage required. This also applies to the latest release from Microsoft - Windows 10. You just need to put a bootable disk or USB flash drive, run Boot Camp Assistant, share disk space and follow the instructions.
Video: How to Install Windows 8 on Mac as a Second OS via BootCamp
Features of installing Windows using a USB flash drive
In fact, the process of installing an additional OS using a USB flash drive is the same as in the case of a DVD, the only difference is that you need to prepare a USB drive in advance so that it turns into a bootable one. If you just write the image to a USB drive, nothing will work, you need an additional program called UltraISO or the like.
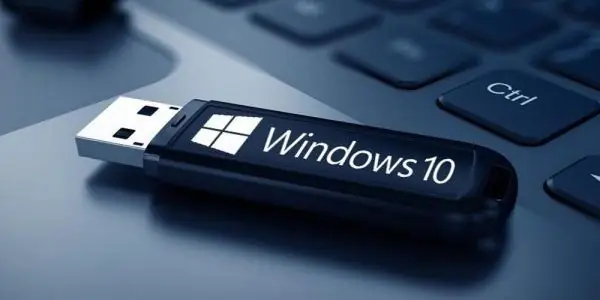
In order to install Windows from a USB flash drive, you need to make it bootable
This program is shareware - there is a test period, which is quite enough to install Windows from a USB flash drive. Here's a quick guide to preparing a USB drive for installing an OS from Microsoft:
- Download the UltraISO program from the official site and install it.
- Launch, click on the drop-down menu in the upper left corner and select the folder with the virtual image of Windows OS.
-
The program will automatically create a bootable USB drive.

Creating a bootable USB drive To create a bootable USB flash drive in UltraISO, you must select a disk image and write it to a USB drive
Using the instructions above, you can install Windows as an additional and, importantly, a stand-alone program. Each time you start your computer, you will have a choice of which installed operating system to use.
Windows virtualization on Mac
In addition to installing via Boot Camp, there is another method for using Windows on Apple computers - virtualization. It differs in that the operating system from Microsoft is installed and used as an application running directly in macOS. In this case, it looks more like a regular program that opens in a small window than a full-fledged operating system.
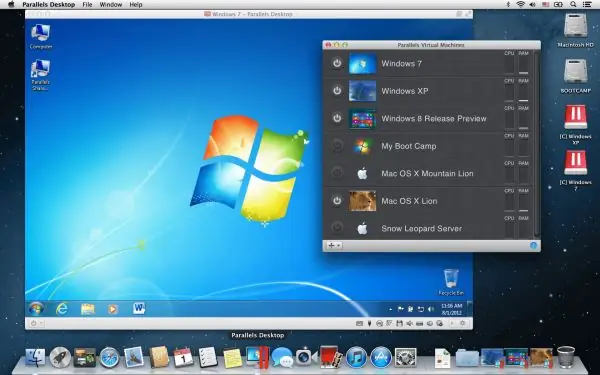
When installed in virtualization mode, Windows looks more like a regular application
At the moment, the most popular virtualization programs are:
- Oracle VM VirtualBox distributed free of charge;
- Parallels Desktop, which costs 3,990 rubles;
- VMware Fusion with a price tag of 5,153 rubles.
The difference in cost is dictated solely by the pricing policy of the developer companies, since all programs work equally well. The only difference between the free virtualization program and its paid counterparts is that it cannot be used with Boot Camp.
The installation of software for virtualization is almost identical, therefore, as an example, consider the installation of only one of them - Parallels Desktop:
- Preparing a virtual disk with Windows OS. You can download it from the official Microsoft website, make a virtual image from a licensed disk or a bootable USB flash drive.
- Install Parallels Desktop.
- Create a new virtual machine (keyboard shortcut Command + N).
- Launch the program and click the Install Windows or another OS from a DVD or image file button.
-
The program will install, after which the computer will restart.

Installing a Windows Virtual Machine in Parallels Desktop To install a virtual machine with Windows, select Install Windows or another OS from a DVD or image file
When you start the program, a window with Windows will open in front of you, which can be maximized to full-screen mode.
Video: How to Install Windows XP on VirtualBox
Combined use of Boot Camp and virtualization
Some users have gone even further by developing a mechanism to combine the capabilities of Boot Camp and virtualization. Thus, they solved the problem of excessive consumption of computer resources with two operating systems running simultaneously.
To achieve the correct operation of the above circuit, you need to do the following:
- Install Windows on your computer using Boot Camp.
- Install one of the virtualization software (except Oracle VM VirtualBox).
- When creating a new virtual machine, check the box next to "Use Windows via Boot Camp".
Pros and cons of using Boot Camp and virtualization
Boot Camp was created by Apple developers to provide users with the ability to change operating systems at will. Moreover, databases in the form of drivers and additional software have been created to simplify the process of adapting Windows to Apple's computing equipment. This is why Boot Camp is so popular among MacBook owners of various modifications.
Benefits of using Boot Camp:
- users accustomed to working with Windows can use both systems;
- using Boot Camp, it is easy to fill the shortage of programs observed in the macOS operating system;
-
installing two operating systems in parallel allows you to use the technical capabilities of the Mac at 100%.

Choosing an operating system when you start up your Mac If your Mac is running a version of Windows, you can choose which operating system to run on at startup
As for the disadvantages, it is only one: not all versions of Windows are supported by Mac computers.
If we talk about the advantages of virtualizing Windows on Mac, then we can highlight the following points:
- the ability to use Windows without leaving macOS;
- fast work with documents and programs.
Disadvantages of virtualization:
- two operating systems running at the same time consume much more system resources;
- some programs in Windows may not work correctly. The situation is similar with the screen resolution settings.
Utilities such as Boot Camp and virtualization programs enable users to run familiar Windows operating systems while using high-performance, high-quality Mac computers. This is a great example of how two once warring giant IT corporations are moving towards each other for the interests of their clients.
Recommended:
How To Make Mayonnaise At Home: Recipes With Eggs, Milk And Without, In 5 Minutes And Others, Video

Homemade mayonnaise recipes. Classic mayonnaise, no eggs, milk-based, lean and vegetarian. Ingredients, cooking secrets
Mastitis In A Cat (including Nulliparous, Lactating And Others): How To Treat At Home, What To Do With Mastopathy (treatment Methods)

Why does mastitis develop in cats? How pathology manifests itself. When a doctor is urgently needed. How to treat at home. Caring for a sick pet. Prevention
Cystitis In Cats And Cats: Symptoms (blood In Urine And Others) And Treatment At Home, Medications (pills And Others), Veterinarian Advice

What causes cystitis, its symptoms, course forms, diagnosis, treatment. Caring for a sick cat, prevention of cystitis
How To Get Rid Of Ants In An Apartment (domestic Redheads And Others): Recipes With Boric Acid And Others

What to do if ants appear in the apartment and why such a neighborhood is dangerous. Folk methods and chemicals to help get rid of insects quickly
How To Install Windows 7, 10 On Mac: Methods With BootCamp, From A Flash Drive And Others
Install Windows on Mac using Boot Camp and a virtual machine (Parallels Desktop, VMware Fusion, Oracle VM VirtualBox). Pros and cons of each method
