Table of contents:
- Author Bailey Albertson [email protected].
- Public 2023-12-17 12:53.
- Last modified 2025-06-01 07:32.
Do-it-yourself door installation

There are doors in every residential and utility building. Their number depends on the layout and size of the space - modern apartments have from 5 to 15 doorways. Considering that the services of an installation wizard are not cheap, the ability to independently mount the door block becomes very profitable. Moreover, the editing algorithm is not complicated, and special tools are not required for this. Having mastered the elementary rules and order of door assembly, everyone will be able to cope with the task at hand.
Content
- 1 Necessary tools for door installation and fittings installation
-
2 How to prepare a doorway for door installation
2.1 Video: how to align a doorway
-
3 The process of installing the door frame and installation of hinges
3.1 Video: installing the door frame
-
4 Fitting installation
-
4.1 Installing the door lock
4.1.1 Video: inserting the lock in the door
-
4.2 Fitting the peephole
4.2.1 Video: self-installation of the door peephole
-
-
5 Finishing
- 5.1 Video: how to align the slopes of the front door
- 5.2 Installation of platbands
-
6 Features of installing various types of doors
-
6.1 Installing compartment doors
6.1.1 Video: step-by-step instructions for installing compartment doors
- 6.2 Installation of sliding doors
-
6.3 Fitting a double-leaf door
6.3.1 Video: Installing a double swing door
-
6.4 Installing the hanging door
6.4.1 Video: design and installation of a suspended sliding door
-
Necessary tools for door installation and fittings installation
The speed and quality of door block installation depends not only on the skills of the installer, but also on the right tool. Imagine not having a drill of the right diameter at hand at the right time. What does an ordinary, non-professional collector do? He drills the hole with what is available. As a result, after six months, the door safely begins to creak, rattle when closed and, in the end, falls apart. Now the work has increased - you will have to disassemble the entire structure and correct errors. Therefore, it is recommended that only the recommended size is used. The diameter of screws, anchors and drills must correspond to the dimensions given in the instructions.
You need to prepare the following set of tools:
- electric drill;
-
a hacksaw for wood (fine tooth, small divorce, preferably with a triangular sharpening);

Furniture hacksaw Three-sided sharpening of teeth allows for fine cuts
- a screwdriver or a set of drill bits;
- puncher;
-
drill bits for concrete (6 mm and 4 mm in diameter);

Concrete drill for rotary hammer Pobeditovaya soldering at the end of the drill allows you to drill solid concrete walls
- a set of drills for wood (4 mm and 3 mm in diameter);
- chisels (5 to 20 mm wide);
- marker or pencil (ballpoint pen);
- measuring instruments such as a tape measure, hydraulic level or laser level;
-
miter box.

Carpentry miter box Using a miter box, you can cut the workpiece at the desired angles
As a rule, all necessary fasteners are included in the factory set of doors. But if this is not the case, you should stock up on:
-
wood screws (with a large thread pitch, optimal diameter 2.5 mm);

Wood screw Wide thread facilitates firm fixation of parts to each other
- dowel-nails (diameter from 6 to 10 mm);
-
polyurethane foam (preferably with a low shrinkage coefficient and a short solidification period).

Polyurethane foam The amount of polyurethane foam in the can is measured in liters
If an electric manual router is in the arsenal of the master, this will greatly speed up the process of installing the doors. With its use, inserting the lock and hinges is performed more efficiently and quickly.

Powerful router with precise settings speeds up the process of cutting the lock several times
How to prepare a doorway for door installation
The following requirements are imposed on the opening in the wall intended for door installation:
-
The linear dimensions (height, width and depth) exceed the outer dimensions of the door unit by no more than 3-4 cm.

Doorway dimensions The width of the door must match the depth of the doorway
- The inner surface of the opening is a flat plane. This condition is necessary in order for the fastening of the door frame to be reliable and durable.
- The opening configuration is a rectangle with vertical parallel side lines.
If there are deviations on one of the points, they must be eliminated. For this:
- the space around the doorway is cleared;
- measurements of height, width and depth are made;
- the amount of "corrective" work is determined.
The most reliable, but not the fastest, way to adjust the opening to the required parameters is plastering with cement-sand mortar. It allows you to completely eliminate all inconsistencies and give the opening the given outlines. To complete the task you need:
-
container for mixing the solution (optimal size from 20 liters);

Construction bucket The mortar is mixed in a construction bucket made of durable and chemically resistant plastic
-
ready-made dry sand-concrete mixture (cement grade from 300 M, fine sand);

Sand-concrete dry mix Dry mix is sold in bags weighing from 25 kg
- two or four edged boards (from 25 mm thick);
- crutches-fixers (4 or 8 pcs.) or dowel nails;
- a hammer;
- Master OK;
- spatulas;
-
hydraulic level.

Construction trowel Filling the formwork with mortar is carried out using a trowel
The order of work is as follows.
-
Mix the solution. Water is first poured into the bucket, then, stirring, add the dry cement mixture. The consistency of very thick sour cream is considered a worker. The homogeneity of the solution is achieved with an electric mixer.

Mixing the solution with a mixer The cement slurry is mixed at low speed of the mixer
- Formwork is mounted from boards. To do this, they are installed around the opening in the same plane with the wall and fixed with crutches or dowels. The edge of the board using a level is set vertically and the line of the future doorway.
-
The resulting cavity is filled with cement mortar. Work is carried out from the bottom up, the cement is gradually poured in and leveled with a spatula. If the cavity is too large (more than 15 cm), it is recommended to reinforce the opening with reinforcement - a metal mesh with a cell of 50 mm or more. A strip of such a mesh is attached with one side to the existing opening in such a way that it is located in the middle of the cavity to be filled. If it is necessary to reduce the opening by more than 20 cm, brickwork is performed.

Brickwork that reduces the opening Narrowing the opening with brickwork is used for entrance doors
- After setting and hardening of the concrete composition (after 24 hours), the formwork is disassembled. The cast surface, if necessary, is putty and covered with paint.
In cases where the doorway is small, use a hammer drill or a powerful wall chaser. To do this, the contours of a new opening are drawn on the wall and the plaster and masonry are gradually chipped off until they reach a given line.

In addition to the punch, you can increase the doorway using a wall chaser
Video: how to align a doorway
The process of installing the door frame and installation of hinges
When the doorway is ready, assembly and installation of the door begins. For this you need:
- assemble the door block, namely, mount the box, install the hinges and hang the canvas;
- insert and fix the door in the opening;
- install the rest of the hardware - door handles, locks, stops, door closers, seals, etc.;
- fix the slopes and platbands.
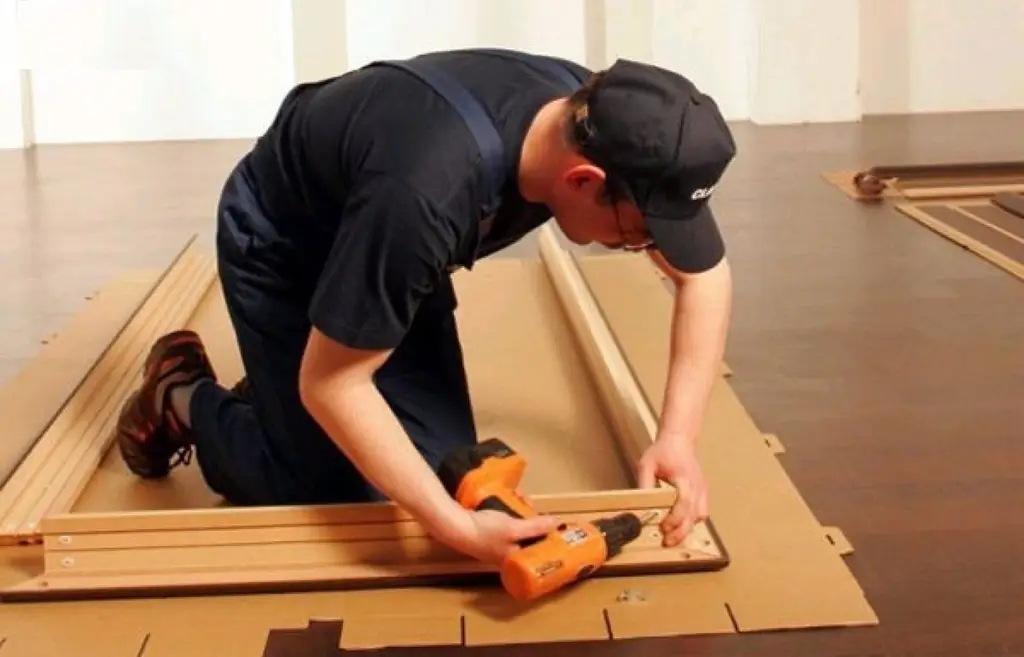
The process begins with the assembly of the door frame. Since the developers use different methods of connecting parts into a single box, you must carefully read the instructions. The frame is attached:
- wedges;
- self-tapping screws;
- grooves;
- metal corners, etc.
The ultimate challenge is for the assembled structure to be a U-shaped support box.

A smaller hole must be drilled before tightening the assembly with a screw.
The most common fixing option is screwing. The assembly is simple, but requires care. The order of work is as follows:
-
The height of the doorway is measured. To leave a technological gap on top, 3-4 cm are subtracted from this value. The size is transferred to the side of the frame. The cut is made at an angle of 45 ° or 90 ° (depending on the design of the box). Sometimes the connection is made by hammering in a wooden or plastic strip.

Layout of door gaps During assembly of the door block, it is necessary to leave technological gaps
- The same operation is performed with the other sidewall. If the opening is even, there should be no differences in height.
-
A crossbar is mounted, the length of which is equal to the width of the doorway. To do this, connect the racks in a U-shaped structure and fix them with screws wrapped from the outer end. In this case, it is necessary to precisely align the edges of the blanks, all the grooves must match.

Door frame parts Precision fixing of parts is a prerequisite when assembling the door frame
- To install self-tapping screws, holes of a smaller diameter are pre-drilled. You cannot screw in the screw without preparation, since dry wood cracks and chips form on it.
- During assembly, the frame is placed on a stable support - on a table or floor. Displacement of the structure or gaps between parts must not be allowed.
When the frame is fully assembled, the hinges are cut. For this you need:
-
Make a markup. The hinges are installed at the same distance from the edge of the door leaf (20-25 cm). If overhead elements are mounted, there is no need for a deepening.

Overhead hinges To install overhead hinges, you do not need to cut grooves on the frame and canvas
-
The points of the location of the screws are punctured with an awl. The loop is applied to the frame (for the most part) and marks are made for drilling. If the hinges are cut-in, the contour of the adjacent wing is outlined on the box and a recess is made for the thickness of the hinge (2-2.5 mm).

A worker marks the loop Overhead hinges are installed 20-25 cm from the edge of the sash
-
The countersunk groove for the hinges is selected with a chisel or a router. With manual sampling, first, the perimeter is knocked to a depth of 2 mm. Then the inner part is gradually cut out. In the process, it is important to determine the direction of the wood grain. The passage of the chisel against it is difficult and fraught with chips. Chips should be removed in the direction of lowering the fibers.

The order of insertion of door hinges It is more convenient to mark with an awl, since there is a recess for the screw on the surface of the door
- The same operation is repeated for the door leaf. The overhead hinges are fixed without holes. For mortise, you need to make a recess along the contour of the part and a depth of 2 mm.
-
When the grooves are ready, holes are drilled in them and the hinges are fixed.

The worker drives the screw into the loop The hinge is secured with four screws
-
After that, the door block is installed in the opening. Armed with a level and wooden (or plastic) wedges, the frame together with the canvas (already on the hinges) is brought into the wall opening. The installer's task is to fix the door in a vertical position and at the same distance from the wall planes or flush with them.

Worker aligns the door The position of the vertical door posts must be strictly vertical
- Wedges are inserted into the bottom of the door and on the sides. To strengthen the position, they are lightly knocked out with a hammer or mallet. Next, the frame is fixed to the wall with anchors, dowels and polyurethane foam.

Following the alignment, the door is fixed with anchor nails and polyurethane foam
If anchor anchors are provided in the design and there are technological holes in the box, through them the landing recesses are drilled and the fasteners are hammered or wrapped. As a rule, at least three anchors are installed on the side posts and two anchors on a horizontal bar. This is mainly practiced on heavy entrance or security interior doors. For light interroom structures, a foam landing is often enough.
Video: installing a door frame
Installation of fittings
In addition to hinges, hardware includes a door lock and a handle.
Installing a door lock
The installation procedure depends on the design. There are locks:
- hinged;
- waybills;
- mortise.
Suspended models in residential premises are rarely used, more often for decorative purposes. If you need to install it:
-
Use a drill with a drill and make notches along the holes in the arms.

Padlock shackles Padlock arms cut into door leaf and frame
- Screws or bolts attach the bows to the door leaf and frame.
- Hanging up the lock.
Installing a patch lock is also easy. Due to the fact that there are many different models of overhead locks, the first and main source of information on installation should be considered the instructions from the manufacturer. In most cases, installation requires:
- Drill a through hole through the door leaf with a diameter of 12 mm.
- Install the lock case on the door leaf by threading the lock outward (2 or 3 self-tapping screws in the frontal plane and 2 at the end of the door leaf).
-
Mount the structure cover from the inside and install the protective strip on the outside of the cylinder.

Surface lock Overhead locks are used as an addition to mortise locks
Mortise locks are considered the most reliable. The body is installed in a groove inside the leaf, the striker is located on the door frame. The lock insert is carried out using chisels or an electric router:
-
The location of the lock at the end of the door leaf is outlined. The body must be mounted symmetrically about the vertical and horizontal axis. Distortions are unacceptable, because of this, the lock will quickly fail.

Mortise lock installation procedure Before installing and fixing the mortise lock, you must prepare a hole in the door leaf
-
A groove is cut to the depth of the lock installation. The easiest way is to make a vertical row of holes with a large drill, and then connect them into a single groove using a chisel. In this case, the drill diameter is chosen according to the thickness of the lock body.

Worker inserts the lock Simple rules will help you prepare a hole for a mortise lock in the canvas
- On the frontal planes, two holes are drilled for the key. The size is selected according to the size of the keyhole.
- If the design of the lock includes a twist handle, another hole must be drilled to allow the axis of the part to pass through the door. The marking is made in accordance with the instructions accompanying the shut-off product. The height of the handle from the floor is 85-90 cm. Since the diameter in this case is quite large, it is convenient to use feather drills.
Video: inserting a lock in the door
Peephole installation
Sometimes, for the convenience of using the front door, a peephole is installed instead of an intercom. Its device is very simple. For installation, only one hole needs to be drilled, the diameter of which is equal to the diameter of the viewing device.

Correctly installed peephole provides visibility on the staircase
After that:
- The peephole is disassembled (unwound) into two parts.
- The outer part is inserted into the hole from the outside.
- The inner lens is inserted into the socket before meeting the outer part.
-
The two tubes are twisted together until they are fully fixed inside the door leaf.

Door peephole design diagram In addition to the monocular, the peephole kit can include protective strips that are mounted on the outside of the door
You can tighten the peephole with a coin. There are notches on the rim of the inner side, by inserting a ruble or five into which, you can scroll the tube a few turns.
The height of the peephole is selected according to the height of the residents. Standard - from 1.5 to 1.7 m above floor level. Most often, the device is mounted in the middle of the door, but displacement towards the lock is allowed. At the same time, the review sector shifts.
Video: self-installation of the door peephole
Finishing
Upon completion of the installation of the doors, the question arises of how to finish the slopes. The task of this part is to give aesthetics to the appearance of the door block, as well as, in part, insulation and noise reduction. Slopes can be made from various panel-type materials:
- drywall;
- laminated chipboard;
- MDF panels;
- plastic extensions.
Each type of panel has its own pros and cons. But the overall advantage is quick and easy installation. Two technologies are used to fix the sheets in the doorway:
- installation on a frame made of wooden blocks or metal profiles.
- direct fixing to glue or polyurethane foam.
The frame is erected in cases where it is advisable to insulate the doorway and isolate it from noise. A space remains between the walls and the outer panels, which is filled with mineral wool. This prevents freezing and dampens sound waves.

Insulation is spread under the slopes, designed to protect the door from freezing
Glue installation is easier and faster than frame installation. Each material has its own type of glue. For example, gypsum-based glue "Knauf" is used for drywall. Due to their low weight, plastic slopes are glued to polyurethane foam.

Gypsum mounting glue is sold as a dry mix in 30 kg bags
The algorithm for installing slopes is as follows:
-
A frame is mounted from boards or profiles for plasterboard. It consists of two posts rigidly fixed to the wall on each side of the door. Fixation is possible with dowel-nails or anchors.

Plasterboard frame for slopes Additional fastening of the upper bar is provided by straight hangers
-
The side surfaces of the wall are sheathed. If the panels are long sheets, each piece is cut strictly according to the dimensions of the slope. One side of the workpiece rests against the door, the other against the edge of the wall. If lath material is used (for example, lining), the sheathing starts from the bottom and progressively covers the entire plane.

Lining slopes The slopes from the lining are installed in the form of a prefabricated structure
- Before direct sewing, the inside of the slope is filled with mineral wool or polystyrene. Strips of the required size are cut and stacked on the walls between the raster posts.
- The last is the sheathing of the upper slope. A whole sheet of the desired configuration or separate pieces of material is cut.
- The corners between vertical and horizontal elements are filled with sealant.
- The outer edges are covered with platbands or decorative plastic corners.
Separately in the list of finishing methods is plaster. This is a rather time consuming technology. But the slope covered with plaster is the most durable and reliable. He is not afraid of shocks and mechanical damage, fires or floods. What can not be said about other types of slopes made of combustible and susceptible to the destructive influence of moisture materials.
To cover the wall with plaster, you need the same tools as for preparing the doorway:
- container for mixing the solution;
- spatulas;
- electric mixer, etc.
The order of work looks like this:
-
Beacons are put up, along which the plaster is subsequently pulled together and leveled. One beacon is installed near the door frame, the other - at the corner of the opening.

Door slope beacons Two beacons are installed on each slope
- A cement slurry is being prepared. After thorough mixing of the dry mixture with water, the composition is allowed to settle for 15-20 minutes. After this time, the solution is ready for use.
- Gradually, starting from the bottom and moving up, fill the space between the beacons and level it with a spatula. The vertical planes of the slopes are plastered first. The horizontal section is covered last.
-
Dried plaster is treated with a primer and covered with putty. This allows you to finally level the surface.

Putty of door slope Putty is applied to slopes, pre-treated with a primer
- A protective metal corner is installed along the perimeter of the slope, covered with a painting net (serpyanka).
Video: how to align the slopes of the front door
Installation of platbands
Platbands are always installed last. The assembly is carried out in several ways. Decorative strips are attached:
- groove method;
- invisible nails;
- glue to the wall.
The installation steps are as follows:
-
Vertical platbands are mounted. The inner side is installed along the slope or extension line:
-
when landing in a groove, the protrusion on the casing is joined with a recess on the door frame;

Installation of platbands in the frame groove For better adhesion, the groove joint is coated with a thin layer of glue
-
nails (without a cap) are driven in with a step of 25-30 cm along the entire length of the bar;

Installation of platbands on nails After fully immersed in the wood, the nails become invisible
- “Liquid nails” or other fast-setting sealants are used as glue.
-
-
In the upper part, the platbands are connected by a transverse crossbar. The joint can be rectangular or diagonal (optional). For the manufacture of compounds of the diagonal strap upper part is cut at 45 on. This can be done using a miter box or an angle circular saw. The joint is treated with a sealant with a color matched to the platbands.

Open the platband with a miter box A 45 ° angle is cut with a carpenter's miter box
Features of installing various types of doors
Doors are not only swing type. These include:
- suspended;
- recoil;
- pendulum;
- carousel and other designs.
There are nuances in the installation of various types of door structures.
Installation of compartment doors
Sliding doors are a type of sliding doors, the doors of which move along a guide profile from above or below. There are also design options in which two canvases go over each other.

Sliding doors save space in small spaces
The installation of these doors is fundamentally different from the installation of swing doors. They have no frame. Instead, a guide profile is installed above the doorway, along which the sash rolls on a movable carriage.
The characteristic features of the assembly include increased requirements for the state of the doorway (platbands and slopes are not placed on it). In addition, sliding doors are of cassette type. For them, a cavity is built in the wall, into which the moving canvas is hidden. A niche, or cassette, is assembled from drywall sheets using traditional partition technology. The convenience of such a door is that it does not take up extra space. However, installation work requires attention and careful fitting of all parts.
Video: step-by-step instructions for installing compartment doors
Installation of sliding doors
Recoil models are distinguished by the lower location of the movable mechanism. Thanks to this, the weight of the leaf can be increased, which means that the strength of the sash increases. Sliding doors are used in large hangars and warehouses. In residential premises, such structures are used only in service and utility rooms that require additional protection.

The sliding door mechanism is capable of withstanding the heavy weight of the door leaf
The peculiarities of installing a sliding door are increased requirements for the condition of the floor covering. Do not place electrical cables or water pipes under the attachment line of the lower guide profile.
Installation of a double-leaf door
Double-leaf doors are not uncommon in modern homes and apartments. They are installed in living rooms and exits to terraces.

An important point in the assembly of a double-leaf door is to set the correct even gap between the leaves.
Features of installation are that there is one frame for two sashes. Therefore, the build order is slightly different:
- First, the door block is completely assembled outside the opening.
- Cut in the hinges, adjust the gaps.
- Then the doors are disassembled and the frame is installed in the opening.
- After that, the sashes are hung and additional fittings are installed - latches, a special lock for a double-leaf door, etc.
Video: installing a double swing door
Hanging door installation
This is a door with a suspension not in the form of a hinge, but in the form of a guide profile along which the canvas moves. This is another type of sliding structure. Installation is not difficult. The main task of the master is to correctly position and fix the rail along which the carriage of the door leaf moves.

The hanging door installation diagram will help you to assemble yourself
Such doors are made both in the factory and in home workshops. The main advantage is that it is difficult for a cracker. The main disadvantage is the lack of tightness and low rates of thermal insulation and sound absorption.
Video: device and installation of a suspended sliding door
A long service life, as well as comfort of use, is possible due to compliance with the rules for installing the door. Moreover, the type of construction is not important. You can do all the work yourself, while you should clearly observe the stages and prepare all the tools in advance.
Recommended:
Door Latch (latch): Varieties With Description And Characteristics, Pros And Cons, As Well As How To Properly Install On The Door
The purpose of the door latch. Principle of operation. Types of door valves. Installation of various types of valves. Features of installation on different types of doors
How To Make A Partition In A Room With Your Own Hands: Selection Of Material And Instructions For Performing Work

Types of interior partitions and materials used to create them. The sequence of manufacturing partitions from plasterboard, aerated blocks and wood
Door Latch: Varieties With A Description And Characteristics, Pros And Cons, As Well As How To Properly Install On The Door
Purpose of the door latch. Types of door latches, features of their device, advantages and disadvantages. The process of mounting and dismantling the door latch
How And How To Lubricate Door Hinges So That They Do Not Creak, The Experience Of Professionals And The Order Of Work
The reasons for the appearance of a squeak at door hinges. How and how to lubricate different types of doors (wood, glass, metal, etc.). Reviews of different types of lubricants
Installation Of Soft Roofs, Including Preparation Of The Roof For Work, As Well As Equipment For Work
Preparatory work before installing a soft roof. Layout and methods of laying. Features of the assembly of additional elements on the roof. Required tools
