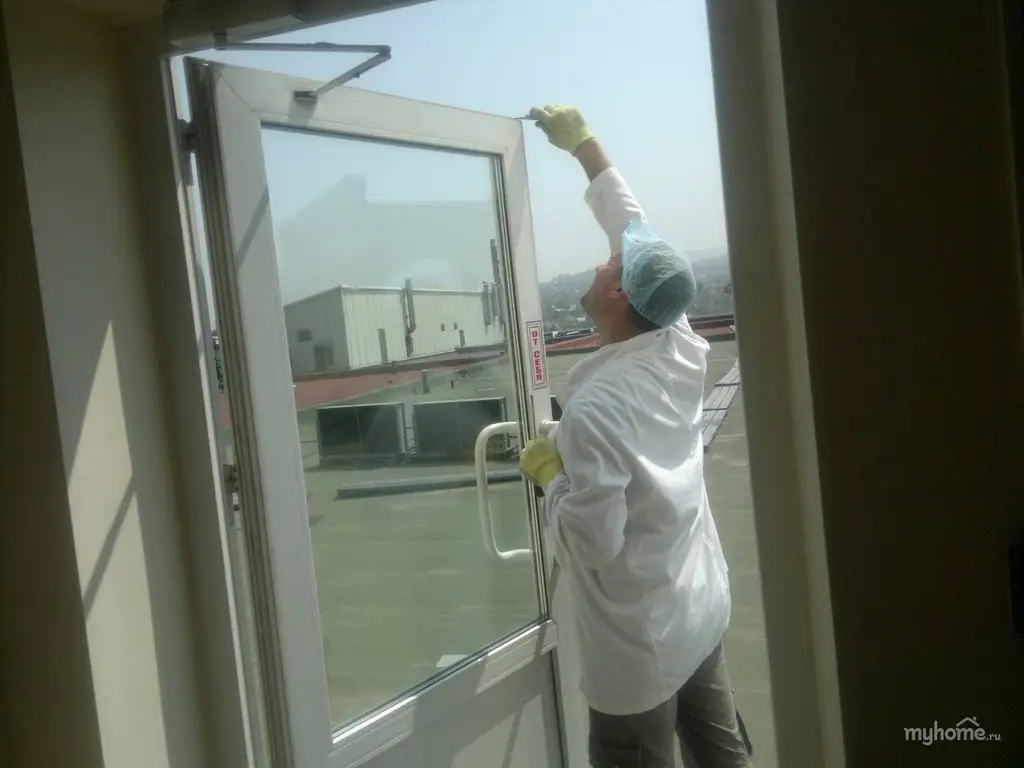
Table of contents:
- Author Bailey Albertson [email protected].
- Public 2023-12-17 12:53.
- Last modified 2025-06-01 07:32.
Adjustment of the entrance plastic door

A plastic or metal-plastic door is designed in such a way that it needs to be adjusted from time to time. This statement is especially true for front doors. A change in ambient temperature by several millimeters changes the linear dimensions of the aluminum profile, and this leads to a distortion of the coordinated work of the door block. Fixing the problem takes a few minutes twice a year. And it is useful for every owner of a plastic front door to find out how this is done.
Content
- 1 What you need to adjust the entrance plastic door
-
2 How to adjust the entrance plastic door
- 2.1 Signs of a door problem
-
2.2 Instructions for adjusting the entrance plastic door
- 2.2.1 How to adjust the plastic entrance door vertically
- 2.2.2 Video: adjusting the door vertically
- 2.2.3 How to adjust the width of plastic entrance doors on hinges
- 2.2.4 Video: adjusting the entrance plastic door
- 2.2.5 Adjusting the pressure of the door leaf to the frame
- 2.2.6 Adjusting the door handle
- 2.2.7 Adjusting the lock striker
- 3 Prevention and prevention of malfunctions of entrance plastic doors
What is needed to adjust the entrance plastic door
Competently and efficiently mounted plastic doors will not bother the owners for a long time. However, some experts argue that at least twice a year, in the off-season, it is necessary to adjust the clamping of the door leaf to the frame according to the ambient temperature. There are good reasons for this. Strengthening the clamping contributes to an increase in tightness and, accordingly, an energy-saving function. But this is not a door repair, but rather an optimization of its operation. We will talk about breakdowns and how to fix them.
The imbalance in the operation of the entrance plastic door is expressed in various "symptoms", which we will get acquainted with in detail below. Diagnostics is not very difficult, it is important to respond in a timely manner to the appearance of a defect. Since a neglected problem is solved many times more expensive.
The following tools and consumables are required to carry out repairs.
- a set of Phillips and flat screwdrivers;
- a set of wrenches and hex keys;
- pliers;
- grease (spindle, engine oil, WD-40 universal household lubricant will do).
-
spare silicone seal for doors.

Adjustment tools A spare silicone seal always comes in handy when removing a door
If the listed inventory is always at hand, you can quickly respond to a breakdown.
How to adjust a plastic entrance door
Most door ailments are completely “curable” in the early stages of the disease. The main task is to recognize the cause of the disorder and eliminate it in time.
Signs of door problems
Here are the most obvious signs that repair and adjustment is needed.
-
Uneven wear on the door seal. In good condition, the door leaf is pressed against the frame with the entire perimeter at the same time. If there are any suspicions of any violations, the first step is to inspect the rubber seal. The presence of tears or excessive wear indicates that the door leaf is skewed. Loose or unbalanced hinges may be the cause.

Worn plastic door seal If cracks and ruptures appear, the seal must be replaced
- Sagging of the door leaf under its own weight. It is expressed in the fact that when closing, the threshold is overwritten. The lower part of the sash hits the threshold and closes poorly. It is very easy to check a suspicion. You need to take the canvas by the handles and lift it up. If at the same time a backlash is felt, and a knock or a metallic clang is heard in the hinges, then adjustment is needed. One of the loops needs tightening.
- Insufficient blade clamping. According to the rules, when the doors are closed, the seal should be compressed by 50% of its volume. In this position, the door seal is maximized. If the plane of the door leaf is pressed to a lesser extent and unevenly, air will freely pass through the gap between the leaf and the frame. This is especially noticeable in winter, when icing zones form around the front door from the inside. Under the influence of drafts, the room is cooled, and abundant condensation appears on the door. The problem is solved by changing the position of the pressure roller.
-
The sash is skewed in the middle, in the area of the lock and handle. This happens when changing from summer to winter. Temperature changes in the air environment lead to small changes in door dimensions. This is reflected in the beating of the canvas and the difficult work of the lock. Before disassembling the lock, you need to make adjustments. Perhaps that will be enough.

Skewed door leaf When the door leaf is skewed, the technological gaps change along the perimeter of the door frame
Sophisticated craftsmen assess faults at a glance. A beginner who is not burdened with a lot of experience needs more time and ways to recognize the problem.
Here are some practical tests to diagnose door health.
- The sash opens slightly by 30 - 45 ° and is released. A properly adjusted blade will remain stationary. If something is wrong with the hinges, the sash will open or close spontaneously.
- Graphical way. You need to arm yourself with a simple pencil and a damp cloth. Having closed the door leaf from the inside, the outline of the sash is outlined along the entire perimeter of the frame. If the lines are parallel after opening, the door is correctly adjusted. If the result is a trapezoid, adjustment is needed, the canvas is overwhelmed. A tape measure will help to check the parallelism - the distance between the vertical lines above and below should be the same. After the test, the lines are erased with a damp cloth.
- Checking the pressure with a piece of paper. A strip of 10 by 30 cm is cut out. The long side is located on the door frame and the canvas is closed. After that, the sheet must be carefully pulled out, remembering the effort that is necessary for this. This operation is then repeated on all four sides of the sash. If the force does not change along the entire perimeter, the pressure is uniform. If, in some place, the paper is difficult to remove, it means that in this zone a pinch of the seal is created. Too easy slip of the sheet indicates a weak fit of the sash to the box.
Instructions for adjusting the entrance plastic door
So, let's proceed directly to the adjustments. I would like to note right away that in the technical passport, detailed instructions for aligning the position of the canvas are attached to each door. Depending on the model range and hinges used, the order of work may differ slightly. Therefore, the data sheet must be kept and, if necessary, carefully studied. But if the accompanying documents have not been preserved, you should not despair. All internal hinges of plastic doors are arranged approximately the same. The principles of their adjustment are general.

Correction of the door leaf position takes place in three directions
How to adjust a plastic entrance door vertically
If the plastic entrance door clings to the threshold, but not on one side, but with the entire plane of the lower bar, this means that there is no skew, but the canvas has slipped down. Need a vertical adjustment - lift the sash up. The control screw is in a vertical position, the head is located at the upper end of the hinge. If you turn the screw clockwise - tighten - the blade rises. If released by rotating counterclockwise, the sash is lowered.

Vertical door deflections are adjusted from the upper end of the hinges
First, remove the protective plastic cap from the upper hinge and tighten the vertical adjustment screw. It is enough to make 1.5-2 turns. After that, the door is closed and it is determined whether a positive effect has occurred. Most often, improvements are noticeable already at this stage. But if the threshold is still overwritten, move on to the bottom loop. Having removed the plastic protection, we find the adjusting screw and tighten it by the same 1.5-2 turns. After that, the sash will rise above the threshold and the problem of sagging will be eliminated.
The number of revolutions is approximate. It is necessary to determine exactly how far you need to turn the screw yourself, using the "scientific poke" method.
Video: adjusting the door vertically
How to adjust the width of plastic entrance doors on hinges
Another common phenomenon is door leaf rubbing on the sides. This is a clear sign of deformation of the position of the valve in width. To eliminate this problem, find the adjusting screw, which is located in the horizontal plane. As a rule, the control head is located in the lateral end of the hinge (on the inside). The procedure is the same as for vertical adjustment.
-
Removable decorative plastic plug. It is not fixed in any way, you just need to pull it off the loop.

Hinged plastic plug The plastic plug is fastened with latches
-
A hex wrench is inserted into the end face of the lower adjusting screw and rotated 1.5-2 turns clockwise. After that, the position of the door leaf is checked. If the work of the door has returned to normal, put the plug in place. If not, go to the next item.

Adjustment of the plastic door in width By turning the adjusting screw, the blade is brought to its original position in width
- We get access to the upper adjusting screw. We twist it a few turns. We check the position of the sash. When a positive result is achieved, we collect the loop in the reverse order.
Video: adjusting the entrance plastic door
Adjusting the pressure of the door leaf to the frame
With the help of a correctly adjusted clamp, unwanted drafts and blowing in winter are eliminated. In summer, on the contrary, it is recommended to loosen the pressure of the door to the frame - this lengthens the service life of the seal and contributes to better ventilation in the building.
The screws, with the help of which the degree of pressure is adjusted, are located on the end surface of the door leaf. From the side of the castle, there are usually three of them - above, in the middle and below. They have the form of elliptical eccentrics. The closing depth is controlled by turning the eccentric around the axis of rotation. Moreover, you need to rotate all three in sequence, trying to give them the same position.

Eccentrics are installed in a single position
The final result is achieved through experimentation. The main reference point is the uniformity and degree of compression of the seal. A minor landmark is the absence of air flows.
But that's not all. The rotation of the eccentrics on the side of the lock adjusts only one side of the blade. In order for the entire plane to become airtight, it is necessary to adjust from the hinge side. Here the screws are located on the lower and upper canopy.
It is important to control the quality of the fit throughout the year, adjusting the closing depth to the desired heat transfer mode
Door handle adjustment
Sometimes the door handle fails. This may be due to a skewed web, but it also occurs for independent reasons.
The main task is to prevent the handle from loosening. To do this, turn the decorative plastic plate covering the lever mount 90 degrees. After gaining access to the fixing screws, you need to tighten the mount using a Phillips screwdriver.

By sliding the decorative cover, we get access to the door handle mount
Adjusting the lock striker
Plastic entrance doors are arranged as a single well-coordinated mechanism. If an imbalance occurs, the consequences can affect all the details. So, for example, when the position of the door leaf is changed, the lock begins to "mope". The tongue of the locking device does not fit into the hole in the frame. Closing the door, you have to desperately pull the sash up and down.
The fix is simple. It is necessary to correct the position of the striker. Adjustment is made with a 2.5 mm Allen key or a small flat-head screwdriver. The tool is used to turn the screw located at the bottom of the striker to the right or left, achieving the desired position.

Use a Phillips screwdriver to adjust the lock striker
“During adjustment work, when access to hinges and other rubbing mechanisms is open, it is advisable to lubricate the fittings. This will prevent squeaks and other unpleasant sounds emanating from the doors, making it easier to open and close the curtain."
Prevention and prevention of malfunctions of entrance plastic doors
When ordering for the manufacture of doors, every economical owner tries to reduce costs. And, perhaps, when the estimate was drawn up, the manager from the manufacturer offered various configuration options. Options such as a microlift, door closer and door opening limiter do not play a decisive role in the operation of the door. And therefore they are often abandoned. But in vain. After all, it depends on them how much time will pass from installation to the first repair of the door.
- Microlift. An irreplaceable device for plastic entrance doors with a heavy frame and double glazing. The purpose of the microlift is to prevent the sagging of the door leaf while the door is closed. Technically, this is solved in various ways, but most often the microlift is a metal movable plate with a roller in the lower part. The device is located at the end of the door leaf and, in fact, is an additional fulcrum for a massive leaf. When the doors are closed, the load on the hinges is reduced. Accordingly, their service time increases.
-
Closer. A device with which the door leaf movement is monitored and controlled. According to many experts, the door closer extends the service life of doors by 5-6 times, and doubles the intervals between preventive maintenance. It is no secret that the lion's share of damage to the door mechanism comes from mechanical loads - blows, bangs, etc. The door closer compensates for all these troubles by making the sash move smoothly, without sharp bangs on the door frame. The closer mechanism is not complicated and consists of a powerful steel spring, a body and a pair of levers. When selecting and installing, take into account the weight of the door and the width of the door leaf. Additional adjustments allow you to control the door travel in an optimal way.

Closer adjustment Closer adjustment allows you to change the door closing speed
-
Door opening limiter. An additional device that protects the doors from excessive swinging and hitting the wall. The hinges are designed in such a way that the movement of the door leaf is not limited by anything. If you push the sash with force, it will move until it hits a wall or slope. To prevent this scenario, a stop bar is installed on the floor (or ceiling), covered with dense rubber or silicone on top.

Door opening limiter The limiter can be attached both to the floor and to the wall near the door leaf
No matter how high-quality the door and the fittings are, you should not neglect additional protection. Perhaps it is better to argue differently - the more expensive the door block, the wiser it is to protect it from premature failure.
Having mastered the simple methods of adjusting the entrance plastic door, everyone will be able to independently correct the operation of the door block, without resorting to paid services from outside.
Recommended:
How To Adjust A Plastic Balcony Door With Your Own Hands + Video
Rules for adjusting balcony doors made of metal-plastic profiles. Symptoms of problems encountered, step-by-step description of their elimination, prevention
How To Independently Adjust A Plastic Balcony Door, Including If It Does Not Close Well Or Sags
Ways to eliminate the violation of the clamping of the sash of the balcony plastic door, its sagging and distortion. DIY repair, insulation and door replacement rules
Do-it-yourself Front Door Repair, As Well As How To Adjust And Restore Them
How to adjust the front door and fix various breakdowns. What tools and materials are needed. Do-it-yourself repair and restoration of the front door
How To Insulate The Front Door: Useful Tips, Step-by-step Recommendations For Insulating An Outer Door + Video

Recommendations for insulating the front door. Additional insulation of wooden doors, metal doors. Materials and tools used
Why You Can't Hang A Mirror In Front Of The Front Door - Signs And Superstitions

Why you can't hang a mirror in front of the front door. What threatens the one who hangs it in front of the entrance
