Table of contents:
- Author Bailey Albertson [email protected].
- Public 2023-12-17 12:53.
- Last modified 2025-06-01 07:32.
How to install an ebb on roofs: features of installation and repair in different cases

The ebb is part of the drainage system, which is necessary for any roof covering. The presence of these elements allows you to quickly remove moisture from the roof and prevent rotting, material corrosion and leaks in the structure. To achieve these goals, you should correctly select and install the ebb, taking into account the characteristics of the roofing material.
Content
-
1 Correct installation of roof sills
- 1.1 Self-installation of the ebb
-
1.2 Ebb for the gable of the building
1.2.1 Video: installation of the ebb for the pediment
-
1.3 Installing the plastic drip
1.3.1 Video: installing PVC drain
-
1.4 Installation of metal gutters
1.4.1 Video: example of installing a metal gutter
-
1.5 How to set the corners of different width ebb
1.5.1 Video: a variant of joining the gutter in the corner area
- 1.6 Drainage system for soft roofs
- 2 Repair of roof gutters
Correct installation of roof sills
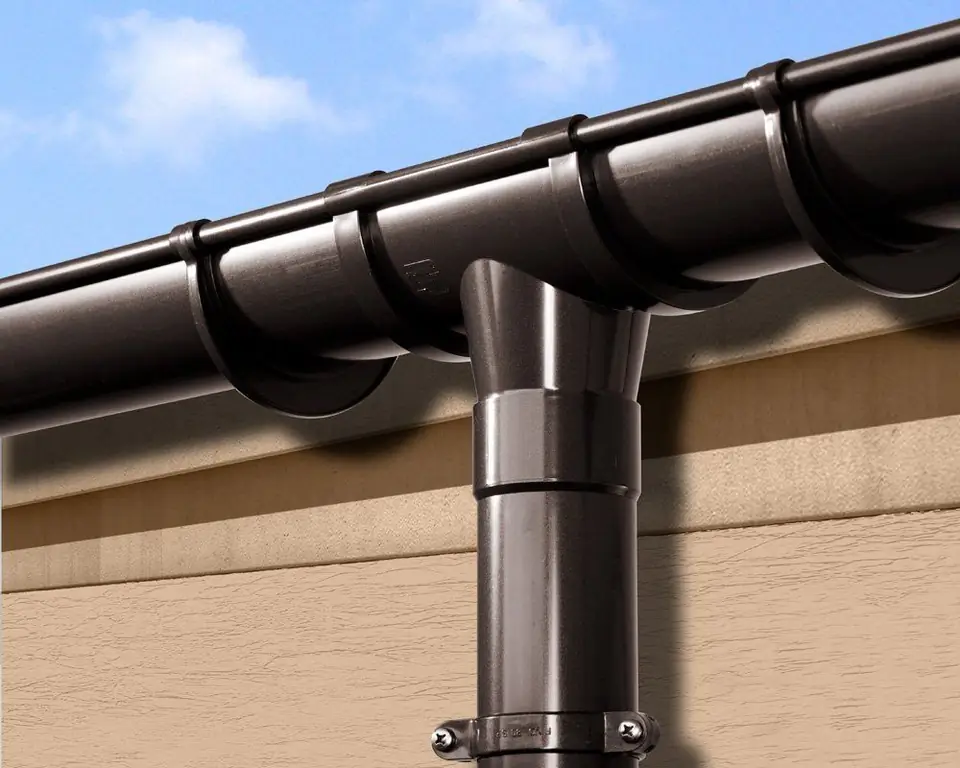
The gutters connected to each other and to other elements of the drainage complex are called ebb. They can be triangular, rectangular or circular in shape, which is the most common. Their principle of operation is that water flows down the roof surface and enters the gutters, and through them enters the drainage lines. Thanks to this, moisture does not accumulate on the roof, which prevents corrosion, rotting and damage to the coating.

Roof drips are matched to the color of the roofing
The design of ebbs always presupposes the presence of connecting elements, thanks to which it is possible to create a drain of the required length. At the same time, the installation of the system on different types of roofs requires adherence to technology.
When self-mounting, the following features should be considered:
- the low tide is located with a slope towards the intake funnel, which will ensure effective drainage of sediments. A slope of 4-5 mm is required for 1 m of pipes;
- the diameter of the gutter depends on the roof area. For example, for a roof of 90 m 2, an element with diameters of 8 cm is required;
- ebb tides are placed 3 cm below the edge of the roof overhang. This is necessary to prevent damage to the element as a result of snow melting;
- vertical drain pipes are installed every 5 m, and with complex roof structures, they are located at every corner;
- the gutter is supplemented with a teardrop that prevents droplets from bouncing off the tide in different directions.
Self-installation of the ebb
The gutter can be plastic or metal, but in any case, it is important to prepare tools and additional materials for work. A saw, a screwdriver and a rope, as well as self-tapping screws, will help secure the structure. With a building level, it will be possible to check the angle of inclination, special brackets are used to install ebbs.

The gutter should be located with a slope towards the funnel and waste water intake system
For work, you will also need all parts of the system, for example, a funnel, plugs, corners connecting the inserts. First you need to determine the location and length of the system. Funnels are often placed in the corners of a building, where vertical drainage pipes are located.
Ebb for the gable of the building
Roof drainage elements can be different, and one of the options is the gable outflow. This detail is a canopy, which is considered part of the building and serves to drain water from walls and windows.

The visor is built on the crate and equipped with an ebb trough
To create such a low tide option, you will need corrugated board, wooden bars 50x80 mm, roofing screws. Fastening the wooden parts to each other can be done with nails and a hammer. These parts must be made of wood with a moisture content of not more than 12%, and they must also be pre-treated with an antiseptic.

The visor can be supplemented with an ebb in the form of a gutter
The complex of works to create a gable ebb involves the following actions:
- The angle of inclination of the rafters for the ebb should be from 20 to 45 °, and the width of this element should be from 500 to 600 mm. The bars are sawn into parts of the appropriate size and taking into account the angle of connection of the elements.
- A frame for the ebb is assembled from the bars, attaching them to the roof rafters and the wall of the building with nails and anchor bolts.
- On top of the finished crate, a covering of corrugated board or metal tile is mounted, making an overlap of about 5 cm and carefully treating the seams with a sealant.
Roofing screws are used to fasten the corrugated board. In the places where the structure adjoins the pediment, the wall must be fixed with the same screws, the metal corner, and the seam must be filled with sealant. This ensures the strength of the ebb and prevents moisture from entering the structure.
Video: installation of an ebb for the pediment
Installing a plastic drip
The plastic drainage system is lightweight and does not load the roof, and modern products are durable. Therefore, a plastic drip is often the most affordable and practical solution to protect the roof from moisture accumulation.

The plastic ebb is fixed on self-tapping screws
The stages of installation of a plastic ebb are as follows:
- After installing the rafters and fixing the waterproofing film, you need to pull the cord along the bottom of the slope, taking into account the required slope of the ebb direction.
- Install the gutter brackets on the extreme roof lathing, which is covered with a waterproofing material. Screw these elements with self-tapping screws at an equal distance from each other. The optimal step is 50-70 cm.
- Connect the gutter modules into a system of the required length, mount plugs at the ends. Fix the parts one by one on the brackets.
To check the tightness and correctness, you need to pour a bucket of water into the system at one of the ends and at the corner of the building and observe the movement of the liquid. If it reaches the special pipe and ditch quickly and does not accumulate in any part of the ebb, then the work has been done correctly.
Video: installing PVC drain
Installation of metal gutters
Metal castings can be copper, aluminum or alloy steel. Such products are heavier than plastic ones and therefore require the same strong brackets. For the installation of metal systems, it is necessary to strengthen the crate in the area of fixing the brackets, and for this, boards with a section of 50x150 mm are used.

The metal cast requires careful fixation, because it has a lot of weight
Installation of metal gutters involves the following steps:
- A rope is pulled along the bottom of the slope at the desired level of the location of the drain and taking into account the slope. This is done before the installation of the waterproofing film, but after the completion of the rafters and reinforcement of the sheathing.
- The gutter elements are fastened together with rivets, and then fastened to the brackets installed on the frontal roof board. The plugs are mounted on the extreme elements, pre-installing a rubber seal and supplementing the joint area with roofing sealant.
- A gutter with a plug is mounted in suspensions. If you plan to install a funnel, then a hole in the gutter is created in advance with a hacksaw for metal or an electric drill and a special crown of the required diameter.
- After installing the ebb, a drainpipe with a funnel is attached, carefully waterproofing the joints. The system is then tested for efficiency by filling with water.
Video: an example of installing a metal gutter
How to set the corners of different width ebb
Forming a gutter on a roof of a complex shape or bypassing a ledge requires the connection of ebbs at the corners. In this case, it is often necessary to connect ebb tides of different widths. For this purpose, special corners are used, namely, internal connectors and external couplings, which can be with different angles.

External couplings help to connect gutters of different widths at the corners of the building
The process of joining gutters at corners does not differ from fixing straight elements. The brackets are positioned close to the corner to ensure the strength and reliability of the system. If the corner has short edges, then the place of their joint with the straight gutter is carefully waterproofed with a roofing sealant.

Some manufacturers produce corners with markings for the downpipe
A downpipe may be located at the corner of the building and therefore an opening must be provided for installing the funnel. Using a hacksaw or a drill with a metal crown, make a hole on the corner joint for the gutters, but first you need to carefully measure the diameter of the funnel. There are also ready-made sets of funnels and corner gutters, which do not require complex installation.
Video: a variant of joining the gutter in the corner area
Soft roof drainage
The roof surface covered with bituminous shingles does not provide a quick drain of moisture and therefore gutters are necessary for soft roofs. For installation, you can choose plastic models, but metal options with a polymer colored coating are more durable.

For a soft roof of any shape, gutters are needed
If plastic brackets are used, then they are fixed on the frontal board with a distance of 60 cm between the elements. The metal supports are attached to the outer board of the crate before laying the material.
The technology involves such stages as:
- At one end of the edge of the crate or frontal board, a self-tapping screw is attached, an inclined line is drawn, taking into account the fact that there is about 5 mm of slope for each meter. At the end of the line, attach another self-tapping screw and pull the rope.
- Along this line, the brackets are fixed at a distance of about 50-60 cm from each other. The extreme supports are mounted at a distance of 15 cm from the end of the board.
- When installing the gutter, the edge of the element, which is closer to the edge, is inserted into the fastener. Let go of the bracket, press a little and fix the opposite edge. From the inside, glue is applied to the corner and the gutter is quickly folded. You need to push the corner all the way. Next, the gutter with the glued corner is placed in other brackets.
- After that, glue is applied to the inner area and the elements are connected. Plugs are installed on the end parts.
Repair of roof gutters
As a result of the melting of snow and ice, heavy rains and strong gusts of wind, the gutters of the drainage system can be damaged. The most unstable to such factors are plastic structures, metal structures are more durable, but in any case, system repair may be required.

Any type of gutter can be damaged by climatic factors
Ebb tides are affected by many factors, and a violation of the functionality of the drainage system requires prompt repair. The following situations are common:
- poor moisture management is often associated with the accumulation of dirt, fallen leaves and debris in the gutters. It is easy to fix the problem by cleaning the system from foreign objects;
- if there is a crack in the gutter, then the element must be replaced. If a fracture occurs over the entire surface, this part must be completely replaced. Small cracks can be easily repaired with two-component cold welding;
- if the elements of the drainage system are disconnected, then you need to clean the damaged area from dirt, remove the old fasteners and carefully connect the parts, treating the joint with a sealant;
- rust occurs on metal products with a damaged protective layer. It can be cleaned with a sponge and covered with anti-corrosion paint. If rust has affected the entire system, then the ebb is best replaced;
- deformed pipes after many years of operation are always replaced with new ones. This is necessary for plastic and metal products that have not been repaired for decades.
The integrity and correct installation of roof sills is the key to good protection of the building from moisture. The gutter system is simple in design, but protects walls, windows and foundations from the harmful effects of water. Regular repairs are just as necessary as correct installation of gutters, as it extends the life of the drainage structure.
Recommended:
The Roof For The Hangar, How To Do It Right, Including With Your Own Hands, As Well As The Features Of Its Design And Installation

How the hangar roof shape depends on its function. The better to insulate the hangar roof. DIY hangar roof assembly instructions
Repair Of The Roof Of A Private House, Including With Your Own Hands, As Well As How To Calculate The Cost Of Work

How to repair the roof of a private house with your own hands. Sealing gaps and seams, leveling subsidence. Types of roof damage and the cost of repair work
Shingles For The Roof, Including With Your Own Hands, As Well As The Maintenance Features Of Such A Roof

The advantages of shingles as a roofing material. Methods for making shingles. Features of laying shingles on the roof: step by step instructions. Care rules
Installation Of Roof Windows, Including With Your Own Hands, As Well As Installation Features In An Already Finished Roof

Step by step instructions for installing a roof window. Features of technology and nuances of installation in various types of roofing
Making Ebbs From Galvanized Steel, Including With Your Own Hands, As Well As The Features Of Installation And Repair

Do-it-yourself technology for making galvanized steel ebbs and brackets for them. How to install roof drips. Repair of gutters
