Table of contents:
- Author Bailey Albertson albertson@usefultipsdiy.com.
- Public 2023-12-17 12:53.
- Last modified 2025-01-23 12:41.
Organic fertilizers in your garden. Part 2

As you know, in order for your garden to give a bountiful, healthy harvest, you should work hard. The soil must be properly fertilized. And, despite the fact that the modern chemical industry offers a large number of means to improve soil health and fertility, people traditionally prefer to use organic fertilizers that are useful and readily available.
Working on your own site, you always have at hand a lot of substances from which you can easily make suitable fertilizers, especially if you have a small farm: livestock or poultry.
In the last article, we looked at the possibility of using manure, poultry droppings, and plants to prepare nutritious fertilizers. Today we will talk about how to make compost and use peat so that the soil in the garden and garden is always prepared for the future harvest.
Content
- 1 Making prefabricated compost
- 2 A few rules for composting
- 3 Can there be any benefit from contaminated tops and weeds with seeds?
- 4 Use of peat, blood and horny meal
- 5 Tips for beginners to fertilize the soil
- 6 Video on the use of organic fertilizers
Making prefabricated compost
Compostable compost is very easy to make. A wide variety of organic waste and waste will be useful for it. It is very good to use any weed as a material. The main condition is that weeds must be harvested for compost before flowering, grass with seeds is excluded, since even unripe seeds have a high conservation capacity, and it will be very difficult for you to control weeds afterwards.
Use excess trimmings of strawberry and strawberry whiskers, vegetable tops (try to exclude the ingress of plants infected with any diseases), yard litter, forest lowland litter, sawdust - in general, any organic matter that was not useful for feeding livestock

In order to lay the compost, prepare a level area, properly compacting its surface. Spread a layer of peat 10-15 cm high and one and a half to two meters wide. If it is not possible to use peat, then humus earth is well suited, which must be covered with a layer of 5-7 cm.
A layer of compostable material (15-30 cm) should be laid on this prepared bedding, if necessary, moisten it with water, slops or a solution of feces, manure, poultry droppings. In order to improve the quality of the compost, you can add superphosphate to it in the calculation of 1.5-2% of the total mass of the mass.
It will not be superfluous to increase the softening and acidity-reducing properties. To do this, add limestone or chalk to the compost mass, as well as carbonate salts, for example, dolomite flour.
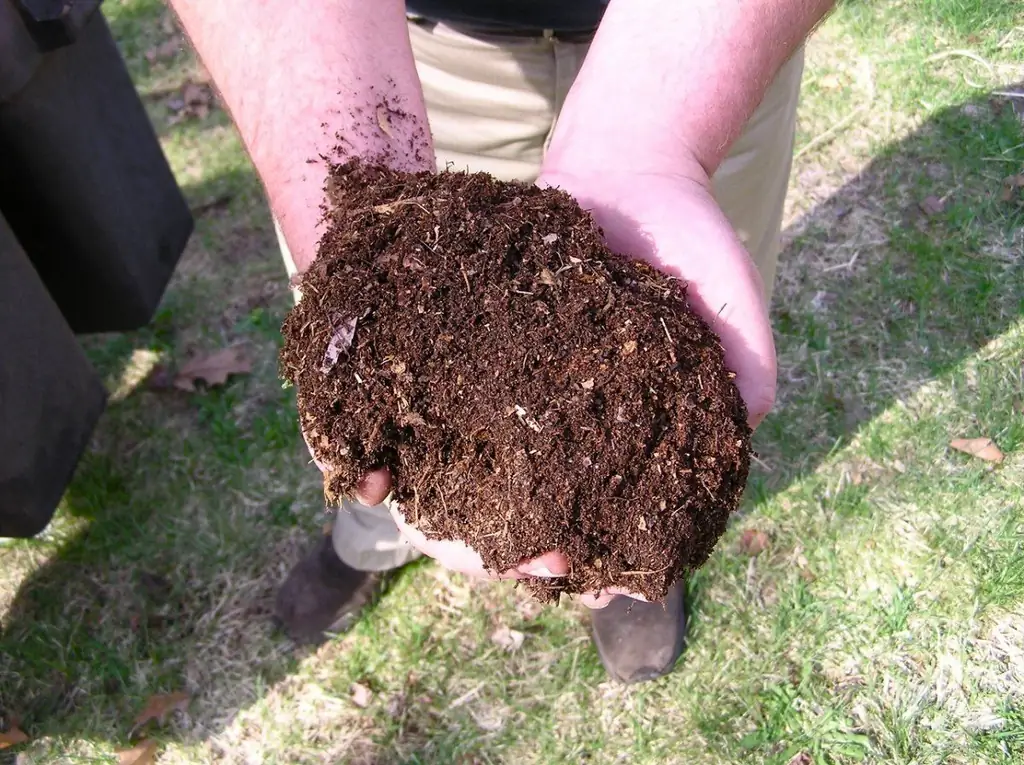
The composting period can be different, and depends on the constituent parts. Compost is considered to be fully prepared after it acquires a homogeneous consistency in the form of a crumbly dark mass. Therefore, if you used only weeds, leaves and tops of vegetable plants, the compost can easily grind and be ready for use after 3-4 hot months, that is, during the summer. If slowly decaying materials were used, for example, sawdust, wood shavings, large stems of plants, for example, sunflower, then the period can be from one to three years.
A few composting rules
It is imperative to check the tops of the composting plants for various diseases. The causative agents of such diseases retain their viability even after the organic part of the plant is completely decomposed. By using matured compost containing harmful bacteria as intended, you contaminate soil that will no longer yield a healthy crop.

Plants on which lesions have been seen are subject to immediate burning. This category includes the roots of the affected cabbage keel, tomato tops and cucumber leaves with foci of rot, diseased fruits of these crops. If it is not possible to burn the plants, then they should be buried deeper in the ground, and preferably at a considerable distance from your site.
If you are using weeds for compost that have already yielded seeds, then keep in mind that the usual compost ripening time is about 2 years, and for weed seeds to die, it may take up to 5 years. Therefore, it is advisable to compost such grass separately, and the more time you give to ripen this mass, the better. During the summer alone, you will have to shovel this compost heap at least 4 times. The seeds that are on the surface and have already germinated will fall to the bottom of the compost during the first mixing.
In addition, it may be necessary to remove the sprouted grass so that it does not have time to bloom and give seeds. The compost pile must be processed and shoveled until the mass becomes homogeneous and nothing grows on it. This may take several years, but at the end you will receive a full-fledged compost fertilizer that will not harm the soil or the fruit and vegetable crops grown on it.
Could there be any benefit from contaminated tops and weeds with seeds?
Oddly enough, but yes. There is a way to turn these harmful products into useful ones. True, this method is very time consuming and will require a lot of time.
To do this, you will need to dig a fairly deep hole, about 1-1.5 m. Place weeds and affected tops with fruits on its bottom, tamp it properly, moisten it with water or manure solution.
You will not use this compost as fertilizer, it will remain underground forever. Therefore, cover it with a layer of soil about 50 cm thick (the more the better). Plant seeds will not germinate through such a layer, and pathogens will not be able to infect subsequently planted vegetable crops. In addition, both the mechanical and nutritional composition of the soil will significantly improve.

The area where such a compost pit is located will have to be well looked after. Weeds growing on it, brought from the surface, must be regularly removed, and not broken through, but carefully undermined with a pitchfork, loosening the ground in order to remove the entire root system. It is better not to use a shovel: with it you can cut the rhizome into several parts, thereby multiplying the number of weeds.
Composting ends in September. Before leaving the heap for ripening, it is sprinkled with mineral fertilizers, dolomite flour, wood ash. A layer of soil about 10 cm thick is placed on top. Then the compost heap is covered with plastic wrap: this will speed up the composting process before winter due to the greenhouse effect, and also prevent freezing at low temperatures.
Use of peat, blood meal and horny meal
Depending on the origin of the bog from which the peat was mined, this substance can be upland, lowland, transitional or mixed. According to the same criteria, its agrochemical properties also differ.
For example, high moor peat is acidic, its pH is 3-4 units, the phosphorus content is low, the nitrogen content is about 1%.
Low-lying peat is characterized by weak or neutral acidity, in some cases it can be alkaline. The phosphorus content is over 1%, nitrogen - from 2.5 to 4%.
The potassium content of all types of peat is extremely low: 0.05-0.15%.
As a rule, peat is used only as an additional agent in the preparation of fertilizer, for example, in a compost bed, using slurry, or for a slight change in the technical and useful properties of the soil, adding lime in the ratio: 1 ton of peat: 50-60 kg of lime. This is because peat has a very long decomposition period and nutrients enter the soil very slowly. Therefore, it will be advisable to keep the peat in the compost pit for at least a year so that the substance reaches the desired degree of decomposition.
The most popular types of peat in gardening are high and low peat: they are the most enriched with useful substances.
Blood meal is one of the fastest-acting fertilizers and is used in its pure form. It is introduced into the soil in a ratio of 30 g of substance per 1 sq. plot about two to three weeks before the day on which the planting of seedlings in the ground is planned.

Horny, or bone meal, is the finely ground bones, hooves, and horns of animals. This substance is rich in phosphorus. It is introduced into the soil in its pure form at the rate of 60-70 g per 1 sq. You can also prepare a solution that is much easier to apply to the soil. Dissolve 1 kg of horny flour in 800-1000 liters of hot water and leave to ferment for 15-20 days, stirring thoroughly every day. At the end of the process, you can use the resulting solution without further diluting it with water.
Fertilizing Tips for Beginners
Novice gardeners often have questions regarding the correct fertilization of the soil for fruit trees. The main rule is to bring enough nutrients into the hole during planting, after which there will be no need for additional fertilization during the year. But in the next few years, it will be needed so that the young tree begins to bear fruit faster and is resistant to external conditions.
Before the beginning of the fruiting period, fertilizers are applied to the soil in the near-stem circles, which in their area exceed the crown projection by one and a half times.

It is recommended to apply organic and mineral fertilizers in sufficient quantities to the planting pit. In this case, you will need to apply mainly nitrogen fertilizers in subsequent years according to the following scheme: as the main fertilizer, once in the spring, about 10 grams per 1 square meter of the trunk circle, or 2 times as an addition: in the spring, 8 g per 1 square meter, and in June (period of enhanced growth) 3-4 g per 1 sq.
It is also advisable to apply nitrogen fertilizers three times in equal doses: in the spring and 2 times during the growth period. This method is most optimal if the summer is rainy
From the end of July, when the period of shoot growth ends, nitrogen fertilizers are not applied.
If during planting you applied little fertilizer, then in the fall or spring, for digging, in addition to nitrogen fertilizers, apply nitrogen-potassium fertilizers. It will also be useful to apply organic fertilizers, for example, manure, to the trunks every 2-3 years. During this period, the amount of nitrogen can be reduced to a minimum. Natural decomposition of manure in the soil will allow the accumulation of assimilable nitrogen in sufficient quantities. You should also halve the rate of potash and phosphorus fertilizers.
Video about using organic fertilizers
By using organic fertilizers on your garden plot, you will not only get an excellent, healthy harvest, but also save a lot of money. Of course, like any work, chores in the garden and vegetable garden require a lot of time and effort, but the result will not be long in coming, and you will be fully rewarded for the work invested. Good luck in your endeavors!
Recommended:
The Use Of Organic Fertilizers In The Garden + Video

Organic fertilizers in gardening works; manufacturing, application, materials used
Interior Laminated Doors And Their Varieties With A Description And Characteristics, Advantages And Disadvantages, As Well As Use And Compatibility In The Interior

What are laminated doors: varieties and their characteristics. How to choose and install doors. Tips for the operation and repair of laminated doors
Interior Glossy Doors And Their Varieties, Advantages And Disadvantages, As Well As Use And Compatibility In The Interior

Glossy doors: production and types. The use of doors with a glossy surface in the interior. Reviews
Fertilizers For Potatoes When Planting: Which Are Better, Including Mineral And Organic

Do I need to feed the potatoes at all. What fertilizers are put into the hole when planting: types and dosage. Gardeners' reviews about the tools used, recommendations
How To Feed Onions So That They Are Large: Organic And Mineral Fertilizers, Folk Remedies

How can you feed the onion so that it is large. Mineral and organic fertilizers. Folk remedies
