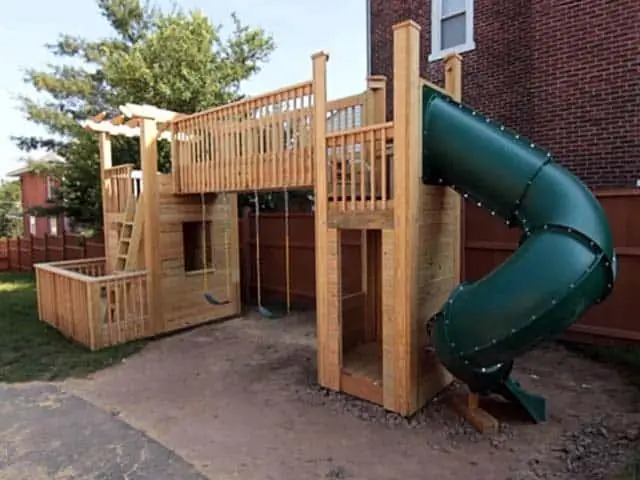
Table of contents:
- Author Bailey Albertson [email protected].
- Public 2024-01-17 22:26.
- Last modified 2025-06-01 07:32.
DIY children's slide for a country house or summer cottage

The slide will be the most fun entertainment for children if you install it on your garden plot. While you are working in the garden or vegetable garden, children will have fun riding the slide. And if you have a sufficient number of tools and materials, as well as golden hands, then a children's slide made of wood or metal can be made by yourself, and it will cost much less than an expensive construction from a store.
Content
-
1 Types of children's slides
- 1.1 Inflatable slides
- 1.2 Plastic slides
- 1.3 Metal slides
- 1.4 Wooden slides
- 1.5 Photo gallery: options for children's slides
-
2 Preparing to work on creating a wooden slide
- 2.1 Slide project
- 2.2 Drawing of the slide
- 2.3 Calculation of the amount of material
- 2.4 Tool List
-
3 Stages of construction of a wooden children's slide
- 3.1 Step-by-step instructions for creating a slide made of wood
- 3.2 Finishing the wooden slide
-
3.3 Tips for operating the slide
3.3.1 Video: how to independently build a wooden children's slide
-
4 Metal slide for children: preparation
- 4.1 Required materials
- 4.2 Tools for mounting the slide
-
5 Stages of manufacturing a metal children's slide
- 5.1 Step-by-step instructions for making a slide from metal
-
5.2 Finishing the metal children's slide
5.2.1 Video: making a children's slide from metal
Types of children's slides
A children's slide is an optimal design for children from 3 to 7 years old, which can be installed on your personal plot. Let's see what slides can be installed on the territory of a country house. Today there are the following types of children's slides: inflatable, plastic, metal, wooden.
Inflatable slides
These slides are made of durable polyvinyl chloride and are suitable for the smallest children. They are easily inflated using an electric pump or a hand pump and are installed in any convenient place in the personal plot, but only on a flat surface. Since even the most durable film can be pierced by any sharp object, it is best to place the attraction on an asphalt, concrete or stone site so that branches, stones, nails cannot damage the PVC film. After the summer is over, you can simply deflate the inflatable slide, put it in a special case and hide it in the closet until next year.

The inflatable slide can be easily installed in any convenient place of the personal plot
Plastic slides
These factory designs are designed for riding children aged 3 to 5 years. Made of durable plastic, the slide can be made in any geometric shape, so that the child would be interested in riding it. The plastic slide does not take up much space, is easy to clean, has an excellent sliding smooth surface and is absolutely safe for babies from 3 years old. Since the slope has a high degree of heat capacity, you can ride on such a slide even in the cold season. The plastic will be warm in winter and cool in summer, so children will be comfortable enough to descend from the slope.

The plastic slide is best for children aged 3 to 5 years old
Metal slides
These are reliable and durable structures that will last for more than a dozen years with proper and proper care of the metal parts of the slide. Here there is an opportunity to make a descent of any height, and therefore the slide is suitable for children over 10 years old. A significant disadvantage of a metal slide is the high thermal conductivity of the material, so it will be very cold in winter and hot in summer. The metal slide must be painted regularly in order to protect it from premature corrosion.

A metal slide with proper care will last more than a dozen years
Wooden slides
Wood is a natural and environmentally friendly material. The wooden slide is light enough, safe and convenient for installation in the courtyard of a country house or in the country. But wooden structures need regular maintenance, since wood is susceptible to fungi, mold, parasite infestation, and can also deform under the influence of sunlight, rain and snow. A wooden slide can be easily made by hand without the help of professionals, as well as without the use of welding and other expensive complex tools.

A wooden slide is the most convenient and environmentally friendly for installation in the courtyard of a country house or in the country
Photo gallery: options for children's slides
-

Wooden slide with plastic descent -
Children's slides made of wood are considered the most environmentally friendly
-

Large inflatable slide - Inflatable children's slide for the winter can be deflated and stored in the closet
-

Metal slide - A metal slide can be very hot in summer and cool down to subzero temperatures in winter
-

Wooden slide with a chimney - Kids will love the highly curved finished plastic tube
-

Wooden slide with metal slope - A low wooden slide with a metal descent is perfect for kids.
-

Wooden slide in the playground - It is better to install a wooden slide next to a sandbox, a trampoline and horizontal bars to get a full-fledged playground
Preparing to work on creating a wooden slide
Before making a wooden slide with your own hands, you need to draw up an accurate project, drawing and make calculations for the entire structure. Today, thanks to the Internet, you can easily calculate its dimensions, make a project in 3D and see how the slide will look in its finished form.
Slide project
For a small child, it is best to build a low, gentle slide so that he can independently go up and down from it. Older children will be happy with a slide with curves and bends. When creating a slide project, the following features should be considered:
- it is necessary to calculate the number of steps and the optimal distance between them, as well as the steepness of the march, it all depends on the height of the children. The taller the child is, the greater the distance between the steps should be. You also need to decide on the height of the handrails and their installation location;
- a slide for kids should have a gentle staircase, and for children from 7 years old, you can make vertical steps;
- the dimensions of the slide depend on the estimated width and height of the slope, as well as the enclosing sides;
- the installation site of the structure must be level, and before descending, sufficient space should be left for safe riding;
- the slope of the descent and the steepness of the stairs must be absolutely safe for your child.
When building a slide, you must take into account the wishes of children and rely on your own abilities
Roller coaster
First, they make a plan of the slide. You can draw your own drawing or find a ready-made layout on the Internet. Ready-made drawings of wooden slides are convenient because they indicate the exact proportions of structural elements and dimensions of parts.

A finished drawing of a wooden slide can be found on the Internet.
Calculation of the amount of material
For the construction of a slide structure with a descent length of 3 meters and a platform size of 50x50 cm, you will need:
- 4 wooden beams measuring 10x10x150 cm for the device of supports;
- 2 wooden beams measuring 2x4x50 cm to enhance the strength of the site;
- 2 wooden beams measuring 3x3x50 cm for installation of the site fencing;
- 2 wooden beams measuring 3x3x150 cm for the device of the handrail;
- 4 boards measuring 2x10x50cm for the bottom connection of the supports (structure strength device);
- 5 boards measuring 2.5x10x50 cm for flooring on the site;
- no more than 8 boards measuring 2.5x10x30 cm for mounting steps;
- 2 or more floorboards 3 meters long or water-repellent plywood more than 2 cm thick for mounting the descent. If desired, you can use a plastic ramp, which is produced in the factory. It can be bought from specialized companies or made to order;
- 2 boards measuring 2.5x10x300 cm for installing ramp fences;
- self-tapping screws and anchors for fastening structural elements. Fasteners should be galvanized so that they do not rust in the future. It is better not to take nails when building a slide;
- 2 boards or beams of the appropriate length for the construction of the ascent stringer or the stringer for the steps. Under the upper platform of the frame, if desired, you can make a large roomy box for storing various children's toys and sports accessories in it.
Tool List
To build a children's slide from wooden elements, you will need the following set of tools:
- construction tape;
- good hammer;
- plumb line or level;
- drill;
- electric saw or gasoline saw;
- Sander;
- carpentry plane.
Stages of construction of a wooden children's slide
Before proceeding with the choice of material for the construction of a children's slide, you should choose a place on the site for installing the attraction. The place where it was decided to install the slide is recommended to be well leveled. It is better to place the hill away from trees and various buildings. The area around the structure can be covered with rubber or sown with lawn grass.
Step-by-step instructions for creating a slide made of wood
-
For the construction of the slide structure, it is necessary to use only completely dried wooden boards, as this will significantly reduce the percentage of various deformations in the future. All boards must be well processed with a plane to remove knots and chipping, and also sanded with a special sander. It is also necessary to remove the chamfers, that is, to round off all the sharp corners of the boards.

Boards and beams Planks and wooden beams are considered the most environmentally friendly material for creating children's attractions
-
The lower part of the support pillars must be treated with good antiseptic agents: fire retardant, waterproofing mastic, resin or engine oil processing, as they will avoid premature decay of the tree and its damage.

Antiseptic treatment of boards Antiseptic treatment of boards will prevent premature rotting, fungus and parasite infestation
- At the installation site of the slide, points should be marked for installing the structure racks. These are four square sectors measuring 50x50 cm. Then you need to dig holes 50-60 cm deep and fill them with a sand-gravel mixture about 20 cm. This will be additional protection for the support posts.
- Wooden racks are installed in the prepared wells and poured with concrete. To make the supports strong, they are "tied" at the bottom. To do this, grooves with a size of 2 cm are cut out in the support posts with a milling cutter or an ordinary chisel. Then insert the board for the lower connection of the supports into the cut grooves and connect the supports together. Fastening is carried out with self-tapping screws or screws. If you plan not to dig the supports into the ground, then you will have to install strong stretch marks on the supports.
-
To mount the surface of the upper platform of the slide, take 2 wooden beams measuring 2x4x50 cm to strengthen the strength of the platform and 5 boards measuring 2.5x10x50 cm for the floor. The bars are laid out parallel to each other, and then prepared pine floorboards are attached to them. Gaps of several millimeters are left between the boards for drainage.

The upper platform of the wooden slide For the installation of the upper platform of a wooden slide, polished boards are required, in which there are no knots and notches
-
The slide for a slide made of wood can be made of plastic, and then you just need to fix it on the constructed structure. To make a descent from a tree, take floorboards 3 meters long or water-repellent plywood and attach them to each other along the slope, and then install the sides for a fence of two boards measuring 2.5x10x300 cm. You can attach the descent to the floor surface of the upper platform by forming an angle at 45 °, and then screwing the boards to the base. The second option is filing grooves. The lower part of the ramp, as well as the upper one, is cut at a certain angle. This will provide greater stability to the entire structure.

Plastic slide slide When creating a children's slide with your own hands, the easiest way is to use a plastic slide
-
The boards from which the slope is made must be well sanded before assembling and after installing the escapement. The exit should be perfectly smooth and even, without knots and clues, so that the child does not get a splinter or abrasion while riding the hill.

Wooden slide for the slide The wooden descent for the slide must be as flat and smooth as possible so that the child does not get hurt during the descent
- A slide for a slide can be made of plastic sheet, as it has excellent sliding properties. But plastic can crack from temperature changes and heavy physical exertion, so it is not quite suitable for areas with harsh climatic conditions.
-
Galvanized steel sheet with a thickness of more than 0.5 mm will be an excellent solution for installing a smooth slope for a wooden slide. You can also use thin plywood, linoleum, as well as a special wax polish applied to the wood. All of these materials can be stacked on top of a wooden ramp, making descent easy and quick.

Metal escapement The metal slide for a wooden slide should be carefully sanded
- For older children, you can make a complex screw slope, but then you will have to approach its design in more detail, and additional coating will be mandatory in this case. Remember that any unevenness of the descent, sharp edges and corners of metal sheets, as well as other traumatic elements can seriously injure children. Therefore, all fastening points of self-tapping screws must be carefully sanded, and the ramp itself must be varnished or painted with paint.
-
To make a ladder, you need to make a bowstring or kosour - it depends on the developed drawing. There should be many steps so that the child can comfortably climb onto the platform or descend if necessary.

Wooden slide ladder The distance between the steps of the wooden stairs at the children's slide is made small so that it is convenient for children to climb up
-
Railings (railings) depend on the design of the slide, its height, and the size of the upper platform. It is best to make high handrails so that the child does not accidentally bend over them and fall. Also, the railing on the descent should be high so that the child does not fly out while riding.

Wooden railing slide The railing of the children's slide should not be very low, otherwise they will not save the child from falling
Finishing a wooden slide
Even if it seems that it is very easy to make a children's slide, some nuances should be taken into account.
Each element and detail of the ladder must be well and securely fixed. It is recommended to paint wooden elements and parts of the slide not with oil, but with acrylic waterproof paint, but best of all - with water-repellent varnish, which is used to cover the decks of yachts. Such a coating must be applied in several layers with the obligatory drying of each subsequent layer.
In order for the child to land softly during descent, there must be a mat or a good sand embankment below.

Acrylic painted wooden slide looks bright and grabs children's attention
Tips for operating the slide
Since the slope is constantly exposed to friction during skiing, you will have to periodically paint it. Before that, it will be necessary to re-grind the surface, eliminate all existing defects and wipe the resulting cracks with a high-quality putty.
It is best to install the slide in the yard in a shady place so that it can be seen from the window of the house. This is the best way to keep an eye on the children rolling.
There should be no thorny bushes, allergenic and poisonous plants such as datura grass and foxglove near the slide, so that children do not accidentally get poisoned by their berries. Honey plants should not grow nearby, as they will attract bees and wasps, which can accidentally sting a rolling child.
Also, further away from the structure, various electrical cables, water pipes and watering hoses should be located.
A lot of free space should be left near the slide so that many children can be there at the same time.
Video: how to build a wooden children's slide yourself
Metal slide for children: preparation
Metal structures for country houses are no less popular than wooden ones, and therefore a metal slide will look great on any personal plot. Children will be able to have fun and not distract their parents from activities in the garden and garden. If you can work with welding, then building such a slide will not be difficult.

The metal slide will look great on any garden plot, such a structure is durable and reliable
The advantages of a metal slide:
- high degree of strength and reliability;
- durability;
- high level of wear resistance;
- sustainability.
Design flaws:
- reaction to temperature changes (it heats up strongly in summer and cools down in winter);
- rapid corrosion of metal without proper treatment and maintenance;
- the complexity of making an attraction without proper experience with metal and welding.
Required materials
The length of all elements will depend on the size and dimensions of the future slide. In this case, it is necessary to take into account the fact that the supports must be necessarily concreted into the ground. To create a metal slide you will need:
- square pipes measuring 3x50x50 mm or round - with a diameter of about 50 mm for supporting posts;
- square pipes measuring 2x50x50 mm for creating an upper platform, descent, railings and flights of stairs;
- galvanized metal sheet with a thickness of more than 3 mm to create a slide slope;
- wooden boards for steps if necessary;
- metal corners with a 5x5 cm strip;
- anti-corrosion agents and primer;
- special water-repellent paint for metal;
- cement, sand and crushed stone.
Slide mounting tools
To create a metal slide for children, you need the following set of tools:
- Bulgarian;
- electric or gas welding;
- drill;
- building level;
- Sander.
Stages of manufacturing a metal children's slide
The first step will be the development of a drawing, which will greatly simplify the calculation of the required material and attachment points for all elements and details of the slide structure.

To make a slide from metal, a more careful design drawing will be required compared to a wooden attraction
Step-by-step instructions for making a slide made of metal
- To create the upper platform of the slide, it is necessary to make a frame from a thick pipe with a square cross section, and then cover it with a sheet of metal and weld it. In order for the platform to be strong, it is necessary to weld iron corners at the bottom in a criss-cross manner. To avoid strong sliding, you need to take ribbed metal or choose another anti-slip rough coating (rubber can be used).
-
For the construction of the frame, support pipes (racks) must be welded to the upper platform. It is necessary to weld square metal "heels" to the lower edges, which will give greater stability to the entire structure. Without them, the supports under the irresistible effect of gravity can significantly sag, and the entire frame of the slide can simply squint.

Frame welding It is better to strengthen the support posts of the slide with transverse pipes so that the structure does not deform over time
-
Installation of a steel frame begins with drilling holes in the ground. The pits should be at least 60 cm deep. On their bottom we pour a sand-crushed stone pillow, on which supports with "heels" will be installed. It should be poured with water and allowed to stand for about 24 hours. Then the supports are installed strictly vertically in level and poured with concrete.

Concreting supports If the supports of the children's slide are not concreted, then over time, the structure may squint
- The construction of the stairs is as follows. On one side of the structure, two inclined square iron pipes must be welded to the upper platform of the frame, which will serve as the main staircase. Then the steps will be welded to them. From the corners, you can make a frame of marches, and the steps themselves can be made of polished and dried wooden boards or rectangular metal elements. Wooden steps are safe, especially during the cold season, while metal is more slippery and traumatic. But if you provide the steps with an anti-slip rubber coating, then you can use metal sheets.
-
The railing of a slide (fencing) for kids is best made of metal mesh, and for older children, metal railing with wooden handrails is enough. The distance between all the parts (pipes) of the fences should be such that the child cannot get stuck between them if he suddenly wants to crawl through them.

Metal descent with handrails The metal descent of the children's slide should be done with a safe handrail and a ribbed upper platform
- When determining the curvature of the chute for the slope, it must be borne in mind that the angle of inclination should be steep at the very top and more shallow at the bottom. This will provide your child with a natural way of braking, which means a smooth, safe landing.
-
A descent of any shape (screw, straight, twisted) can be made from a metal sheet. To do this, it is necessary to bend two frame square pipes in the desired configuration using a pipe bender or hot welding. Then the upper ends are welded to the site parallel to each other, and the lower ends are buried in the ground. After that, stiffening ribs are welded to them, which are transverse crossbars. A rectangular sheet of metal intended for the descent device is laid on this structure, and it is welded along the edges to parallel frame pipes. The sheet is overlapped so that the child can ride comfortably. For the slope, it is best to take galvanized, stainless steel or aluminum sheet.

Perfectly smooth slide descent The smoother the descent along the hill, the faster the child moves, therefore, below such a descent should be made less curved
- It must be remembered that the metal elements of the slide will be very hot in summer, and the child may get burned while riding. And in winter, the metal will freeze strongly, which is also inconvenient for children, especially at low temperatures the wet hands of the baby can "stick" to the metal. Therefore, it is best to cover the descent with linoleum, and all metal elements that the child will touch can be covered with rubber pads.
- Parallel to the base of the slope descent, at a height of about 5-10 cm, special elements made of reinforcement or a thin pipe are installed, which will act as sides protecting the descent. They will make riding safe for little ones. In order to prevent the child's hands or feet from getting into the gap between the side and the slope while rolling, it is necessary to sew it up with the remnants of a metal sheet.
-
Since the metal slope is light enough and can bend under its own weight, as well as under a child, it is best to weld additional sturdy racks under the chute for descent and bury their lower part in the ground.

Descent deformation example Without strong racks under the gutter, the metal slope of the children's slide can deform
Final finishing of the metal children's slide
After completing all welding work, it is necessary to carefully process all seams, edges and corners of the structure with an electric grinder in order to ensure complete safety when children ride.

In order to safely use a metal slide, all seams, corners and edges of the structure must be sanded
All metal elements should be treated with an anti-corrosion primer and painted with metal paint. It is not recommended to paint the ramp itself, as this will slow down the sliding process, the descent is already made of stainless material.
Where possible, all metal elements should be covered with rubber pads that can protect children from burns in summer and freezing of hands in winter. Cover the slide area with a special coating that has anti-slip qualities.
The pipes for the manufacture of the frame must have thick walls (at least 3 mm or more) so that they do not bend during operation. This is especially true of the pipes from which the support legs will be made. The quality of the metal profile and sheet for the slope is a very important factor in the construction of a children's slide.
The place for the installation of the attraction must be chosen even and preferably on a hill where there is no groundwater, since they can wash the structure over time and it will squint.
To install a slide, it is best to choose an area where you can later install other children's attributes: a sandbox, swings, carousels, horizontal bars. It will turn out to be an excellent children's sports and entertainment area.
Video: making a children's slide from metal
Thus, a children's wooden or metal slide is easy to make with your own hands, if you follow all technological processes and accurately follow the drawn drawing and dimensions. Children will appreciate your efforts and will be happy to ride such a slide both in summer and winter, having fun in your country house.
Recommended:
How To Make A Children's Swing In The Country With Your Own Hands (made Of Wood Or Metal, Drawings, Photos And Videos)
Step-by-step instructions for the construction and installation of a swing at a summer cottage. Material selection, tools, model drawings
How To Make A Bar Stool With Your Own Hands From Wood, Metal And Other Materials + Drawings, Photos And Videos
Bar stools manufacturing options. Required tools, materials used. Step-by-step description of the manufacturing process with a photo
How To Clean White Shoes At Home Made Of Natural, Artificial Leather And Other Materials + Photos And Videos

Features of cleaning white shoes. How to clean shoes made from natural or artificial materials. The subtleties of caring for sports white shoes, practical advice
How To Soften Shoes (made Of Leather, Suede And Other Materials), Including Softening The Backing So That It Does Not Rub + Photos And Videos
What to do if your shoes rub your feet. Proven ways to soften shoes made from different materials. Using professional products and folk recipes
How To Make A Screen With Your Own Hands From Wood And Other Materials + Photos And Videos
What screens are there, what they are for. Materials for making screens with your own hands. Step-by-step instructions with drawings for manufacturing
