Table of contents:
- Author Bailey Albertson [email protected].
- Public 2023-12-17 12:53.
- Last modified 2025-06-01 07:32.
Door seals and installation

The functions of the door block include not only protection from the entry of unwanted guests into the house, but also protection from cold or hot air, foreign odors and noise. In the places where the leaf adheres to the door frame, gaps always remain, and seals are used to stop the movement of air through the cracks. Not so long ago, our parents and grandfathers used various auxiliary materials for this - rags, felt, moss and even straw. Today, technological progress has replaced these handicraft methods with more efficient and durable ones.
Content
- 1 Purpose of door seals
-
2 Varieties of door seals
- 2.1 Rubber
- 2.2 Silicone
- 2.3 Foam seals
- 2.4 Polyurethane
- 2.5 Brushed
- 2.6 Magnetic
-
3 Installation and replacement of the seal on various types of doors
-
3.1 Sealing metal doors
3.1.1 Video: how to properly glue the seal on the entrance iron door
- 3.2 Installing the seal in wooden doors
- 3.3 Installing a seal in a plastic door
-
3.4 Installing brush seals in sliding doors
3.4.1 Video: Installing the brush seal on the door
-
- 4 Reviews
Purpose of door seals
It is quite simple to understand why seals are installed on the door. Suffice it to recall the refrigerator that is in every home. What if there was no rubber strip on the door? The answer is obvious - it is tantamount to leaving the door open, the effect of cooling products would have to wait a very long time. Indoor cold air constantly mixed with warm air, as a result, the refrigerator would turn into an air conditioner that lowers the temperature in the kitchen. To localize the cooling zone, it is necessary to stop air circulation. This task is performed by the rubber seal.
Similar processes occur with the entrance and interior doors. The door leaf adjoins the frame with a technological gap of 3-4 mm, otherwise the door will simply not open. Through it, air can freely penetrate both in one and the other direction. If this does not play a special role for internal doorways, then a stream of either cold or hot, sultry air will move through the entrance doors all year round. In winter, cold drafts will begin to blow inside the hallway, freezing will increase. In summer, hot air from the street will appear in the house, and at the same time dust and noise.
According to experts, from 25 to 30% of heat is lost through the front door without sealing during the cold season. The solution to all problems is an elastic seal that seals the cracks inside the door block and allows you to control the movement of air.

Air chambers inside the seal increase its thermal insulation properties
Varieties of door seals
For ease of selection, seals are classified according to the following criteria:
- by the material of manufacture (there are rubber, plastic, silicone, foam and polyurethane);
- for the intended purpose (for entrance doors or interior doors);
- by the method of installation (fixing with glue or in a special groove).
Rubber
Rubber seals are time-tested and are most often used for entrance doors. Rubber vulcanized in a special way withstands not only moisture, but also a wide range of temperature differences (from -60 to +90 o C). Possible installation options:
- on the door frame;
- on the door leaf;
-
double seal - one strip is attached to the frame, the other to the sash. When properly installed, the insulation effect is doubled and the shock absorption is increased when the door is slammed.

Rubber door seal The back side of the seal is covered with a self-adhesive layer for ease of installation
Silicone
An analogue of a rubber seal, adapted for interior doors. It is characterized by softness in operation and a lower price, since its resistance to mechanical stress is lower. It is used for light doors made of wood and its derivatives - fiberboard, plywood, chipboard, etc.

Silicone seals are mainly installed on interior doors
Foam seals
Foam rubber is the most inexpensive and short-lived type of door seal. Service life - a year, at most two. With intensive use, the material quickly deforms (shrinks and breaks), so that the sealing has to be renewed almost every season. Foam rubber is more suitable for insulating blind window frames. However, the low price allows you to change the seal as often as you like. The disadvantage is the ability of a porous material to absorb moisture with all the ensuing consequences - freezing and deformation of the door junction with the frame.

Foam seal is available in the form of a twisted bundle of various widths
Polyurethane
Polyurethane gaskets are used in sliding doors (compartment, booklet, sliding doors, etc.). Their purpose is to minimize gaps, as well as soften impacts. The design feature is that inside the elastic body there is a filling made of polyurethane foam. The seals have a long service life and are designed for 15-20 years of service (more than 300,000 opening cycles). They are also used for plastic windows and doors, as they withstand exposure to UV radiation. The main disadvantage is the high price.

Polyurethane seals are used in structures exposed to solar radiation
Brushed
A relatively new product that emerged with the development of sliding doors. The abutment of the canvas to the frame is not always so even that the rubber seal can be properly installed. In these cases, a flexible nylon bristle brush design is used to close misconfigured gaps. Such seals are successfully used for revolving and sliding doors (not only for interior and exterior doors, but also for automobile doors). Especially often they are installed on thresholds - where dust accumulates most. During the movement of the blade, the brushes "rake out" debris and clean the guide track from dirt. Manufacturers claim (and not without reason) that such a seal is effective in combating dust and freezing. Although its sonic permeability is, of course, much higher than that of rubber.

The brush seal is easy to install and slows down the movement of air in the lower part of the doorway
Magnetic
Magnetic seals are used primarily in metal entrance doors, where sealing is critical to keeping the home warm. The design of the seal includes a rubber body and a magnet built into it along the entire perimeter. The force of attraction forces the sash tightly against the door frame, thanks to which the smallest gaps are leveled. In each case, it is important to choose the right magnetic seal: a weak attraction will not work effectively enough, and an excessive one will create difficulties when opening the door. The force to open the refrigerator door can be taken as a sample - it is with this force that the magnet must hold the door closed.

The magnetic stripe, mounted inside the seal, has an unlimited service life
Sealing a room with a magnetic seal received the highest marks from specialists. Air from outside, as well as noise and fine dust, practically does not penetrate into the room. Service life - 15 years or more (depending on the quality of the rubber band). During operation, it is necessary to ensure that small metal objects do not fall between the leaf and the door jamb, steel shavings with sharp edges are especially dangerous. The outer rubber gasket must be washed and cleaned of adhering debris at least once a month (the magnet attracts not only metal, but also small electrostatically charged objects).
When selecting a ready-made factory seal, you must pay attention to the following parameters:
- tape thickness;
- the width of the strip;
- mounting method.
I'd like to add from myself. There is an old grandfather's method that is still relevant today. To determine the thickness of the seal, a piece of soft plasticine (or raw rubber) is wrapped in a plastic bag and clamped into the door in several (at least four) places. It is possible that the compression will be stronger in the area of the hinges, and less near the door handle. From the print on the plasticine, the maximum and minimum size of the seal is determined, and then the average value is found. For example, at the hinges, the plasticine shrank to 3 mm, and in the opposite corner - to 4 mm. This means that a tape with a minimum thickness of 3.5 mm must be installed.
In normal operation, the gasket is considered to contract no more than 50% in thickness
As for the width of the tape, everything is simple here. It should not exceed the width of the supporting part of the door jamb - when the door is closed, it should not be visible from the outside.
The fixing method is determined by visual inspection of the door block. If there is no groove in the frame or canvas for mounting the seal, then the fastening is carried out with glue. If a thin (from 3 to 5 mm) groove is chosen around the entire perimeter, the door is designed for a groove seal.

Compression of the seal should not exceed half of its thickness
Installation and replacement of a seal for various types of doors
The tool required for self-assembly is simple and can be found in every home:
- pencil or marker;
- tape measure and ruler;
- sharp knife;
- brush with long (2-3 cm) bristles.
To install the brush seals, you will additionally need a hacksaw for metal.
The glue is waterproof, best of all - rubber. For degreasing and cleaning the door edge, acetone solvents and sandpaper are used.

When working with a solvent, it is necessary to protect the respiratory system from poisonous vapors with a respirator
If the old seal is being replaced, it is necessary to remove the used tape from the doors and carefully treat the surface with fine emery. Before direct sticking of the tape, the end of the frame (or canvas) is washed and degreased. Small bumps are grinded, and small depressions are putty (pre-filled with glue and dried).
Depending on the type of gasket, there are certain installation nuances. Having familiarized themselves with them, everyone will be able to install thermal insulation tape on their door on their own.
Sealing metal doors
Since a metal door has a flat surface, self-adhesive or simply adhesive seals are most often used. The sequence of actions is as follows:
- Preparatory work. Remove the old sealant (if any), clean and degrease the surface.
- Marking and cutting a rubber band. It is advisable to draw a line for installing the gasket in advance.
-
Gasket gluing:
- if the seal is equipped with an adhesive layer, the protective film is removed. If not, the surface of the door is coated with glue;
- the fixation starts from top to bottom, step by step. The film is removed 20-25 cm each and the seal is glued to the door;
-
on the corners of the tape is cut at 45 on and fit in closely with a minimum clearance.

Installing the door seal The self-adhesive seal is easier to install, you just need to remove the protective film and firmly press the material to the surface
The main mistake when working with silicone and rubber products is excessive belt tension. It is impossible to tighten the gasket during installation; it must be laid in a free, "relaxed" state.
Video: how to properly glue the seal on the entrance iron door
Installation of a seal in wooden doors
The seal is mounted on a wooden base in two ways - with glue (we examined it above) and in a groove. The second method is considered more reliable. The procedure for installing the seal in this case is as follows:
-
The back of the sealing strip is located. It is a perpendicular “shoot” with a comb surface.

Groove door seal "Comb" is designed for tight installation of the rubber band in the groove
-
A segment of the required length is prepared and pressed into the groove with a "brush". In this case, it is necessary to ensure that the tape lies evenly and without distortions into the recess.

Door seal installation Installation is carried out in successive steps of 25-30 cm
- The joints are cut at an angle of 45 on and glued with water resistant adhesive if necessary.
Installing a seal in a plastic door
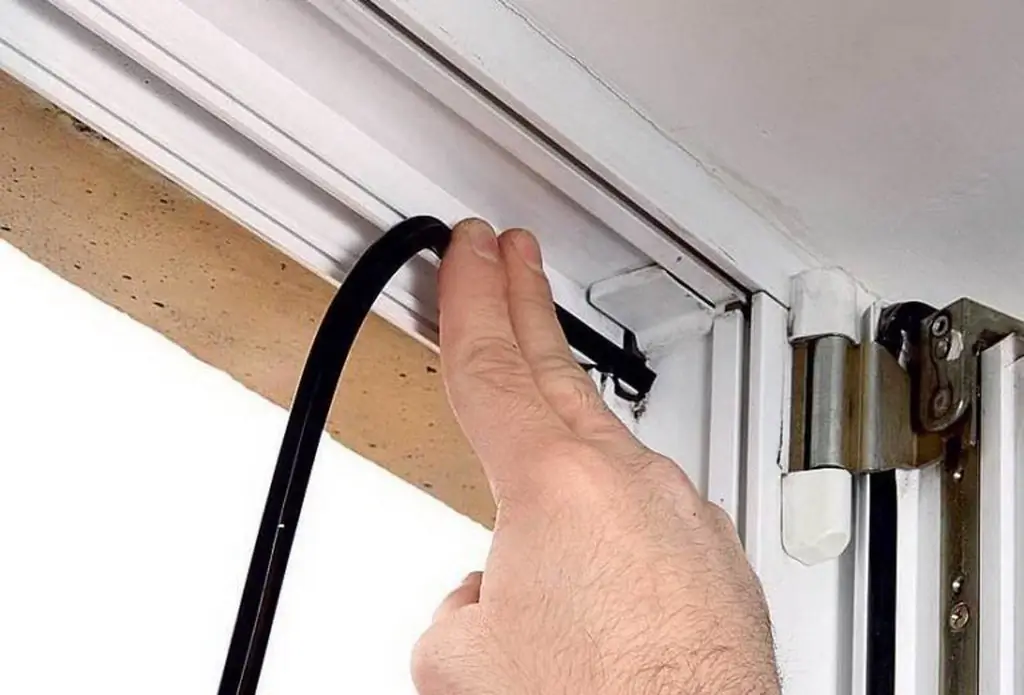
Plastic doors are equipped with seals at the manufacturing stage. In domestic conditions, the replacement of a used part is more relevant. The door has a special ebb (groove) for installing the seal on the glue. Therefore, to replace you need:
- Remove old rubber strip. In practice, it is simply torn off by pulling the free end with force.
- Clean the recess from glue and rubber residues.
- Apply a fresh layer of adhesive with a brush and carefully (without stretching) stick on a new seal.
-
Dock the corners at 45 o. To do this, the ends are cut with a sharp knife and additionally coated with glue from the inside.

Replacing the seal of the plastic door A new seal is installed in place of the old one after thorough cleaning of the seat
- Close the door and wait for the glue to set (from 30 minutes to one and a half hours).
Installation of brush seals in sliding doors
Sliding doors are most often equipped with brush seals. Sometimes they are also called anti-thresholds. Due to the design features, the installation of brushes differs from the installation of rubber and silicone gaskets. They are attached at the bottom of the door or (less often) at the side end.
The installation diagram is very simple. If the door has a flat and smooth surface, the brushes are glued to double-sided tape. If there is any doubt about the strength of the adhesive layer, the fixation can be additionally reinforced with screws. The steps for installing a brush seal are as follows:
- Door leaf end preparation - cleaning and degreasing before gluing.
- Cut out the workpiece - the seal is cut to the width of the door leaf.
-
Fixing the brushes on the door.

Brush seal for sliding doors End brushes are glued to the door and, if necessary, additionally fixed with self-tapping screws
Some models of brushes are attached using brush holders - special metal or plastic profiles. Most often they are used on doors with large dimensions - in garages, warehouses, etc. In this case, the mounting profile is first installed, and then the brushes themselves are attached to it.
Video: installing a brush seal on the door
Reviews
Whichever type of seal you choose, always remember that the key to good insulation is the tightness of the gasket. When installing the tape in the doorway, follow the rules and order of installation. Carefully done work will bring only positive results - the house will be warm, dry and quiet.
Recommended:
Do-it-yourself Pool Cleaning And Repair - How To Remove Greens, Small Particles And Rust, Seal The Film With Your Own Hands, Get Rid Of The Nematode, Clean Without A Vacuum Cleaner

Do-it-yourself pool repair and cleaning. Methods for plastering and painting the structure. How to seal an inflatable pool. Water treatment methods
What To Make A Fence From: Which Is Better For A Summer Cottage, Principles And Tips For Choosing, Their Pros And Cons, Types, Purpose

Country fences have many varieties, it depends on the function, place and material. Which is better to put in a summer cottage and what can be made of
Cystitis In Cats And Cats: Symptoms (blood In Urine And Others) And Treatment At Home, Medications (pills And Others), Veterinarian Advice

What causes cystitis, its symptoms, course forms, diagnosis, treatment. Caring for a sick cat, prevention of cystitis
Liquid Rubber For Roofing: Description And Characteristics Of The Material, Reviews And Disadvantages, Features Of Use

What is liquid rubber and how did it come about. Characteristics. Equipment for application to the roof. Consumer reviews
How To Get Rid Of Ants In An Apartment (domestic Redheads And Others): Recipes With Boric Acid And Others

What to do if ants appear in the apartment and why such a neighborhood is dangerous. Folk methods and chemicals to help get rid of insects quickly
