Table of contents:
- Author Bailey Albertson [email protected].
- Public 2023-12-17 12:53.
- Last modified 2025-06-01 07:32.
What are door slopes and how to arrange them correctly

Even new and beautiful doors will have an unattractive appearance without properly executed slopes. Modern building technologies make it possible to use a variety of materials for decoration. In addition to improving the appearance of the doorway, the slopes help to solve a number of other problems. If they are done correctly and competently, they increase the tightness, heat and sound insulation characteristics of the door, and also prevent physical burglary.
Content
-
1 Functions and device of door slopes
1.1 Features of the device slopes in the doorway
-
2 Materials used for finishing door slopes
2.1 Video: How You Can Hide Curved Slope Angles
-
3 Plastering door slopes
- 3.1 Video: plastering door slopes
- 3.2 Plastering an empty doorway
- 4 The nuances of installing door slopes
- 5 Reviews
Functions and device of door slopes
A door slope is the area around a door or empty opening. The use of modern technologies and materials makes it possible to carry out a variety of design finishes of this place, after which it becomes one of the decorations of the room, emphasizing the tastes and preferences of the owners of the house.
A properly executed door slope at the entrance to a house or apartment will help get rid of many problems, ranging from noise and cold entering the house, and ending with an increase in the safety and comfort of housing

The door slope should harmoniously fit into the surrounding interior
The door slope has the following functions:
- heat insulating. After it is properly finished, heat or cold from the street will not penetrate into the house;
- noise canceling. A correctly executed slope will not give an opportunity for extraneous sounds to enter the house from the street or from the entrance;
- aesthetic. By choosing the right finishing material and completing its installation in accordance with the developed technologies, you can design the room in an original way and make it bright, memorable and unique;
- protective. After installing the slopes, the burglary resistance of the door block increases.
The finishing of the slopes is started after the door is installed. First, the upper part is installed, after which you can proceed with the installation of the side elements.
Features of the device slopes in the doorway
If you look at the door slope in section, you can see that it is made according to the principle of a sandwich and consists of several layers arranged in a strict order. Only by observing the installation technology, you can correctly install the door slopes and get not only high-quality, but also a beautiful result.
The door slope consists of the following layers:
-
Rough. It is executed in the following order:
- primer. A special composition is applied to the prepared and dust-free surface with a roller or brush, designed to level it and improve adhesion with subsequent layers;
- thermal insulation. This layer is not an obligatory element of the door slope and is usually performed only near the entrance doors. Expanded polystyrene is most often used as a heater;
- plaster or drywall. It is easier and faster to make plasterboard slopes; this method is more often used when decorating interior doors. The material can be glued to the surface of the slope or fixed on a pre-installed frame. Working with plaster is more difficult and time-consuming. In this way, the slopes of the entrance doors are usually trimmed, since there is a high probability of high humidity;
- reinforcing corners. They are necessary to protect the outer corners of the slopes;
- surface putty and grout;
- outer layer of primer.
-
Finishing layer. You can use a wide variety of finishing materials: paint, wallpaper, decorative stone, mosaics, tiles and others. Depending on their choice, the method of attachment will also change.

Door slope device First, the slope is roughly finished, and then it is covered with finishing material
Materials used for finishing door slopes
There are many options for finishing door slopes, so when choosing materials, you must take into account your preferences and financial capabilities, as well as interior features. The most commonly used:
-
PVC panels. The choice of plastic insulating panels is one of the best options when decorating entrance door slopes. This is due to the high heat and sound insulation characteristics of the material, its durability and sufficient strength. The main advantages of finishing the slopes with PVC panels:
- the installation process has no "dirty" stages;
- it takes a minimum of time to complete the work and you do not need to have special skills;
- during operation, minimal maintenance is required;
- panels tolerate temperature drops and ultraviolet light well;
-
moisture does not accumulate, the material is not afraid of its negative impact.

Door slopes from PVC panels Decorating door slopes with PVC panels is quick and does not require dirty work
-
Drywall. This is the most common finishing material with which you can quickly and easily decorate a doorway. To work with drywall, you do not need special tools and skills, so you can cope with its installation yourself. After laying drywall, you will have to use finishing materials, their choice depends on the preferences of the owners. Finishing can be done in two ways:
- panels are fixed to the surface with glue;
-
create a frame from a metal profile or a wooden bar and already fix the gypsum board on it.

Plasterboard slopes Plasterboard slopes allow you to quickly and easily arrange a doorway
-
Plaster. To use this finishing option, you need to have certain skills. You can take not ordinary, but decorative plaster, this will allow you to get a more beautiful and original result. Often a perlite mixture is used for these purposes. Its only drawback is its high cost. One centimeter of such material in its thermal insulation characteristics corresponds to laying in one brick. Any plaster must be applied in several layers and wait a certain time until they dry. Therefore, such work takes a long time and requires the application of serious physical efforts.

Plastering of slopes To plaster door slopes, you must have the appropriate skills
-
MDF panels. They allow you to decorate a doorway of any width. This finishing material, like drywall, can be mounted on glue or on a frame. For wide openings, the second option is more acceptable. In this way, slopes up to 80 cm wide can be trimmed. MDF panels can be faced with natural veneer and then covered with varnish or laminated foil of various colors. This allows you to beautifully decorate the doorway and select the finishing material for any interior.

Slopes from MDF panels MDF panels can be used to trim slopes up to 80 cm wide
-
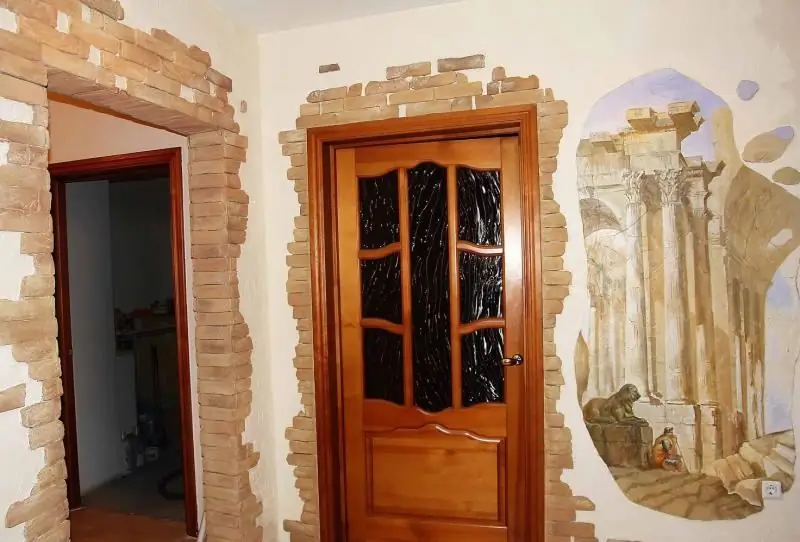
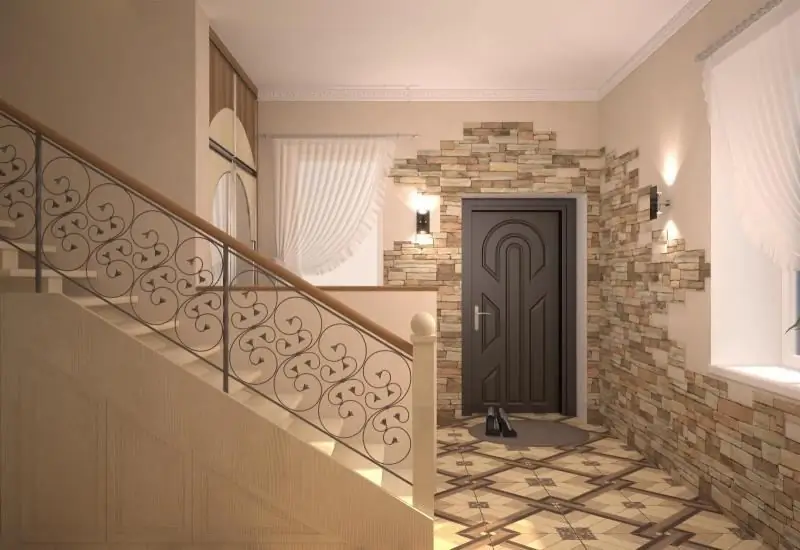
Decorative rock. Although this is an expensive material, finishing the door slopes with it allows you to get a beautiful and original solution. In order not to overload the interior, it is recommended to use medium sized decorative stones. The main advantages of this option are:
- beautiful appearance;
- high coating strength;
- ease of maintenance and the possibility of restoration or replacement of damaged elements;
-
good compatibility with other finishing materials.

Decorative stone slopes The use of decorative stone allows you to finish the door in an original and unusual way
-
Other options. If you want to make an exclusive and unique door jamb, you can use natural materials. This can be cork bark, bamboo hew, and other materials. Their advantage is that they do not cause allergic reactions, therefore they can be used in a house where people who are sensitive to dust and foreign odors and small children live. In addition, they do not accumulate static electricity, so dust does not adhere. Natural materials go well with all types of doors and help create a harmonious and peaceful atmosphere in the house.

Natural wood slopes Natural wood does not cause allergic reactions and looks very beautiful
Video: how to hide curved slope angles
Plastering door slopes
Although the plastering of door slopes requires certain skills, if there is a desire, then, adhering to the developed technologies, it is quite possible to cope with this task on your own.
To complete the work, you will need the following tools:
- large building level;
- rule;
- wide spatula;
- template;
- brush or roller;
- grater;
- construction mixer or drill with attachment;
- container for solution;
- knife;
- sandpaper;
-
masking tape.

Plastering tools Plastering slopes requires simple hand tools
In order to save mortar when filling large potholes, they can be filled with pieces of polystyrene, and then plastered
You can plaster door slopes with different compositions:
- ordinary sand-cement mortar. You can prepare it yourself; for this, mix cement and sand in a ratio of 1: 4;
- you can add a little alabaster or gypsum to the sand-cement mortar. This will speed up the process of its setting, so the work can be done faster;
-
ready-made plaster mixes.

Preparation of mortar for plastering For plastering slopes, the consistency of the mortar should be like thick sour cream
It is easier to work with ready-made mixtures, but a cement-sand mortar prepared on your own will cost less
Technology for plastering door slopes:
-
Surface preparation. Since this is a dirty job, it is necessary to cover the door leaf, floor and nearby objects with foil or tape. After that, poorly adhering plaster, brick or other materials are removed from the surface. It is recommended to completely remove all old plaster for a good result. The cracks around the door frame are filled with foam. After it dries, the excess is cut off with a sharp knife.

Surface preparation of slopes All remnants of old materials are removed from the surface of the slopes, having previously closed the door leaf with a film
-
Exposing guides. In order to get a flat surface, you need to set the guides. Outside the doorway, a perforated corner is installed, fixing it with a solution. The door frame will play the role of the second guide. The plaster should not completely cover it, so a template is made of wood or dense plastic to level the solution. If the work is done with a spatula or a rule, then it will be necessary to expose beacons.

Applying a template Using a template, level the layer of applied plaster
-
Rough plaster. In order for the solution to adhere well to the surface, it must be cleaned of dust and primed. You can not use a primer, then the surface is slightly moistened with water before applying the plaster. Using a spatula or a painting bucket, they throw a solution onto the wall, and then level it with a rule or template. At this stage, you should not achieve special evenness, but you need to control the condition of the corners and remove excess mortar. The upper slope is more difficult to cope with, but this work can be done independently.

Rough plaster When applying rough plaster, you should not achieve a special evenness of the surface
-
Fine plaster. The first layer should dry within 12-16 hours. To determine the readiness of the surface, you must try the coating by touch - it should not float, but crumble. For a finishing application, a more liquid solution is prepared compared to that used for the rough plaster. It is thrown and leveled well. To get the most flat surface, the rule must be moved along a zigzag path.

Finish plaster layer To obtain the most even surface, the rule must be moved along a zigzag path.
-
Grout. At this stage, the maximum flat surface is achieved. You can start work only after 16-24 hours, when the plaster is completely dry. They make a fairly liquid solution and distribute it not with a spatula or template, but with a special grater. The work is performed in a circular motion. If you plan to putty slopes, then this stage can be skipped.

Grout If the surface is putty, then the plastering can be skipped
-
Finishing finish. It is recommended to prime the surface again, and then putty it. First, a layer of starting putty is applied, and when it dries (this will take 4-8 hours), the finishing compound is applied. After it dries, using a special mesh, the surface is leveled, eliminating all, even the smallest irregularities.

Finishing After filling the slopes, they are leveled, achieving a perfectly flat surface
If the plastering of the slopes is performed independently and for the first time, then a perfectly flat surface for painting may not work right away, but even a beginner can prepare a slope for gluing wallpaper
Video: plastering door slopes
Plastering an empty doorway
Sometimes interior doors are not installed, but it is still necessary to arrange the slopes in such an opening. The technology for performing the work is similar to that described above, the only differences will be in the method of installing the guides:
- You can start finishing the opening only after the walls on both sides have already been plastered.
-
The guides are installed on both sides of the opening. To do this, use flat boards, profile or plastic. The easiest way is to fix the guides with clamps. You can do this with screws, and then carefully seal the holes left after them.

Plastering an empty doorway You can fix the guides with clamps or self-tapping screws
The nuances of installing door slopes
Due to the existing variety of materials, owners have the opportunity to experiment and choose the one that perfectly matches the interior of the room. It is imperative to take into account the purpose of the door, since it can be entrance or interior. In addition, before choosing a material for finishing slopes, you should evaluate your capabilities, since some installation options require special skills.
Expert advice:
- when using drywall, MDF panels or other board materials, it is necessary to accurately measure and correctly cut the material;
-
by painting slopes, you can quickly change their appearance. The only drawback of this option is that the surface must be perfectly flat;

Painted slopes Painting slopes allows you to quickly change their appearance
- the easiest way to finish slopes is considered to be the use of drywall when it is mounted on a frame. In this case, it is not necessary to level the surface, all work is done simply and quickly;
- when finishing the slopes of entrance doors, it is recommended to lay insulation. This allows you to increase not only heat, but also sound insulation characteristics of the door block;
- in the case of the front door, attention must also be paid to sealing the entire structure so that there are no drafts. First, all the cracks are filled with polyurethane foam and only then they start finishing the slopes;
- if you decide to apply plaster to the slopes and will do it for the first time, you need to carefully study the technology for performing the work, since this is the most difficult way of finishing;
- in order to perform high-quality plastering, it is necessary to properly prepare the surface. To increase the adhesion of the mortar to the wall, it is recommended to apply a layer of primer.
To obtain a high-quality and beautifully designed slope, one must clearly adhere to the technology for performing work, which will be different for each material. If you skip at least one of the steps or do it incorrectly, the result will be ugly, and the materials will be spoiled.
Reviews
If you decide to finish the door slopes yourself, you first need to decide on what materials are at hand. This may lead to a new idea, since there are quite a few finishing options. In addition, they must take into account their own preparation, since the installation of some materials requires special skills. You can implement an original solution, for example, make 3D slopes or use several different materials at the same time. If the opening is wide, then niches, shelves, hiding places can be created in the slopes. There is no limit to imagination, so everything is in your hands.
Recommended:
Door Safe: Varieties, Device, Components, Installation And Operation Features

Safe door structure. Construction types. DIY step-by-step installation instructions. Features of repair and selection of components. Photo and video
The Second Entrance (internal) Door To The Apartment, Features Of The Device, Installation And Operation

Why do you need a second entrance door and what material to choose the product from. How to install a second door and features of repair and operation of the structure
Door Closer: Functions, Varieties And Device, As Well As What To Consider When Choosing

What is a door closer and how it works. Varieties of mechanisms, how to choose the right one. Installation and adjustment
Slopes For Entrance Doors And Their Finishing: The Choice Of Material And The Order Of Installation By Hand

Features of the slopes of the entrance doors. Materials used to create slopes. Different ways of mounting materials on the slopes of entrance doors
Mauerlat, Its Purpose And Functions, As Well As Features Of The Device And Installation

Appointment, features and calculation of the Mauerlat. Principles of mounting the base under the truss system. Methods for attaching the Mauerlat to walls made of different materials
