Table of contents:
- Author Bailey Albertson [email protected].
- Public 2023-12-17 12:53.
- Last modified 2025-06-01 07:32.
How to make a house for a cat with your own hands
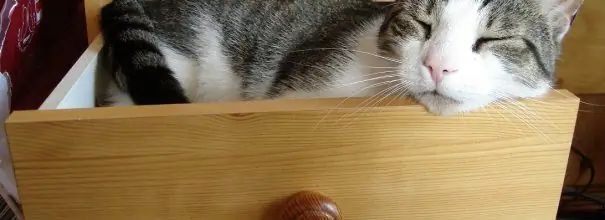
In specialized stores, a huge range of everything necessary for cats is presented. These are bowls, trays with fillers, and toys. But at the same time, it is important to provide the pet with its own home, where it can feel safe and comfortable. The price of such products can "bite", but you can always make it yourself.
Content
- 1 Requirements for the cat house
-
2 Step-by-step instructions for making a house with your own hands
-
2.1 House from a cardboard box
2.1.1 Video: a real cardboard cat house
- 2.2 House made of plywood
-
2.3 House made of foam rubber and fabric
2.3.1 Video: how to sew a home for a pet
-
2.4 House-scratching post
2.4.1 Video: how to make a do-it-yourself cat complex with a scratching post
-
2.5 House of newspaper tubes
2.5.1 Video: original house with a cover for a kitten
- 2.6 Cat litter box
-
- 3 Where is it better to place the finished house
Requirements for the cat house
When choosing a design, it is recommended to take into account the needs of the animal, which may depend on breed, age and character. Therefore, the cat's house must meet the following requirements. The design must be:
- safe;
- fenced;
- strong, reliable, the house should not fall when the cat jumps;
- able to withstand the mass of an animal (if you have a kitten, then you need to study what is the maximum weight of an adult representative of this breed) or several pets at once;
- as closed as possible;
- suitable in size (if there are several cats, then the house should be such that several loungers fit in it);
- easily accessible to the animal, while taking into account individual characteristics, some of them love height, while others feel more comfortable closer to the floor;
- cleanable, the material should not easily absorb odors, because they can scare the cat away.
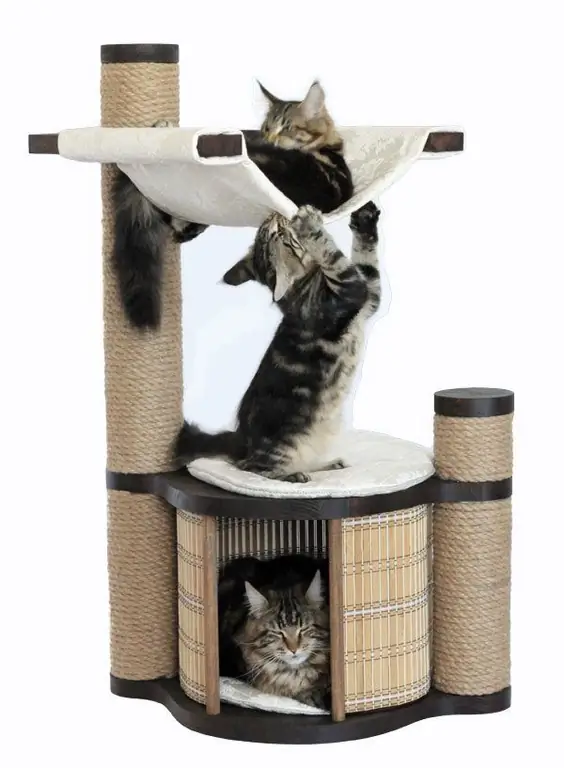
A cat should feel comfortable in its house.
Scratching posts, hanging toys, hammocks will be useful on the cat's house. This will save space in the room. It is advisable to make as many different holes and lying surfaces as possible to give your pet a choice.
DIY step-by-step instructions for making a house
A homemade house is ideal for your cat, because when creating it, all individual characteristics, character and preferences will be taken into account. It must be done in such a way that, if necessary, it can always be modernized (for example, if the kitten likes to eat deliciously, but is indifferent to physical activity, which means that its mass may be excessive).
House from a cardboard box
This design is the simplest and most win-win, because everyone knows the love of cats for boxes of all sizes. Such a house has other advantages, for example, good thermal insulation, material availability.
The first stage in the manufacture of a product is design development. It is recommended to provide a place for sleeping and playing, while the shape should be free of small details and sharp corners.
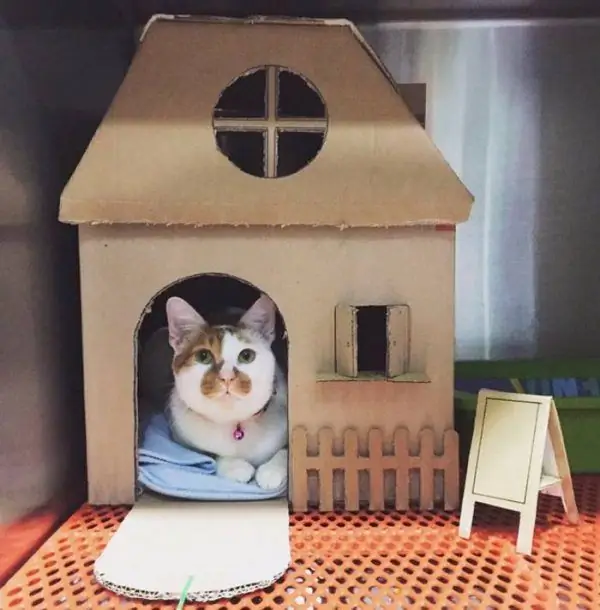
The love of cats for boxes can be used when choosing material for a house.
To make a house from a cardboard box, you need to follow the instructions:
-
On the box, mark the places where there will be holes about 15-20 cm in size in the future. Both a kitten and an adult cat can enter such a house. You can make them with scissors or a stationery knife. If you want to make a tunnel out of the boxes, do this work with each of them.

Cardboard box The box must be large enough for a kitten and an adult cat
- Sheathe the blank with felt. Do it both outside and inside. This material will increase the strength of the structure, and hence the service life.
- Put a piece of carpet on the floor of the house. This must be done in such a way that, if necessary, the carpet can be removed from the house and cleaned. Therefore, glue is not suitable for this purpose. Better to use metal staples.
-
Make a roof from pieces of thick cardboard.

House blank You can make doors and windows in the house
-
The house can be decorated, for example, painted.

Finished house The roof of the house can be flat or pitched
Video: a real cardboard house for a cat
House made of plywood
Plywood requires certain skills, working with this material is a little more difficult than with cardboard, but a house made of it will be more durable and reliable. For the manufacture of the structure you will need:
- plywood;
- furniture corners;
- carpet, felt or any other similar upholstery material;
- foam rubber;
- glue;
- fine-grained sandpaper.
The manufacturing process itself is as follows:
-
Cut 6 identical squares out of plywood. Their dimensions are about 40 * 40 cm or 50 * 50 cm.

Plywood house scheme Most often, a cat house is shaped like a cube.
-
Make holes in two parts so that the cat can enter its house. Sand them with sandpaper.

Blanks for a plywood house The entry hole is usually round
-
Connect 5 squares together in the form of a cube without an upper bar. For fastening, you can use furniture corners and screws of suitable length.

Fastening the details of the house Furniture corners can be used to fix the walls of the house.
- Sheathe the house from the inside. To do this, first put the foam rubber on the bottom, which is fixed with a stapler, and then lay out the carpet or felt. Also secure it with a stapler. Perform the same work with the side walls.
- Cover the house with the remaining square piece, which is also attached with a furniture corner.
Exterior decor can be made in accordance with the design of the room. For decoration, the same carpet, self-adhesive wallpaper or paint is suitable.
Additionally, you can install a scratching post with a viewing platform. To make this part you need:
- Take a pipe for a scratching post. It can be a plastic or wooden part. It needs to be covered with glue and tied with a rope. Make sure that each loop fits snugly against the previous one.
- Make an observation deck out of a square of plywood. It must first be sheathed with foam rubber, and then sewn with fabric on both sides.
- Attach the observation deck to the scratching post with furniture corners, and then the pipe to the house in the same way.
A hanging toy can be attached to the bottom of the viewing platform.
House made of foam rubber and fabric
Sewing a house out of fabric is not difficult, for this you do not need to be a professional in handling a sewing machine. The following materials must be prepared in advance:
- foam rubber (1.5 cm thick material is suitable for walls, 2.5 cm for the bottom);
- dense fabric for external and internal (you can use not a single piece, but pieces) finishing.
The very process of creating a classic cat house is as follows:
-
Pattern of fabric parts. First you need to make a template, for which newspapers or old wallpapers are suitable. It must be transferred to the fabric, taking into account an allowance of 2 cm. You will need 8 such blanks for the walls (base - 40 cm, height - 30 cm, distance from the edge of the wall to the edge of the roof - 25 cm). A zigzag stitch is recommended for the edges of these parts.

House details Each part needs two copies
- Pattern of foam parts. Their dimensions correspond to the fabric details, but there should be no allowances here. Their number is smaller: 4 wall parts (40 * 30 * 25 cm) and 1 floor part (40 * 40 cm).
- Assembly of parts. To do this, place foam rubber between two fabric blanks. Make a rough outline around the perimeter, and then sew along the marks. After that, turn the workpieces out.
-
Arrangement of the entrance. Mark a round hole on one of the wall parts, then cut it out, and machine the edges with a machine stitch.

Front wall The hole must be large enough for the cat
-
House assembly. Sew all the parts together from the seamy side, and you need to start from the entrance, and finish with the back wall. At the end, the bottom is sewn to the house.

The seamy side of the house You need to sew all the details from the wrong side
-
Now the house needs to be turned out through the inlet.

Cat in a cloth house The house made of foam rubber and fabric retains heat perfectly
Video: how to sew a home for a pet
House-scratching post
Sharpening the claws is a must for the cat. If this is not done, then damage to furniture or walls cannot be avoided. There are different options for making such a design. The simplest is a house made according to the following instructions:
-
Cut truncated circles with a radius of 27 cm from two pieces of chipboard.

Chipboard sheet The back and front walls must not be completely round
-
Leave one circle solid, and make holes on the second: one for the entrance (diameter 22 cm) and several decorative (diameter 5.5 cm). You can cut out parts with a jigsaw, and for small holes, a drill with special crowns is suitable.

Back and front walls On the front wall, you can make not only an opening for the entrance, but also several decorative
-
Mark the mounting locations. They should match on two parts. Drill holes for fasteners according to the marks.

Drilling parts To hide the caps of the screws, you first need to make a depression in the blanks
-
Prepare wooden blocks 37 * 3 * 4 cm in size. Sand them with sandpaper. Screw them to the walls using self-tapping screws.

Preparation of a house for a cat The frame for the house may not be solid
-
Cut pieces of fabric in accordance with the dimensions of the walls, not forgetting about the allowances. Paste the walls with them. In this case, it is better to choose a glue gun, as it does not have a strong smell. Particular attention should be paid to the edges of the walls and holes.

Cat on the bed It is better to use a heat gun to glue the house with a cloth.
- On a piece of chipboard, mark the location of the house and the scratching post. On the site where the house will be, place the foam rubber that needs to be glued. Glue the fabric on top with allowances. Additionally, you can fix it with a stapler. She also glue the sides of the lower rails. Close the bottom of the base with a sheet of fiberboard.
- Cut a piece of fiberboard measuring 40 * 122 cm. This material will serve as a roof. Before fastening it must be pasted over with a cloth.
-
Attach the house to the prepared base. Self-tapping screws are ideal for this. The exposed parts of the slats and the remaining side walls can then be covered with a suitable cloth.

House from the inside The house for the cat must be pasted over with a cloth from the outside and from the inside
-
Now attach a pipe for a scratching post to the base. First, insert the bars into it from both sides. On one side it is attached to the base (with self-tapping screws), on the other side they make a stove bench.

Bar in the pipe To fasten the pipe, you can use bars that need to be placed in the cavity of the part
-
For this, parts are cut out from a sheet of fiberboard (in the middle of the part, you need to make a hole with a diameter the same as that of the pipe) and chipboard (this part must be solid). The first part is put on the pipe, and the second is screwed to the bar in the pipe. Now you need to put a piece of foam rubber on the couch, and then paste it over with a cloth.

Detail for the bench It is better to make the bed semicircular
- Paste the lower part of the scratching post with a cloth that was used to decorate the house from the inside, the rest with a rope.
-
Additionally, you can make an inclined scratching post from a board measuring 18 * 41 cm. Cut the bottom edge at an angle of 45 °, then glue it on both sides with cloth, and fill the middle with a rope.

Ready house with a scratching post The scratching post can be in the form of a pipe or inclined
Video: how to make a do-it-yourself cat complex with a scratching post
House of newspaper tubes
If it is not possible to purchase material specifically for making a cat's house, then a newspaper is quite suitable for this purpose. You can make tubes from it, which can later be used to weave a house. You need to prepare in advance:
- pencil (any object of a similar shape, for example, a brush, knitting needle);
- ruler;
- scissors;
- glue;
- cardboard.
After preparing the necessary materials and tools, you can proceed directly to weaving:
-
Cut the newspaper into strips 10 cm wide. Now attach a knitting needle to the strip at an angle of 45 ° relative to the narrow part of the part. Pressing the needle against the newspaper, wind the latter around the tool. After that, remove the knitting needle, and glue the tip of the tube. The number of tubes cannot be specified in advance, it all depends on the size of the house.

Materials for a house made of newspaper tubes It is not difficult to get materials for a house from newspaper tubes
- Cut out the bottom of the house from cardboard (two parts). Make holes in it at a distance of 1.5-3 cm from the edge, into which to insert the tubes, having previously greased them with glue. Now glue the second part of the bottom so that the ends of the tubes are between them.
-
Now you can weave the walls, for which the tubes need to be passed between the wall tubes, alternately changing their direction (either from the outside, then from the inside).

Harvesting a house from tubes Weaving a house from tubes is a monotonous process.
- At a height of 4-6 cm from the bottom, you need to start making a hole for the cat to enter the house. Its size depends on the size of the cat (if you have a kitten, you still need to make a hole for an adult animal). The hole must be strengthened by braiding around the edges.
- To weave the roof at a height of 30 cm, you need to start tapering.
-
It is better to decorate the house with food coloring, so you can be sure of the environmental friendliness of the product.

House for a cat made of newspaper tubes House of newspaper tubes is environmentally friendly
Video: original house with a cover for a kitten
House-toilet for a cat
Although the cat litter box is a special device that helps to avoid unpleasant situations with the cat's trips to the toilet, its contents do not always look aesthetically pleasing. But you can always hide it in a specially prepared house. It is not difficult to make it. You need to prepare in advance:
- plywood (material with a thickness of 12-15 mm is suitable for the walls);
- boards 4 cm wide;
- a hammer;
- self-tapping screws;
- nails;
- screwdriver or screwdriver;
- glue;
- jigsaw;
- hacksaw;
- drill;
- roulette;
- furniture hinges;
- sandpaper;
- tracing paper;
- masking tape;
- paint.
The instructions for making such a house are as follows:
-
Sizing. You need to take into account only the size of the tray, because the cat will not rest there, and the height of the cat while sitting.

House scheme for the tray When determining the size of the house, you need to take into account the parameters of the tray
-
Cutting out parts from plywood. You can use a jigsaw for this. In total, you will need 4 wall parts: 2 side, 1 rear and 1 front.

Piece of plywood Plywood is perfect for a cat house
-
Sawing a hole in the front wall. You can use a paper template for this. The hole should be 5 cm from the floor.

Hole pattern The entrance form to the house can be any
-
Grinding the edges of the hole.

Grinding hole edges The edges of the hole must be smooth so as not to injure the cat
-
House assembly. All parts must be combined, after having greased the ends with glue. Leave the house until the glue dries. To prevent the structure from disintegrating, it can be fixed with tape. After the glue is dry, you can remove it.

House blank for the tray So that the walls do not part, they can be held with adhesive tape or electrical tape
-
Fixing details. Now all parts of the house need to be fastened together with nails.

Hammer hammer in nails You need to fix the details with nails.
-
Top cover manufacturing. To do this, you need to attach the boards to the end strips.

Roof blanks The roof may not be solid
-
House painting. Only then can the roof parts be connected with furniture hinges. Moreover, one of them must be attached to the house, and the second must remain free so that the tray can be removed through the roof.

Tray house The tray house has an opening cover
Where is it better to place the finished house
After the house is made, you need to figure out where to put it. The area near the battery is not the best place. There are several reasons for this:
- the battery is under the window, which means there is a risk of draft, which can be the cause of the cat's illness;
- due to the effect of heat, the house will become unusable faster;
- The warm air can make your cat shedding.
A corner is considered the ideal place for a house. There, the structure will not interfere with anyone, there is no draft in this part of the room, and the heat lingers there, which means that the cat will definitely not freeze.
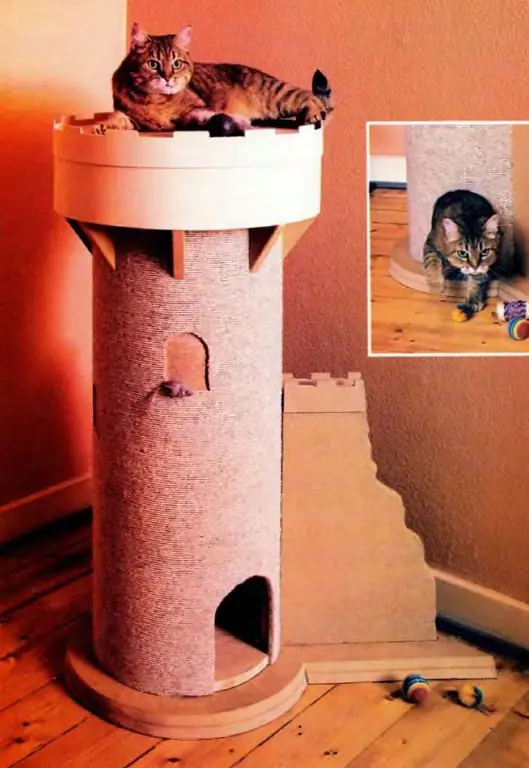
The best place for a cat house is in the corner of the room
A cat can be a full member of the family, which means it also needs a separate room. You can do it yourself, with a little effort and showing imagination.
Recommended:
How To Make A Gazebo Out Of Wood With Your Own Hands - Step-by-step Instructions With Photos, Drawings And Video
A gazebo made of wood, who has not dreamed of having it? Now you have such an opportunity, read and get to work on making the structure yourself
How To Make Garden Benches With Your Own Hands From Pallets, Pallets And Other Materials At Hand - Step By Step Instructions With Photos, Videos And Drawings
Do-it-yourself construction of classy garden benches from pallets, old chairs and other improvised materials: step-by-step instructions, drawings, photos, videos
How To Make A Scratching Post For A Cat With Your Own Hands: A Master Class, Step-by-step Instructions (diagrams, Sizes, Photos And Videos)

Practical step-by-step advice and recommendations for owners of cats and cats: how to make an excellent scratching post with a house with your own hands, with diagrams, photos and videos
How To Make A Font For A Bath With Your Own Hands, Wooden And From Other Materials - Step-by-step Instructions With Photos, Videos, Dimensions And Drawings

Why do you need a hot tub, its design. Types of fonts. How to make a font with your own hands: step by step instructions. Photo and video
How To Make A Septic Tank For A Private House With Your Own Hands - Step By Step Instructions With Photos, Drawings And Video
Design, principle of operation and features of installation and operation of septic tanks. DIY design and manufacture of concrete treatment facilities
