Table of contents:
- Author Bailey Albertson albertson@usefultipsdiy.com.
- Public 2023-12-17 12:53.
- Last modified 2025-06-01 07:32.
Recessed roof: features and installation rules

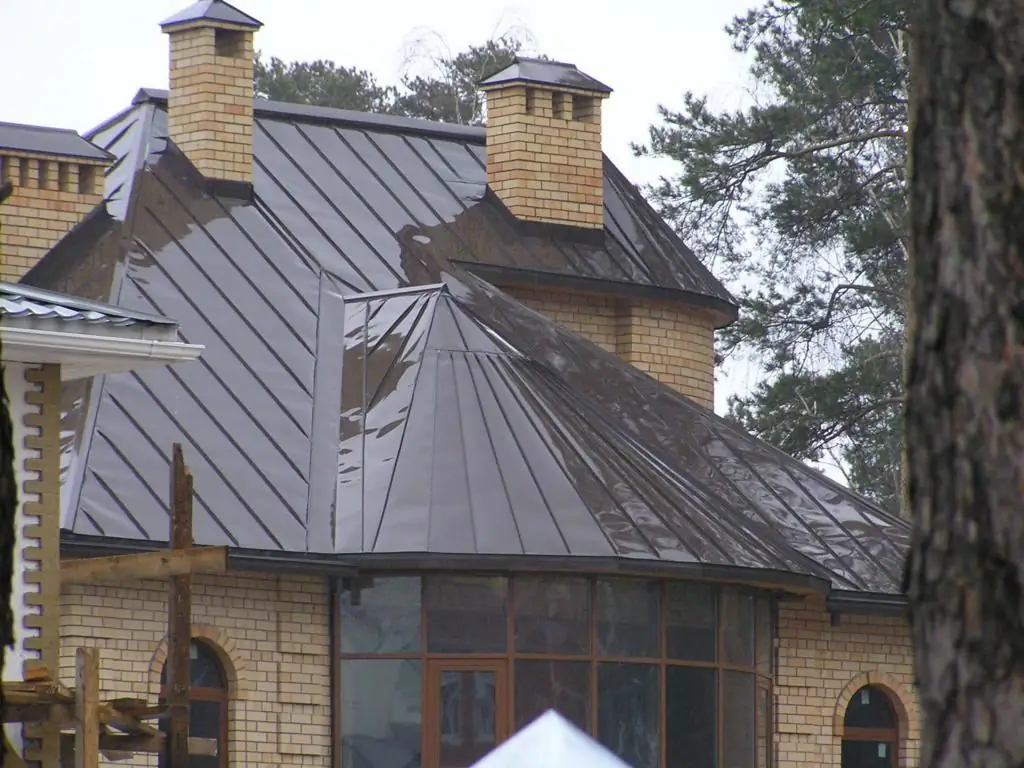
The roof performs a very important function, regardless of its type and the purpose of the structure. It is she who protects the house from the penetration of moisture, snow, wind, and also retains heat inside the living quarters. There are a large number of roofing materials that help the roof to fulfill its function, but the folded look has a special place. And there are reasons for this - this is the reliability of the structure, its long service life, the ability to do it yourself.
Content
-
1 Tools for installing seam roofing
1.1 Video: folded roof bending machine
- 2 Material for standing seam roof
-
3 Laying seam roof with your own hands
-
3.1 Technology of laying seam roofing
3.1.1 Video: installation of a click-folded roof
-
3.2 Stages of seam roof installation
3.2.1 Video: DIY installation of a folded roof
-
3.3 Installation of rebated roof elements
3.3.1 Video: laying the valley
-
-
4 Errors in the installation of a seam roof
4.1 Video: mistakes that can be made when installing a seam roof
- 5 How to properly disassemble a folded roof
Tools for mounting seam roofing
It is possible to install a seam roof on your own only if you have a special tool:
-
Folding machine. It is used only if the seam length is more than 10 m. The tools can be manual, semi-automatic or electric. For self-installation, the first two options are most often used.

Folding machine It will not be possible to do without a folding machine when installing a metal roof
- Measuring and marking tools (tape measure, ruler, square, pencil). It must be mandatory, since during installation it will be necessary to mark the places of the bends of the edges.
- Mallet.
-
Folding hammer. Its distinctive feature is the short handle.

Folding hammer Folding hammer is needed for work in hard-to-reach places
- Scissors for cutting metal. They can be right and left, which indicates the direction of the cut.
-
Manual "frame". Its length is 22 cm. It corresponds to the processing step of the connecting seam.

Manual fold frame The length of the rebate frame corresponds to the seam step
-
Mandrel blade. It is usually made of steel.

Mandrel blade A mandrel blade will help to fold the edges of paintings without using a machine
- Pliers that are used to open damaged folds.
- Chisel, pliers, file.
- Screwdriver and drill.
- Sealant gun.
Video: folded roof bending machine
Seam roof material
Seam roofing involves the use of metal sheets. More recently, it was only galvanized steel, which still serves some homeowners due to its resistance to corrosion. Now the list for arranging a folded roof is much wider:
-
Color coated galvanized steel. It protects the folds from the harmful effects of ultraviolet rays on the metal, and also performs an aesthetic function, because the tone of the material can be matched to the color of the general idea of landscape design.

Color coated galvanized steel Color coated galvanized steel can be of any color
-
Copper. As a rule, it comes in rolls. The material can be clean or textured. The latter most often imitates the relief of tiles or other roofing material. Copper seam roof has a long service life, in some cases it reaches hundreds of years. In addition, it is copper that allows you to connect metal sheets not only with the usual folds, but also by the soldering method.

Copper pattern for standing seam roof The copper roof has a typical shade for this metal.
-
Aluminum. This material is particularly soft. It is somewhat similar to copper sheets, in particular, it is produced in rolls and may have a pattern. It has a long service life, it can reach 80 years. The advantage of aluminum is that it does not corrode and does not require painting or coating with any other similar material. Also, aluminum is absolutely not afraid of temperature changes, which means it can be used in areas with a difficult climate.

Aluminum rebated roof Aluminum is absolutely non-corrosive
-
Zinc titanium. A relatively new metallic material. It is produced both in rolls and in tape. It has one significant drawback - excessive fragility, which makes the installation process a little more complicated. Zinc-titanium is incompatible with other metals, as well as with some types of wood, so the scope of the material is limited. To work with it, you need a special tool and some skills. In addition, it is forbidden to work with it at an air temperature below 5 degrees. But there are also advantages of zinc-titanium: long service life and resistance to corrosion.

Zinc-titanium on the roof Zinc-titanium requires utmost care during installation
Do-it-yourself seam roofing
It is possible to make a folded roof with your own hands, provided that the technology is fully followed. It is equally important to properly prepare the roof for installation. This process includes:
-
Installation of battens. Before installation, all wooden elements must be carefully treated with antiseptic agents and mixtures that prevent rotting and burning. The type of battens depends on the material used. For galvanized steel, it should have a step of 20-25 cm, for copper, it should be solid. In the first case, boards are additionally stacked along the edge of the roof, there should be several of them and must be fixed without gaps. A similar masonry should be along the ridge joint.

Recessed roof lathing The rebated roof battens must be installed with a minimum pitch or be continuous
-
Material preparation. This should be done even before the metal sheets are lifted onto the roof. Cut the material according to the drawings made to draw up a pattern on the roof. Additionally, you need to prepare elements for abutments, overhangs and other elements of the roof. You should also take the edges that are needed to securely fasten the standing folds. Different types of connections can be used to equip a seam roof: single and double standing, single and double recumbent. Their choice depends on the angle of inclination of the roof. For example, if it is 15 degrees, then a single standing connection can be used. On roofs with a shallower slope, it is recommended to use a double standing joint. This step is not necessary when using self-locking folds.

Types of seam roof joints Each type of seam roof connection is suitable for a certain slope of the slopes and the place of abutment
Seam roofing technology
Technology does not stand still. This also applies to the method of laying folded roofs. At the moment, the so-called roll technology is used. Its peculiarity is to create a picture for the entire length of the roof. In this case, the rolls rise to the roof already with the edges prepared for fixation, and this greatly simplifies the installation process.
Metal sheets are attached directly to the lathing with clamps, it is advisable to use the so-called wandering clamps, which significantly increases the reliability of the fastening.

It is considered more reliable to use a floating clasp for a seam roof
In problem areas, it is recommended to use a double bend. This applies to valleys, gutters, gutters and other places where snow and water can accumulate. Reclining seams can be used if you want the roof seams to be virtually invisible. For roofs with an angle of inclination of more than 25 degrees, it is recommended to choose an angled standing seam, for which you just need to correctly bend the top edge of the metal sheet.
Video: installation of a click-fold roof
Stages of seam roof installation
The process of laying a seam roof is as follows:
-
Installation of a cornice overhang, after which you need to install a drainage system in the form of gutters. They should be installed at a slight angle. This will allow the water from the roof to drain by gravity towards the funnel.

Recessed roof eaves You need to start the installation of a seam roof with the installation of a cornice overhang
-
Laying pictures on slopes. The finished sheets must be laid out on the slopes in a vertical direction, starting from the ridge to the lower edge of the roof. Fasten the strips together with the selected type of connection. Temporarily, metal strips can be nailed almost at the ridge itself.

Installation of seam roof paintings It is necessary to lay the seam roof paintings in the vertical direction
-
Fastening sheets to the crate. For this, it is worth using clamps. They must be made of the same material as the roof covering. It is necessary to lay metal sheets in such a way that they rise 5-6 cm above the ridge. This ledge will serve as material for the formation of the ridge ridge.

Rebate fastening The paintings are fastened with clamps
-
Sealing joints. All places of abutment to walls, joints of gutters must be treated with silicone sealant. This will prevent leaks in these areas.

Sealant gun A special gun is recommended for the sealant
Video: DIY installation of a seam roof
Installation of seam roofing elements
After laying the metal sheets, you can proceed to the installation of the roofing elements, namely the valley and the ridge.
To install the first element you need:
-
Purchase a special profile that is impossible to make with your own hands. You can replace it with a sheet of metal of such a width that this strip is enough to give a special shape, while the valley should go on both slopes by at least 20 cm. You need to lay a profile or a metal strip in place of the joint and fix it with self-tapping screws.

Metal valley Endova is able to prevent roof leaks
- Now you should draw lines at a distance of 5 cm from the edge of this element. Further along these lines you need to make a cut, and wrap the ends of the valley sheet under the cornice.
- Similar work should be done on the top and bottom edges.
A special metal pad is suitable for the skate. It has curved edges, which makes it easy to fit with metal roofing sheets. The ridge can be ventilated and non-ventilated, and the first option is preferable, since this will save on the installation of aerators to prevent condensation under the roofing material.

The ridge for standing seam roofing can be made by yourself
Video: endova eyeliner
Errors in the installation of a seam roof
With self-assembly of a seam roof, errors are possible. The most common are:
- Large step of the lathing. Ideally, it should be solid. This will prevent deformation of the metal sheets during the operation of the roof.
- Lack of processing of wooden elements of the roof with antiseptic agents and mixtures against decay. Ignoring this rule will reduce its service life. Despite the strength of the metal roofing, an unprotected roof will only last as long as the sheathing.
- Lack of ventilation gap in the roofing cake. This can lead to the fact that condensation will accumulate under the paintings, which will cause corrosion, because all the protective layers are on the outside.
- Using fasteners made of metal that is incompatible with the metal of the roofing material. If you take copper for coating, then the clamp must also be copper, otherwise the seams will part.
- The use of a simple clamp when editing long pictures. The metal expands and contracts under the influence of temperature changes, and a simple clamp is not able to withstand this. Therefore, it is recommended to use a floating element that has a free play.
- The use of a single method of attaching paintings in difficult places, which leads to deformation and divergence of the seam.
Video: mistakes that can be made when installing a seam roof
How to properly disassemble a folded roof
When repairing or replacing the seam cover, it will need to be dismantled. But it is very important to disassemble it correctly. This must be done in a certain sequence:
- covering around chimneys and ventilation pipes;
- windows, if any on the roof;
- ordinary metal sheets;
- gutters;
- overhangs.
The folded roof is disassembled up to the restricting grid, if any. Everything after it must be disassembled from the attic. For dismantling, it is worth taking a special tool - pliers. This must be done carefully, because the material can be reused.
Long service life is possible only if the installation technology is followed. Therefore, in advance, you need to carefully deal with all the nuances associated with a folded roof, and prepare a special tool.
Recommended:
Dismantling The Roof, Including The Main Stages Of Carrying Out, As Well As Features For Different Types Of Roofs

Situations in which it is necessary to dismantle the roofing. The procedure for dismantling the roof. Features of dismantling roofs with different roofing
Roofing From A Profiled Sheet, Including The Features Of Its Design And Operation, Repair, As Well As How To Avoid Mistakes During Installation

What kind of profiled sheet can be used for the roof. DIY cold and insulated roof device. What mistakes are possible. Features of operation and repair
How To Cover The Roof With Roofing Material, Including With Your Own Hands, As Well As A Description Of The Main Stages Of Installation

Appointment and features of roofing material. How to lay material on the roof and step-by-step instructions for work, as well as laying rules for a wooden roof
Installation Of Roofing From Corrugated Board, Including With Your Own Hands, The Main Stages Of Carrying Out, As Well As How To Avoid Major Mistakes

Features of working with profiled sheet when covering the roof. What tools are needed, how to make the crate correctly. Installation errors. How to dismantle and repair
Seam Roofing, Including The Features Of Its Construction, Operation And Repair, As Well As How To Avoid Mistakes During Installation

Features of the design and characteristics of the folded roof. Required tools and installation sequence. Repair and operation of seam roofing
