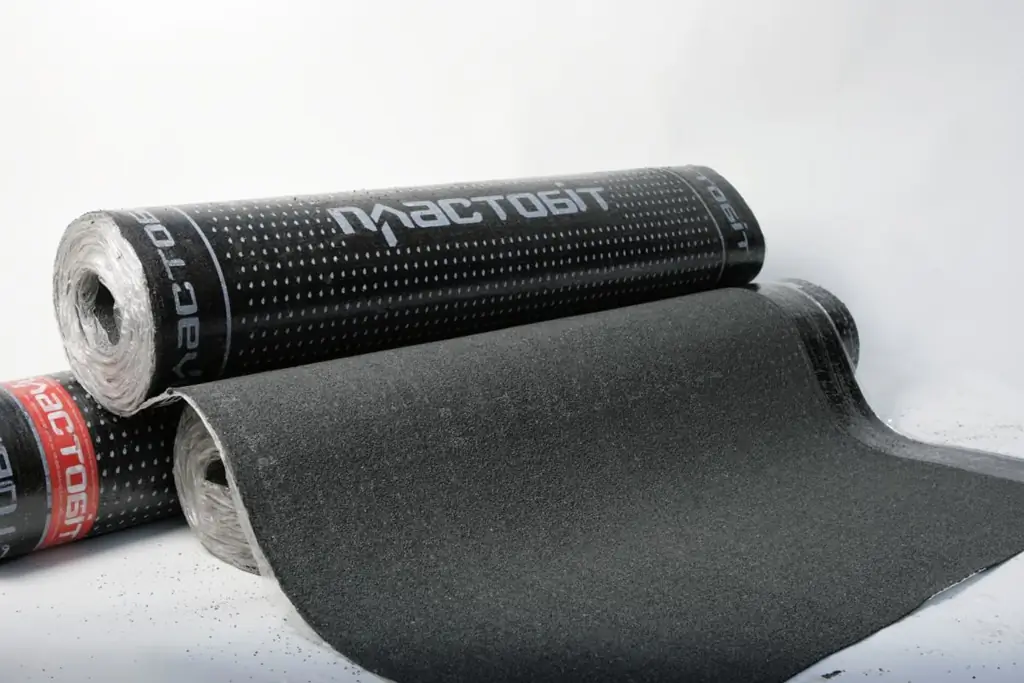
Table of contents:
- Author Bailey Albertson albertson@usefultipsdiy.com.
- Public 2023-12-17 12:53.
- Last modified 2025-01-23 12:41.
Laying roofing material on the roof with your own hands - easy and simple

Roofing material is a popular and practical material for protecting the roof from moisture, ultraviolet radiation and other influences. It requires proper installation, and for this you need to know the installation technology. Using quality tools and taking into account the rules of work will allow you to get an effective result.
Content
-
1 Features of self-laying roofing material
- 1.1 Selecting material grade
- 1.2 What tools are needed for laying roofing material on the roof
-
2 Step-by-step technology for laying roofing material on the roof
2.1 Video: dismantling the old coating and laying roofing material on the roof
-
3 Installation of roofing material on a wooden roof
3.1 Video: features of installing roofing material on a wooden crate
Features of self-laying roofing material
Roll material roofing felt is a roofing board impregnated with refractory bitumen. In addition to cardboard, the base includes fiberglass and polyester, synthetic rubber, and on top there is a protective coating made of stone chips or quartz sand. They create a strong, durable, affordable and easy-to-install material.

Roofing material is produced in rolls, which makes installation convenient
There are several brands of this structure, each of which differs in characteristics, appearance, service life. In this case, the sheets are laid taking into account the general rules:
- installation is carried out only on a dry, level and clean surface without debris, dust and dirt. This is necessary for better adhesion of the sheets to the base of the roof, which will ensure the durability of the layer and protect the structure from moisture;
- before starting work, prepare all the necessary tools, equipment and materials, which must be of high quality and suitable for use on a specific type of roof;
- a roofing carpet is created from roofing material, which is a complex of sheets of different types;
- if the slope of the roof is more than 15 °, then roofing material can not be used, and with a smaller slope, the number of layers is selected depending on the angle.
Material grade selection
Roofing material is laid in several layers, and for each of them a material of the corresponding brand is used. Therefore, when choosing, you need to take into account the marking of the roll, which includes all the necessary information about the purpose of the structure.

Each roll of roofing material is marked, which makes it easy to select the desired option
Roofing material marking contains symbols that indicate the following material features:
- the letter "P" in the marking means the class of material - roofing material;
- the second letter reflects the purpose of the structure. If it is "K", then the material is intended for the roof, and "P" - lining. The first option is used as the top layer, and the second type is intended for the inner layers of the carpet;
- the last symbol indicates the type of top dressing. For example, "PP" is dusty, and "Ch" is scaly, "M" is fine-grained, and "K" is coarse-grained;
- if there is a letter "C" after the numbers, it means that the material has a colored dusting;
- digital symbols are an indicator of the density of roofing material, which can be in the range from 200 to 400 kg / m 3;
- if after the numbers there is the letter "E", then the material is elastic and suitable for roofs of complex geometric shapes.
Before starting work, you should also calculate the required amount of material. To do this, find out the area of one slope and divide this indicator by the area that can be covered with one roll of material. Standard packaging has a width of 1 m and a length of 10 m, and laying is carried out with an overlap of at least 10 cm. Thus, the amount of material required for work is determined for each slope or plane.
What tools are needed for laying roofing material on the roof
Installation of layers of roofing material on the roof always requires the mandatory presence of a safety belt, which is equipped with all employees carrying out the installation. Only after preparing this safety element are the remaining tools and materials selected.

All roofing works are carried out with a safety belt
Roofing material is attached to a special bituminous mastic, which is presented in several versions. Euroruberoid already has a layer of bitumen and therefore does not need to use a separate composition, and for other types of material, mastic is required. It can be cold or hot. The first version is produced in a liquid state and does not require preheating, but it does not provide such a tight adhesion of structures as the hot version.

Cold mastic is simply applied to the roof surface with a roller.
The second type of mastic is a hot composition that requires self-preparation. For this, pieces of solid bitumen are melted in a metal barrel and a special filler is added. When the mass is heated to 150-200 °, foam appears, which means that the product is ready. After boiling, the composition is supplemented with sand, fiberglass or peat, and the amount of additional components should be about a quarter of the bitumen volume. Everything is mixed and applied hot to the surface.

The bitumen needs to be melted in a large barrel
The tool is selected depending on the installation method:
- mechanical fastening of rolled roofing material involves fixing sheets with slats to a wooden surface. To do this, you will need nails, a hammer, a screwdriver, plastic fungi to prevent damage to the material;
- for laying sheets on mastic, you need a container for preparing the composition, a long brush for applying hot or cold compositions, a long spatula for smoothing the sheets and a knife for cutting off excess material;
- a gas torch or soldering equipment is required to fix the welded roofing material. You also need a long mop-like attachment to help roll the roll and press it to the surface.
During installation, it is often required to cut the roofing material along the sheet. This should be done with a saw for wood and cut the material right in the roll, slightly wetting the structure. You can use a sharp linoleum knife to cut the sheets across. A tape measure will help you measure the length you need.
Step-by-step technology for laying roofing material on the roof
Before laying the roofing material, you need to clean the roof surface from debris and dirt, and the installation is carried out on a dry area. If the roof is concrete and has potholes, then they need to be repaired with a concrete screed and wait for it to dry.

The concrete roof is leveled and cleaned of dust
If there is an old and cracked roofing material on the roof, then it is removed with the help of a grinder, chisel, drill. For minor damage, you can lay a new layer on top of the old one.
The main stages of installing roofing material on the roof are as follows:
-
The roll is rolled out and cut into strips of the desired length. A bitumen mastic of cold or hot type is applied to the surface of the roof with a roll or a roller, and then strips of roofing material of the lining type are laid before the composition cools down. The elements overlap each other by about 10-15 cm.

Scheme of laying sheets of roofing material on the roof With a roof slope of up to 6 °, sheets of roofing material are laid perpendicular to the rafters
-
Without waiting for the first layer to dry, a liquid mastic is applied to it and the strips of a new layer are fixed. It is important to provide an offset of half the roll width so that the joints of the first and second layers do not have to coincide. Seams are carefully treated with bitumen.

Laying roofing material sheets The joints of roofing material sheets are carefully coated with bitumen
-
The finishing layer is a material with a protective coarse-grained dressing. Before laying it, make sure that there are no blisters on the surface of the already installed strips. After that, the final sheets of roofing material are fixed.

Device for laying roofing material The roofing material coating is ironed with a special heavy roller
Video: dismantling the old coating and laying roofing material on the roof
Installation of roofing material on a wooden roof
It is possible to cover a wooden roof with roofing material, but this requires a continuous sheathing. Such a base is required when fixing sheets to mastic, but mechanical installation is possible. In the first case, the technology for fixing roofing material is similar to the arrangement of a concrete roof. In this case, the sheets should be laid perpendicular to the previous layers.

A solid crate settles on the main
With the mechanical method of fastening sheets on a wooden roof, such manipulations are carried out as:
- The roll is cut into strips of the required length and taking into account the fact that about 10 cm of material should be wrapped on the cornice.
- The strips are attached to the sheathing boards sequentially, making an overlap of 10 cm. You can fasten the sheets together and the roof covering with long staples and a construction stapler. In the area of the connection, you need to coat the joints with roofing glue, and fix a metal strip on top.
- At the edges of the roof and on the slope, the material is folded by about 10 cm and fixed with brackets to the Mauerlat or the ends of the rafters.
- After working with roofing felt, you can mount the lathing for the roofing.

Roofing material sheets can be placed both along and across the slopes
Mechanically, the material is laid in one layer, and if several are required, then they use the technology of installation on a concrete roof, but use cold mastic. Often one layer is sufficient, since the wooden roof is subsequently equipped with a roof covering.
Video: features of installing roofing material on a wooden crate
youtube.com/watch?v=Q6RP2mHDE5w
Roofing material is a simple but effective material for waterproofing and protecting roofs of various types. Correct installation of sheets on the prepared surface will create a reliable moisture barrier and install the main roof covering.
Recommended:
Repair Of Metal Roofing, Including A Description Of Its Main Stages, As Well As Material And Tools For Work
Methods and materials for the repair of metal roofing. What tool is needed and step-by-step instructions for eliminating roof breakages
Installation Of Seam Roofing, Including With Your Own Hands, The Main Stages Of Carrying Out, As Well As How To Avoid Major Mistakes

What is a seam roof. What tools and material are needed for installation. Coating laying technology, stages of installation. What mistakes can be made
How To Cover The Roof With Metal Tiles, Including With Your Own Hands, As Well As Calculating The Amount Of Required Material
Preparatory work for a roof made of metal tiles. Features of installation of elements of a roofing pie and laying of sheets of covering. Calculation of the material for the roof
Installation Of Roofing From Corrugated Board, Including With Your Own Hands, The Main Stages Of Carrying Out, As Well As How To Avoid Major Mistakes
Features of working with profiled sheet when covering the roof. What tools are needed, how to make the crate correctly. Installation errors. How to dismantle and repair
Installation Of Roof Windows, Including With Your Own Hands, As Well As Installation Features In An Already Finished Roof
Step by step instructions for installing a roof window. Features of technology and nuances of installation in various types of roofing
