Table of contents:
- Decking for roof installation: material features, installation instructions, operating rules
- Features of working with a professional sheet
- Selection and installation of corrugated board
- How to independently install corrugated board on the roof
- Incorrect installation of corrugated board: causes of errors and how to eliminate them
- Dismantling the roof from corrugated board
- Is it possible to repair a corrugated roof and how to do it
- Author Bailey Albertson albertson@usefultipsdiy.com.
- Public 2023-12-17 12:53.
- Last modified 2025-06-01 07:32.
Decking for roof installation: material features, installation instructions, operating rules

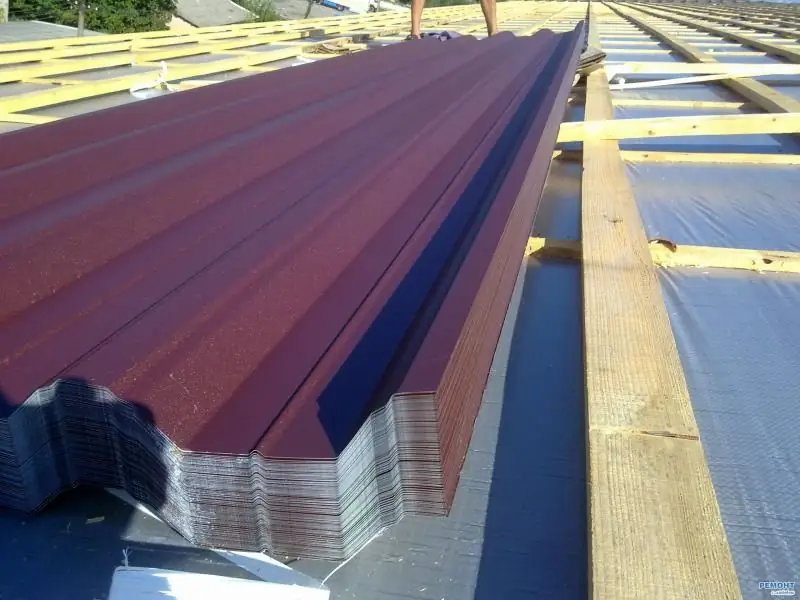
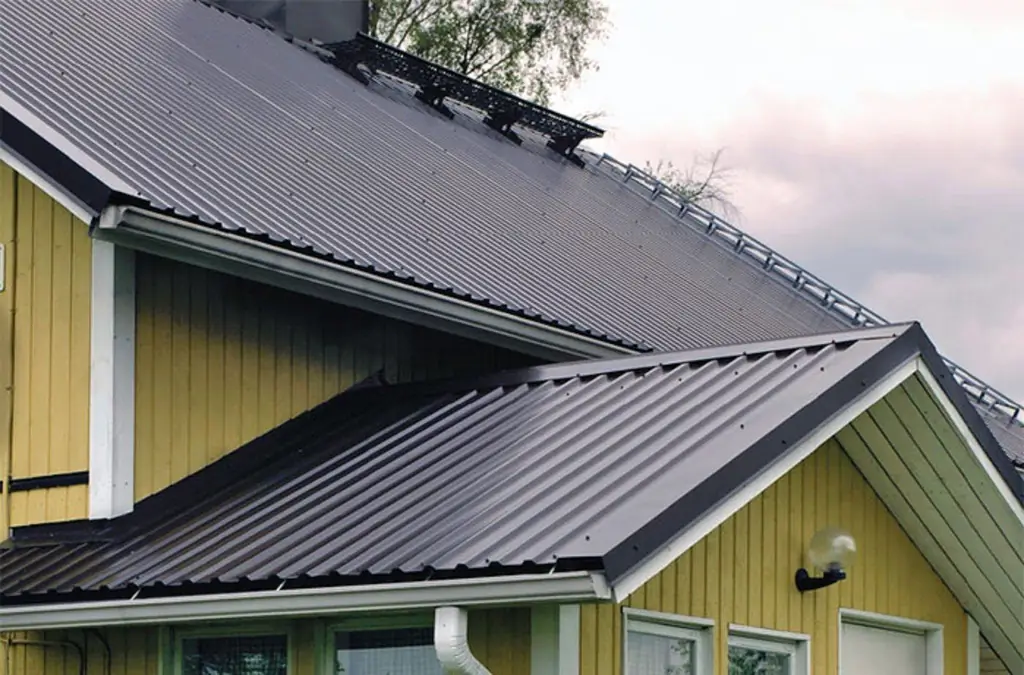
Decking is one of the most affordable and economical materials for overlapping roofing structures with your own hands. The metal coating is successfully used by developers in the construction of private houses, verandas, terraces, gazebos, baths and utility buildings.
Content
- 1 Features of working with a professional sheet
-
2 Selection and installation of corrugated board
2.1 Calculation of materials for the installation of roofing
-
3 How to independently install corrugated board on the roof
- 3.1 Main points to consider when laying the flooring
-
3.2 Description of the main stages of working with corrugated board
3.2.1 Video: DIY installation of corrugated board
-
3.3 Additional roof elements
3.3.1 Video: attachment of additional elements
-
3.4 Rules for filing a cornice with a profiled sheet
3.4.1 Video: filing roof overhangs from profiled sheet
-
4 Incorrect installation of corrugated board: causes of errors and ways to eliminate them
4.1 Video: how to fix errors of incorrect installation of a profiled sheet
- 5 Dismantling the roof from corrugated board
- 6 Is it possible to repair a roof from corrugated board and how to do it
Features of working with a professional sheet
Installation of a roof made of corrugated board is carried out using a standard set of tools available even from novice craftsmen. Depending on the stage of construction to be performed, you will need:
- set for taking measurements - tape measure, coil of rope, level, pencil;
- a set for working with materials - a knife or scissors for metal, a hammer, a sealant (for ease of application, you will need a gun), a construction stapler;
- electrical equipment - screwdriver, drill with drills of the required diameter.

The professional sheet is made of metal, so you will need special scissors or a jigsaw to cut it
When working with a profiled sheet, it should be remembered that its polymer coating can only withstand cold processing. For the convenience of cutting this material, it is recommended to use a jigsaw and a hacksaw in addition to metal scissors. It is impossible to cut corrugated board with a grinder with an abrasive wheel.
For fastening the corrugated board to the wooden base, roofing screws are used, in the manufacture of which durable galvanized galvanized steel is added.

For fastening a sheet of corrugated board, a roofing screw with a sealed rubber gasket is used
In addition, each fastener in the kit comes with a rubber gasket, which ensures a tight connection of materials. With its help, metal sections are reliably protected from moisture, and the wooden crate - from the decay process.
Roofing screws are selected according to the following parameters:
- depending on the wave height of the profiled sheet and the method of its attachment, you can use products measuring 4.8 × 35, 4.8 × 60 or 4.8 × 80 mm;
- parts must be treated with a zinc layer with a thickness of at least 12 microns;
- the composition of the metal must include a stabilizer that protects the material from aging due to exposure to ultraviolet rays;
- the head of the screw must be covered with powder paint with a layer not thinner than 50 microns;
- it is necessary to distinguish between the purpose of sealed gaskets from different materials: elastomeric is used for fastening the profiled sheet, aluminum - for mounting valleys.
When installing metal roofing, polyethylene or polyurethane foam seals can be used. They are attached to the crate, creating a layer for corrugated board. The task of these materials is to reduce noise from precipitation, leaves and branches falling on metal sheets, as well as to improve thermal insulation and increase the operating life of the roof.

A polyethylene or polyurethane foam layer should be laid under the profiled sheets on the roof to protect the roof from birds and cold air currents
Both sides of the sealing sheet are covered with adhesive, and for ventilation it is provided with special holes. Thanks to the gasket, you can close the gaps between the profiled sheets and the main roof structure. This installation will protect the roof from birds, insects and cold air currents.
Selection and installation of corrugated board
Due to the presence of stiffening ribs in the form of waves, created by the cold roll forming method, the sheet metal roofing perfectly copes with the external load. The low market price, variety of color options and ease of installation allow this material to be used both in industry and in the work of private developers.
Calculation of materials for installing roofing
Depending on the roof chosen at the design stage, its shape can be rectangular, triangular or trapezoidal. To perform the calculations, it is enough to apply simple formulas from the school geometry course. The total area of the roofing surface is determined by adding up the areas of all slopes. In addition, it is important to know the length of the remaining roof elements, which include:
- ridge elements;
- endova;
- ribs;
- adjoining structures;
- cornice and end overhangs.

In addition to the main covering, quite a lot of special additional elements are used on the roof made of corrugated board
The width of the profiled sheet can be understood as:
- full transverse dimension, which is usually 1180 mm;
- useful or working width, which remains after deducting the overlapping margin of the sheets (most often one wave). It is usually equal to 1100 mm.
During installation, you should operate only with the working parameters of the sheets.
- To calculate the amount of corrugated board for one horizontal row, it is enough to divide the length of the slope by the width (working) of the corrugated board, rounded to a larger value. This formula is used when installing the material with a horizontal overlap of at least 80 mm. An important factor when choosing the amount of overlap is the angle of inclination of the roof. If the slope is located at an angle of less than 15 degrees, and a corrugated board with a small wave height (10-20 mm) is used, then it is better to overlap with two corrugations. A larger roof slope allows installation in one corrugation.
-
At the next stage, the number of horizontal rows is determined, taking into account the length of the slope, including the eaves overhang, and the length of the sheet. When preparing roofing materials, great attention is paid to various additional elements, the standard length of which is 2 meters. Their number is calculated by adding the lengths of all the lengths of the roof slopes and dividing the resulting value by 1.9 to take into account an overlap of 10 to 20 cm, depending on the number of elements. The number of ends is determined by summing their length and dividing the result by 1.7. The overlap in this case is about 30 cm.

Installation of a ridge on a roof made of corrugated board When calculating additional elements, it is necessary to take into account the overlap, which ranges from 10 to 30 cm, depending on the type of element
-
Having an idea of the amount of roofing material, you can calculate the approximate number of self-tapping screws. For this, the following data is used:
- for the installation of 1 m 2 of profiled sheet, 7-8 self-tapping screws are spent;
- one additional element of a standard length of 2 m is installed on 8 self-tapping screws.
For example, for a house measuring 3 * 5 m with a gable roof, you will need the following components:
- corrugated sheets - 18 pcs.;
- ridge - 3 strips of 2 m each;
- ridge seal - 6 pcs. 2 m each;
- end plate - 7 pcs. 2 m each;
- cornice strip - 6 pcs. 2 m each;
- roofing screws - 200 pcs.
Having performed simple calculations, you can not only quickly cope with the installation of roofing material, but also minimize the amount of its remnants.
How to independently install corrugated board on the roof
Strict implementation of the recommendations of experienced developers and following the manufacturer's instructions will allow you to do the installation of roofing in a short time with your own hands.
Consider the sequence of roof installation using corrugated board.
Key points to consider when laying the flooring
Depending on the shape of the roof slope, the place of starting work is determined. On a rectangular slope, laying is allowed from any of the ends along the cornice line. When working with a trapezoidal or triangular roof, you should draw up a laying option in advance, given that it is better to fix the first sheet in the center of the eaves line with further symmetrical installation of sheets on both sides of the slope.

On rectangular slopes, sheets of corrugated board are stacked in a checkerboard pattern, starting from any edge
If a drainage system is installed on the roof, then the corrugated board should hang by 60 mm, but if the structure does not imply drainage elements, then the overhang is determined based on the brand of the sheet:
- professional flooring NS-20 allows overhang up to 100 mm;
- profiled sheets of the S-44, NS-35 brands are stacked with an overhang of 200-300 mm.
When attaching the first sheet, it is aligned from the end and the eaves of the roof. The following elements of the covering, previously fastened along the longitudinal part, are aligned with the eaves structure and screwed to the wooden crate. According to this scheme, all rows of the coating are laid.

Fastening of corrugated board at the junction of the sheets is made in the upper wave, and in all other places - in the lower
When screwing in self-tapping screws, it should be remembered that the sheets located next to the cornice require reinforced fastening with a step of 30-40 cm. On the surface of the profiled sheet, the screws are placed at a distance of no more than 1 m in a checkerboard pattern. Longitudinal overlaps are fixed with self-tapping screws in the upper part of the profile with a step of 30-50 cm.
Consumption per 1 sheet of coating is about 7-8 screws. The size of the overlap of the upper row of material on the lower is determined based on the slope of the slope, and is usually 10-30 cm.
Description of the main stages of working with corrugated board
The sequence of work depends on the type of roof being erected. If a cold roof is arranged, then two main operations are performed:
-
Creation of a waterproofing layer. The purpose of waterproofing is to prevent the negative impact of condensation formed in the under-roof space on the wooden parts of the structure. It is not difficult to choose the desired material from a large number of options. When installing, remember that the film is attached to the batten before installing the roof covering. The waterproofing sheet should sag slightly. It is important to make sure that the pitch of the battens of the crate is uniform, where the corrugated board will be attached in the future.

Installation of waterproofing The waterproofing film is laid with a slight slack and is fixed with the transverse slats of the counter lattice
-
Laying of profiled sheet cover. Installation of a reliable wooden flooring 60 cm on both sides of the gutter is in progress. At the same time, the boards are brought under the valley with an overlap and an indent of 20 cm from the lower parts of the valley planks. The bottom beam can be fixed with nails, but it will be possible to achieve its stable fastening only at the stage of completion of construction work. Next, the lower valley is installed with preliminary flanging or with the bend of the upper valley ridge onto the roof ridge. During installation, it is important to check that the bar is 25 cm or more under the ridge. It will not be superfluous to lay an additional seal between the valley and the covering sheets. When working with rectangular slopes, it is recommended to first install the end boards, which will greatly facilitate the subsequent location of the corrugated board.

Laying corrugated board on a gable roof Sheets of corrugated board are laid after the registration of all joints and abutments with the help of valleys
If the roof requires insulation, then the sequence of installation work is as follows:
-
A vapor barrier film is laid on which the crate is mounted.

Installation of vapor barrier The vapor barrier film is laid along the rafters and fixed with brackets
-
Insulating material is mounted between the rafter joists (it is recommended to choose insulation in the form of mats or slabs). If it is necessary to lay several layers of thermal insulation material, it must be staggered so that there are no through gaps.

Insulation laying Insulation plates should enter the space between the rafters with a noticeable interference
- A waterproofing film is laid, on which the counter-lattice is fixed.
-
Roofing material is being installed.

Roofing cake for a roof made of corrugated board The device of a roofing pie requires a ventilation gap to remove condensate that forms on the reverse side of the corrugated board
Video: DIY installation of corrugated board
Additional roof elements
When arranging a profiled roof with a drainage system, it is necessary to take care of the installation of all elements before the laying of the coating begins:
-
Roofing ridge. On both sides of the slope, several additional boards are nailed to the crate at the location of the ridge. There should be two ventilation gaps in the ridge. The entire surface of the slope is covered with a waterproofing material, leaving only a strip 10 cm wide to the ridge uncovered. To maintain normal ventilation, the corrugated board is placed at a distance of 5 cm from the ridge element. The ridge is attached to self-tapping screws 4.8 × 80 mm in size along the top of the profile every 30-40 cm. Caps are placed from the ends of the ridge strip.

Roofing ridge The color of the ridge can be matched to the roofing
-
End plate. The length of a standard product is 2 m, in the case of a plank extension, an overlap of 10-15 cm should be observed. The end plate is installed so that at least one wave of the roofing sheet overlaps. For fasteners, self-tapping screws are used that connect the bar to the end board and the profiled sheet.

End plate The end strip protects the roof covering from side wind
- Junction bar. Upon completion of the roof construction, abutment strips are attached. The length of the parts is 2 m, when installing them, it is important to maintain an overlap of 20 cm. Self-tapping screws 4,8 × 19 mm with a pitch of 40 cm are used as fastening elements. a longitudinal seal is mounted. If the roof slope is steep, then longitudinal installation is not required.
Video: fastening additional elements
Rules for filing a cornice using a professional sheet
The design of roof overhangs with metal sheets is carried out according to the following scheme:
- The profiled sheet is screwed to the cornice parallel to the wall plane.
-
In the places where the profiled sheets join the wall, the inner corners are installed to the profiled sheets and the frontal strips to the frontal board.

Installation of eaves The design of the joints of the corrugated sheets is carried out using decorative corners and frontal strips
- Along the gable overhang, the sheets are attached from the outside parallel to the wall surface, after which the corners and end strips are fixed. For optimal ventilation, the cover sheets should be 1-2 cm narrower than the overhang itself.
Video: filing roof overhangs from a profiled sheet
Incorrect installation of corrugated board: causes of errors and how to eliminate them
Among the main reasons for errors in the construction of roofs from corrugated board are:
- wrong choice of materials;
- incorrect calculation of corrugated board;
- non-compliance with the technology of work.
You can eliminate the shortcomings associated with the calculation of the material yourself, relying on a number of rules:
- Be sure to measure the full roof surface (on all slopes) immediately before purchasing building materials.
- Based on the data of two diagonal measurements of one slope, while the difference between the obtained figures should not exceed 2 cm.
- Select the brand of the profiled sheet depending on the roof area. So, for a small roof, the C-18, 20, 21 grade will be optimal. Large surfaces are subject to significant loads, therefore, the NS-35, 60 profiled sheet is suitable for them.
- Check the amount of overlap of the coating elements immediately before screwing in the screws.
- Lay the corrugated board against the wind to prevent rainwater and melted snow from entering.
You can do work to solve the problem of incorrect installation yourself:
-
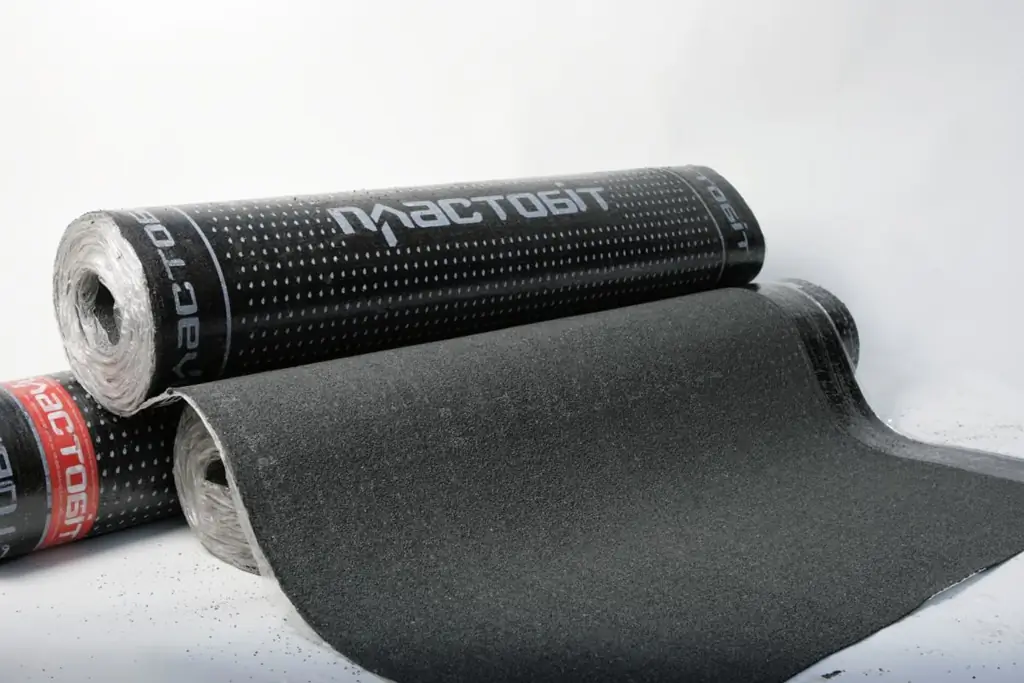
Incorrect fastening of self-tapping screws. A leak can appear if the self-tapping screw was not screwed into the batten of the crate. The solution to this problem is quite simple. It is necessary to make special patches from eco-bit. They need to be cut out, and then heated with a hairdryer and glued to the places where there were previously incorrectly installed screws. At the end, the patches are painted in the color of the corrugated board.

Correct installation of self-tapping screws Self-tapping screws must be screwed in strictly vertically and firmly fixed in the sheathing canvas
- There is a gap under the ridge. This problem arises due to the fact that the profiled sheet does not fit tightly to the ridge. This problem can be solved by applying a patch, carefully sanding and degreasing the joints. For repairs, you can also use polyurethane foam.
- Wrong overlap. In this case, it is necessary to dismantle the roof, and then carry out the installation taking into account the correct size of the overlap.
Video: how to fix errors of incorrect installation of a profiled sheet
Dismantling the roof from corrugated board
It is quite simple to determine the sequence of work when disassembling a cover made of profiled sheets - you need to remember the sequence of stages of installation of the cover and do the opposite. First you need to remove the ridge strips, visors and other elements, and then remove the corrugated sheets. As for the tools, it all depends on the fasteners used. If the installation was carried out with self-tapping screws, then you should arm yourself with a screwdriver; when working with nails, it is enough to have a nail puller.

If the profiled sheet was nailed, you will need a nail pull
Is it possible to repair a corrugated roof and how to do it
The scale of roofing repair is determined by the degree of damage. First of all, a thorough inspection of the roof is performed to identify a malfunction. If we are talking about such minor defects as leaks, metal damage by rust, mold or the appearance of fistulas, then the roof repair scheme will generally be the same for all cases.
So, when detecting, for example, a leak of roofing material, experts recommend checking the quality of the tightening of self-tapping screws with a rubber seal. If the installation of the roof has been completed recently, then, as a rule, the fasteners should be tightened to troubleshoot.
For more serious defects, the following work is performed:
- Replacement of profiled sheets.
- Repair or installation of a new roof screed.
- Replacement of aprons at the junctions of roofing elements, parapets, cornices.
- Installation of new funnels of the drainage system.
Often, problems arise with structural joints. Repair of scratches, small cracks in the roof can be carried out by soldering the defect or installing a special sealing tape, and patches of special mastic are applied to eliminate deep holes. If there are remnants of metal sheets, you can cut out a part of the required size from them and weld over the damaged surface.

To repair the roof in the event of a leak, you can use a sealing tape
Fistula repair is carried out using tow soaked in hot bitumen and a patch of the same mastic. To eliminate large defects, burlap or roofing felt is used, from which a patch is cut 25-30 cm wider and longer than the size of the hole in the roofing. Initially, the area around the hole is thoroughly cleaned with a metal brush and impregnated with hot bitumen. As soon as the surface dries up, burlap or a piece of roofing material treated with bituminous mastic is applied over it in several layers. Hot bitumen is poured onto the patch from above.
Roofing made of corrugated board has many advantages over other similar materials, but only with proper installation and timely repair it will decorate the house and serve as the protection of its owners for many years.
Recommended:
Dismantling The Roof, Including The Main Stages Of Carrying Out, As Well As Features For Different Types Of Roofs

Situations in which it is necessary to dismantle the roofing. The procedure for dismantling the roof. Features of dismantling roofs with different roofing
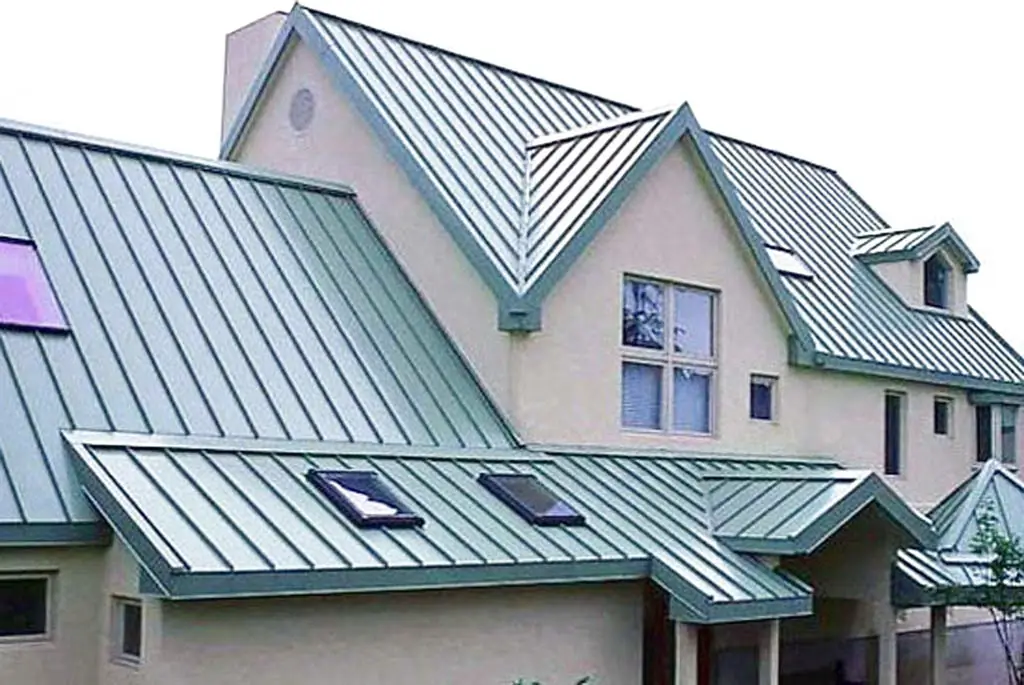
Installation Of Seam Roofing, Including With Your Own Hands, The Main Stages Of Carrying Out, As Well As How To Avoid Major Mistakes

What is a seam roof. What tools and material are needed for installation. Coating laying technology, stages of installation. What mistakes can be made
Roofing From A Profiled Sheet, Including The Features Of Its Design And Operation, Repair, As Well As How To Avoid Mistakes During Installation

What kind of profiled sheet can be used for the roof. DIY cold and insulated roof device. What mistakes are possible. Features of operation and repair
How To Cover The Roof With Roofing Material, Including With Your Own Hands, As Well As A Description Of The Main Stages Of Installation

Appointment and features of roofing material. How to lay material on the roof and step-by-step instructions for work, as well as laying rules for a wooden roof
Roofing Made Of Corrugated Board, Including The Features Of Its Design And Operation, Repair, As Well As How To Avoid Mistakes During Installation

Features and characteristics of corrugated roofing. Types of roofing sheeting. Calculation of the amount of material for the roof. Features of installation and operation
