Table of contents:
- Author Bailey Albertson albertson@usefultipsdiy.com.
- Public 2023-12-17 12:53.
- Last modified 2025-01-23 12:41.
The wisdom of making a polycarbonate canopy with your own hands

A modern personal plot, no matter whether it belongs to a cottage or a simple country house, is difficult to imagine without a canopy, for example, over the owner's car. This design nowadays performs not only a practical function, but also an aesthetic one. At the same time, the most common material used for awnings is polycarbonate. You can make a structure out of it yourself.
Content
- 1 Advantages and disadvantages of polycarbonate
-
2 Preparatory work: what thickness of material to use
- 2.1 How to choose the size of the structure: drawing up a drawing
- 2.2 How to calculate the material
- 2.3 Required tools
-
3 Step-by-step instructions for installing a polycarbonate canopy
- 3.1 How to properly attach a canopy to a private house above the porch
- 3.2 Installation of an arched canopy around the pool in the country
- 4 Video: do-it-yourself polycarbonate carport
Advantages and disadvantages of polycarbonate
The choice of such sheet blanks when installing hinged structures is justified by many advantages.
- polycarbonate transmits light, but at the same time protects against the harmful effects of ultraviolet radiation;
- it is non-flammable, which eliminates the danger of fire;
- sheets have different colors, you can choose a color to taste;
- structures from these blanks look aesthetically pleasing;
- polycarbonate is lightweight;
- it is flexible, but at the same time shockproof;
- retains heat well inside the overall structure;
- it is easy and pleasant to work with it (it is cut with a clerical knife, and screwed to the frame with self-tapping screws).

A variety of colors allows you to choose a polycarbonate sheet that fits perfectly into the landscape design
True, polycarbonate also has disadvantages. They can appear during the installation and operation of the hinged structure. Namely:
- over time, such a material is capable of cracking, which will require replacing individual sheets;
- if you violate the installation rules, polycarbonate will also collapse;
- thin sheets may not withstand layers of snow if the frame is poorly thought out.
So, the described material has clearly more advantages, so its use in sheds is logical. But before you start building such a structure, you need to decide on the dimensions and draw up a sketch.
Preparatory work: what thickness of material to use
Before choosing the size of the structure, it is recommended to decide on the type of sheets for installation. That is, you first need to choose the color and thickness of the blanks. Cellular polycarbonate is sold in sheets of various thicknesses (from 4 mm to 12 mm). When buying for suburban construction, the material can be cut (depending on what size the building will be).
The thickness of the part for making a canopy is selected according to the following principle - the structure must withstand snow. But this is more influenced not so much by the quality of polycarbonate as by the reliability of the frame. Therefore, even the thinnest sheets can be used. This will significantly reduce the cost of the canopy.

Polycarbonate is a very plastic material, so you can easily make a canopy of any shape with your own hands
How to choose the size of the structure: drawing up a drawing
The most difficult thing is to determine the size of the planned structure. There are several options:
- If the canopy is made over the porch, the width of the structure should be such that the latter protrudes 30 cm to the left and right of the front door. In this case, rain drops will not fall on the floor and the person entering. The length of the product is taken to be equal to the distance from the wall of the house to the edge of the first step of the porch.
- If the canopy is located above the car, then its dimensions must correspond to the dimensions of the car, while additionally, for each parameter, at least 30 cm must be added.
- The same goes for the pool. The canopy over it needs to be done a little more.
After determining the dimensions, you need to draw a drawing.

On the drawing of a polycarbonate canopy, you need to indicate all the dimensions of the canopy
From the side of the facade, the canopy is often made arched. In this case, the bending radius of cellular polycarbonate should be equal to the height of the extension.
How to calculate the material
The calculation of the amount of materials required can be made using the constructed drawing. Suppose we will create a structure without arched elements. Let it be a canopy over the porch. In this case, the width of the entrance door is 80 cm. According to the recommendations of specialists, we take the width of the canopy equal to H = 80 + 30 + 30 = 140 cm or 1.4 m.
A profile square pipe with a section of 25 x 25 mm is ideal for the frame. It is enough to install three polycarbonate-supporting segments 1 m long each and connect them transversely at the edge of the canopy.

The size of the canopy depends on many parameters, for example, where it will be located
Structural supports can be made from ordinary steel pipe with a diameter of 32 mm It is enough to install two pillars in the ground up to the level of the upper edge of the entrance door (at least 2 m). Do not forget to add 0.5 m to the hole in the ground.
Required tools
To work with polycarbonate you need:
- stationery knife;
- screwdriver;
- Bulgarian;
- roulette.
Step-by-step instructions for installing a polycarbonate canopy
The process of making a canopy depends on many parameters, in particular on the location relative to the walls of the house.
How to properly attach a canopy to a private house above the porch
The first option is a construction attached to a private house. All work is done in several steps:
-
For the main elements of the frame, it is better to use a metal profile pipe with a cross-section in the form of a square made of plain steel 25 x 25 mm in size. It needs to be cut with a grinder. According to the calculation carried out, it is necessary to cut off 3 profiles of 1 m each and a piece 1.4 m long. Also, it is necessary to prepare two pipes of 2.5 m.

Profile cutting with a grinder Cutting metal with a grinder requires strict safety measures
- In the corners of the porch, that is, along the edges of the rib of the first step, two pipes are buried 0.5 m into the ground strictly vertically. It is advisable to concreted the foundations of these pillars. Why combine cement, sand, crushed stone in equal parts, mix with water and fill the pits with the solution into which the pipes are inserted.
- The ends of sections of a square profile with a length of 3 m at equal distances are attached to the wall of the house 20 cm above the entrance door. Metal corners, large self-tapping screws and a screwdriver are used for fastening. If the house is brick, you will have to take a puncher, drill holes for self-tapping screws and first insert plastic dowels into the holes. It is necessary to try to ensure that the two extreme segments with their front ends rest on the tubular posts.
- The transverse profile is laid. It must also rest on the ends of the tubular posts. For its perpendicular connection with segments 1 m long, metal corners and self-tapping screws are used. As a result, the frame should have a slight slope.
-
A sheet of cellular polycarbonate of the required size is cut from a single piece. A clerical knife is suitable for this operation. The sheet is easily cut along the honeycomb. In the lateral direction, you have to make a little effort.

Cutting polycarbonate Polycarbonate can also be cut with a jigsaw
- The polycarbonate is fastened with self-tapping screws on the profiles using a screwdriver. In this case, the honeycomb lines must be laid parallel to the wall of the house, otherwise the sheet will bend from the snow and break.
Installation of an arched canopy around the pool in the country
The second option is the location of the canopy over the pool. It has its own peculiarities, since it will not lean on the wall of the house. The sequence of work is as follows:
- First, pillars are installed at the corners of the pool using the previously described technology. Material - pipe with a diameter of 32 mm. But at the same time, you need to retreat from the corners in each case by 30 cm along the imaginary diagonal of the pool.
- Further, a frame from a profile is mounted on these pillars. It is advisable to use arched elements here. For their manufacture, it is better to use the services of a construction organization, since self-assembly of such a frame is very difficult.
- It is better to weld the ends of the skeleton for the roof to the posts using electrodes and a welding machine.
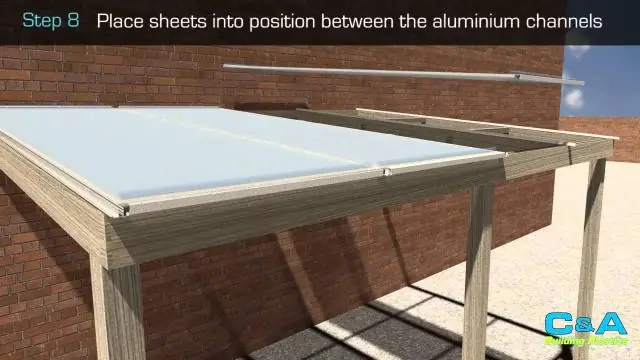
- Sheets of cellular polycarbonate should be laid alternately until the entire space is filled, neatly joining together.

A canopy over the pool will keep water from clogging
In a similar way, there is a canopy over the patio, barbecue, outdoor recreation area and any other element of the architecture of the local area.
Video: do-it-yourself polycarbonate carport
A polycarbonate canopy will last a long time if you take care of it regularly. It is necessary to view the condition of the fasteners, as well as the safety of the cellular polycarbonate sheets. Minor repairs consist in replacing screws or part of the coating.
Recommended:
Diy Brick Brazier: How To Make, Drawings, Photos And Videos

How to make a brick brazier yourself. A step-by-step description of the work, advice on choosing the type of barbecue and the necessary materials
How To Make A Veranda With Your Own Hands To The House - Instructions, Projects, Drawings, Photos And Videos

The article describes how to build a veranda close to the house with your own hands
Do-it-yourself Canopy Construction From A Profile Pipe - Drawings, Instructions With Photos And Videos

How to build a canopy from a profile pipe with your own hands: drawings, structural calculations, step-by-step instructions for construction and decoration, photos and videos on the topic
Installing A Polycarbonate Greenhouse On A Timber, How To Properly Fix The Structure, Instructions With Photos And Videos

Detailed instructions for the manufacture and installation of an arched greenhouse made of wooden beams and sheathing of the frame with polycarbonate
Do-it-yourself Carousel For A Playground - Instructions With Drawings, Dimensions, Photos And Videos

How to make and install a children's carousel yourself. Types of carousels. Required drawings and materials. Carousel decoration and maintenance
