Table of contents:
- Author Bailey Albertson albertson@usefultipsdiy.com.
- Public 2023-12-17 12:53.
- Last modified 2025-06-01 07:32.
Self-installation of the bathroom sink

One of the essential elements of the bathroom is the sink, since it is almost impossible to do without it. In addition to the fact that this accessory provides convenient carrying out of hygiene procedures, it should also harmoniously fit into the interior of the bathroom. It is not always possible to buy a bathtub, toilet, bidet and sink at the same time, so they are often bought at different times and from different manufacturers. Despite this, all these devices must form a single ensemble. In order to choose the right bathroom sink, you need to know what they are, how they differ, and also understand the main advantages and disadvantages of each type.
Content
-
1 Types of sinks
- 1.1 Types of bathroom sinks by installation method
- 1.2 Shape and size
- 1.3 Material of manufacture
- 1.4 Video: types of sinks
-
2 Preparing for installation
- 2.1 Materials and tools
- 2.2 How to shut off the water supply
- 2.3 Removing the old sink
-
3 Installation steps
- 3.1 Installation work
-
3.2 Connecting the sink
- 3.2.1 Fitting the mixer
- 3.2.2 Fixing the sink
- 3.2.3 Video: Installation of a washbasin on a pedestal
- 3.3 Connecting the sink to the water supply
- 3.4 Connection to the sewerage system
- 3.5 Video: installation of a wall-hung sink
- 4 Checking system performance
-
5 Possible errors and methods of their elimination
5.1 Video: sealing the joint between the wall and the sink
Types of sinks
Unlike kitchen sinks, bathroom sinks are available in a much wider range. In order to choose the right accessory, you need to pay attention to the following characteristics:
- type of instalation;
- shape and size;
- material of manufacture.
Types of bathroom sinks by installation method
According to the method of installation, the sinks are divided into the following types:
-
With a pedestal. In the people, this design is also called a tulip. Its main feature is the presence of a leg or pedestal. This solution allows you to hide the siphon and water pipes, and also provides a reliable support for the bowl. These structures have a predetermined height, usually 70-80 cm, and if it is not enough, you will have to additionally make a stand or pedestal. It is impossible to reduce the height of the pedestal.

Sink with pedestal The pedestal is a support for the sink and allows you to hide communications
-
Overhead. Such models are installed on the countertop and protrude above it at a distance not exceeding 10 cm. After installing the surface-mounted sink, it seems that it is a free-standing object. Such structures do not have a hole for installing a mixer, so the crane is mounted on a tabletop. For ease of use, the height of the table top should be no more than 85 cm.

Overhead sink The countertop washbasin is installed on the countertop
-
Mortise. Such a sink cuts into the countertop; this can be done both from below and from above. When inset from below, the plumbing is flush with the countertop, which greatly simplifies the removal of water that has got on it. When the sink is installed on top of the countertop, it protrudes several centimeters above it. The mixer can be installed both in the hole on the sink and on the countertop.

Mortise sink The recessed washbasin can be mounted both above and below the countertop
-
Wall mountable. This design is also called console. There is no need to install a cabinet or a countertop, as the sink is fixed directly to the wall using special fasteners. There are models of sinks with wide wings that allow you to simulate a countertop. The faucet can be installed either on the sink itself or on the wall. The main disadvantage of such models is that the piping to the water supply and sewerage system remains in sight. The advantage is the freeing up of free space, and this is an important point for small rooms. A washing machine can be installed under flat models.

Wall-mounted washbasin A wall-mounted sink saves space
-
Furniture. Typically, these models come with bathroom furniture. They can be mounted on a separate countertop, but most often furniture sinks are installed on a stand or bedside table that matches their size.

Furniture sink Furniture sinks are included with bathroom furniture
Shape and size
One of the main parameters that you need to pay attention to when choosing a bathroom sink is its size. Only a properly sized washbasin will ensure its comfortable use and will not take up a lot of free space.
For small rooms, sinks 50-65 cm long and 40 cm wide are usually chosen. If you have a large room, then you can install models up to 75 cm long or a double sink, in which case two people can wash at the same time.
Having decided on the size of the shell, you can proceed to choosing its shape. Sinks are:
- round;
- oval;
- rectangular or square;
- complex shape.
Manufacturing material
Various materials are used in the manufacture of bathroom sinks:
-
ceramics are the most common products. Porcelain is more expensive and of high quality, sanitary ware is simpler and cheaper;

Faience sink The most common option is a faience sink.
-
natural or artificial marble. Although natural marble is a more expensive material, the presence of pores in it requires more careful maintenance. Sinks made of artificial marble outwardly practically do not differ from those made of natural stone, but they are cheaper. In addition, they have a smoother surface, which greatly facilitates maintenance;

Marble sink Artificial marble outwardly practically does not differ from natural
-
Corian is a composite material that includes acrylic resins and a mineral filler, and with the help of a pigment, a coating of any color can be applied. Since this material is easy to process, it can be used to make shells of any shape. Such models have a smooth surface, so they are easy to care for;

Corian shell Corian can be used to make a shell of any shape
-
glass. Glass sinks, although they are expensive, look very nice. For their manufacture, special glass is used, so their strength is high. The disadvantage of such models is that traces of water are visible on them, so you need to take care of them more carefully;

Glass sink Glass sink always looks stylish and beautiful
-
Stainless steel. These sinks have a long service life, high durability and hygiene. The disadvantage is that a lot of noise is generated when the water jet enters. Care for metal models should be done carefully so as not to scratch their surface.

Bathroom sink The metal sink has a long service life and high strength
Video: types of sinks
Preparing for installation
Despite the large selection of bathroom sinks, the installation is almost the same. In addition to the fact that it is necessary to firmly fix the bowl, you will also have to connect the water and drain, install the mixer. Only high-quality execution of all stages of installation will allow you to correctly install the sink and avoid leaks.
Materials and tools
In order to independently carry out the installation of the sink in the bathroom, you will need the following materials and tools:
- hammer drill or hammer drill;
- screwdriver;
- gas wrench;
- spanners;
- measuring instruments;
- building level;
- fasteners;
- sealant;
-
winding.

Sink mounting tools To install the sink, you need tools that any home craftsman can find
How to shut off the water supply
Before carrying out any plumbing work in the bathroom, you must shut off the water supply. Please note that not only cold, but also hot water is supplied to the sink, so both taps must be shut off. They do this at the entrance to the apartment, and if there are additional taps, then you can stop the water supply only to the bathroom.
Make sure the water pipes and drain can be connected to the chosen sink model. If this is not possible, then it is necessary to lengthen the existing pipes or install new ones.
Dismantling the old sink
If an old sink is being replaced, it must first be dismantled. The work is performed in the following sequence:
-
Removing the mixer. First, the pipes of cold and hot water are disconnected from it, after which the fastening nut is pumped out and the mixer is removed.

Removing the supply to the mixer To remove the mixer, you need to unscrew the nut of its fastening
-
Removing the siphon. On the bottom of the sink, unscrew the siphon fastening nut, disconnect it from the drain and drain the water.

Removing the siphon To remove the siphon, unscrew the nut and drain the water
-
Dismantling the sink. They remove the sink from the support - it can be a tabletop, a cabinet or brackets.

Removing the sink The sink is removed from the support
To prevent the smell of their sewage from spreading throughout the apartment during the installation work, you need to close the hole in the drain pipe with a rag
Installation steps
Although there are some peculiarities when installing sinks of different designs, the main stages of work are performed in the same way.
Installation work
Before proceeding with the installation of the sink, you first need to decide on the place of its installation. At this stage, the following works are performed:
-
Determination of height. There are no strict standards for the installation height of the sink in the bathroom. Most experts recommend mounting the sink 80-85 cm from the floor. It all depends on the growth of the tenants of the apartment. Choose this parameter so that it is convenient for everyone to use the sink.

Sink mounting height The installation height of the sink should be such that it is convenient for all residents to use it
-
Installation layout:
- if the washbasin is attached to the wall, then a horizontal line is drawn at the selected height, a sink is applied to it and the fixation points are marked;
- if the sink is being installed on a cabinet, then it is enough to set it in a horizontal position, and fill the joint between the wall and the sink with sealant;
-
the sink with the pedestal must be pressed against the wall, and then mark the places for fastening.

Sink installation markup A sink is applied to the wall and the attachment points are marked
-
Installation of brackets. Brackets must be installed to mount the sink to the wall. They are supplied with the washbasin and correspond to its dimensions. In the marked places, holes are made using a perforator, plastic dowels are inserted, and then the brackets are fixed to the wall. Mounting the sink on the wall is possible only if its surface is strong enough. When installing a sink with a pedestal, it is also necessary to fix the bowl to the wall in order to securely fix it. If installation is carried out on studs, it is imperative to use plastic inserts.

Installing brackets A wall-mounted sink can only be mounted on a solid wall
Connecting the sink
Further, the sink is connected to the hot and cold water supply system, as well as to the sewage system. The work is carried out in several stages.
Mixer installation
The faucet can be installed on the sink, on the wall or on the countertop. If it is placed on the bowl, then installation can be performed after its installation, but experts recommend doing this before fixing the sink, so all the work will be easier to do.
The mixer is installed in the following order:
- The fastening pins are screwed in. Depending on the mixer model, there may be two or one.
-
Tighten the hoses. Tighten the nuts with a wrench. This should be done carefully and with moderate force. After installing the mixer, it will be very difficult or even impossible to tighten the nut.

Hose connection Hose nuts should be tightened with moderate force
-
Hoses are passed through the holes in the sink.

Hose routing Hoses from the mixer are put into the holes of the sink
- Fixing the mixer. A rubber gasket, a pressure washer and nuts are attached to the studs. Place the mixer in the hole in the bowl and tighten the nuts.
Sink fixing
After installing the mixer, the sink must be secured. This step will vary depending on the model chosen:
-
Fixing the sink to the wall. The bowl is put on the installed studs, plastic liners are inserted and the nuts are tightened. If the installation is carried out on brackets, then the bowl is simply placed on them.

Fixing the sink to the wall Put the bowl on the installed pins, insert the plastic liners and tighten the nuts
-
Installation of a washbasin with a pedestal. This design can be of two types:
- the bowl is attached to the wall and the pedestal plays a decorative role. This option is used more often. The bowl is fixed to the wall with pins, and then a pedestal is substituted;
-
the bowl rests completely on the pedestal. The pedestal is screwed to the floor, after which a sink is installed on it.

Fixing a washbasin with a pedestal The pedestal can be a support for a bowl or serve as a decorative role
-
Installation of a sink with a cabinet. A curbstone is placed, its horizontality is checked, after which a sink is placed on it. The sink can be pulled to the wall with pins, but this is a difficult option. Usually it is glued with a sealant, since the main support falls on the cabinet, and the sealant only prevents water from getting between the wall and the sink.

Washbasin fixings with vanity unit The vanity sink is usually attached to the wall with sealant.
Video: mounting a sink on a pedestal
Connecting the sink to the water supply
At this stage, the mixer is connected to the hot and cold water supply system. To ensure tightness between the tap and the nut, a rubber gasket must be installed on the hose. If a flexible hose is used for the connection, then the gasket is already installed in it, you do not need to install or wind anything extra. Then water turns on and the tightness of the connection is checked. If a leak appears, then the nut is tightened slightly.

If leaks appear, just tighten the nut slightly
Connection to the sewerage system
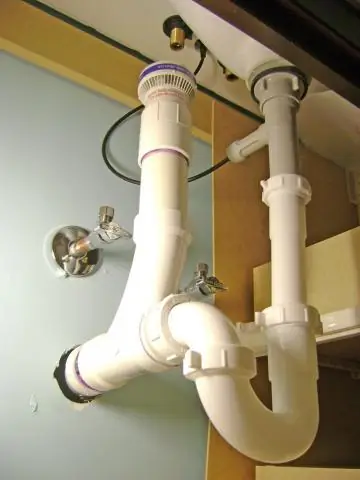
Now the sink needs to be connected to the sewer system. To do this, first install a siphon. This device can be S-shaped or bottle-shaped. Some sinks have an overflow hole. In this case, it is necessary to install a siphon in which there is a hole for installing an additional pipe.
Siphon installation sequence:
-
A siphon outlet is inserted into the hole of the sink, after which it is fixed. To do this, you need to install a mesh, a gasket and fix the siphon with a screw.

Fixing the siphon in the sink The siphon is attached to the sink with a screw
-
Installation of a drain pipe. A corrugated or rigid pipe is screwed onto the siphon body.

Connecting the pipe to the siphon Corrugated or rigid pipe can be connected to the siphon
-
The pipe is inserted into the sewer outlet. If its diameter is less than the size of the hole in the sewer pipe, use a special sealing collar.

Sealing cuff If the diameter of the sewer pipe is greater than the size of the pipe from the siphon, use a transitional sealing collar
- Checking connections. After installing the siphon, a control drain of water is carried out. It is checked for leaks, if they appear, then they must be eliminated. If a leak occurs from under the sealing collar, then it must be pulled out, lubricated with sealant and a new connection made.
Video: installation of a wall-hung sink
System health check
Before you start using the washbasin, you need to check the quality of the connections and how firmly the bowl is installed. To do this, check the quality of all fasteners again. After that, open a tap with hot and cold water and check the tightness of the water supply hoses. If there are water leaks, then the connections must be tightened, and when this does not help, unscrew the hose and wind up the FUM tape.
To check the tightness of the siphon, it is recommended to draw water into the sink by closing the drain hole. Then drain all the water - if there are no leaks of the siphon and hoses, then you can start operating the sink.

When draining the water, check the tightness of the connections
Do not overtighten the connections as you may damage the gaskets or strip the threads
Possible errors and methods of their elimination
Although the installation of the sink is not difficult, certain mistakes can be made when doing it yourself. Incorrect installation not only leads to leaks, a loose sink can fall and injure household members.
Major errors and how to fix them:
- installation of a new sink on the mountings from the old one. Often people do not want to make new holes and fit a new bowl into the old holes. In this case, the sink is not very securely fixed and may fall;
- strong tightening of fasteners. If you do not calculate the force when tightening the fasteners of the sink, you can split the bowl. Tightening the nuts of the water hoses and the siphon forcibly will damage the rubber gaskets, leading to leaks;
- thread stripping. With a lot of force, you can break the threads on the fasteners and have to be replaced;
- selection errors. It is necessary to choose the right size of the sink, otherwise it will interfere with free movement around the room;
-
the gap between the bowl and the wall. Its presence leads to the appearance of smudges on the wall, so it is necessary to lubricate the joint with a sealant;

Sealing the gap between the bowl and the wall A sealant is used to seal the joint between the wall and the sink
- uneven installation. During installation, you do not need to focus on the joints of the tiles. The horizontal position of the installation should be checked using a building level. To install the pedestal, the floor must be level, otherwise you will have to use plastic spacers.
Video: sealing the seam between the wall and the sink
Modern bathroom sinks can have a variety of shapes, differ in the type of installation and material from which they are made. When choosing, one must take into account not only the shape and size of the bowl, but also the fact that the washbasin is convenient to use. The most affordable and popular are ceramic sinks. Modern technologies allow you to create coatings that repel dirt, they do not deposit limescale, so they have a long service life and retain an attractive appearance throughout the entire period of operation. If you adhere to the sink installation technology and follow the recommendations of specialists, you will be able to cope with its installation without involving craftsmen, whose services are not cheap.
Recommended:
Installing A Polycarbonate Greenhouse On A Timber, How To Properly Fix The Structure, Instructions With Photos And Videos

Detailed instructions for the manufacture and installation of an arched greenhouse made of wooden beams and sheathing of the frame with polycarbonate
How To Make A Wardrobe With Your Own Hands At Home: Step-by-step Instructions For Making, Installing Filling And Doors With Drawings And Dimensions

A detailed guide to making a wardrobe with your own hands. Design, marking, installation of internal filling, installation and adjustment of doors
How To Make A Clothes Dryer With Your Own Hands Or Choose, Assemble And Install A Ready-made (ceiling, Floor, Liana Or Other), Other Tips

Dryers for clothes: floor, ceiling, wall - how they differ. How to choose the right one or assemble it yourself, including from scrap materials
How To Install A Toilet With Your Own Hands - Step-by-step Instructions For Installing And Connecting To The Sewer With Video

Classification of toilets according to different criteria. The choice of the toilet, installation features depending on the type of construction. Installation errors and how to fix them
How To Properly Make A Chimney With Your Own Hands, What You Need To Consider, Including The Features Of Its Installation And Decoration

Chimney parameters and methods for their determination. The choice of material. Rules for the design of nodes for the passage through the enclosing structures and places of abutment to the roof
