Table of contents:
- Author Bailey Albertson albertson@usefultipsdiy.com.
- Public 2023-12-17 12:53.
- Last modified 2025-06-01 07:32.
Making a chimney with your own hands: basic operations and recommendations for their implementation

A chimney is an integral part of any heat generator, except, of course, an electric one. At first glance, there can be no difficulties with this element, a pipe is a pipe. But this simplicity is deceiving. When designing and installing a chimney, many questions arise, the answers to which you can find with the help of this article.
Content
-
1 The main stages of making a chimney
-
1.1 How to calculate the diameter of the chimney and its other parameters
- 1.1.1 Configuration
- 1.1.2 Chimney height
- 1.1.3 Shape and cross-sectional area
-
1.2 What to make a chimney
- 1.2.1 Brick or special concrete blocks with round holes
- 1.2.2 Ceramic pipes with aerated concrete shell
- 1.2.3 Steel pipes
- 1.2.4 Asbestos pipes
- 1.2.5 Plastic pipes
- 1.3 Video: budget chimney option
-
1.4 How to insulate the chimney pipe in the ceiling and other places of intersection of the enclosing structures
1.4.1 Video: installing a chimney through the ceiling
-
1.5 Insulation of the chimney
1.5.1 Video: do-it-yourself chimney insulation
- 1.6 Sealing the roof chimney
- 1.7 Adjoining the roof to the chimney
- 1.8 Features of the design of the junction to the roof made of metal tiles
-
-
2 Chimney finishing
-
2.1 Manufacturing a spark arrester
2.1.1 Video: a spark arrester on the chimney will save your life and property
- 2.2 Chimney heat exchanger
- 2.3 Chimney hood
-
The main stages of making a chimney
The smoke exhaust structure will properly perform its functions if its parameters were correctly selected at the design stage, and all technology requirements were observed during the installation work.
How to calculate the diameter of the chimney and its other parameters
There are thermal installations in which air supply to the furnace and smoke removal is carried out using fans or turbines - they are called turbocharged. The chimney of such a heat generator can be located as you like (usually it is laid horizontally) and have any section. Most boilers and furnaces operate on natural draft caused by the tendency of hot gases to move upward (convection) under the action of the Archimedean force.
In this case, the process of designing a chimney becomes much more complicated: you have to look for such a combination of its parameters so that the thrust force is optimal for a particular device. If you make a mistake, then either the fuel will burn poorly and the smoke will go into the room, or the lion's share of the heat produced will whistle into the chimney.
The main parameters of the chimney are:
- configuration;
- height;
- shape and cross-sectional area.
Configuration
The chimney of a natural-draft heating installation must be vertical. The presence of horizontal sections is allowed, for example, for going out through the wall, but their length should not exceed 1 m.

The length of the horizontal section of the chimney must not exceed 1 m
To avoid obstacles such as floor beams, elbows with an angle of 45 ° or less should be used - 90-degree elbows greatly increase the drag of the duct.
The chimney must have the same internal dimensions throughout. The presence of sections with a reduced cross-sectional area is not allowed.
When designing a chimney route, you should first of all decide where it will be located - inside the building or outside. The best option is inside, since this arrangement provides a number of advantages:
- heat from flue gases enters the room;
- the gases do not cool much, which means that condensate forms in small volumes;
- the pipe is mostly protected from the effects of atmospheric factors - wind, dampness and temperature extremes;
- the original appearance of the building is preserved.
But here's what you need to consider when choosing the internal location of the chimney:
- it is necessary to ensure the absolute tightness of the smoke exhaust channel, otherwise fire or carbon monoxide poisoning of residents is possible;
-
you will have to go through at least two obstacles - the attic floor and the roof, and on the roof there are difficult work to seal the passage;

Internal chimney When installing an internal chimney, you will have to go through at least two obstacles: the overlap of the attic floor and the roof
- there will be less free space inside the house (this solution is not suitable for small premises).
When laying the chimney, the following important requirement must also be taken into account: it should not come into contact with utilities, especially gas pipelines and electrical wiring.
Chimney height
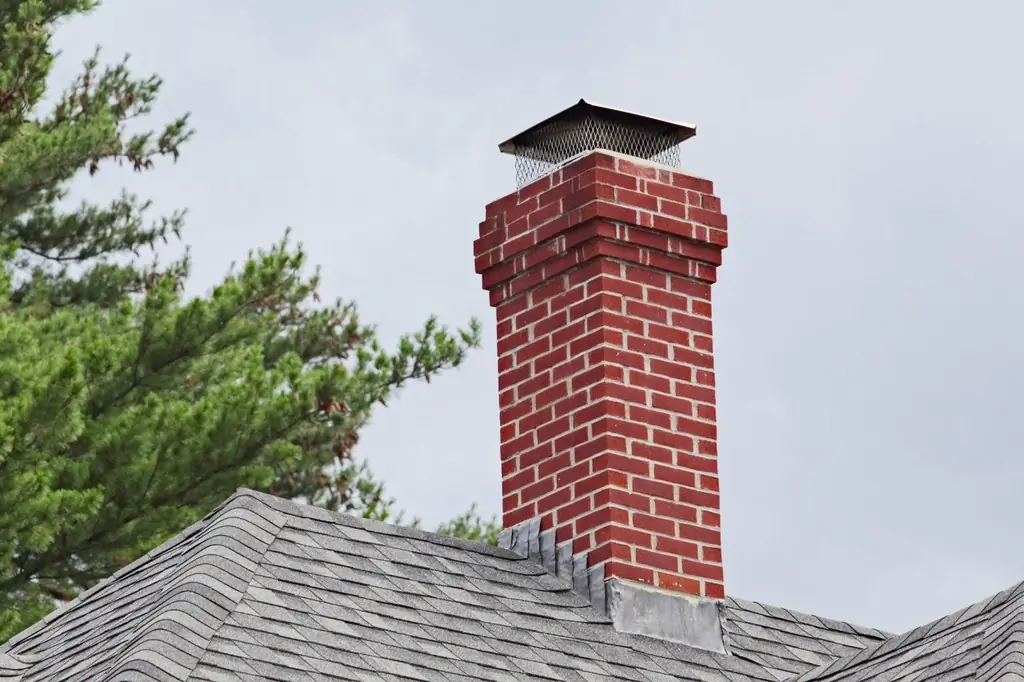
To create a good draft, the difference in height between the chimney head and the grate or heat generator burner must be at least 5 m. It is also necessary to take into account the requirements for the head height relative to the roof:
- If the roof is flat, the head must rise at least 0.5 m above it.
-
If the roof is pitched, the height of the head depends on the distance between the pipe and the ridge:
- up to 1.5 m - the head should be located 0.5 m above the ridge;
- between 1.5 and 3 m - flush with the ridge;
- more than 3 m - not lower than a line drawn through the ridge at an angle of 10 o to the horizon.
-
If flammable roofing materials are used on the roof (ondulin, mastic, roofing material, soft tiles and other coatings containing bitumen), then the chimney head should rise above it by at least 1.5 m. Under such conditions, the chimney of a solid fuel installation should be equipped with a spark arrestor.

Chimney height The height of the chimney overhead depends on its distance to the ridge, the type of roofing material and the aerodynamic situation next to the chimney
When calculating the height of the chimney, it is also necessary to take into account the aerodynamic situation around the buildings. If a building is adjacent to a taller building, the chimney must be built above it. Nearby tall trees can also have a negative effect on the operation of the chimney. It happens that the pipe has to be extended after the surrounding trees have grown up.
Shape and cross-sectional area
The round duct is the best solution for flue gas evacuation. Due to the uneven heating of the walls, the smoke swirls around the vertical axis during movement, which in a rectangular chimney leads to the formation of vortices in the corners. The vortices make the outflow of gases uneven and significantly impair the thrust.
As for the cross-sectional area, in the general case, it is determined by a rather complicated calculation. Today it can be done using computer programs, but even with them it will take some time to tinker until all the parameters are perfectly matched.
The owners of private houses are helped by the fact that they usually have to deal with the simplest case, when the chimney is straight, has a constant cross-section and height within 5-10 m. Under such conditions, the diameter or dimensions of the rectangular section of the pipe are selected depending on heater power:
- up to 3.5 kW - 158 mm or 140x140 mm;
- 3.5-5.2 kW - 189 mm or 140x200 mm;
- 5.2-7.2 kW - 220 mm or 140x270 mm;
- 7.2-10.5 kW - 226 mm or 200x200 mm;
- 10.5-14 kW - 263 mm or 200x270 mm;
- over 14 kW - 300 mm or 270x270 mm.
What to make a chimney
You can build a chimney from the following materials:
- brick;
- concrete blocks with round holes;
- pipes - ceramic, steel, plastic, asbestos.
Brick or special concrete blocks with round holes
It is better to use hollow blocks, since construction is carried out faster and the smoke channel turns out to be round. Otherwise, both brick and concrete chimneys are quite similar:
- have a lot of weight, which is why a separate foundation has to be erected along with the chimney;
- are built for a long time and with great labor costs;
- are expensive, since you have to hire a master (a beginner will not be able to build a high, narrow structure perfectly straight);
- have a rough wall, from which they quickly overgrow with soot;
- absorb moisture, which, when frozen, will destroy the material (if downtime occurs in the operation of the heat generator);
-
They are quickly destroyed by acids, therefore, they are not suitable for modern ultra-efficient installations with a low exhaust temperature (condensate is abundantly formed in them, which contains chemically active products of incomplete fuel combustion).

Concrete block with holes The rough surface of the concrete block contributes to the rapid overgrowth of the inner channel with soot, but the chimney from such material is built quickly and lasts quite a long time
The advantages of stone chimneys are strength, high thermal resistance of the walls and good tightness. But the disadvantages still prevail, so today such designs are not too in demand.
However, a reservation should be made: freestanding brick chimneys are not popular. But the device of a smoke channel in a brick wall of a house is ideal:
- the chimney is located inside the room;
- a little space is lost (the wall will need to be made a little wider);
- it is always warm in the adjacent room, since the wall is heated by flue gases.
Ceramic pipes with aerated concrete shell
Ceramic pipes with a concrete shell are made specifically for the construction of chimneys. This material has a number of positive qualities:
- the construction process takes little time;
- the pipe has a circular cross section;
- the wall is smooth;
- ceramics perfectly tolerate high temperatures and exposure to acids, so the chimney from it has a long service life;
-
thick walls and aerated concrete shell do not allow gases to cool down quickly.

Ceramic chimney The pipe is wrapped with a layer of insulation and lined with bricks, so the ceramic chimney will keep heat well
The picture is spoiled only by the high cost of ceramic pipes, which is why their field of application is still limited to boiler houses and industrial enterprises.
Steel pipes
For a private house, steel pipes are the most suitable option, unless it is possible to arrange a smoke channel inside the wall. Due to the combination of high temperature and aggressive environment, ordinary steel will not stand for a long time, therefore it is better to use stainless steel. All that a high-quality chimney needs, a steel pipe has:
- round section;
- smooth and waterproof wall;
-
resistance to high temperatures and acids.

Steel chimney The steel chimney has smooth walls and a circular cross-section, which provides the best conditions for creating draft
At the same time, the material costs much less than ceramics and weighs little, so it does not need a foundation.
It is quite difficult to make a chimney from steel pipes from scratch - it is difficult to ensure the tightness of the joints between individual sections. It would be more correct to purchase a factory-made set, which consists of pipe sections and other necessary parts (bends, revisions, condensate traps, etc.), already wrapped with insulation and hidden in a protective casing made of galvanized steel or inexpensive stainless steel. The construction of two coaxial pipes, between which a layer of heat-insulating material is laid, is called a sandwich chimney.
The details of the sandwich chimney are made in such a way that one of them fits into the other (socket connection), and the structure is ultimately hermetic. Available in flange and bayonet versions.
Steel pipes are also used for casing brick and concrete chimneys if they are connected to installations with a low exhaust temperature (when acid condensate is abundantly formed)
Asbestos pipes
Asbestos pipes are brittle, rough and porous, but the main disadvantage of this material is low heat resistance. Moreover, if the temperature turns out to be higher than the permissible (300 o C), the asbestos-cement pipe may even explode. Because of this, it is necessary to monitor the state of such chimneys with special care in order to prevent the ignition of soot.

Asbestos pipes collapse at temperatures above 300 degrees, so they are used mainly in the upper sections of chimneys
Nevertheless, due to their low cost, asbestos-cement pipes are used quite often as chimneys: they are installed as an extension of in-wall ducts in order to bring the chimney to the desired height. The flue gases in this area no longer have a high temperature, so overheating is not to be feared.
Asbestos chimneys should not be used with solid fuel heaters, but for gas ones, in the exhaust of which there is no soot, they are excellent
Plastic pipes
Certain types of polymers are able to withstand the temperature that the exhaust of the most low-power heating installations has - gas water heaters, condensing and low-temperature boilers. The temperature of the combustion products in such installations does not exceed 120 o C. Plastic pipes are used to crimp brick chimneys and channels inside the walls.
Video: budget chimney option
How to insulate the chimney pipe in the ceiling and other intersections of enclosing structures
Regardless of whether the chimney is located outside or inside, when laying it, you will have to cross at least one building structure - a wall or a ceiling (we will talk about the roof separately). If the structure is made of non-combustible materials, the passage is quite simple: a sleeve is laid in the opening - a piece of asbestos-cement pipe, into which the chimney section is then placed. The space around the sleeve can be filled with mineral wool or filled with mortar.
The situation is somewhat more complicated with structures that contain combustible materials, for example, with wooden floors. In this case, at the place of passage, it is necessary to perform a cutting, which provides the necessary clearance between the surface of the chimney and the combustible material, followed by filling it with basalt wool.

An amateurish approach to the design of the place where the chimney passes through a combustible ceiling can lead to its charring and fire
Cutting is performed as follows:
- An opening with such dimensions is punched in the wall or ceiling so that a distance of 20 cm remains between its edges and the outer surface of the chimney.
-
A so-called pass-through unit is installed in the opening, which is a frame with external dimensions that coincide with the dimensions of the opening, and a hole for installing the pipe.

Slab passage box The passage unit has the dimensions of the opening and allows you to pass the chimney pipe, isolating it from combustible materials of the ceiling
- The free space in the passage unit is filled with mineral wool, after which a chimney section is introduced into it. The closest joint between sections must be at least 150 mm above or below the walk-through node.
-
On both sides, a special decorative overlay is attached to the wall or ceiling, which will hide the opening. It can be replaced with steel sheet.

Decorative strip at the passage The place of passage of the chimney is closed with a decorative metal plate on both sides
Pass-through units in finished form, that is, already filled with non-combustible insulation, can be purchased as part of a sandwich chimney
In a brick chimney, at the place of passage through the ceiling, a fluff is arranged - a section with a thickened wall. The thickening is gradual: from row to row, thicker brick plates are added to the masonry until the wall reaches its maximum thickness (1-1.5 bricks) at the floor level, then - also gradually - the wall thickness decreases with each row to its previous value …

When approaching the ceiling, a brick chimney gradually thickens along the outer contour, while the inner section remains constant.
A fluff for a brick pipe can also be made of reinforced concrete: from below the opening is sewn up with plywood formwork, after which steel reinforcement, partially embedded in the brickwork, is placed in it, and then concrete is poured.
Video: installing a chimney through the ceiling
Chimney insulation
If the flue gases in the chimney cool down strongly, this will lead to the following consequences:
- the thrust force will significantly decrease, due to which the fuel will burn worse, and smoke may enter the room;
- in large quantities, acidic condensate will form, which will shorten the life of the chimney and lead to its rapid overgrowth with soot.
Most of all, a steel pipe needs insulation, if, of course, it is not a sandwich chimney, in the design of which there is already an insulation. The most effective heat insulators today are:
- slabs and shells made of granular polystyrene foam (in everyday life we call it polystyrene);
-
glass or basalt wool.

Chimney insulation If the external chimney is insulated with mineral wool, it must be protected with a waterproofing material
Each material has its own characteristics:
- Expanded polystyrene is absolutely not afraid of moisture, but when it comes into contact with hot surfaces, it emits vapors that are harmful to health.
- Mineral wool, on the other hand, does not gas when exposed to high temperatures, but it absorbs water and completely loses its heat-insulating qualities.
Based on this, we can conclude: sections of the chimney inside the building should be insulated with mineral wool, and those located outside - with expanded polystyrene
The thermal insulation material is fixed to the pipe using a knitting wire, after which the entire structure is enclosed in a protective casing made of thin galvanized steel. The edges of the casing are connected with a seam seam or with rivets.
Asbestos cement has a low thermal conductivity, therefore, in regions with low frost, pipes made of this material can be left uninsulated. Brick chimneys need even less insulation. However, in areas with especially harsh winters, it would be useful to insulate such a pipe. Usually, plastering or cladding with cinder concrete is used for this purpose.
Video: do-it-yourself chimney insulation
Roof Chimney Sealing
If the chimney is installed inside the building, then an opening has to be made in the roofing cake to release it outside. The rafters and crate located in the immediate vicinity of the pipe must be wrapped with non-combustible heat-insulating material - the same mineral wool or basalt cardboard. You can fix it with a construction stapler.
Having outlined the boundaries of the opening on the vapor barrier and waterproofing films, holes are not cut out in them, but a cross-shaped cut is made. Subsequently, the resulting corners are bent and shot to the rafters and crate.
In order to prevent water from entering the opening, a protective element is installed on the outside of the pipe:
-
if the cross-section is round, mount the so-called roof cut or rat - a conical part made of thin sheet steel or elastic polymer;

Rat The roof is a standard part that covers the pipe passage and ensures tightness in the area of the joint between the roof and the chimney
-
for rectangular chimneys, a steel apron is made with abutment strips.

Steel apron for sealing the chimney passage The apron is assembled from metal sheets painted in the color of the main roofing
Ready-made cuts and aprons are produced by manufacturers of sandwich chimneys and basic roofing materials such as corrugated board, metal tiles, ceramic tiles and ondulin. Ready-made elements are convenient in that their lower part is shaped to match the profile of the roof, thereby achieving the most tight fit. Usually, protective elements are produced in three versions for different slope angles, so this parameter must also be taken into account when placing an order.
If it was not possible to purchase a factory-made apron or rat, you will have to make such an element yourself. It is made from strips of galvanized steel about 40 cm wide, which are folded in accordance with the angle of inclination of the roof so that it looks like a collar. The strips are joined together by a standing double seam.
A homemade apron is laid around the chimney in two layers, with the inner part being wound with the lower edge under the roofing, and the upper one being stuffed from above.
If the pipe is round, the upper part of the apron is pressed against it using a clamp with a gasket, after having lubricated the joint with a heat-resistant sealant for outdoor use. An annular groove is cut into a rectangular brick or concrete pipe, into which the edge of the apron must be inserted, after which it is also filled with sealant.
Adjoining the roof to the chimney
During the installation of the chimney passage through the roof, it is important to ensure a tight abutment of the lower part of the apron to the roof covering. The technology will depend on what material is installed on the roof:
- Cement-sand and ceramic tiles. In a set with these roofing materials, manufacturers supply flexible aluminum tape with a layer of glue applied on one side. The apron-shaped tape wraps around the pipe, and thanks to its flexibility, it precisely follows the relief of the tiles. From above, the tape must be fixed to the pipe with a clamp or special clamping strips (on a rectangular pipe). The joints of the upper part to the pipe and the lower part to the roof are sealed with a sealant.
- Flexible shingles. A semblance of an apron is also made for it, but not from a metal tape, but from an ordinary tile or valley carpet, the edges of which must be brought into the chimney.
- Slate. It is quite difficult to give the lower part of the steel apron the shape of slate waves, therefore, very often the abutment is made out by making a bead from a cement-sand or clay mortar. It must reliably cover the gap between the pipe and the roof covering. From time to time it is necessary to check the condition of the bead and, if necessary, restore its tightness by applying new portions of the solution.
The “Master Flash” roof helps to solve the problem of adjoining the roof to the chimney very effectively. It is not made of metal, but of a special kind of rubber that is resistant to weathering. Due to its flexibility, it can tightly fit any kind of roofing, while the upper part is pulled over the pipe so tightly that leaks are completely eliminated. Due to its good compatibility with all types of coatings and pipes of any diameter, as well as independence from the slope of the roof, the Master Flash canopy is positioned as universal. Its lower part is fastened through the covering to the crate with self-tapping screws with sealing washers.

The “Master Flash” canopy is made of a special type of rubber that takes the shape of any surface well, therefore this passage element is considered universal and can be used on most roofing
Features of the design of the junction to the roof made of metal tiles
On the roof made of metal, a sheet of stainless steel or galvanized steel is placed under the apron, along which water will flow, bypassing the opening. It needs to be shaped into a tray by bending the edges with a hammer and pliers. The tray should go either to the cornice or to the nearest valley.
The gap between the pipe and the roof covering can be additionally covered with the Ecobit self-expanding tape. When the apron is installed, a metal tile must be laid on top of its lower part.
Next, a decorative top apron is installed over the tiles. The places of its contact with the pipe and the tiles must be sealed with a sealant.

A sealing apron for metal roofing consists of two parts: the lower one, which is laid under the covering, and the upper one, which performs more decorative functions.
Chimney finishing
The steel chimney does not need finishing, since galvanized or stainless steel used as a protective casing is highly resistant to any weather conditions. Brickwork is a different matter. To extend its service life, it is advisable to apply one of the following types of finishes:
- Facing with clinker tiles. It is expensive, but it looks beautiful and goes well with all types of roofing. Another plus: thanks to the dark color, dirt on the clinker tiles remains invisible.
- Plastering. Plaster is cheaper than clinker tiles and easier to install. But it attracts not only by this, but also by the possibility of staining in any color. Silicone paint should be used. You can use a traditional cement-sand mortar for plastering with the addition of lime. But new, more stable mixtures on a silicone, acrylic or silicate base will last much longer.
- Facing with fiber-cement boards. Such plates are inexpensive and at the same time they perfectly withstand solar radiation and the effects of atmospheric phenomena. You can also note their light weight and varied colors. The surface can be smooth or embossed.
- Finishing with slate slabs. This finish is used if the roof is also covered with slate. Plates differ not only in color (they are purple, green or graphite), but also in shape, which can be arched, octagonal, scaly or regular rectangular.
- Facing with sheets of corrugated board. Usually used when using the same material as roofing.
From above, the pipe is protected from precipitation by a conical part - an umbrella. If the heat generator operates on coal, peat or wood and at the same time flammable materials are used as roofing, then a spark arrester must also be installed. You can make this element yourself.
Making a spark arrester
The spark arrester is extremely simple. It consists of a cover that causes the smoke to deflect to the side, and a mesh through which the smoke is released to the outside.
A homemade version of a spark arrester can be made in the following ways:
-
Most simple. You should take a pipe with a diameter corresponding to the diameter of the chimney, weld a plug to one of its ends and drill a lot of holes with a diameter of 5 mm in the side wall next to this plug. It remains to put a homemade spark arrester on the chimney and fix it in some way.

Scheme of the simplest spark arrester A simple spark arrester is a pipe with evenly spaced rows of holes, tightened with a steel clamp
-
More difficult. Having measured the pipe with sufficient accuracy, a ring is made of steel tape so that it can be put on the head of the chimney. A mesh of wire with a mesh size of 5 mm is welded or soldered to the ring. The mesh can be made in the form of a cylinder. A conical umbrella made of sheet steel with an anti-corrosion coating is welded or soldered on top. After folding into a cone, the edges of the workpiece can be fastened with rivets.

Spark arrester with wire mesh For the manufacture of a spark arrester, you can use a pipe segment with a wire mesh welded to it and an umbrella located on three holder legs
Video: a spark arrester on the chimney will save your life and property
Chimney heat exchanger
The temperature of the flue gases in most heating installations is so high that the withdrawal of some part of the heat for heating air or water does not lead to any noticeable decrease in the thrust force. Such selection has no effect on the combustion mode in the furnace, therefore, nothing prevents the installation of a heat exchanger on the chimney.
The heat exchanger is usually made in the form of a coil. The most popular material is stainless steel. Galvanizing can only be used if the temperature of the flue gases does not exceed 200 o C. With higher heating, zinc begins to evaporate, thus poisoning the air. Copper has a higher thermal conductivity than steel, but it costs much more.

Copper has the best thermal conductivity, but a heat exchanger made from this material is much more expensive than from steel
To increase heat transfer, the coil must be welded or soldered to the chimney with tin solder. The air heat exchanger can be made of aluminum corrugated pipe. To increase heat exchange with the chimney, it should be wrapped in foil. Such a device is not able to act as the main heating, but for the forced warming up of the room until the furnace is fully fired up, it is quite suitable.
Chimney cap
To protect the chimney from moisture, a device similar to an umbrella or a cap is installed on its head.

The hood protects the chimney channel from moisture and foreign objects, and also serves to increase the draft
Along the way, this detail has a direct impact on the traction force:
- the air flow on collision with the surface of the hood is divided, causing a suction effect;
- as a result, a zone with reduced pressure is formed, which is filled with smoke from the furnace.
With the right visor, the efficiency of the chimney can be increased by 10-15%.
The cap can be made of galvanized steel:
- Measurements are taken from the chimney.
-
A pattern is built on cardboard.

Pattern for making a cap Before cutting out the details of the cap from metal, make a pattern from cardboard and check that all dimensions correspond to the parameters of the chimney
- A steel sheet is marked according to the pattern.
- The workpiece is cut with metal scissors.
- At the joints, three holes for rivets are pre-drilled with a pitch of 15-20 cm.
If the pipe is made of bricks or blocks, it is also necessary to make a drop apron.

The apron additionally protects the brick pipe from precipitation and suction of air from the environment into the chimney channel
Umbrella brackets are made of metal plates.
Although the chimney seems to be a rather simple design, many nuances have to be taken into account when constructing it. But those who are sufficiently aware of them will be able to do all the work, except perhaps laying a brick chimney, on their own.
Recommended:
The Roof For The Hangar, How To Do It Right, Including With Your Own Hands, As Well As The Features Of Its Design And Installation
How the hangar roof shape depends on its function. The better to insulate the hangar roof. DIY hangar roof assembly instructions
How To Make A Roof For A Bathhouse, Including With Your Own Hands, As Well As The Features Of Its Design And Installation
Types of roofs in baths and features of their design. The choice of materials for this design. Roof construction for a bath. Bath roofing repair
Shed Roof For A Garage, How To Do It Right, Including With Your Own Hands, As Well As The Features Of Its Device And Installation
Existing types of pitched roofs. Features of creating and maintaining such a structure in their own hands. What tools and materials you need to have
How To Make A Roof For A Summer Residence, Including With Your Own Hands, As Well As The Features Of Its Design And Installation
Types of roofs for summer cottages. Calculation and selection of materials. DIY installation and insulation, Dacha roof repair with replacement of materials
Waterproofing The Roof Of The Garage, How To Do It Right, Including With Your Own Hands, As Well As The Features Of Its Device And Installation
Materials that protect the garage roof from moisture. Waterproofing tools. Laying material on different types of roofs. Replacing the waterproofer
