Table of contents:
- Author Bailey Albertson albertson@usefultipsdiy.com.
- Public 2023-12-17 12:53.
- Last modified 2025-06-01 07:32.
DIY installation of the drainage system

A properly executed roof reliably protects the building from moisture penetration into a residential attic or a cold attic. Flowing down its slopes, water can fall on the walls and foundation of the building. To prevent this, the roofing system must be supplemented with an effective drainage system. To ensure the normal operation of such a system, it must be correctly calculated and installed. All this can be done independently, but first you need to familiarize yourself with the technology for performing work and the recommendations of specialists.
Content
-
1 How to properly install roof gutters
-
1.1 Installing gutters with your own hands
1.1.1 Video: installing gutters
- 1.2 Installation of sills
-
1.3 How to properly attach the gutter hooks
- 1.3.1 Securing long hooks
- 1.3.2 Fitting short hooks
- 1.3.3 Video: features of mounting hooks
- 1.4 Common mistakes
-
-
2 Installation of internal gutters
2.1 Video: how the installation of the intake funnel is performed
-
3 Installation of an external drainage system
3.1 Video: heating gutters and drain pipes
How to properly install roof gutters
Before you start installing the drainage system, you need to decide whether you will buy industrial drains or make them yourself. If you have certain skills, then all the elements of the drainage system can be made by yourself. For this, galvanized steel is usually used. But they resort to this method quite rarely, since in addition to certain abilities and experience, it will require a significant investment of time and labor. It is much easier to buy finished products and install them yourself.
According to the material of manufacture, drainage systems are divided into two types.
-
Plastic gutter system. Its elements can be connected using glue or rubber seals. Plastic does not corrode, is lightweight, easy to install, and available in a wide variety of colors. Its disadvantages are that the mechanical strength is not very high, damaged plastic elements cannot be repaired, and if the connection is made using rubber parts, then they will need to be changed periodically.

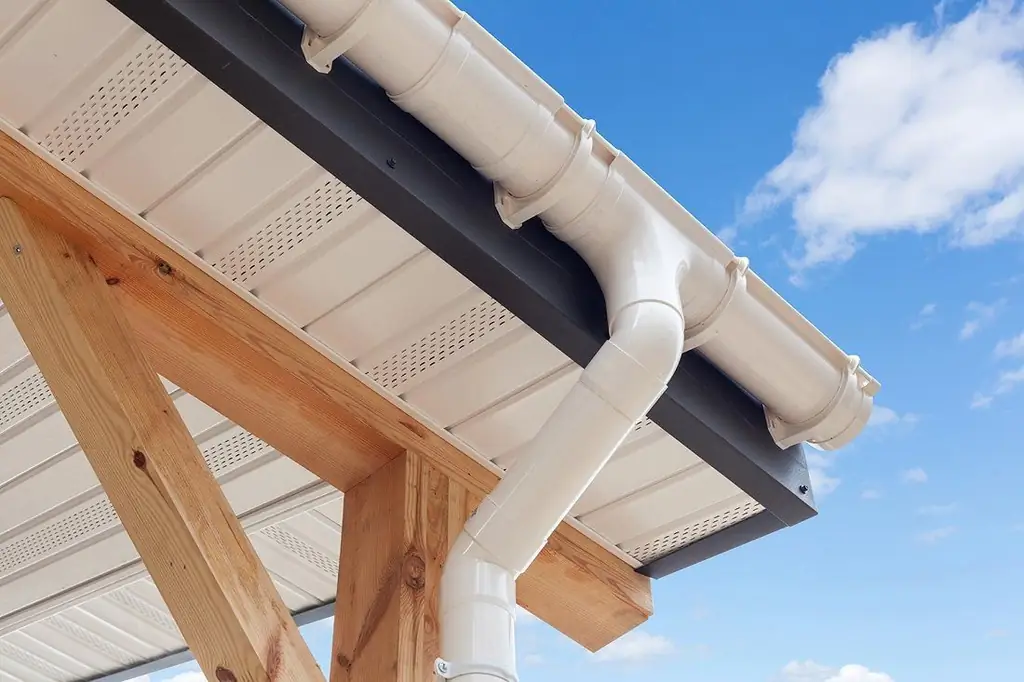
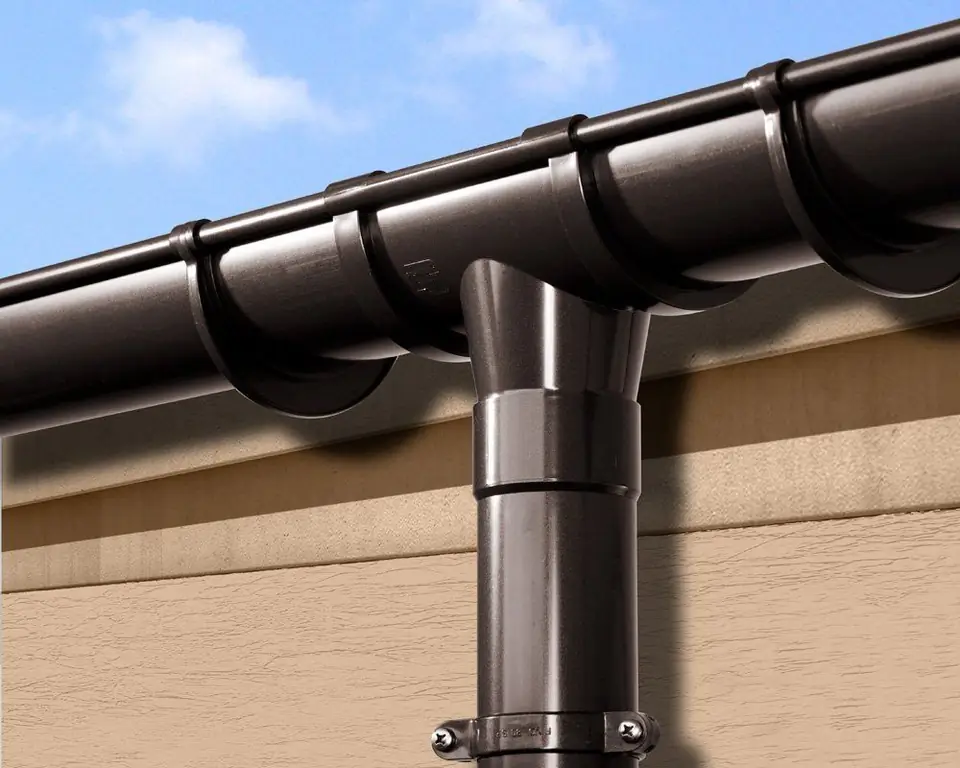
Plastic gutter system Plastic gutter systems are widely used due to their resistance to corrosion, light weight and ease of installation.
-
Metal drainage system. For its manufacture, galvanized steel is usually used, which can be coated with a polymer, much less often gutters are made of copper. The elements of such a system are characterized by high strength, they can withstand heavy loads and have a low coefficient of expansion. The disadvantages of such a system are its high cost, heavy weight and installation complexity. If the protective polymer layer is damaged, rust begins to appear. In addition, metal products are presented in much fewer colors.

Metal gutter system The metal gutter system is heavier than plastic, but it has a longer service life.
This is not to say that this or that drainage system is better, it all depends on the operating conditions and the region in which the building is located. The plastic system has a large number of various elements, so it is more convenient to use it when creating a system of complex configuration. Metal gutters look nice, last a long time, but their installation is more difficult.
It is easier to install the drainage system before laying the roofing material. For the correct implementation of this work, you must adhere to the following recommendations.
-
The installation must be carried out at a certain temperature depending on the material:
- plastic elements - more than 5 o C;
- metal products coated with plastisol or ceramic granules - more than 10 o C;
- metal treated with pural - 5 o C and above.
-
The gutter must be installed with a slope relative to the roof. It can be organized in one (with a roof length of less than 12 m) or in two directions. The standard slope should be 3-5 mm per 1 m of length towards the rain inlet. In this case, it is necessary to maintain a distance between the rainwater inlets no more than 24 m.

Gutter slope If the length of the building is less than 12 m, then the slope of the gutters can be done in one direction, otherwise it is necessary to mount the gutters with an inclination from the center of the wall to each of its corners
- The holders must be at the same distance from each other. For a plastic gutter, the fasteners are installed after a maximum of 50 cm, and for a metal one - after 60 cm. The holders begin to install from the top point and gradually move to the bottom.
-
The gutter should be positioned so that the edge of the roof protrudes 35-50% of its width.

Fastening the gutter to the frontal board The edge of the gutter must be at least 3 cm below the plane of the roof, otherwise it can be ripped off during the snow sliding
-
It is possible to cut gutter elements only in the manner recommended by the manufacturer. Plastic elements are cut with a hacksaw with fine teeth, metal elements - with a hacksaw for metal. The grinder cannot be used for products with a polymer coating, since during its operation intense heating and destruction of the coating occurs.

Gutter cutting In no case should you cut a polymer-coated gutter with a grinder
- Holders of drain pipes should be installed at least every 2 m, and at a house height of more than 10 m - every 1.5 m.
-
It is necessary to connect the elements correctly and securely. Plastic parts are joined with glue, rubber seals and latches. Metal elements can be fastened to each other with latches or rubber seals. The drain pipe should not reach the ground by 25-40 cm.

Gutter connection When connecting the gutters between them, it is necessary to leave an expansion gap for thermal expansion of the material
Diy gutter installation
When performing an independent installation of the drainage system, you will need the following set of tools:
- water level for setting the angle of inclination of the gutters;
- tape measure and pencil;
- rope to mark the line of attachment of the brackets;
- hacksaw for metal;
- the tool with which the hooks are folded;
- metal scissors, if metal elements are installed;
- electric drill;
- regular and rubber hammer;
-
ticks.

Tools for installing gutters For the installation of gutters, the usual tools are mainly used, which are available from most individual developers, the only exceptions are devices for bending and installing rivets
Usually the installation of the gutter system is carried out during the construction of the building, before the installation of the roofing material. Let's consider the sequence of these works in more detail.
- Fastening the brackets with respect to the slope and the step of their installation.
-
Installation of funnels. These elements are located in those places where drain pipes are installed. Funnels are also used to connect plastic gutters. In the place of the gutter, where the funnel will be attached to it, a hole is made and the edges are well cleaned. Glue is used to fix the funnels. To prevent debris from entering the drain pipe, a protective mesh is installed on the funnel, which must be periodically cleaned of debris.

Installation of funnels It is imperative to install a protective mesh on the funnel, otherwise the drain pipe will become clogged with debris
-
Installation of gutters. These elements can be semicircular or rectangular. The brackets are selected depending on the shape of the gutters, after which they are simply put on the ready-made fasteners. The edge of the drain that is not in use must be closed with a plug, its tightness is ensured by a rubber seal. It is recommended to install brackets on both sides of the connection to avoid sagging of the gutter system.

Installing gutters The type of bracket is selected depending on the type of gutter
- Gutter connection. In order to connect two gutters together, special additional elements are used, which are put on the ends of adjacent gutters. A distance of about 3-5 mm should remain between the grooves, it is necessary to ensure possible deformations of the elements. This is especially important for plastic parts, since they have a large coefficient of expansion.
-
Installation of knees. Elbows, as well as gutters, can have a semicircular or rectangular shape and are selected in accordance with the shape of the installed gutters. The knee is put on the funnel from below, it will direct water into the drain pipe. It is necessary to choose the required knee angle, although there are usually no problems with this, since the choice of such elements is quite large.

Installation of knees If the length of the elbow is not enough, then an additional piece of pipe is installed between it and the drain pipe
-
Installation of risers. The elbow is connected to the riser pipe and fixed with clamps to the brackets installed on the wall of the building. If one pipe is not enough, it is lengthened, for which one or more elements of the required length are attached.

Installation of risers The maximum distance between riser mountings cannot exceed 2 m.
-
Installation of clamps. Usually these elements are made in the form of two arcs that cover the pipe, after which they are fixed with bolts. A pin is used to attach the clamp to a wooden wall, and a dowel is used to a brick wall, for which a hole is previously made.

Downpipe clamps Clamps consist of two arcs that cover the pipe and tighten it with clamps
- Drain installation. This element is final, in its appearance it looks like a knee. The drain is mounted at the very bottom of the pipe, with its help the incoming water will be diverted from the foundation of the building. It is recommended that the distance from the edge of the drain to the blind area is no more than 40 cm.
Video: installing gutters
Ebb installation
Correct installation of window sills is of great importance for protecting the house from moisture. These are metal or plastic slats that are mounted from the outside of the house to the lower part of the window opening.

Ebbs are made of galvanized steel with a polymer coating or plastic
Each window must have an ebb, which is also popularly called the outer window sill. In addition to protecting the walls from moisture penetration, they also give the house a beautiful and complete look.
The ebb installation sequence consists of several steps.
-
Carrying out measurements and determining the required size of the low tide. For the manufacture of ebbs, galvanized steel is used, it can also have a polymer coating or plastic. Such an element must have a fold corresponding to the shape of the window near which it is installed, as well as folds on the sides and bottom. The low tide should protrude 3-5 cm beyond the wall and be inclined towards the street in order to ensure free drainage of water along the lower drip chamber. In order for the water to drain well and quickly, the slope should be about 10 o.

Low tide scheme The length of the ebb is standard, and its width is selected for each window sill separately
- Cleaning the installation site from debris.
-
Fixing the ebb with self-tapping screws to the bottom profile of the window.

Fixing the ebb with self-tapping screws For reliable fixation of the ebb, the screws are installed in increments of 40-45 cm
-
Filling the space between the window sill and the ebb with polyurethane foam, which, after hardening, firmly fixes this element, and also provides reliable noise and heat insulation. During solidification, the ebb tide must be pressed with a heavy object so that the expanding foam does not raise it during the solidification process.

Ebb installation The ebb should be tilted away from the window so that water can drain well from it
- Sealing the junction of the ebb and the window frame with silicone sealant.
During the installation of the ebb tide, it is necessary to ensure that its lateral bends go under the slopes so that water does not fall on the wall. It is recommended to install ebb tides before the outer slopes are formed.
How to properly attach the gutter hooks
Before proceeding to fixing the hooks, it is necessary to make markings to ensure the angle of inclination of the gutter system. Due to the slope, water will flow towards the riser and be effectively removed from the roof.
It is recommended that the slope is about 3-5 mm per 1 meter of the gutter, that is, with a gutter length of 10 m, the difference between the height of its right and left edges should be 3-5 cm.
Attaching long hooks
Installation of hooks under the gutters is carried out before laying the roofing material. This is due to the fact that they are installed under the roof and after it has been laid, long hooks cannot be fixed.
The installation sequence for long hooks will be as follows.
- Calculation of the number of hooks. It should be borne in mind that they should be located every 60-90 cm, as well as along the edges and on both sides at the junction of the gutters.
- Hook markings. It is recommended that they be numbered so that later it would be easier to perform installation.
-
Preparation of hooks. It consists in bending them in accordance with the angle of inclination of the gutter. Bending is carried out with a special tool, while taking into account that the front edge of the installed groove should be 6 mm lower than the rear one.

Hook bend A special tool is used to bend the long hook
-
Fixing hooks. The first hook is mounted at the highest point. The hook is attached to the rafters or eaves with self-tapping screws. In accordance with the markings made, the installation of the remaining elements is carried out.

Attaching long hooks Long hooks are attached before installing the roofing material
Installation of short hooks
If only short hooks are available, then it's okay. Their installation is carried out in the same way, but if in the first case the hooks were attached to the crate or rafters, then here they are fixed to the end plane or to the cornice board.

Short hooks can be installed after laying the roofing material
Short hooks are usually installed after the roof has been installed. Universal holders can also be used, which can be attached as short or long hooks if required.
Video: features of mounting hooks
Common mistakes
If you carelessly approach the design and installation of the drainage system, you can make certain mistakes, because of which it will not be able to fully perform its functions:
- horizontal installation of drains leads to the fact that water remains in the gutter, and in winter it freezes there;
- a large release of roofing material over the gutter and leads to the fact that during heavy rainfall, water does not enter the catchment;
- placing the drain pipe too close to the wall of the house causes the wall to constantly get wet;
- an insufficient number of brackets leads to a sagging of the gutter, due to which water accumulates in this place;
- poor-quality assembly violates the tightness of the structure, so water gets on the walls.
Installation of internal gutters
The structure of the internal drainage system includes the following main elements:
- water intake funnel;
- riser;
- branch pipe;
- release.
In order for this system to work at any time of the year, water intake funnels must not be installed next to the outer walls of the house, otherwise they will freeze in winter
The installation of the internal drain is carried out in a certain sequence.
-
Installation of funnels. If the floor slabs are already installed, funnels can be installed. If there is no overlap yet, then you need to start with the installation of risers. The funnel is connected to the riser by means of a compensating socket so that the connection does not break with external deformations.

Internal drainage system An internal drainage system is usually set up on flat roofs, where there is no natural drainage of water due to the slope of the slopes
-
Installation of risers and pipes for draining water from funnels. Pipes connecting funnels and risers must be laid with a slope. The diameter of the riser must be equal to or greater than the diameter of the funnel. If the diameter of the pipes is not more than 110 mm, then they go in coils and run from top to bottom. For large sizes, pipes are installed from the bottom up. The uprights are fixed every 2-3 meters.

Internal gutter risers Indoor gutters should be fixed at a maximum every 3 m
-
Laying horizontal pipelines. Their installation is carried out in the same way as for sewer pipes, but the slope is made about 2-8 mm per meter. For pipes with a diameter of 50 mm, the cleaners are installed after 10 m, and if their diameter is 100-150 mm, then after 15 m.

Internal drain Horizontal pipes of the internal drain are mounted in the same way as sewer pipes, but with a smaller slope.
The main recommendations that must be followed when creating such a system:
- the roof surface is divided into sections;
- one riser should have no more than 150 m 2 of the roof;
- the roof of the building should have a slope of the order of 1-2%, which is directed towards the funnels;
- when choosing a pipe diameter, it must be borne in mind that 1 cm 2 of a pipe is able to effectively drain water from an area of 1 m 2, the diameter of pipes can be from 100 to 200 mm;
- for an internal drain, you will need to lay an underground drainage collector, which goes into the sewer system;
- in order to ensure water drainage throughout the year, risers should be installed in the heated part of the building;
-
the connection of the intake funnel and the roof of the house must be airtight so that water does not flow under the roofing material;

Water intake funnel The intake funnel must be tightly connected to the roofing material so that no water gets under it
- funnels must be closed with grates so that debris does not fall into the drainage system and does not clog it;
- all connections must be tight, during the installation of risers, all pipes are connected by welding.
Internal drainage systems can be of the following types:
- gravity - collection and drainage of water is carried out along troughs located with a slope. Such a system is only partially filled with water;
- siphon - completely filled with water, which enters the funnel, and then into the riser. Due to the resulting vacuum, the forced removal of water occurs, so this method is more effective.
Video: how the installation of the intake funnel is performed
Installation of an external drainage system
An external roof drainage system can be:
- disorganized. In this case, the water comes off arbitrarily, this method is usually used for small outbuildings;
- organized. Water is collected in gutters, after which it is discharged through drain pipes outside the building.
When creating an external drain, the gutters are attached using special brackets, which you can make yourself, but it is better to purchase ready-made ones
When creating an external gutter, the gutters should be mounted at a slope, this will ensure the effective removal of water from the roof. It is not difficult to create an external drainage system with your own hands. All the necessary items are now on sale. It is enough to draw up a diagram and calculate how many and what elements are needed, after which you can simply and quickly perform their installation.

It is quite possible to mount an external drainage system with your own hands, because all the necessary components are on sale to facilitate this process
Installation of the outdoor drainage system is carried out in the following order.
- Calculation of the required amount of materials. You need to decide on the number of holders, gutters, drain pipes and elbows.
- Marking of places for fastening hooks. After the attachment points are marked, the hooks are bent to the required angle and their fixation.
-
Preparation of places for funnels. Holes for funnels are prepared in the grooves, after which they are fixed.

Installation sequence of the outdoor system During installation, all connections must be made tight so that water from pipes and gutters does not fall on the walls of the house
- Laying gutters. The gutters with the installed funnels are placed in holders and fixed.
- Installation of drain pipes. They are attached to the wall using special brackets.
-
Connection of drain pipes and funnels. Using elbows with the required angle of inclination, the drain pipe and funnel are connected.

Preparation of places in the gutters for funnels For the funnel, a hole is made in the gutter, the edges of which are well cleaned to obtain an airtight connection
A properly executed external drainage system reliably protects the roof, walls and foundation of the building from water penetration into them. During the cold season, during frequent thaws, the drain pipes of the gutters can freeze, so the water will not be effectively removed. To avoid such a problem, you can install heating of these elements. For this, a self-regulating or resistive cable is used, which is attached to gutters and pipes. The electric current passing through the cable causes it to heat up, as a result of which the elements of the drainage system remain warm, so the water in them does not freeze.
Video: heating gutters and drain pipes
The main requirements for the drainage system are the removal of water from the roof of the house, as well as high strength, tightness and long service life. It is necessary to reckon that such a system can withstand heavy loads; in winter, a large amount of ice can accumulate on it. In order for a self-installed system to meet all the requirements, it is necessary to correctly calculate it, and then carry out the installation in compliance with the developed technologies.
Recommended:
The Roof For The Hangar, How To Do It Right, Including With Your Own Hands, As Well As The Features Of Its Design And Installation
How the hangar roof shape depends on its function. The better to insulate the hangar roof. DIY hangar roof assembly instructions
How To Make A Roof For A Bathhouse, Including With Your Own Hands, As Well As The Features Of Its Design And Installation
Types of roofs in baths and features of their design. The choice of materials for this design. Roof construction for a bath. Bath roofing repair
Shingles For The Roof, Including With Your Own Hands, As Well As The Maintenance Features Of Such A Roof

The advantages of shingles as a roofing material. Methods for making shingles. Features of laying shingles on the roof: step by step instructions. Care rules
Installation Of Roof Windows, Including With Your Own Hands, As Well As Installation Features In An Already Finished Roof
Step by step instructions for installing a roof window. Features of technology and nuances of installation in various types of roofing
How To Install Roof Eaves, Including With Your Own Hands, As Well As The Features Of The Repair
The design and purpose of the ebb and how to install it on roofs with different coatings. Installation of ebb tides in various situations and their repair
