
Table of contents:
- Author Bailey Albertson albertson@usefultipsdiy.com.
- Public 2024-01-17 22:26.
- Last modified 2025-01-23 12:41.
Problems with an Android device after flashing: reasons and solutions
Many users, wanting to give new life to their devices, flash them on their own, but unfortunately, not always successfully. There are problems with loading the system, options, up to a complete refusal to start in Recovery mode. Can the situation be corrected?
Content
-
1 The main problems that arise after the firmware
- 1.1 The device does not turn on
-
1.2 Doesn't turn on or charge
1.2.1 Recovery by standard ADB tools
- 1.3 The device is constantly rebooting
- 1.4 The device freezes on the splash screen
- 1.5 Touchscreen has stopped working
- 1.6 Just a black screen
- 1.7 After the firmware does not work Recovery Mode
- 1.8 The computer stopped seeing the device
- 1.9 Missing sound on the device
-
1.10 "Invalid IMEI" message after flashing
- 1.10.1 How to enter IMEI manually
- 1.10.2 Change or generate a new IMEI using the Chamelephon application
- 1.10.3 Video: how to change the IMEI code
-
1.11 The device does not see the GSM network and does not connect to Wi-Fi
- 1.11.1 Does not get an IP address and does not identify the network
- 1.11.2 Connects to an access point, but does not load pages
- 1.11.3 Can't see home hotspot
- 1.11.4 Video: Setting Up a Home Router
-
1.12 The device is slow or buggy
1.12.1 Photo Gallery: How to Hard Reset on Android
- 1.13 Missing internal memory
- 2 How to flash Android: useful tips
The main problems that arise after the firmware
Unlike iOS, the Android platform is open, so it is often easier to fix a bug than it seems at first glance. In each case, the reasons and solutions are different. There is no single panacea for all situations, so they must be considered separately.
The device does not turn on
Sometimes, after flashing, the device does not want to turn on due to the fact that the battery is discharged. Therefore, before you start flashing, you need to make sure that your phone or tablet has enough charge. If the gadget does not turn on, but the PC recognizes it, it will be logical to recharge it first.
If the device does not turn on, but can boot into recovery mode, you need to take this chance. How to restore the phone system using Recovery Mode will be described in detail below.
Doesn't turn on or charge
If the device does not turn on and does not want to charge via USB, you can try charging the battery outside the phone, that is, using the so-called frog.
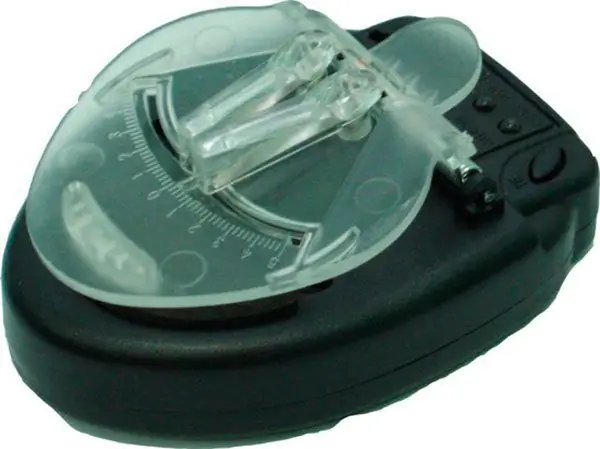
"Frog" allows you to charge batteries separately from the devices, it does not matter from which manufacturer you have your smartphone
If it turns out that the matter is not in the battery, but the device is recognized on the PC, you need to flash the phone again. It is better to contact a service center, but you can do it at home.
If the old firmware version remains on the phone, it is recommended to install it. If not, the correct solution is to download the desired file from the manufacturer's website, and not from a third-party web page. The firmware must necessarily match the device model.
The file must be loaded into the root folder of the MicroSD card and start the installation using the Recovery mode. To start the mode, press the power and volume buttons simultaneously. This combination may differ for different phone models. If this option did not work, you can try holding down the Home key and the same volume button.
Recovery with standard ADB tools
If the smartphone does not support SD cards, then you can use ADB commands. This method is also suitable for the case when the device is constantly rebooting. The procedure is carried out as follows.
-
Enable USB debugging and run ADB Run on your computer. If there is no driver, download and install it. Select the Backup menu.

Backup menu In the main menu of the ADB Run program, select the Backup item
-
Click on Adb Restore.

Switching to Adb Restore mode In the menu that opens, click on Adb Restore
-
On the device itself, click on the "Recover data" button.

Data recovery request The device will ask you to restore data, which you need to confirm
The device is constantly rebooting
With a constant spontaneous reboot, control over the phone is lost. To return it, you must first check the condition of the battery, as often the problem occurs due to its malfunction. If the battery is not swollen, you need to reset the settings to the factory settings using Recovery Mode or in the settings themselves. For more information, see the sections on black screen and phone sluggishness below.
The device freezes on the splash screen
The problem is that the flashed phone starts launching but hangs on the logo. Then everything goes out and the user is left with nothing. This problem is called bootloop. The reason is the installation of firmware that is not suitable for a smartphone or tablet. Another option is unsuccessful replacement of files in the system partition of the OS. The device is trying to start something that constantly reloads the system memory. Logically, device failure is inevitable.
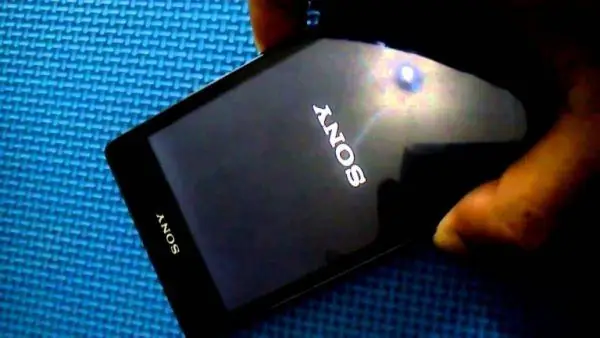
The reason for the freezing of the smartphone is usually the installation of incompatible firmware or unsuccessful replacement of system files
Touchscreen has stopped working
If the touchscreen stops working, you should immediately try to enter Recovery Mode. If the phone boots in this mode and the user has a data backup, roll back to the old version. Detailed instructions in the next section.
Just a black screen
If the phone won't boot up and even the manufacturer's logo isn't displayed, but the phone enters recovery mode, it's obvious that you need to try restoring the old version of Android. If the device does not enter Recovery mode, you need to resort to at least: install a new version of the OS or custom Recovery using a PC and ADB commands.
-
Enable recovery mode. Again, different key combinations are used to enter for each brand (and sometimes model) of smartphone / tablet:
- in Samsung devices, you need to hold down the power button and "Vol +";
- in Sony products - Power, "Vol -" and the camera power button;
- for HTC - "Vol -" and Power before enabling Recovery mode.
-
In the Recovery menu, using the volume keys (in some cases, you can use the touch screen to move), select the wipe data / factory reset item. Press the power key of the device to access this menu.

Recovery menu In the Recovery menu, select the wipe data / factory reset item
-
Confirm consent to delete data from the smartphone and rollback by selecting the appropriate sub-item.

Deleting data from a smartphone We confirm the deletion of user data
-
Wait until the end of the rollback process to the old OS version, and then select the reboot system now item to exit recovery mode and let the operating system boot.

System reboot command We select the reboot system now item and wait for the operating system to reboot
After successful completion of the described operations, the previous version of Android will return to the device.
Recovery Mode does not work after firmware
If the Recovery Mode does not start after the firmware, but the smartphone turns on and works, this may be caused by a mismatch between the factory Recovery mode and the new OS version. A special recovery platform, for example, CWM (ClockworkMod), can save the situation. The Rom Manager program will help you install it. There are also other, more complex methods for flashing the recovery service. For example, if you have a Samsung phone, it's better to use Odin. Many well-known manufacturers create their own special software, as in the case of Acer.
To flash a device using Rom Manager, you need to get Root rights. This can be easily done with another utility like Framaroot. When the superuser rights are obtained and the Rom Manager is loaded, you need to do the following:
-
Open the Rom Manager application and select the first Recovery Setup item.

Rom Manager interface In the initial menu, select the Recovery Setup item
-
Click on ClockworkMod Recovery and select the model of the device from the list of available ones. Confirm download.

Selecting a mobile device model Click ClockworkMod Recovery, select the gadget model and wait for the download to finish
After that, the files will start downloading, and then a notification will appear that you need to grant the program Root rights. Next, the installation of CWM will begin.
The computer stopped seeing the device
First of all, you need to check the functionality of the USB port and install the drivers. If this does not help to correct the situation, you can use the following instruction.
-
Enable debug mode by going to settings. For different models of smartphones and in different versions of the OS, the sequence of actions may differ. For example, in Sony Ericsson Xperia Arc based on Android 4.0.4, you need to select the "Features for Developers" section in the settings, and then - "USB Debugging".

Debug mode Go to the section "Features for developers" and turn on the debug mode
-
Confirm enabling debug mode by clicking OK.

Confirmation of entering debug mode Click OK to confirm the transition to debug mode
-
Go to settings again and select Xperia.

Xperia model settings Find the Xperia item in the settings and open it
-
Select the "Connection" item.

Connecting a gadget to a computer Select "Connection" - this is the last line in the menu
-
Click on "USB Mode" and select "Media Transfer Mode".

Selecting the connection setup mode Select the media transfer mode - your computer and mobile device can share files
After these manipulations, the smartphone should be detected correctly on the PC again.
Missing sound on the device
The problem indicates that the custom firmware is not compatible with the device. A solution is to reflash the device again, but with a different version. You need to download the firmware file to a removable card and replace the version using Recovery Mode.
However, for a start, you can try resetting your phone to factory settings. This method is described below in the section on how to combat degradation of device performance.
"Invalid IMEI" message after flashing
The notification means that the IMEI was overwritten or changed during the flashing. There can be two reasons: violation of the firmware procedure or installation of a custom version of inadequate quality from an unreliable developer (the version lacks the corresponding functionality for IMEI).
First you need to determine if the code has actually been erased. To do this, go to dialing mode and enter * # 06 #. A window will appear with the IMEI number, which must be checked against a number of numbers written on the box of the device. If they do not match, this means that the IMEI was overwritten.
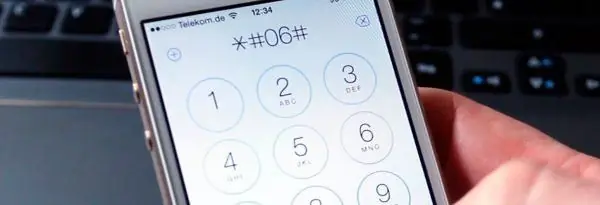
To check the IMEI code, which is stored in the device's memory, you need to enter * # 06 # in dialing mode
In this case, you must manually enter the code to restore GSM communication. The phone will then be able to call and send messages.
How to enter IMEI manually
You can change the overwritten IMEI to the correct one in Android OS in at least two ways. The first of them consists in prescribing IMEI in the engineering menu of the phone.
- Enter the dialing mode and enter the code to open the engineering menu, for example: * # 3646633 # or * # * # 3646633 # * # * (if the indicated codes do not work, find the combination for your phone model on the Internet).
-
Go to the CDS Information - Radio Information - Phone 1 menu.

CDS Information In the engineering menu, select the item CDS Information, then Radio Information and Phone 1
- The AT + item will be located at the top. In the field below it, specify EGMR = 1.7, ".
- Place the cursor between the quotes and enter your IMEI, which is indicated on the box of the device.
-
Click on the SEND AT COMMAND button to apply the changes.

Entering the IMEI code Enter the IMEI installation command and click the Send at Command button
To restore the IMEI for the second SIM card (if available), you will need to close the engineering menu, repeat all these steps, but instead of EGMR = 1.7, enter EGMR = 1.10, and in quotes, indicate the IMEI for the second SIM card
After that, you need to restart the device. IMEI codes will be overwritten and the GSM module will work again.
Change or generate a new IMEI using the Chamelephon app
The second way is to install IMEI through special software. It is simpler than the first, but requires Root rights:
- Download Chamelephon app from Google Play Market. Obtain superuser rights first.
- Open the downloaded program and enter IMEI in the special fields. It is also possible to create a new code for your phone or tablet.
-
Restart the device - the system will contain the correct number of numbers.

Chamelephon program interface Chamelephon app allows you to enter old or generate new IMEI code
Video: how to change the IMEI code
The device does not see the GSM network and does not connect to Wi-Fi
If the phone does not detect any GSM networks, it means that there is a problem with the IMEI code. How to fix this problem was described in the previous section.
Doesn't get an IP address or identify the network
The problem of connecting to a Wi-Fi router can manifest itself in different ways. For example, the device does not connect to certain access points and constantly displays "Obtaining an IP address" or "Identification problem". In the second case, you just need to re-enter the password, since, most likely, it was damaged during the device update.
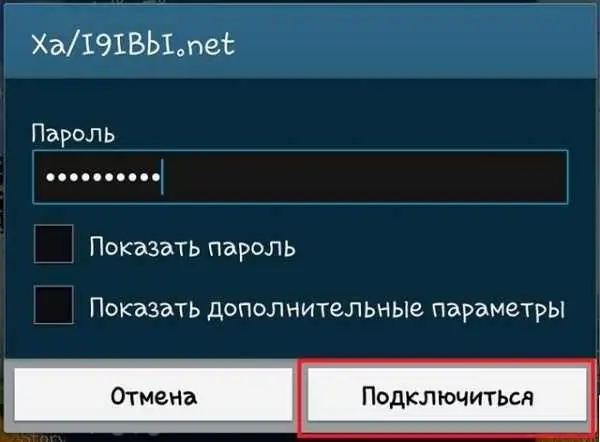
If the saved password password for the Wi-Fi access point was damaged during the flashing, just enter it again
In the case of the message "Obtaining an IP address", an effective way to solve the problem will be to temporarily remove the network.
-
In the list of available networks, select the inoperative one, which cannot receive an IP address, click on it and hold your finger for a while until a menu appears. Click on the "Delete network" item.

Removing an access point Delete the broken access point to restart the connection with it
-
Restart the search for Wi-Fi points and reconnect to the remote network.

Adding a remote network Add the remote access point again
Connects to an access point, but does not load pages
The essence of the next version of the problem with connecting to Wi-Fi: the device successfully connected to the required access point, but the pages do not load. The reason must be found in the proxy server settings.
-
Clamp the network and then select the "Change network" item in the menu.

Network change We select the item "Change network"
- Check "Show advanced options". In different versions of Android and on different device models, the section names may differ: one of the possible options is "Show advanced functions". The item "Proxy Server Setting" appears. If “Manual” is selected in it, then the reason for the problem was precisely this, you need to reinstall it in the “No” position and click “Save”.
Another reason: the date was knocked off during the update. You can check it in the “Date and Time” settings item. It may have changed as of the firmware release date.
Can't see home hotspot
If the home access point is not in the list of available networks, this means that the new firmware has changed the broadcast frequency on the mobile device. In this case, you need to change the settings on the router. The following instructions will help you troubleshoot.
- Go to the administrative menu of the router by typing 192.168.1.1 in the browser search bar.
- Go to wireless settings (Wireless).
- Change the broadcast channel (Channel) to any other and save.
-
Experiment with different channels, maybe this will solve your problem.

Changing the channel on the router Changing the broadcast channel on the router can help you connect to it from your phone or tablet
This procedure is only available if it is a home and not a public network. If nothing worked, it makes sense to reset the settings on the device. This will help resolve a system error that often appears when merging an existing version with a new one.
If the problem still persists, the problem is in the firmware itself. You should donate the update and reset your device to a previous version or install custom firmware.
Video: setting up a home router
The device is slow or buggy
Often, users notice to their surprise that after flashing the device began to work even slower, which they just wanted to get rid of by updating the OS. Clearing the cache and reinstalling applications will not produce noticeable results. An effective solution would be to reset your phone or tablet or Hard Reset. This is done in the menu "Settings" - "Backup and reset" - "Reset phone settings".
It is important to note that after the reset, all information will be erased: contacts, photos, videos, settings and applications. Thus, it is advisable to make a backup copy of the data, if necessary, by ticking the boxes "Backup" and "Auto recovery". The latter is needed to reinstall applications and restore settings and data.
Photo Gallery: How to Hard Reset on Android
-

Backup and reset - Click "Backup and reset" in the phone settings
-

General reset - Select the last item - "General reset"
-

Reset phone settings - Click on "Reset phone settings"
Internal memory is missing
After updating to a new version of the OS, the phone may refuse to recognize its own internal memory. The alleged reason is a bug in the firmware version or a mismatch between the phone parameters and the custom firmware. The problem is eliminated by resetting the phone to factory settings (Hard Reset procedure described in the previous section of the article).
How to flash Android: useful tips
Flashing a phone or tablet is a lesson for those who understand technology. For an ordinary user, this will most likely be difficult - it is better to contact the service center to knowledgeable people. Nevertheless, if you have studied a lot of instructions, re-read a lot of information and still decided on an independent firmware, you should consider a few more points before carrying out this difficult procedure.
- Think about why you need firmware. Is your phone slow? Crashes constantly? Memory full of unknown data? Then, to increase the speed and performance of the smartphone, it is still recommended to reflash it. If the phone works normally without problems, then perhaps the flashing does not make sense.
- Create a backup in case something goes wrong. Then you can rollback to the previous version.
- Save the current firmware version on the SD card for the same purpose.
- Charge the device.
- Use the USB cable that came with the device.
- Before starting the procedure, familiarize yourself with all firmware available for this model.
-
Read the installation instructions for the selected version several times. Information must be taken from reliable sources, for example, the xda and w3bsit3-dns.com forums.

Charging your smartphone Before interrogating a device running Android OS, it is recommended to fully charge it, otherwise you can "turn" the gadget, that is, turn it into an inoperable item
It is recommended to flash the device only for people who are knowledgeable in this subject. This does not mean that an ordinary user, clearly following reliable instructions, will not be able to solve the problem. However, there is a risk of problems, both serious and minor. There is no single panacea for solving all problems; each malfunction has its own method of elimination.
Recommended:
Windows 10 Computer, Laptop, Or Tablet Does Not Turn Off After Shutdown: Causes Of The Problem And How To Fix It
How to solve Windows PC, laptop or tablet turning on / off problem: update drivers, remove devices, adjust power supply, reset BIOS
IPhone Does Not See Or Does Not Catch The Network, What To Do

What if iPhone won't connect to the network. Checking the SIM card, disabling airplane mode, removing SIM-lock, hardware breakdowns, etc
A Laptop Or Computer Does Not See A WiFi Network: What To Do, How To Solve The Problem With Wi-Fi Connection

Why does the system not display your Wi-Fi access point? What to do if only your network is not visible or if the list of connections is completely empty
Why The Computer Does Not See The IPhone, But It Can Charge, What To Do
Why doesn't my computer recognize my iPhone connected via USB. What to do if the smartphone is charging, but does not appear in the system
The Phone Fell Into The Water: What To Do, Including With An IPhone In The Toilet, If The Gadget Does Not Turn On, The Speaker Does Not Work
What to do if your phone falls into the water: instructions for saving your phone. Features for different models. Frequent misconceptions. Possible problems after drying
