Table of contents:
- Author Bailey Albertson [email protected].
- Public 2023-12-17 12:53.
- Last modified 2025-06-01 07:32.
Roof with history: roof structure - choosing the best option

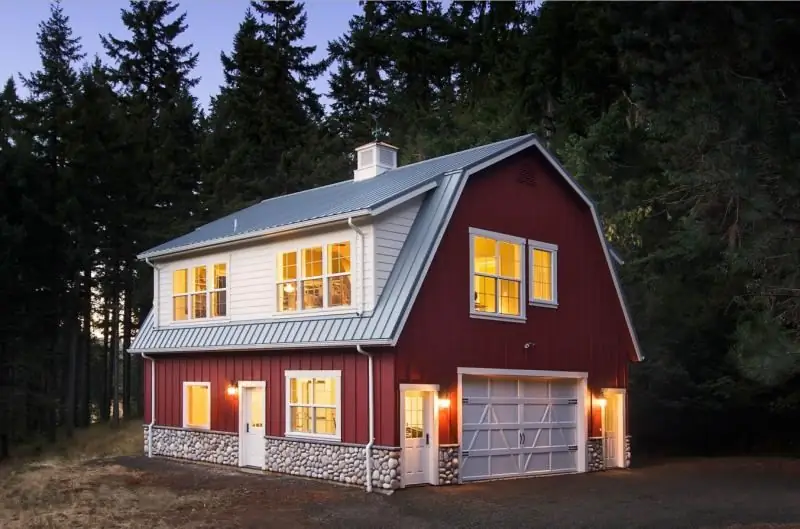
Mansard roofs are very popular in private construction today. And for good reason. Even taking into account the fact that the construction of the roof is 15-20% of the total cost of construction, the attic option, which sometimes gives additional living space of an entire floor, is considered the most economical.
Content
-
1 Mansard roof and the history of its origin
1.1 Video: Mansard Roofs in Medieval Castles in France
-
2 Varieties of attic roofs
2.1 Video: projects of attic houses
-
3 Mansard roof structure
-
3.1 Rafter system
- 3.1.1 Calculation of the roof truss system
- 3.1.2 Table: snow load by region
- 3.1.3 Table: Wind Load by Region
- 3.1.4 Table: Wind Load Correction Factor for Different Terrain Types
- 3.1.5 Table: relationship between beam thickness and load
- 3.1.6 Table: selection of the cross-section of the rafters according to the specific load
- 3.1.7 Video: Designing a Roof System in ArchiCad and SolidWorks
-
3.2 Roofing cake
- 3.2.1 Video: Mansard Roof, Roofing Pie
- 3.2.2 Calculation of the roof cake of the attic roof
- 3.2.3 Table: Demand for roofing materials for time-consuming work
- 3.2.4 Video: calculation of roofing materials - features, nuances, errors
- 3.3 Mansard roof requirements
- 3.4 Video: mansard roof - an overview of the structure, support nodes, roofing pie
-
-
4 Diagrams of the device of the rafters of the attic roof
- 4.1 Video: tips for constructing the roof truss system from personal experience
-
4.2 Mansard roof with your own hands
4.2.1 Video: manufacturing and installation of roof rafters
- 5 Features of the operation of the attic roof
-
6 Mansard roof repair
6.1 Video: repairing the attic roof - fixing mistakes
Mansard roof and the history of its origin
The mansard roof got its name in honor of the French architect François Mansart, who used in his projects broken steep roofs typical for France. Mansar's choice of just such a roof structure was not accidental. Together with rich, smooth and graceful facades, it allowed creating volumetric-spatial architectural ensembles that are extremely clear and laconic. At the same time, a huge plus was the opportunity to equip an inhabited room under the rafters, which they began to call the attic.

Dampierre Castle is famous for a very beautiful old mansard roof, built by the French architect François Mansart
Although it should be noted that the discoverer of the beauty and convenience of mansard roofs was not Mansart, but Pierre Lescaut, also a French architect, famous for his work on the dazzling Louvre and the majestic Notre Dame de Paris.

The Flora Pavilion in the Louvre is crowned with a massive mansard roof adorned with sculptural semicircular pediments with statues of Greek gods
Video: mansard roofs in medieval castles in France
But history has been written, and we must thank the French architects for giving the world such a wonderful construction, the demand for which has not faded away for many centuries.
Varieties of attic roofs
Modern mansard roofs, although they have changed due to fashionable style trends dictated by the time, still remain respectable and dimensional. Private developers are very fond of sheltering their houses with them, even though the price of such a roof is quite high in comparison, for example, with a simple gable structure.
Here, first of all, additional space under the roof plays a role, which can be used at your discretion. Most often, living quarters are equipped in it, thus solving an eternal housing problem. After all, no matter how high the cost of building a mansard roof, it will still cost less than building an additional floor or a major extension.
And, of course, the external attractiveness of the attic roof and its ability to make even the simplest structure unusually beautiful, and sometimes just fantastic, are of great importance.

The mansard roof, arranged according to modern technology - with a large extension of powerful rafter legs outside the house - looks unusually impressive
Mansard roofs are:
-
Single-pitched with an inclined surface fixed to the bearing walls of the building of different heights.

Shed roof roof In a lean-to attic structure, the living space under the roof is formed by attaching the slope to the walls of the house of different heights
-
Simple gable structures of two symmetrical or asymmetric slopes with the same or different angles of inclination. Gable options are the easiest to arrange, which is why they are perfect for self-assembly. In addition, they do not require serious maintenance, which is especially important in winter - the steepness of both slopes prevents snow from settling on the roof.

Mansard roof based on a gable A house with a gable mansard roof can be given originality due to the removal of the attic and a well-chosen color scheme in the exterior
-
Broken shape on the basis of gable, shed, hip, half-hip and other traditional types of roofs with a break line both inward and outward. This format is most in demand among homeowners, since it allows you to get a roofing room of a much larger area than with other types of attic roofs.

Sloping mansard roof The device of a sloping mansard roof based on a hip structure allows you to get a living space of almost the same area as on the first floor
-
Four-slope systems with a very comfortable, but less beautiful than in sloping roofs, attic.

Mansard hipped roof The two-tiered four-pitched thatched dormer roof is a striking element of the architecture of a modern country house
-
Cantilever - formed by a combination of broken and gable surfaces with roof elements protruding far beyond the walls of the house, due to which a spacious volumetric room under the roof is obtained.

Cantilever roof roof The cantilever roof structure is characterized by a large sweep, gives the house quality and monumentality, forming a spacious attic room
-
Domed, hip-roofed or conical, which, with the “ruble locks” gone into the past, are quite rare in private housing construction, except as part of complex roofs.

Composite mansard roof Dome, conical and hipped roofs are usually combined with pitched structures, equipping bay windows and annexes to the house
-
Hybrid type - difficult to describe and define, but very original.

Hybrid roof type A variety of designs can be present in hybrid skylights, but they are all performed in a single design, which is why the house as a whole usually looks unusual and fabulous.
Video: projects of attic houses
Mansard roof structure
The attic, like any other, the roof consists of a rafter (bearing) block and a roofing pie.
Rafter system
The construction of a roof with an attic is more complicated than a simple non-insulated roof. It has many additional binding nodes, due to which it is heavier. Therefore, it is better to make the truss system under the attic from wood. The use of reinforced concrete and metal is not recommended in order not to increase the pressure on the foundation.

In the truss system of the attic roof, both layered and hanging structures can be used
The main components of the mansard roof supporting system:
- Mauerlat - a base made of timber with a cross section of at least 90x140 mm, laid along the upper edge of the bearing walls. It serves as a support for the rafter legs, taking their mass onto itself.
- Rafters - hanging or layered, forming the slope of the slopes.
- Vertical posts that define the boundaries of the attic room.
- Braces to support the rafters, which prevent them from bending under the weight of the roofing cake.
- Tightening - horizontal beams for connecting a pair of opposite rafters, located at the bottom and top of the rafter legs. The upper puffs (crossbars) are the basis of the attic floor.
- Inter-rafter purlins installed in broken structures to enhance their rigidity.
Calculation of the roof truss system
Consider the calculation of the bearing block using the example of a sloped mansard roof, which is more complex in its structure. Before carrying out calculations, it is necessary to draw a plan of the house with the display of the measured and design parameters - the angle of inclination of the slopes, the width of the walls of the house, the shape of the roof, etc. In addition, it will not hurt to have maps of snow and wind loads by region.

Before calculating the attic roof, it is necessary to draw its plan indicating all the parameters required for the calculations.
Let us assume that the following initial data were obtained as a result of measurements or when designing a building:
- the width of the end of the house (W d) - 7.0 m;
- the angle of inclination of the layered rafters from the slab of the upper floor to the break (angle a) is 60 ° and the slope of the hanging rafters at the break point (angle b) is 30 °;
- the estimated height of the attic (B m) - 2.3 m;
- installation step of rafters - 0.6 m;
- the planned width of the eaves overhangs (W s) - 0.6 m.
The house is being built, for example, in Nizhny Novgorod. There is no removal of the elements of the rafter block outside the walls of the house.
Using the map of distribution of wind and snow loads by regions, we find the indicators corresponding to the construction site. For Nizhny Novgorod, the snow load is 240 kg / m², and the wind load, taking into account the correction factor, is 32 x 0.65 = 20.8 kg / m².

To avoid roof deformation due to improperly selected materials, it is necessary to take into account wind and snow loads, which depend on the construction region
Table: snow load by region
| Region number | one | 2 | 3 | 4 | five | 6 | 7 | 8 |
| Snow load, kg / m 2 | 80 | 120 | 180 | 240 | 320 | 400 | 480 | 560 |
Table: wind load by region
| Region number | 1a | one | 2 | 3 | 4 | five | 6 | 7 |
| Wind load, kg / m 2 | 24 | 32 | 42 | 53 | 61 | 84 | 100 | 120 |
Table: Wind Load Correction Factor for Different Terrain Types
| AND | B | IN | |
| Building height, m | Open shores of lakes, seas, reservoirs, steppes, deserts, forest-steppe, tundra | Forests, urban areas and other areas evenly covered with obstacles more than 10 m high | Urban areas with densely built buildings over 25 m high |
| no more than 5 | 0.75 | 0.5 | 0,4 |
| 5-10 | 1.0 | 0.65 | 0,4 |
| 10-20 | 1.25 | 0.85 | 0.55 |
| Note: if the house is being built within the city limits, but near the sea, then take the value from column "A" | |||
Calculation sequence:
- We calculate the possible width of the future attic based on the slope of the slopes using trigonometric functions: W m = W d - 2 x B m / tq a = 7.0 - 2 x 2.3 / tq 60 ° = 7.0 - 2 x 2, 3 / √3 ≈ 4.34 m. The calculation was made without taking into account the removal of the rafter elements outside the walls. Adding conditionally an indicator of the removal of rafters and recalculating the formula taking it into account, we conclude that the more rafters are taken out of the walls of the building, the wider the attic will be.
- We calculate the total height of the attic roof B = B m + B k, where B k is the height of the ridge triangle, calculated by the formula W m x tq b x ½: B = 2.3 + 4.34 x 1 / √3 x ½ = 2, 3 + 1.25 ≈ 3.55 m.
- We calculate the length of the lower (layered) rafter legs B m / sin a = 2.3 / √3 / 2 ≈ 2.66 m and ridge rafters B k / sin b = 1.25 / ½ ≈ 2.5 m. Here you need to take into account the following: if there is no removal of the beams, then to form the overhangs it is necessary to lengthen the rafters. Therefore, we additionally calculate the length of the fillies according to the formula W s / cos a = 0.6 / ½ ≈ 1.2 m. Here W s is the planned width of the eaves.
Determine the amount of load on the rafters. We will take a soft tile as a covering material (load 11 kg / m²). Then the total load on the rafter system will be 11 + 240 (snow) + 20.8 (wind) = 271.8 kg / m². We multiply this indicator by a given rafter step: 271.8 x 0.6 = 163.08 kg / r. m.
Knowing the pressure on the rafter system and using the table of the relationship between the load and the thickness of the timber, you can easily select the lumber necessary in size for the construction of the rafter system.
Table: relationship between beam thickness and load
| Rafter leg load, kg / running m | Board (timber) thickness, mm |
| 75 | 40 |
| 100 | 50 |
| 125 | 60 |
| 150 | 80 |
| 175 | 100 |
| Note: when choosing the thickness of the rafters, the load is rounded up | |
You can more accurately determine the dimensions of sawn timber using a special table indicating the permissible cross-sectional dimensions of the material, depending on the length of the rafters and the magnitude of the load
Table: selection of the cross-section of the rafters according to the specific load
| Rafters section | Specific load per 1 running meter m rafters, kg | |||||||||||
| From a log | From a bar (board) | 75 | 100 | 125 | 150 | 175 | ||||||
| Diameter, mm | Bar thickness, mm | |||||||||||
| 40 | 50 | 60 | 70 | 80 | 90 | 100 | ||||||
| Bar height, mm | Permissible rafter length between support points, m | |||||||||||
| 120 | 180 | 170 | 160 | 150 | 140 | 130 | 120 | 4.5 | 4 | 3.5 | 3 | 2.5 |
| 140 | 200 | 190 | 180 | 170 | 160 | 150 | 140 | five | 4.5 | 4 | 3.5 | 3 |
| 160 | - | 210 | 200 | 190 | 180 | 170 | 160 | 5.5 | five | 4.5 | 4 | 3.5 |
| 180 | - | - | 220 | 210 | 200 | 190 | 180 | 6 | 5.5 | five | 4.5 | 4 |
| 200 | - | - | - | 230 | 220 | 210 | 200 | 6.5 | 6 | 5.5 | five | 4.5 |
| 220 | - | - | - | - | 240 | 230 | 220 | - | 6.5 | 6 | 5.5 | five |
According to the initial data, the total length of the rafter is 6.36 m (between the support points it is 3.86 m + 2.5 m). In the table, we find the closest value that exceeds the previously calculated load - this is 175 kg / running. m. Further, we go down the found column to the indicator of the permissible length between the support points of 4.0 m and we see that a log of Ø180 mm or a bar with a section of 60x220, 70x210, 80x200, 90x190 and 100x180 mm is suitable for us.
Similarly, we determine the dimensions of lumber for the second block of the attic roof with a rafter length between the supports of 2.5 m - you will need a Ø120 mm log or boards with a cross section from 40x180 to 100x120 mm.
Of course, a similar calculation can be done for small-sized roofs. It is best to calculate complex overall mansard roofs using special computer programs ArchiCad or SolidWorks or entrust the calculation to specialists, and it is desirable even at the design stage of the house.
Video: designing a rafter system in ArchiCad and in SolidWorks
Roofing cake
Insulated mansard roofs are simple pitched and broken. The layers of the roofing cake and their order are the same for both options and look like this:
- Finishing the attic with plasterboard, clapboard, waterproof plywood and other facing materials.
- Vapor barrier film or membrane.
- Insulation, laid between the rafter legs, not reaching the edge of the rafters in thickness.
- A waterproofing material laid over the rafters along their entire length.
- Counter-lattice bars fixing the waterproofing and forming a ventilation gap.
- Sheathing.
- Roof covering.
Simple and broken structures differ only in the location of the insulation and vapor barrier. In simple ones, it fits along the entire length of the slopes, and in broken lines - to the break point, and then horizontally along the upper support beams (girders).

The roofing cake of the insulated mansard roof has a strictly defined sequence of laying materials and necessarily requires the device of ventilation gaps
Thus, in the upper part of the pitched roof, a cold triangle is formed, which ensures good ventilation of the insulated under-roof room, and therefore the longevity of the attic roof.
Video: mansard roof, roofing pie
Calculation of the roofing pie of the attic roof
It is easy to calculate roofing and insulation materials for a mansard roof. You just need to take into account the type of covering flooring and the angle of inclination of the slopes:
- On a piece of paper, draw a roof plan and apply measurements - length, width, angle of inclination, etc.
- We divide the slopes into geometric shapes and, using mathematical formulas, calculate the area of each of them.
- We summarize the results and get the total roof area, which we divide by the area of the covering material, adding 10-15% for the stock and overlaps.
- We calculate the need for insulating materials and additional elements.
For ease of calculation, you can use the table or online calculator on the website of the supplier of the selected roofing materials.
Table: the need for roofing materials for time-consuming work
| Name of materials | unit of measurement | Consumption rate for 10 m 2 roof | The need for 92 m 2 of the roof |
| Sheathing device: | 0.12 | 1.1 | |
| boards 32 × 100 mm | m 3 | ||
| bars (40-75) × (75-100) mm | m 3 | 0.06 | 0.55 |
| Thermal insulation device: | |||
| mineral wool thermal insulation plates (thickness 100 mm) | m 3 | 1.11 | 10.21 |
| anti-condensation film | m 2 | 1.05 | 97.0 |
| vapor-proof film | m 2 | 1.05 | 97.0 |
| Roof installation: | |||
| metal tile | m 2 | Direct calculation | 98 |
| sheet steel (0.7 mm) for valleys | m 2 | ten | |
| end plate | m length | 26 | |
| cornice strip | m length | fifteen | |
| ridge bar | m length | 14 |
Video: calculation of roofing materials - features, nuances, errors
Mansard roof requirements
The rafter system and its filling - the roofing pie - are interconnected. Errors and miscalculations during the installation of the bearing block will affect the laying of the roofing cake, which will result in negative consequences, up to rotting of the wooden elements of the bearing section. Conversely, a poorly laid roofing cake, a violation of the order of the layers, the use of low-quality insulation materials will lead to dampness and cold in the attic, the appearance of fungus, and the destruction of rafters.
Therefore, certain requirements are imposed on the arrangement of the attic roof:
- Ensuring a sufficient attic height - at least 2.2 m.
- Mandatory arrangement of ventilation gaps and installation of roof accessories - aerators, turbines, etc. to ensure effective roof ventilation.
- The use of the lightest covering materials, so as not to weigh even more on an already massive structure.
- Laying, if necessary, additional insulation to equalize the level of thermal insulation of the roof and walls of the house.
The construction of an insulated attic should be included in the project in order to calculate in advance the actual load on the bearing walls and foundation.
Video: mansard roof - an overview of the structure, support nodes, roofing pie
Mansard roof rafters
The roof rafter can be mounted in several ways:
-
The rafters rest on the Mauerlat and do not go beyond the walls. The lower part of the supporting block is rectangular triangles along the entire length of the walls of the house. The sides of the triangle are layered rafters and vertical posts. The latter also form the walls of the attic. Hanging rafters form the upper roof zone and connect the side parts of the structure with puffs. Puffs at the same time serve as the basis for the attic ceiling. With such a roof arrangement, there are no large loads on the puffs, they work only in tension. Therefore, it is recommended to use a regular section bar for them.

Rafter system without eaves If the length of the rafters is only enough to the point of support on the Mauerlat, to form the eaves overhangs they will have to be extended with fillets
-
The same design as in the first version, only with the extension of the rafter legs outside the walls of the house. In this case, the rafters rest on the floor beams, and not on the Mauerlat. Therefore, they are necessarily reinforced with struts, under which, if necessary, additional posts are installed in order to relieve the floors.

Rafter system without rafter extension If the rafters go beyond the walls of the house, forming a cornice overhang, the attic room turns out to be much larger
-
A scheme similar in design to both previous options, with one significant difference. The upper rafters are mounted in a layered manner supported on racks, which, in turn, are connected to the upper floor beam by cutting by ⅓ of the floor thickness. The puffs become a support base that can support the weight of the attic ceiling as well as the pressure of the uprights. As a result, it is advisable to make them from a powerful bar, and the rafters from a board, the section of which is selected for a particular roof after the calculations.

Tie-supported rafter system The upper rafters are mounted on racks based on the layered principle, which gives the structure rigidity and stability
Video: tips for constructing a roof truss system from personal experience
Mansard roof with your own hands
The construction of an attic roof practically does not differ from the construction of an ordinary pitched roof - the same composition of the frame, the same works:
-
The Mauerlat is installed along the entire length of the walls, laying two layers of roofing material under it as a waterproofing agent, and fastened to the walls with anchors every 2 m. In wooden buildings, the upper logs serve as Mauerlat.

Mauerlat laying Mauerlat harness is made at a distance of at least 300-500 mm from the attic floor, which improves roof ventilation and facilitates inspection and repair of the rafter frame
-
On top of the Mauerlat, with a certain step, a beam ceiling is laid with an extension beyond the walls up to 0.5 m and fixed with corners and self-tapping screws. First, the extreme beams are laid, a cord is pulled between them, along which the intermediate spans are aligned. The height of the beams is adjusted by pulling or lining the bars.

Installation of beam floors The beam ceiling can be mounted on the Mauerlat with or without the beams outside the walls of the house, as well as through special pockets in the masonry without the beams
- Vertical posts are mounted on the end beams and fixed with inclined supports and nails. A cord is pulled between them, along which all the other racks are aligned.
-
Girders are laid on the racks and fixed with corners with self-tapping screws or nails. Crossbars are fixed on top of the girders. To prevent deflection, temporary wooden supports are placed under the crossbars, and from above, until the rafters are installed, the crossbars are fastened with boards. It turns out a strong structure that limits the attic room, which is subsequently strengthened with fights and struts to increase strength, in some cases also with a number of additional racks under the struts.

Assembling the attic frame The attic frame is formed by vertical uprights and crossbars, connected with metal corners
- Before installing the layered rafters, first a sample is made from a light board and a saw is made for attaching to the upper girder. Try on the template until it fits perfectly into the design. Then the upper part of the rafters is cut out according to the template, and the lower one, supported by the Mauerlat, is adjusted at the junction. Attach the lower rafter legs to the corners with screws or nails.
-
Mark the middle of the roof with the center pillars on both sides, lay a board to level the upper rafters. Prepare a template, make upper and lower cuts. Try on the standard on both sides, checking the clarity of the center of the roof. If the template fits everywhere without problems, then hanging rafters are prepared according to it and installed on the girders. At the top, they are connected with metal or wooden plates, and at the bottom they are fixed with corners. Align the upper rafters with struts and mount the suspension racks.

Installation of layered rafters The rafters must be reinforced with struts, after which all temporary elements can be dismantled
- Install struts under the layered rafters, fixing them with corners to the floor beams and bolts to the rafter legs. Then all temporary elements are removed.
- The gables are sewn up, leaving the openings intact. If necessary, build up the lower rafters with fillets to form a cornice overhang.
-
Waterproofing is laid along the rafters and the crate is filled - solid or thinned - according to the type of covering material. Roofing is installed.

Erection of a gable roof attic When erecting a sloping roof, first the frame of the attic room is assembled, and then the upper and lower rafter blocks are installed
-
From the inside of the room, between the rafter legs, insulation is laid so that it does not reach the upper edge of the rafters, forming a ventilation channel. The heat insulator is fixed with transverse slats, and vapor barrier films or membranes are pulled from above, fastening the canvases with a stapler or tape. The attic room is faced.

Insulation of the attic roof The insulation is laid in the space between the rafters with an interference fit and a ventilation gap is left relative to the upper edge of the rafter board
Video: manufacturing and installation of roof rafters
Features of the operation of the attic roof
Proper roof maintenance saves money. Annual roof maintenance requires certain costs, but much less than what may be needed for repairs. Of course, no one canceled the natural aging of all the components of the roof, but it is possible to extend the service life if you follow some simple rules:
- Carry out an annual inspection of the roof in order to identify possible damage in advance. It is advisable to occasionally invite specialists with a thermal imager, hot-wire anemometer and infrared cameras to detect places of moisture accumulation and for early diagnosis of problems.
- Equip the roof with anti-icing systems and install snow guards.
- Clean the roof and drainage system from dirt and debris in time.
When inspecting the roof, you must pay attention to the following parts:
- ridge ridge - check the integrity of the waterproofing and the presence of all additional elements;
- valleys - find out their condition, remove debris or snow if necessary;
- places of abutments to pipes and other engineering structures - check the integrity of the insulation and fastening of the aprons;
- overhangs - make sure that the cornice board is not damaged by moisture, and the bottom layer of the covering flooring has not collapsed from the wind;
- stingray surfaces - make sure they are free of moss and lichen, chips and scratches.
In winter, during the thaw period, attention should be paid to the uniformity of snow melting on the roof. If thawed patches are found, this is a serious cause for alarm. Probably, cold bridges have appeared, which sooner or later will lead to the formation of dampness in the attic, the appearance of mold and rotting of the rafters.
In addition to external inspection of the roof, you also need to examine the attic room. The most common trouble is the appearance of wet spots on the ceiling, smudges on the walls and streaks. If the spots appeared after rain, this indicates damage to the waterproofing, which will have to be changed. When spots appear even in dry weather, condensation and air circulation problems may be the cause. In this case, check the ventilation gaps and replace the vapor barrier.
Mansard roof repair
In most cases, the basis for repairing a roof with an attic is leaks due to deformation of the covering flooring under the influence of weather conditions due to uneven shrinkage of the building or incorrectly selected sawn timber for the truss block. It is possible that during the construction wind and snow loads were not taken into account, poor-quality roofing materials were used, or gross violations were made during installation. The main thing is to timely identify the true cause in order to further eliminate the problem.
Replacing a damaged section of roofing material is the easiest type of repair work. But here, too, you need to take into account the type of covering flooring. For example, it is quite easy to replace a broken tile with a new fragment. But the repair of bituminous shingles will require a professional approach - it needs to be torn off, sealed and a new strip nailed down. If the work is carried out in cold weather, then the bituminous shingles are first softened with a construction hairdryer. This must be done very carefully so as not to solder together new and old fragments of the tile.

Damaged shingles of bituminous tiles must be torn off, and repaired or new coating elements must be nailed into place.
If the cause of the leaks is not in the roofing, then you will have to carry out a full repair according to the following algorithm:
- A temporary wooden frame is erected over the roof, which is covered with plastic films to protect the living quarters from the elements.
- Dismantle the old roofing and disassemble all layers of the roofing cake.
- Examine the rafter system. An assessment of its condition should be given by specialists. It may be enough to remove the mold, treat it with an antiseptic, replace the elements corroded by the fungus, correct the geometry and strengthen the roof structure. But it is possible that you will have to completely change the entire rafter system.
- After repair or maintenance of the supporting block, all layers of the roofing cake are re-laid, having analyzed their condition - whether they are suitable for further use or it makes sense to replace some materials with new ones.
Video: mansard roof repair - fixing mistakes
If the homeowner does not have the funds to repair the truss structure, then, as a temporary option, the existing roofing can be replaced with two-layer shingles. This durable roof covering will protect the roof from leaks for a certain time, make it possible to solve financial problems and subsequently eliminate the actual cause.
Building a mansard roof on your own is a difficult but very exciting process. The daily transformation of the house is inspiring, so you want to achieve the end result as quickly as possible. Performing the work step by step, it is important to follow the instructions, take into account the recommendations and not neglect the little things. And then the mansard roof will delight for many years.
Recommended:
Inverted Roof, Its Structure And Main Elements, As Well As Features Of Installation And Operation
What is an inversion roof. Inverted roof types. What materials can be used. DIY installation of an inverted roof. Operating rules
Copper Roof, Its Structure And Main Elements, As Well As Features Of Installation And Operation
Copper roof, its types and advantages. Installation of roll and tiled copper roofs and features of their installation. Copper roof maintenance and repair
Liquid Bulk Roof, Its Structure And Main Elements, As Well As Features Of Installation And Operation
What are the properties of a liquid roof. How does it differ from other roofing materials. Liquid rubber roofing instructions
Wooden Roof, Its Structure And Main Elements, As Well As Features Of Installation And Operation
What is a wooden roof. What materials is it made of. Installation of a wooden roof and its features. Safety and operation
Broken Mansard Roof, Its Structure And Main Elements, As Well As Features Of Installation And Operation
Brief description of the mansard sloping roof. The device of the rafter system. Calculation of the cross-section of the rafters. The procedure for installing a sloping roof and the rules for its operation
