Table of contents:
- Author Bailey Albertson [email protected].
- Public 2023-12-17 12:53.
- Last modified 2025-06-01 07:32.
Armopoyas for Mauerlat: purpose, design features, recommendations for the device
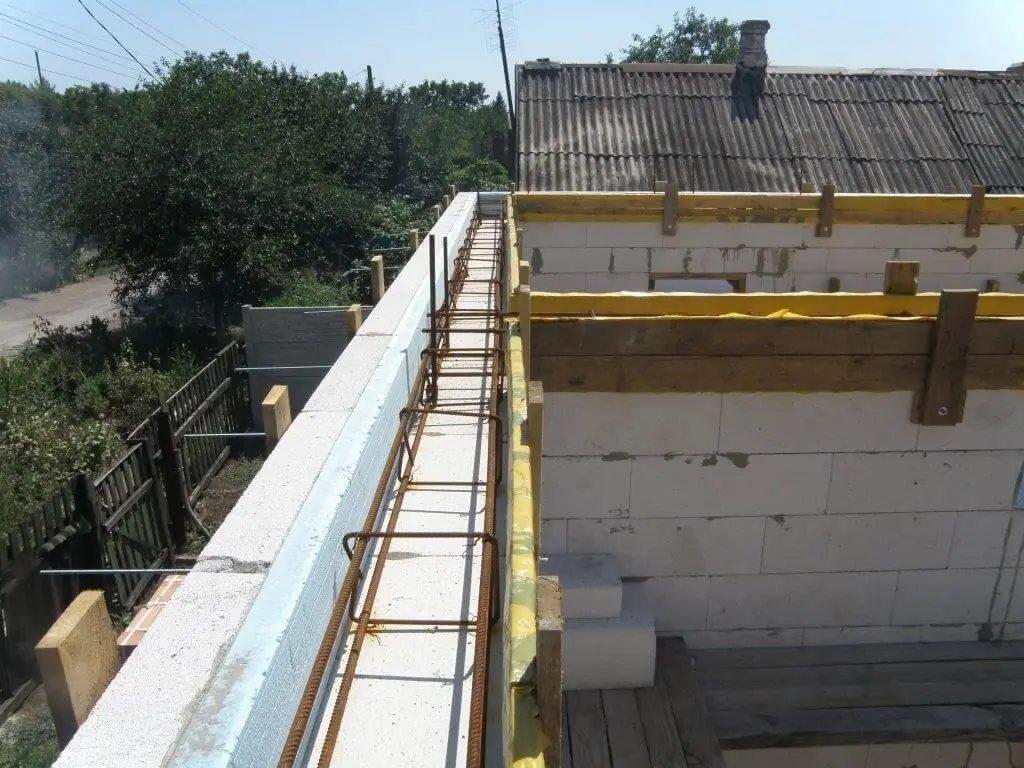
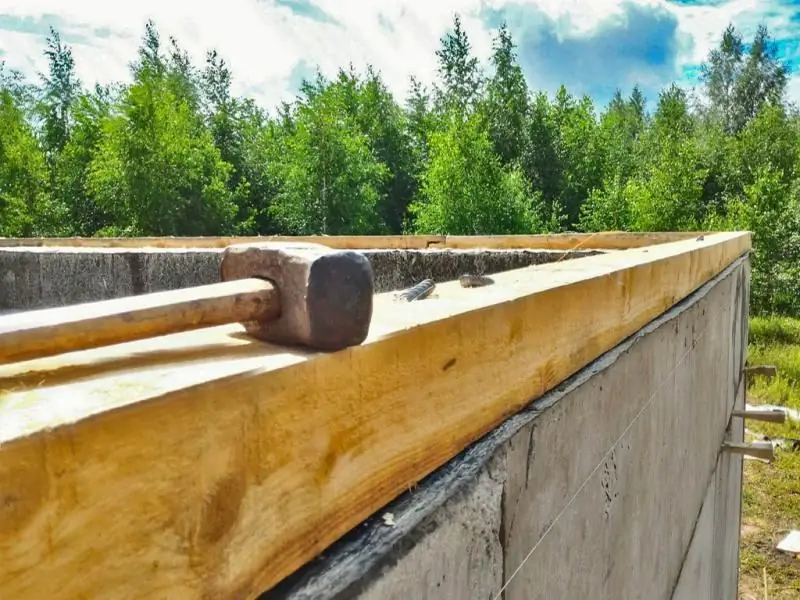
In the overwhelming majority of cases, a strip reinforced concrete foundation is erected under the walls of the building. But sometimes something similar has to be built on top of the walls - to support the gable roof. The armopoyas device under the Mauerlat has a number of features, but it is possible to do it yourself, observing the manufacturing technology.
Content
- 1 When and why an armopoyas is required
- 2 Armopoyas parameters
-
3 Armo-belt device for Mauerlat
-
3.1 Installation of formwork
1 Video: formwork for armopoyas made of foam concrete blocks
-
3.2 Installation of the reinforcement cage
3.2.1 Video: preparatory work for the armopoyas
-
3.3 Requirements for concrete
- 3.3.1 Strength
- 3.3.2 Mobility
- 3.3.3 Other parameters
- 3.4 Self-production of concrete
-
3.5 Placement of concrete
3.5.1 Video: preparing concrete and pouring the armopoyas
-
-
4 Mount Mauerlat
4.1 Video: installing the Mauerlat on the armopoyas
When and why you need an armopoyas
As you know, the rafter system of the gable roof is attached to the timber laid over the walls - the Mauerlat. And that, in turn, is attached to the wall using anchor bolts or embedded studs.
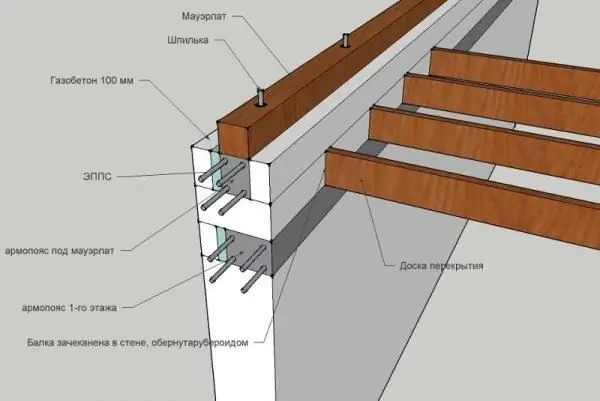
The hairpin takes the load of the wind and the rafter system
During the operation of the building, a horizontal force is transmitted from the Mauerlat to the studs, due to the loads:
- wind;
- rafters seeking to disperse under their own weight and snow load.
Brickwork can easily withstand such an effort, but modern porous materials, such as gas silicate, aerated concrete and expanded clay concrete blocks, can collapse. Even if the masonry survives, most likely, the hairpin embedded in it will be torn out. And under pressure from the Mauerlat, unless its width is equal to the width of the wall, the porous material can crumble.
To prevent the listed phenomena, a monolithic reinforced concrete belt is formed over the foam concrete walls. Along the way, it performs the following functions:
- Levels the unevenness of the masonry, as a result of which a perfectly flat surface is created for supporting the Mauerlat. In the presence of irregularities, the load from the side of the bar would concentrate on them, leading to deformation of the masonry or to the curvature of the bar, followed by cracking.
- Promotes the most even distribution of the load on the masonry. At the same time, due to the fact that the armopoyas exceeds the Mauerlat in width, the specific pressure on the foam concrete decreases.
- It gives the entire building as a whole the necessary rigidity, which excludes deformation of the walls in case of uneven soil shrinkage or its seasonal movements. For foam concrete block masonry, this is especially important, since this material does not have internal reinforcement, and concrete, as you know, does not hold tensile forces well.
In earthquake-prone areas, a reinforced concrete belt is required even over brickwork
Armopoyas parameters
A monolithic armored belt is usually laid over the outer walls around the entire perimeter of the building. If the rafter system also rests on the inner walls (most often - by ridge racks), here you also need to lay a reinforced concrete belt.
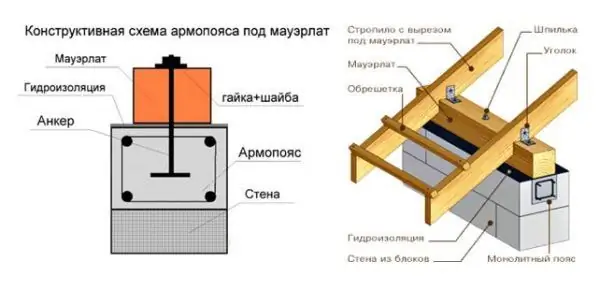
Armopoyas is a reinforced concrete structure with embedded anchors for fastening the Mauerlat
The dimensions of the section are taken as follows:
- height: from 25 cm and no more than wall thickness;
- width: ideally should be equal to the thickness of the wall. The minimum value is 25 cm. Regulatory documents prescribe to lay a belt with a width equal to about 2/3 of the wall thickness over the expanded clay masonry. That is, with a wall thickness of 40 cm, the reinforced concrete belt should have a width of about 30 cm.
The working bars of the reinforcing cage must have a periodic profile (ribbed reinforcement) and a diameter of 10-12 mm. They fit into two belts - upper and lower, with two or three threads in each.
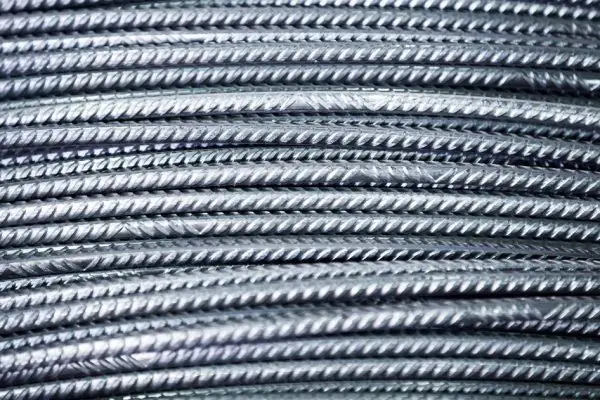
For the reinforcement of a reinforced concrete belt, only ribbed reinforcement is used (smooth reinforcement can be used for the manufacture of transverse bars)
The diameter of the cross bars is 6-8 mm.
Armopoyas device for Mauerlat
The work on the construction of the reinforcing belt begins with the installation of the formwork and ends with the pouring of the concrete mixture.
Formwork installation
During installation, it is important to observe the condition: the upper edge of the formwork must be located strictly horizontally. It is convenient to control the water level. The method of formwork device depends on the material of the walls.
-
Walls from foam blocks. Everything is simple here: besides the usual ones, U-shaped blocks are made - and they need to be used as formwork.

U-shaped foam block U-shaped foam blocks are used as permanent formwork for armopoyas
-
Brick walls. A somewhat more complex case: on the front side, a brick wall ½ brick thick plays the role of formwork, on the inside, boards or chipboard are used. The challenge is to anchor the timber formwork with sufficient strength - it must support the weight of the heavy concrete. Alternatively, the boards can be connected to the front brick wall using pins threaded through plastic sleeves. After the concrete has hardened, the pins are knocked out, and the sleeves remain in the armored belt.

Installation diagram of an armored belt on a brick wall The studs are removed after pouring, and the sleeves remain in place
If long poles are available, you can support the formwork with them as struts, resting the lower ends on the floor.
So that wooden formwork elements are not damaged by mortar and can be reused, they can be wrapped with plastic wrap
Video: formwork for armopoyas made of foam concrete blocks
Reinforcement cage installation
The reinforcement should be located as close as possible to the surface of the reinforced concrete element, since it is here that the greatest tensile forces are observed during bending. But at the same time, it must be protected from moisture and air by a layer of concrete 30-40 mm thick. To ensure the presence of such a layer under the frame, the latter is installed on special plastic bosses. In the absence of such, you can use brick fragments of suitable sizes for the same purpose.
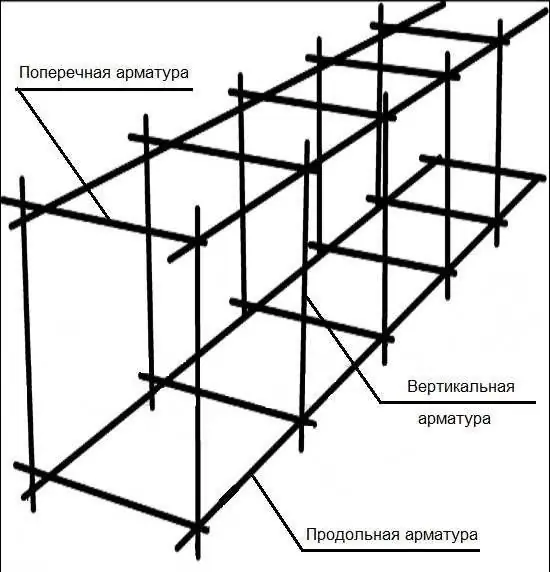
Reinforcement cage is a spatial structure formed by a set of longitudinal, vertical and transverse rods
When assembling the reinforcing cage, you must adhere to the following rules:
-
When forming a thread, the working rods are laid with an overlap of 200 mm.

Forming a thread of working rods When forming threads of reinforcement, it is necessary to ensure the minimum allowable distance between adjacent joints of reinforcing bars of 61 cm
-
It is impossible to cook the frame with electric welding - the reinforcing steel in the connection zone will become brittle due to overheating. The frame should be tied with annealed wire (unannealed wire will break) using a special crochet hook or a gun.

Rebar knitting The armature is knitted using a special hook
-
In the corners, bent at right angles, that is, L-shaped, rods with a length of each branch of at least 30 cm should be laid. Laying intersecting straight rods in this place is not allowed, since the armopoyas ribbons in this case will not be rigidly connected to each other. The same applies to the places where there is a T-shaped intersection of the armopoyas strips on the inner and outer walls.

Reinforcement of corners When reinforcing corners, intersection of straight bars is not allowed
- Transverse reinforcement is usually used in the form of clamps covering the working rods. They are installed in increments of 200-400 mm. With a larger step, displacement of the working rods is possible when pouring concrete.
- Embedded parts must be tied to the frame for attaching the Mauerlat.
Pay attention to the composite reinforcement: this material is stronger than ordinary steel reinforcement, does not corrode, and is cheaper
Video: preparatory work for the armopoyas
Requirements for concrete
In the case of an armored belt, the main characteristics of concrete should be considered its strength and mobility.
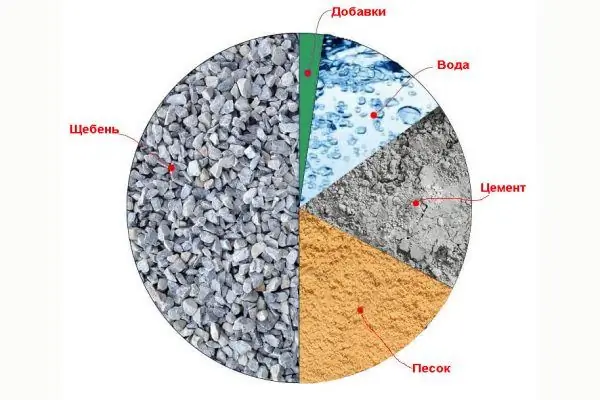
The approximate ratio of the constituents of the concrete mixture can be represented as a diagram
Strength
Indicates the maximum specific compressive force that concrete can withstand. It is displayed by its brand, for the designation of which the letter "M" and the number corresponding to the maximum permissible load in kg / cm 2 are used. For various needs, concretes of grades from M50 to M800 are made, for an armored belt, the M200 brand will be enough.
Mobility
This parameter characterizes the so-called workability of concrete, that is, its fluidity, the ability to fill bottlenecks, the ease of leveling the mixture. An individual developer, who usually does not have professional equipment for high-quality concrete placement, should pay special attention to workability.
In general, it is a complex concept and depends on several parameters, but the most important of them is precisely mobility. It is designated by the letter "P" and is determined by how much a cone made of raw concrete with an initial height of 300 mm settles under its own weight.
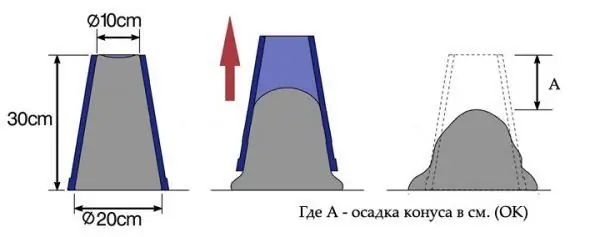
The concrete mobility is determined by the settlement of the concrete cone
In private construction, concretes with the following mobility are used:
- P2 (the mixture smoothly slides off the bayonet shovel): provided that the reinforcing bars are laid relatively rarely and a vibro-layer is used during pouring;
- P3 (the mixture flows from the shovel): it is considered suitable for pouring the armored belt with any frequency of the location of the reinforcing bars, the use of a vibrating layer is mandatory;
- P4 (flowable mortar): can be supplied by a concrete pumping unit, the use of a vibrator is desirable but not required.
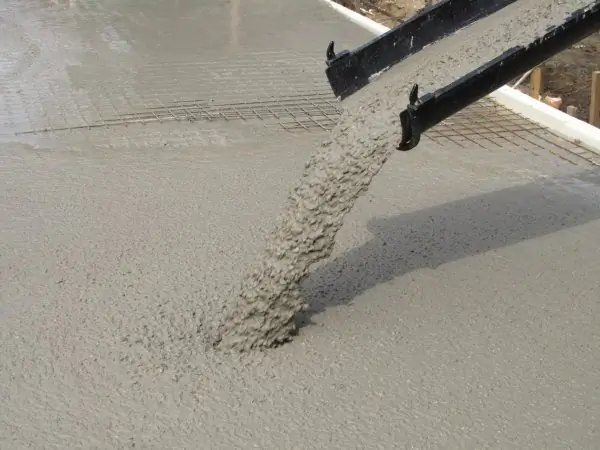
The flowable concrete solution is conveyed by a concrete pumping unit
A mixture with P5 fluidity is also used, but it is more suitable for the device not of an armored belt, but of monolithic ceilings and walls
Other parameters
Such characteristics as frost resistance (letter "F") and water resistance (letter "W") should not be given importance. The minimum values, which are obtained by themselves, while observing the concrete production technology, will be sufficient, since the armopoyas will be protected from moisture by the lining.
When ordering concrete from a specialized company, it should be noted that from the moment of the initial mixing of the mixture with water to unloading, no more than:
- 45 minutes, if delivery is carried out by a regular dump truck;
- 90 minutes if the concrete is transported in a concrete mixer.
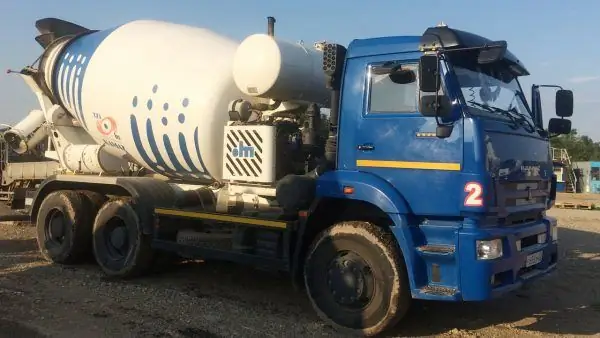
The concrete mixer allows to increase the delivery time of concrete
That is, it is necessary to assess in advance whether there are convenient access roads and other conditions for organizing the timely pouring of the mixture into the formwork.
Self-production of concrete
If the concrete manufacturer is located too far away or lacks trust, you can prepare the mixture yourself. In doing so, consider the following:
- the armopoyas should be monolithic, that is, the concrete should be poured in one go. Accordingly, you need to choose a time when nothing will distract, prepare all the necessary components in sufficient quantities, think over ways to dose them, and possibly get an assistant;
- you will need an electrically driven concrete mixer - you can rent it. If you prepare concrete by hand, that is, with a shovel in a trough, its strength will be lower by about half;
- Portland cement of the PC-400 brand is used as a binder. It is possible to use cement of higher grades, but this will lead to an unjustified rise in price.
The date of production of cement is of great importance: it should be purchased as fresh as possible.

Cement is the basis of the concrete mixture: the performance characteristics of the reinforced concrete structure depend on its quality
Even if the storage is organized correctly, the cement becomes less durable:
- in three months - by 20%;
- in 6 months - by 30%;
- for 12 months - by 40%.
It is possible to use stale cement, but it is necessary to increase its share in the mixture in proportion to the loss of strength, as well as the preparation time (fourfold)
It is better to use quarry sand. It must be dry - then the correct ratio of water and cement will be maintained.

For the preparation of concrete, quartz sand is used, mined in quarries.
The maximum size of crushed stone or gravel should not exceed 30% of the smallest size of the reinforced concrete product, and ideally it should not exceed 20% of this size. That is, for an armored belt with a section of 250x250 mm, a coarse-grained aggregate (generalizing the name of gravel and crushed stone) with a size of no more than 50 mm is best suited. In this case, the maximum size of stones should not exceed 2/3 of the distance between adjacent threads in the belt of the reinforcing cage.
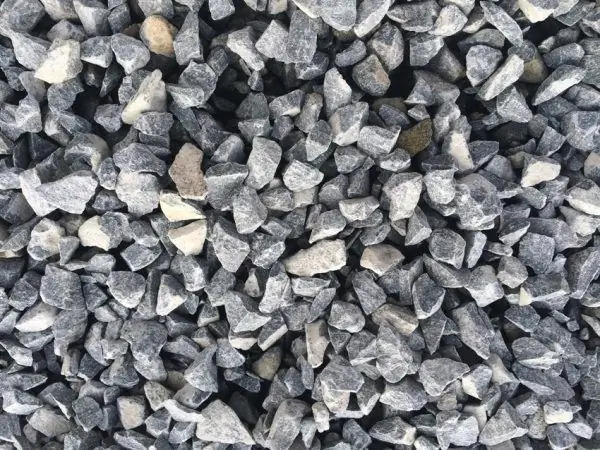
The dimensions of crushed stone should not exceed 2/3 of the distance between the working threads of the reinforcing cage
This material is divided into 4 factions:
- from 5 to 10 mm;
- from 10 to 20 mm;
- from 20 to 40 mm;
- from 40 to 70 mm.
Regulatory documents prescribe the use of at least two different fractions of filler in the composition of concrete if stones up to 40 mm in size are used, and three - when using larger stones. But in practice, in individual construction, crushed stone or gravel with a uniform grain size is often used - about 20 mm, which is quite enough. It is convenient to work with such a filler, and it allows the fittings to be placed quite close.
Water can usually be taken from a mains supply or well. It is important that it does not contain acids, oil products, sugars, phenols. The volume of water is strictly related to the amount of cement by the so-called water-cement ratio. Lack of water will lead to the fact that not all of the cement will react and the solution will turn out to be fragile; its excess will lead either to the appearance of pores as a result of intense evaporation, or to the destruction of reinforced concrete products during freezing, if excess water remains in it in a bound form.
For different grades of concrete made from Portland cement grade PC-400, the following water-cement ratio should be used:
- M100 (B7.5) - 1.03;
- M150 (B12.5) - 0.85;
- M200 (B15) - 0.69 (for PC-500 - 0.79);
- M250 (B20) - 0.57 (for PC-500 - 0.65);
- M300 (B22.5) - 0.53 (for PC-500 - 0.61).
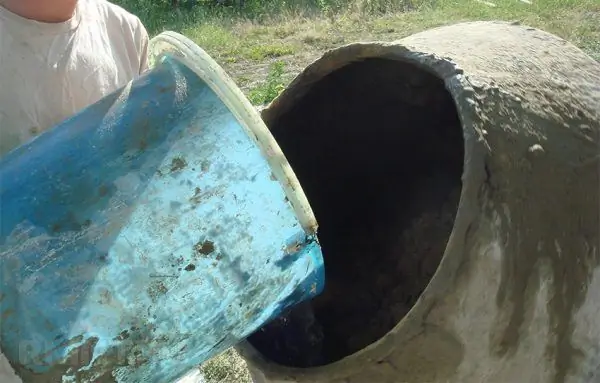
When adding water to concrete, the water-cement ratio must be observed
The ratio of other components also depends on the grade of concrete. Here are the recommended proportions for cement grade PC-400, sand and crushed stone (gravel):
- for concrete grade M100: mass - 1: 4.6: 7, volume - 10:41:61;
- M150: mass - 1: 3.5: 5.7, volume - 10:32:50;
- M200: mass 1: 2.8: 4.8, volume 10:25:42;
- M250: mass - 1: 2.1: 3.9, volume - 10:19:34;
- M300: mass - 1: 1.9: 3.7, volume - 10:17:32.
The procedure for preparing concrete looks like this:
- The concrete mixer is lubricated by stirring a very liquid cement-sand mortar in it for several minutes.
- The solution is poured, and water is sequentially loaded into the concrete mixer without stopping it - in the amount of 15-20% of what is needed to prepare this portion of the mixture;
- Sand (all) is added to the container.
- Pour out the entire portion of the cement.
-
When the contents mix well enough, add the crushed stone and the remaining amount of water.

Loading components into a concrete mixer To obtain a high-quality concrete mix, you must strictly adhere to the sequence of actions
If the concrete mixer has a small volume (up to 0.5 m 3), it is better to apply the following manufacturing procedure:
- All the sand required for the preparation of one portion is mixed dry with a 50% load of crushed stone.
- All cement is added to the dry mix.
- When the dry mixture is mixed until smooth, water is added to it.
- Then the remaining crushed stone is immediately added (it will contribute to crushing the lumps).
As a result of this sequence of actions, the cement paste will completely envelop every stone and grain of sand, which is the key to the high strength of the reinforced concrete product.
The process of mixing the mixture after adding water should not be delayed, as the moisture evaporates intensively. It usually takes 1-1.5 minutes
Concrete placement
The concrete is fed into the formwork manually or using a concrete pump.
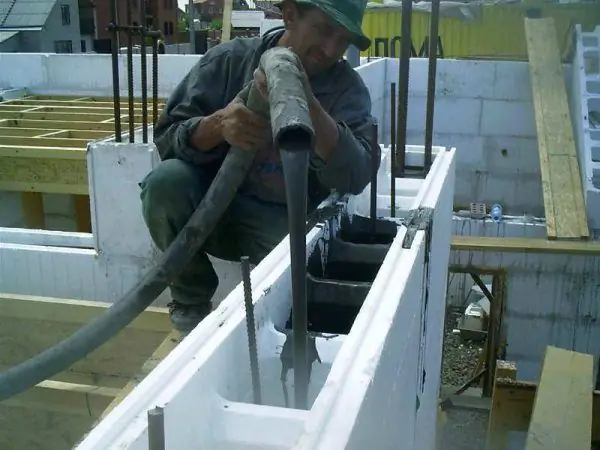
The use of a concrete pump ensures continuous pouring of the concrete mixture
As already mentioned, it is advisable to fill in the entire solution in one go. If you still had to pause, cover the fill with polyethylene.
When concrete is poured, air bubbles form in it, which are very important to release outside. Otherwise, cavities will remain in the structure of the armopoyas, due to which its strength will be lower than the design one. To remove air, a construction vibrator (vibrolayer) is used, the study of which must be performed after 1 m. If it is not available, the solution must be thickly chopped with a reinforcing rod or a bayonet shovel.
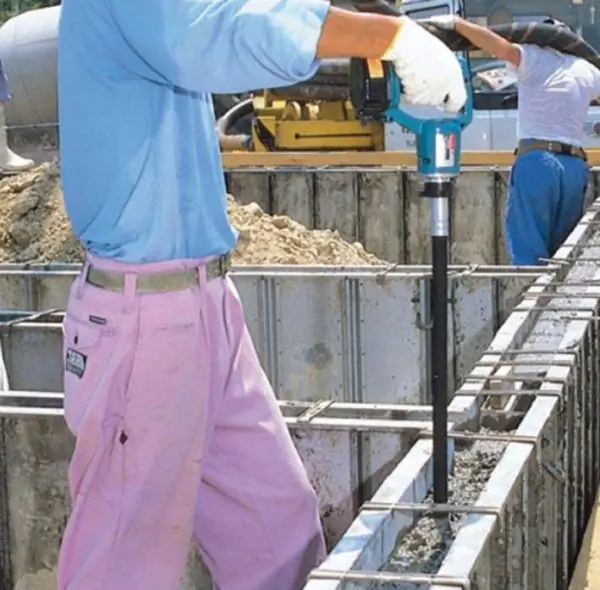
With the help of a construction vibrator, the freshly poured concrete mix is worked through in increments of 1 m
To prevent freshly poured concrete from losing too much moisture as a result of evaporation, it must be covered with polyethylene. If the weather is hot, the casting should be watered daily.
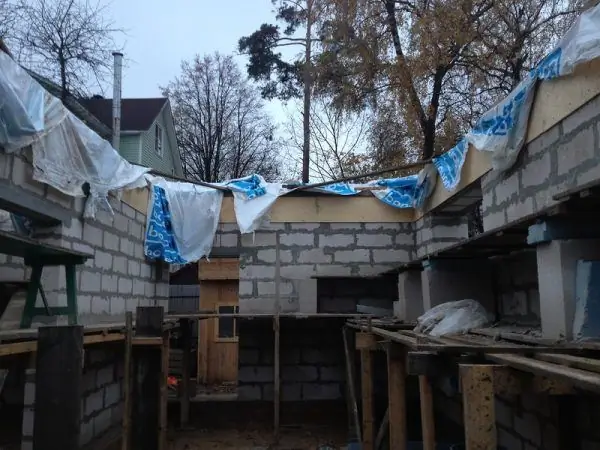
Polyethylene protects concrete from excessive moisture evaporation
The formwork can be dismantled 4-5 days after pouring, the time for complete hardening (maturation) of the concrete is 28 days
Video: preparing concrete and pouring the armopoyas
Mauerlat mount
To fix the Mauerlat, the armopoyas must be equipped with embedded parts - studs with a diameter of 12 mm. Before the concrete is poured, the studs are tied to the reinforcing cage, and a nut must be screwed onto each of them from below - it will not allow the fastener to be pulled out of the concrete. The length of the stud should be such that its upper part protrudes from the Mauerlat by 40-50 mm. Each inter-rafter space must have at least one stud, while a step of 1 m is considered optimal.
The Mauerlat is laid in the following sequence:
-
A roofing felt gasket is laid on top of the armopoyas.

Armopoyas waterproofing Before laying the Mauerlat, the armopoyas is covered with roofing material
- Drill holes in the Mauerlat for studs with a diameter of 14 mm, treat it with an antiseptic and put it in place.
-
A washer is put on the studs and a nut with a locknut is screwed on. One nut will not be enough - vibration from the wind can loosen the fasteners.

Mauerlat fastening scheme to armopoyas When attaching the Mauerlat, you must install a counter nut
- If the pin is too long, it can be trimmed.
Usually the Mauerlat is assembled from several bars, since the length of one is not enough: they should be connected with an oblique cut or a straight lock

Bars for maurlat are connected with an oblique cut or a straight lock
Video: installing a Mauerlat on an armopoyas
The armopoyas laid along the perimeter of the building is not only a solid foundation for the rafter system, but also a reliable bundle for the walls. As has been shown, the device of this structural element is not difficult, you just need to pay special attention to the quality of the concrete mix. It should also be remembered that heavy concrete, unlike porous concrete, conducts heat well, therefore, measures should be taken to insulate the armopoyas.
Recommended:
Installation Of Fire Doors: How To Properly Carry Out The Installation And What Regulatory Documents Must Be Followed
Fire doors installation technology, for which premises they are suitable. Features of service and repair
Making Glass Doors, As Well As How To Install Them Correctly And What Tools Are Required To Carry Out The Work

Self-manufacturing technology of glass doors. How to install, adjust, dismantle them correctly. What tools can be used
Do-it-yourself Installation Of Interior Doors, As Well As What Tool Is Required To Carry Out The Work

Types and methods of installing interior doors. The order of work when installing doors. Tools and supplies. Features and nuances of installing fittings
Do-it-yourself Installation Of Entrance Doors, As Well As What Tool Is Required To Carry Out The Work

Do-it-yourself installation of entrance doors. The sequence of work. Checking the correct installation. How to dismantle the front door
Mauerlat, Its Purpose And Functions, As Well As Features Of The Device And Installation
Appointment, features and calculation of the Mauerlat. Principles of mounting the base under the truss system. Methods for attaching the Mauerlat to walls made of different materials
