Table of contents:
- Author Bailey Albertson [email protected].
- Public 2023-12-17 12:53.
- Last modified 2025-06-01 07:32.
How to install a front door with your own hands: features and instructions

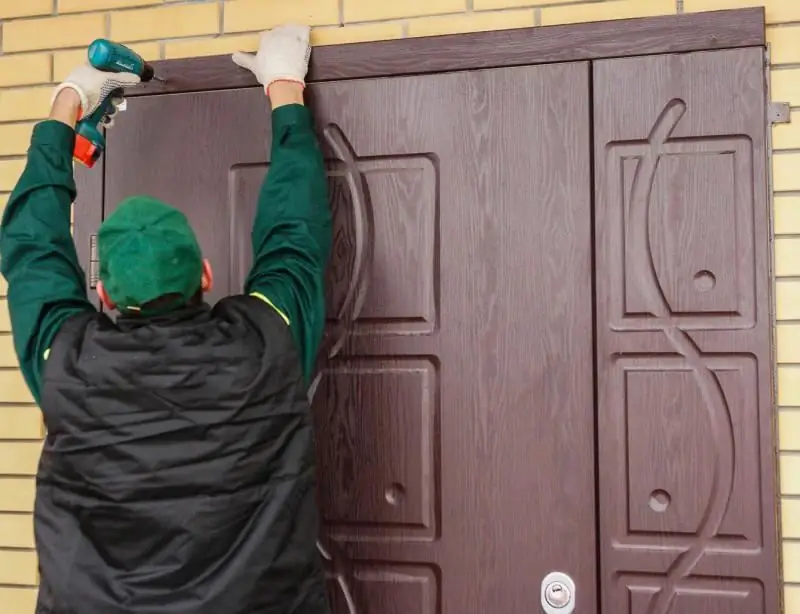
The main element that ensures security in a house or apartment is the front door. It is she who will be the first to be seen by people who come to you, so the door should be not only strong and reliable, but also beautiful. The heat and sound insulation characteristics of the front door will depend on the quality of its manufacture, the materials used and the correct installation. If you decide to install the front door yourself, you must strictly observe the developed technologies and the sequence of installation steps, then the work will be done no worse than when contacting professional craftsmen.
Content
-
1 What you need to install the front door
- 1.1 Recommendations for choosing a door
- 1.2 Required tools and materials
-
1.3 How to prepare the opening for the installation of the front door
1.3.1 Video: preparing doorways
- 1.4 Choice of fasteners
- 1.5 How to measure the entrance door for installation
-
2 Do-it-yourself front door installation
- 2.1 Video: installing the front door
- 2.2 Features of installing an entrance door in aerated concrete
- 2.3 Installing a double door
- 2.4 Installing the handles
- 2.5 How to install a doorbell on your front door
- 2.6 Installation of platbands
-
2.7 Installation of additional elements
2.7.1 Video: installation of extensions
- 3 How to check if the front door is installed correctly
-
4 Dismantling the front door
4.1 Video: dismantling doors
What is required to install the front door
Since the front door must reliably protect the house from uninvited guests, cold and extraneous noise, its installation must be performed carefully and diligently, in compliance with all the recommendations of specialists. But before you start installing the door, you first need to buy it.
Recommendations for choosing a door
Most often, people change their front doors in order to protect their home from thieves. When choosing a door, attention is paid to the quality of its workmanship - it should not be very thin in order to ensure reliable protection of the home. Too thick and massive door is also not worth buying, otherwise there will be difficulties in opening it.
It is imperative to look at the quality and technology of the hinges so that they are protected, there is no access to them from the outside, otherwise there will be no point in expensive reliable locks and a strong door leaf. Since the web is heavy, the hinges must have the necessary strength to withstand the load for a long time. For the front door, its heat and sound insulation characteristics are of great importance; it must protect the house from cold and extraneous sounds from the street or from the entrance.

The front door should protect the house from thieves, cold and extraneous street noise
Before you buy an entrance door, be sure to measure the doorway even if you are sure that it has standard dimensions. Pay attention to the characteristics of the door - if you install it in a house or apartment, and not in a bunker, then you should not buy the most expensive and massive models, it is enough to purchase a solid and reliable door of the middle price category.
Required tools and materials
If you decide to assemble the front door yourself, then you will need:
- building level;
- puncher;
- measuring instruments;
- Bulgarian;
- a hammer;
- saw and ax;
- welding machine;
- wooden wedges;
- cement mortar;
- polyurethane foam;
- anchors.

Depending on how you will mount the front door, certain devices may be added to the tool kit, for example, a clamp, hydraulic stops, etc.
Depending on which doors are installed, the set of required tools may vary. It is also necessary to decide what the space between the wall and the door frame will be filled with - polyurethane foam or cement mortar.
How to prepare an opening for installing an entrance door
The ease and quality of installation of entrance doors largely depends on how correctly the doorway is prepared. The more precisely you adjust its size to the dimensions of the door frame, the smaller the installation gap will be and the more reliable the door will be installed. If the opening turns out to be too large, then the doors will be located in a suspended state, so there is no need to talk about the reliability of installation. If it exactly coincides with the dimensions of the door, then it will not be possible to set it correctly and fill the gap with polyurethane foam with high quality. The average clearance between the door frame and the opening should be 15-25 mm.
If there is a need to increase the doorway, then they do it using a puncher and a grinder. Much more questions arise when it needs to be reduced. It is much easier to remove the extra 100 or more millimeters, since this can be done with a brick than, for example, choosing a gap of 50 mm. In such cases, an additional metal frame is used, which is inserted and fixed in the opening. This structure covers the wall on both sides and levels the opening, and the remaining voids are filled with mortar.

The doorway should be 15-25 mm wider and higher than the door frame
A perforator is used to clean the opening from plaster and mortar. This must be done especially carefully at the bottom so that the door can be installed flush with the floor in the hallway. At the bottom there may be a wooden beam or brick that has lost its strength, so it is necessary to assess their condition and, if necessary, replace.
Video: preparing doorways
Choice of fasteners
After you correctly position the front door, it must be firmly fixed, for which anchors are used. Since the structure is quite heavy, in order to maintain its position, it is necessary to use powerful fasteners.
A feature of anchors is that they can expand inside the wall and, unlike nails or screws, provide strong fastening - over time they do not loosen, so the fixing strength does not weaken
Several types of anchors can be used to install doors.
-
Driving. They have a body with special cuts and a bolt. A body is inserted into the prepared hole, after which a bolt is screwed into it. As a result, the anchor expands and a reliable anchorage is provided. The working part is additionally reinforced, so over time the mount does not weaken or loosen from all kinds of vibrations.

Drop in anchors The drop-in anchor consists of a body, which is inserted into the hole, and a fastening bolt
-
Wedge. In their shape, they are similar to hammered ones. As the nut is tightened, the rod begins to tighten, and the wedge moves along with it, which is fixed at the end. The body petals expand, due to which the anchor is securely fixed in the hole.

Wedge anchors There is a thickening at the end of the wedge anchor, which tightens when the nut is tightened and ensures reliable fastening
-
Rod. Here, fixation also occurs while tightening the nut due to the expansion of the body petals. There is a large selection of such elements in length and the ability to fix parts at a certain distance from each other.

Rod anchor The rod anchor is long and can have two thickenings, therefore, provides a more reliable fixation
-
Chemical. The anchor is fixed using a special glue. Glue is poured into the finished hole 2/3 of the length and the bolt is installed. After solidification of the composition, a strong and reliable connection is formed. Such a fastener is used to fix doors in a porous material. To ensure reliable fastening, it is necessary to clean the hole thoroughly and supply the adhesive from special capsules, in which the components are mixed in the required proportions.

Installation of a chemical anchor The adhesive must be supplied from special capsules in which the adhesive and hardener are mixed in the required proportions
When choosing the diameter of the anchor, the dimensions of the hole in the box must be taken into account. If its diameter is 13 mm, then you need to take 12 mm fasteners. Wedge products are most often used to install a metal entrance door. They form a spacer at the very beginning of the hole, so even if the edge of the wall crumbles a little, this will not affect the strength of the fastening.
If the door is installed in a tight opening with minimal gaps, drop in anchors can be used. For reliable fixing, fasteners with a length of 100-150 mm are used, depending on the gap between the box and the wall. Three anchors are installed on one side. The outer part of the bolt should not prevent the door from closing, therefore, fasteners with a countersunk head are usually used, and for wedge anchors, the protruding part is carefully cut off.
When installing anchors, you must choose a drill that exactly matches the diameter of the fastener body. If it is larger, the fixation will be less reliable, because the hole will break during drilling. The anchor hole must be perpendicular to the door frame, and this must be monitored from the very beginning. If a deviation was made and an inexperienced craftsman tries to correct the mistake, the hole will expand, so the anchor will not sit very tightly.
How to measure an entrance door for installation
It is very rare that houses or apartments have perfect doorways, so they need to be aligned. If the opening has non-vertical walls, then the hinges and other accessories will work unevenly and quickly break.
To avoid possible problems during the installation of entrance doors, namely the need to narrow or expand the opening, saw canvases, extensions, platbands, make embedded elements, etc., it is necessary to correctly measure
To calculate the width of the doorway, two thicknesses of the door frame are added to the width of the door leaf, 4 mm for the lock and 2 mm for the hinges, as well as 10 mm on each side for the assembly seams. When calculating the height of the opening, it is necessary to add two thicknesses of the box to the height of the canvas, the gaps along the narthex and 10 mm for the assembly seam.

During measurements, it is necessary to correctly determine the height, width and thickness of the doorway so that the door frame fits smoothly into it and the necessary mounting gaps remain
When preparing a doorway, the following conditions must be met:
- the same height at any point, no protrusions on the floor and in the upper part;
- parallel arrangement of opposite racks;
- the same width of the opening along the entire length, all corners must be straight;
- constant thickness throughout the opening.
Do-it-yourself front door installation
Installation of the front door is carried out in the same sequence, regardless of its design. After you have decided on the size of the opening and completed its preparation, you can proceed directly to the installation of the door.
The order of work will be as follows.
- Separation of the leaf from the door frame. If it is possible to remove the canvas, then it is better to do this, it will be much easier to carry out the installation work.
-
Installation of the box. To do this, you will have to invite an assistant, since you will not be able to complete the stage yourself. With the help of wooden or metal wedges, the door frame is exposed in a vertical and horizontal position, which is controlled by the building level. On all sides, the gap between the box and the opening should be approximately the same.

Aligning the door frame To align the door frame, it is necessary to use lining from the available material, and the position of the frame itself should be controlled by the building level
-
Drilling holes. Through the mounting slots, holes are drilled in the wall, first from the side of the hinge jamb, and then from the opposite. If there are no blanks for drilling on the jambs, then they are made three on each side and two on top and bottom.

Drilling holes for anchors Hole diameters must match the size of the existing hardware
-
Fixing anchors. We insert anchors into the prepared holes on the sides and fix them securely. We hang the canvas and check how it opens. If everything is fine, remove the canvas and fix the frame from above and below. We hang the canvas again and check how it opens. If necessary, the position can be corrected by loosening and tightening the nuts.

Fixing anchors on the door frame After installing the anchors into the prepared holes, the finishing fitting of the door leaf and the final tightening of the fasteners are carried out
-
Joint filling. It remains to fill the gaps with polyurethane foam or cement mortar and close all unpresentable places with cashing.

Filling the joints in the door frame The seam between the door frame and the opening is filled with foam or cement mortar
Video: installing the front door
Features of installing an entrance door in aerated concrete
Aerated concrete is a modern material that is often used for building houses. The fact that it is porous has many advantages, but it is also a disadvantage. The technology for installing entrance doors in aerated concrete is slightly different from the traditional one.
If you install the front door in such a house in the usual way, then the porous material will not be able to ensure its reliable fastening, so here you need to act differently. The blocks are specially prepared, their outer part is pasted over with a waterproofing self-adhesive tape or primed with a deep penetration compound. Such measures will help protect the block from moisture and strengthen its surface.
Methods for installing the front door in aerated concrete.
-
Wooden harness. When installing massive doors, high loads can cause deformation of aerated concrete, therefore, the door frame is installed on embedded beams or frame-strapping. Wooden elements are treated with antiseptics, in the doorway they are fixed with glue and additionally fixed with bolts. The door frame is connected to the strapping with self-tapping screws.

Options for installing doors in aerated concrete When using a wooden trim, its elements are attached with glue and bolts, and the door frame is installed with self-tapping screws
-
Using anchors. For lightweight structures, you can use anchors for aerated concrete - they can be glued or spacer.

Expansion dowel mounting Lightweight entrance doors can be anchored into aerated concrete using spacer or adhesive anchors
-
Metal carcass. This is the most reliable installation method - a frame made of metal corners is used, its parts cover the opening, and are interconnected with jumpers. For massive entrance doors, you must use a corner with a cross section of 50x50 mm.

Metal corner strapping A frame made of a metal corner is the most reliable way to install entrance doors in aerated concrete
Installation technology using a metal frame will be as follows.
-
According to the size of the doorway, two sets of corners are prepared, consisting of two long and two short elements.

Corners for making frames To install a door in an aerated concrete block opening, you must have two sets of metal corners for the manufacture of U-shaped frames
- Two U-shaped arches are welded and inserted from the outside and inside of the opening. They are connected to each other using ribbon jumpers.
- Jumpers are fixed to the wall with self-tapping screws.
- Insert the door frame and align it vertically and horizontally with wooden wedges.
-
Through the jumpers and the box, self-tapping screws 15 cm long are screwed into the aerated concrete.

Installation of frames for fastening the door Frames to reinforce the opening are fastened with anchors installed in the lintels and in the box itself
- The gaps are filled with polyurethane foam.
Double door installation
Double doors have a common frame and two leaves, which are placed on different sides. If the region has severe winters, then single entrance doors cannot always provide the necessary thermal insulation characteristics, therefore, the installation of a double inlet circuit becomes a way out of the situation. Otherwise, due to the large difference in temperatures outside and inside, condensation will form on the surface of the canvas, which will lead to metal corrosion, and the resulting frost will not allow the door to be opened and closed normally.

Most often, the outer door is made metal, and the inner wooden
The double door can be installed in thick doorways. The larger the air gap between the canvases, the better the thermal insulation characteristics of such a structure. The doors of the double door open in different directions, there should be a distance between them that will allow the handles to move freely. In apartments, there is usually not enough free space, so there is little space between the doors. So that the handles do not interfere with each other, they should be mounted on each canvas at different heights.
You won't be able to use a peephole in a double door, so in order to see who is knocking on your door, you will have to install a video surveillance system
Installation of a double door is no different from the usual one, it just has a larger door frame thickness and two canvases that open in different directions, instead of one. The following combinations can be used:
- both canvases are metal;
- external metal, and internal wooden (the best option);
- two wooden canvases (rarely used).
Installing handles
The handle of the front door must be strong, reliable and beautiful so that it can withstand a large number of opening and closing cycles, and also act as a decoration of the door leaf. Door handles are usually made of metal, it is better if they have a hidden fastening, and they are installed from the inside using long screws.
The installation technology will be as follows.
- Purchase of the necessary accessories.
- Trying the handle on the door leaf and marking the places for its attachment.
- Creating the first mounting hole with an electric drill.
-
Mounting the handle with one screw and adjusting the location of the other holes.

Installing the front door handle The outer door handle must be installed with screws from the inside so that it cannot be unscrewed from the street
- Creation of all mounting holes.
- Fixation of handles with screws.
The screws included with the doorknob are usually longer than necessary and must be cut to size
How to install a doorbell on your front door
If you decide to install a door lock with your own hands, there is nothing difficult about it. First you need to familiarize yourself with the technology of work performance and the existing nuances. At the preparatory stage, you need to buy a button, often on metal doors it is already included in the kit. The choice of buttons and calls is quite large, so you should decide on the appearance, the presence of additional functions and a ringtone, as well as find out how and where it is better to lay the cable. If possible, it is advisable to hide the cable in the wall. When this does not work out, decorative boxes are used.
Since the power of the call is small, a two-core wire with a cross section of 1.5 mm 2 will be enough. For modern models that have backlighting and other additional functions, a three- or four-wire wire may be required. If you do not have enough experience, then it is better to install simple and reliable devices.
Do-it-yourself door lock installation is performed as follows.
- A through hole is made in the wall near the door.
- Using a perforator and a special nozzle, they cut through a groove for laying a cable.
-
On the outside, a button is installed, and on the inside, a bell. Dowels are used for fastening.

Bell button installation The bell button is fixed near the door from the outside at a convenient height
- The cable is connected to the bell and the button.
-
Turn off the power in the house and connect the wire from the bell to the house's wiring system. A neutral conductor is connected to the bell, the phase is laid to the button, and only then to the bell. When the contact is closed on the button, a bell should ring.

Call connection diagram The zero power wire goes directly to the bell, and the phase wire goes through the button, which closes the circuit when pressed
Installation of platbands
With the help of platbands, the space between the door frame and the wall is closed. These decorative elements give the entrance door a complete and attractive look. They can be flat, rounded, or curly. If flat elements can be joined in any form, then for the other two types this is done at an angle of 45 o. To obtain a straight cutting line, it is imperative to use a miter box.
In addition, the platbands can be solid or have a special channel in which it is convenient to hide the wires, if necessary. When choosing platbands and extensions, you need to look to ensure that their color and texture match the shade of the door leaf and frame.
According to the method of installation, platbands are:
- overhead - they are mounted using fasteners;
-
telescopic - fixed with a special comb, which is inserted into the groove on the additional element, for more reliable fixation, glue can be used additionally.

Telescopic platbands fastening scheme Telescopic platbands are attached to the additional elements using a thorn-groove connection, which allows you to hide small wall irregularities in the area of the door
The platband installation technology is very simple.
- Measurements are being carried out.
- Using a hacksaw and a miter box, cut parts of the required length.
-
Platbands are fixed along the edges of the door frame. Fastening can be done with nails without heads, followed by masking the place of their installation with furniture stickers or on liquid nails that are applied pointwise, after which the element is pressed against the wall.

Installation of curly platbands Platbands can be fixed with liquid nails or special nails without heads
Installation of additional elements
From the name it is clear that additional elements are intended for installation in those places where the thickness of the door frame is less than the thickness of the wall. When installing them, you must adhere to the following rules:
- if the extensions are installed on a finished door, then the platbands are first removed. They are already mounted on additional strips;
-
the width of the opening is measured in several places so that you can determine the width of the additional elements;

Installation of additional elements Platbands are simply pressed to the usual additional strips, and they are firmly fixed to the telescopic ones using special grooves
- for fastening the panels, nails, screws or glue can be used;
- the gaps are filled with polyurethane foam or silicone sealant.
The additional element looks like a letter "P", it can be attached to a door frame, to a wall or to a bar fixed to the wall. Since these elements do not experience loads, there is enough glue to fix them, but if installation is carried out on nails or screws, the places of their installation must be closed with plugs.

If the extensions are fixed on nails or self-tapping screws, their caps must be recessed into a wooden base and closed with special plugs
When choosing doors, you need to pay attention to the presence of special grooves in the box, into which the extensions are attached.
Video: installation of extensions
How to check if the front door is installed correctly
After the installation of the front door, before the sealing of the seams and the installation of additional elements and platbands, the correct installation is checked.
When checking, pay attention to the following details.
- Door leaf position. The door should be opened at 90 o, it should remain in this position, not open further or close. Then it is checked in other positions - at 45 and at 15 o. If the canvas does not move, then it is correctly aligned in the vertical and horizontal plane.
- Opening force test. It all depends on the thickness of the seals. If they are powerful and wide, then at first the door will be difficult to open. With thin seals, the door leaf should open without effort.
- Closing force test. There are no defined standards for how hard the front door should be closed. It all depends on how convenient it is for the owners. Many doors have an eccentric that can be used to adjust the kick. If there are small children in the house, then the adjustment is made so that the door leaf closes relatively easily.
- Locks work. Locks should open and close smoothly without jamming and extraneous sounds.
- Assembly seams. They should be evenly filled with foam or mortar without visible voids. If part of the foam has gone beyond the dimensions of the doors, it must be cut off.
If the check is successful and the result suits you, you can proceed to the installation of decorative elements.
Dismantling the front door
Before starting dismantling work, it is necessary to remove objects that will interfere and protect the flooring in the house. It is also recommended to take furniture and clothes out of the corridor, or at least cover them well with a film, because there will be a lot of dust when dismantling the slopes.
Dismantling a wooden front door is carried out in several stages.
- The door leaf is removed from the hinges.
-
The platbands are dismantled. To do this, use an ax or nail puller. If decorative elements will be used further, then they must be removed very carefully.

Dismantling of platbands Wooden platbands are dismantled with an ax and a hammer
-
Disassemble the box. Work begins with a threshold, which is sawn in half and removed with a nail puller. The sides and the upper crossbar are torn off with a nailer or pry bar.

Dismantling a wooden door frame First, dismantle the bottom of the box, and then the sides and top
The metal door is removed in a slightly different way.
- The door leaf is also removed first. If it is enough to lift the wooden door and remove it from the hinges, then the hinges must be unscrewed here.
-
The anchors that secure the box are unscrewed. If the fixation was carried out for welding, then the attachment is cut off with the help of a grinder.

Dismantling the metal door frame If the installation was carried out for welding, then the door frame fasteners will have to be cut off with a grinder
- If it is not possible to pull out the door frame, the slopes are removed using a punch. It is also necessary to remove the platbands.
- The box is pulled out of the doorway.
Video: dismantling doors
If you study the technology for installing entrance doors, it becomes clear that it is relatively simple, and you can cope with such a task on your own. During the installation of the door, the frame must be correctly aligned and securely fixed. All work is done carefully so that scratches and dents do not appear on the canvas and the box. When doing this work with your own hands, you will not only be able to save significant money, but also get experience that will be useful in the future and which you can share with your friends.
Recommended:
Double-leaf Doors: Entrance And Interior Doors, As Well As Their Varieties With A Description Of The Device And Installation

Double-leaf doors: types, standard sizes. Accessories for double doors. Installation stages and operation features. Reviews
MDF Doors: Entrance And Interior Doors, Their Varieties With A Description And Characteristics, Advantages And Disadvantages, As Well As Installation And Operation Features
Doors from MDF: features, characteristics, varieties. Making and installing MDF doors with your own hands. Door restoration. Reviews, photos, videos
Installation Of Fire Doors: How To Properly Carry Out The Installation And What Regulatory Documents Must Be Followed
Fire doors installation technology, for which premises they are suitable. Features of service and repair
Making Glass Doors, As Well As How To Install Them Correctly And What Tools Are Required To Carry Out The Work
Self-manufacturing technology of glass doors. How to install, adjust, dismantle them correctly. What tools can be used
Armopoyas For Mauerlat And Its Purpose, As Well As How To Properly Carry Out Installation Work
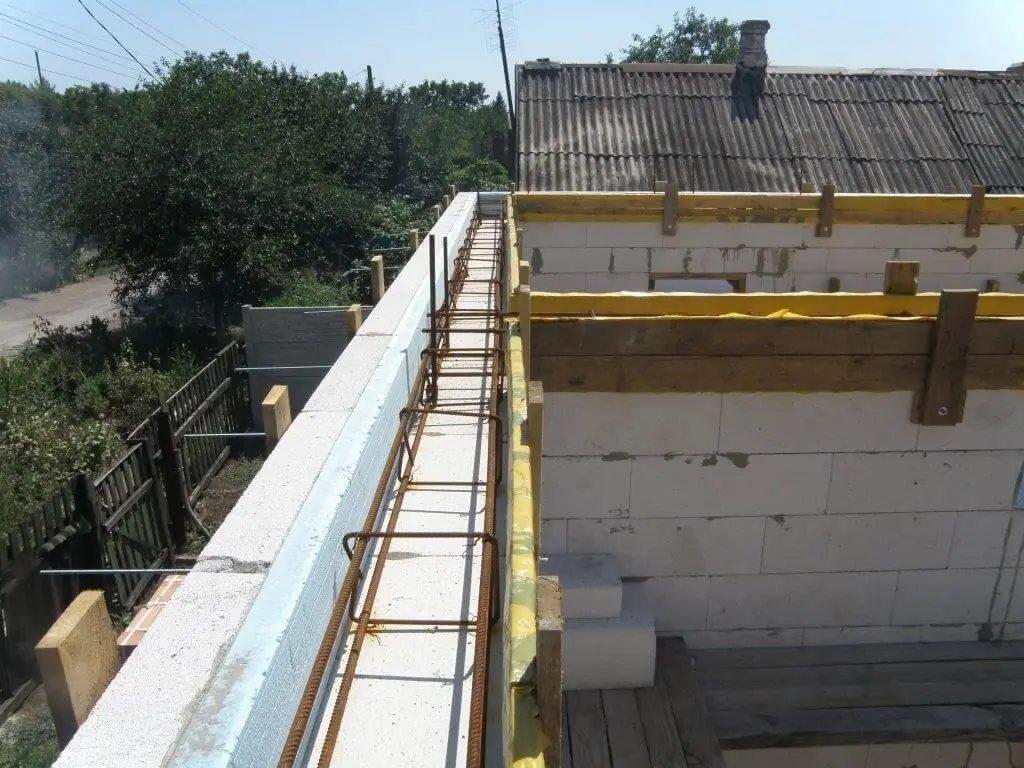
Armopoyas functions and its main parameters. How to make your own concrete mix. Instructions for the construction of an armored belt and attaching a Mauerlat to it
