
Table of contents:
- Author Bailey Albertson [email protected].
- Public 2023-12-17 12:53.
- Last modified 2025-06-01 07:32.
The device and installation of the valley

In order for the roof to meet all the architectural features of modern buildings, it is often made in the form of structures from a variety of pitched roofs. Geometrically complex frames of the rafter system have a large number of abutments of pitched surfaces that form the inner corner of the roof. Such areas in a timber roof structure are called valleys. Another name for this element is the gutter or valley gutter. Having a v-shape, the roof valley actually acts as a gutter through which water flows are directed and removed. Proper installation of this element is of great importance, since installation errors can lead to leaks, damage to the insulation and additional repair costs.
Content
-
1 Diagram of the device of the valley
1.1 Video: the device of the valley and abutments
-
2 Sequence of installation of the valley
- 2.1 Video: installation of a valley on a metal roof
-
2.2 Connecting two ends on a ramp
2.2.1 Video: valley with access to the slope on the roof made of metal tiles
- 2.3 Features of fastening the elements of the valley unit
- 2.4 Installation of the overhang aero element
- 2.5 Strengthening the valley
-
2.6 Trimming shingles when arranging a valley
2.6.1 Video: installation of ceramic tiles - formation of the valley
- 3 Errors when installing the valley
Valley device diagram
Endova is one of the most important and complex elements of the roof structure. The mating line of adjacent slopes is exposed to severe climatic loads during operation. When it rains, water flows down it from the neighboring slopes, and in winter snow accumulates here.

Typically, the valley consists of a decorative top strip that covers the joint of two slopes, and a lower gutter, which is located under the roofing
The number of valleys depends on the design features of the roof, as well as on the availability of additional roof windows.

Depending on the features of the roof structure, the number of installed valleys will be different
The design of the valley implies the construction of a base in the form of a continuous crate, along which a layer of waterproofing is laid, as well as the presence of a lower and upper element. The lower plank of the valley serves as a gutter, and the upper element serves as a decorative piece that covers the slope joints. Most often, these roofing elements are made of metal. The best quality material for making valleys is steel sheets with polymer coatings and special sprays. In some designs, the top of the valley is not used.

To improve the waterproofing properties of the lower valley, its upper shelves can be sealed with a self-expanding porous material
Depending on the angle formed at the junction of the roof joints, there are three types of valleys:
- Open valley construction - used in roofs with a low pitch angle and implies the installation of an additional waterproofing layer. Such a gutter is convenient in that less debris accumulates in it, precipitation falling on the roof surface quickly flows down, and installation work will not take much time. The open design is less aesthetic than other types of valleys.
- Closed valley - used on roofs with steep slopes, the edges of which are close to the gutter. This design has a beautiful appearance, it better protects the joints of the roof from moisture ingress.
-
Interlaced valley - in appearance it resembles a closed device. In this case, the joints of the roof can intersect, forming a solid surface. The intertwined and closed type of gutter design has more disadvantages than advantages, which are expressed in the following criteria:
- the interwoven structure of the valley makes installation difficult;
- it will take more time to install such a gutter;
- debris will accumulate on such a roof;
-
when the snow melts, the lower and upper planks of the valley will contribute to the formation of ice plugs.

Garbage on the closed valley Debris often accumulates on the slopes of roofing with a closed type of valley
The design of the rafter system, which serves as the basis for the installation of valley slats, depends on the intended type of roofing. In this regard, there are several types of lathing for laying valley slats:
- Continuous lathing is used when installing a soft roof. In this case, the valley is made in the form of a continuous coating of waterproofing layers. Installing the valley in this way is the easiest.
- If slate, profiled sheets or tiles are used as roofing for a gable roof, the lathing will have a completely different look. For its device, 2 or 3 edged boards are used, which are mounted along the joints of the roofing with a step of 10 cm.
- Lathing with additional elements. When using metal tiles, intermediate strips can be installed to the main battens of the crate.
- A wooden base for ondulin is made of two boards 10 cm wide, which are mounted in 15-20 cm increments. Such a base will not allow the groove to sag.
Video: the device of the valley and abutments
Valley installation sequence
The valley is installed in the following sequence:
-
Before the start of installation, a drip is installed along the entire length of the eaves to drain condensate from the under-roof waterproofing.

Installation of a drip for condensate drainage The drip tray is made from the same material as the main roof covering
- On both sides on the bony rafter leg with a gap of 5 cm from its edges, bars of a horizontal counter-lattice are nailed. The lower ends of the bars should be sawn flush with the eaves.
-
Increased requirements are imposed on waterproofing in the valley area. Three layers of diffusion membrane are laid here. Its task is to protect the underlying structures and thermal insulation materials from moisture penetration, but not to prevent the escape of water vapor. The first layer of membrane is laid out along the valley on top of the horizontal counter-lattice. The film inside the counter-lattice forms a kind of gutter that protects the wood from getting wet from the side in the event of under-roof condensation. The membrane is attached with brackets to the top and side edges of the strips. Then the membrane is trimmed at the edge of the drip and counter grill.

Valley waterproofing The waterproofing material protects the slats of the counter-lattice from getting wet from the side and is attached to them with a construction stapler
-
Further, the diffusion membrane is laid out along the slopes onto the rafters according to the previously made markings. The waterproofing on the slopes is laid with a pigtail, that is, alternately on both sides of the valley. In this case, the membrane is transported through both horizontal counter-gratings and cut off behind its opposite edge. The membrane is also fastened from the slopes with a stapler on the side and top edges of both horizontal counter-gratings. The joints of this waterproofing barrier can be glued with double-sided tape.

Bonding the diffusion membrane When gluing the membrane, it is necessary to make an overlap of at least 10 cm and glue it with double-sided tape
- To prevent the membrane from slapping on the drip from the wind and not getting disheveled over time, it is necessary to glue it to the edge of the drip gutter with double-sided tape.
-
On top of the waterproofing, bars of the valley board are stuffed, which form an air gap for ventilation of the under-roof space and drainage of condensate from the film.

Ventilation gap in the valley A gap is left between the lower plank of the valley and the waterproofing film for condensate drainage
- Laying the membrane from the opposite slope, as well as fastening with staples to a horizontal counter-lattice and gluing with double-sided tape, occurs in the same way.
-
After both adjacent slopes and valleys are closed by the membrane, the counter-lattice filling is completed on them and the installation of the lathing bars begins. The installation of the lower lathing along the eaves is carried out flush with the ends of the counter-lattice.

Installation of battens Wooden lathing, laid on the bars of the counter-lattice, is necessary for ventilation of the under-roof space and for fixing the topcoat
-
In the area of the valley, on the lower battens of the battens, markings are made at an angle for accurate joining with each other. Ventilation tape is installed along the entire eaves to protect against bird penetration.

Docking the valley in the area of the eaves The lower battens in the valley area are trimmed to form an even joint
- The ends of the lathing on the side of the gable overhang are closed with a membrane flap turned upwards, which is fixed on the bars with a stapler. A frontal board is stuffed on top of it. If provided by the project, brackets are mounted along the entire eaves for attaching gutters.
-
In the valley area, in the middle between the ordinary battens of the crate, additional bars are packed that support the gutter, preventing it from deforming under the weight of the snow. At the same time, thanks to the frequent lathing, the space under the valley groove is well ventilated. If there is a drainage system, a plastic overhang apron is mounted. Its task is to prevent water and snow from entering the ventilation gap between the tiles and the waterproofing.

Lathing in the valley area To counteract snow loads, a frequent crate is arranged under the plank of the lower valley
Video: installation of a valley on a metal roof
Connecting two ends on a ramp
The installation process at the junction of two valleys is carried out as follows:
- If the project provides for the joint of the valleys below the ridge, then the gutters on both sides are trimmed for tight mating and fixed with self-tapping screws. The gutter joint is carefully glued with a sealing tape along its entire length, profiled along the edges and rolled with a roller.
-
The valley plank in the upper part is attached to the lathing with staples. The upper corner of the joint is formed by hand, and the flange is pressed against the surface of the grooves.

The connection of the valleys below the ridge bar In order to prevent moisture from penetrating into the under-roof space, bends are made along the edges of the valleys
-
The flanging is completely bent inward along the entire length, while efforts can only be made in places above the crate. Along the entire length of the valley groove, foam rubber strips are glued on both sides. They protect the under-roof space from precipitation and dust. The lower edge of the foam strip should be on the overhang aero element. If the foam strips were not used for some reason, water, snow and dust will constantly fall under the roofing, thereby reducing the service life of the structure.

Installing the foam rubber seal for the valley Foam strips must be installed to protect the space under the valley strip from water, snow and dust
-
The roofing material is laid on both adjoining ramps in the direction from the gable overhang or the ridge of the valley, closing the groove as much as possible. To ensure the unhindered flow of rainwater and snow down the valley gutter, the cover is trimmed at the same level on both sides. The overlap of the cut shingles on the valley groove should be 13 to 15 cm or 8-10 cm from the center of the lower plank.

Leveling metal tiles in the valley area Sheets of metal tiles are cut so that they go to the lower plank of the valley by 13-15 cm
The cutting line is applied with a dye cord along the marks located at the top and bottom of the valley, and marked on both sides of the groove.
Video: valley with access to the slope on the roof made of metal tiles
Features of fastening the elements of the valley unit
The valley node looks like a concave angle between two roof slopes. To fasten this roof element, roofing screws are used, which are equipped with a rubber or plastic washer. The washer has several functions:
- protects the surface of the roofing material from scratches and damage;
- serves as a waterproofing layer between the self-tapping screw and the hole in the roof, hermetically closing all the cracks.

Rubber washer provides a soft hold on the self-tapping screw and waterproofing the hole
When installing the valley strip, an overlap of at least 10 cm must be made.
The planks of the lower valley are mounted directly to the wooden lathing using clamps fixed with nails or self-tapping screws. The upper element of the valley must be screwed to the metal tile with self-tapping screws. It should be noted that the self-tapping screws for fastening the upper valley should not rest against the lower groove. The gaps between the roofing and the gutter sheets must be filled with a foam rubber seal.

Clamps secure the lower valley strip without damaging its edges
When installing the valleys, you should pay special attention to the quality of the lathing. It is recommended to install the lower gutter on a solid crate, the width of which should not be less than the width of the valley itself.
The installation of the valley nodes is carried out as follows:
- Bend the edges or flanges on the metal groove of the valley. It is most convenient to do this on the edge of the crate.
-
Bend the groove sheet along the middle line, repeating the profile of the valley. The grooves are laid in the valley from the bottom up, starting from the eaves. The rainwater from the valley must fall exactly into the gutter. For this, the protruding edge of the lower groove is marked along the edge of the inner corner of the gutter with an offset of 3-4 cm, after which it is trimmed according to the marking.

The exit of the valley into the gutter The node of the valley must be marked so that the water from the gutter falls exactly into the gutter
- To prevent displacement of the groove, leave a distance of 1-2 cm from the edge of the upper edge and attach it to the counter-lattice with two nails or self-tapping screws.
- Fasten the groove on both sides using the six supplied brackets in 40 cm increments. Then fold the groove flange inward.
The upper groove is laid on the underlying groove with an overlap of at least 10 centimeters. When laying, it is necessary to combine the transverse edges of the grooves and fix the subsequent grooves in the same way as the first.

When installing a valley from several planks, an overlap of 10 cm must be made
Installation of overhang aero element
An overhang aero element is installed for additional support of the lower row of metal tiles, as well as to prevent birds from entering under the roof.
- In the presence of an overhang apron, the position of the aero element is determined depending on the selected overlap of the tiles on the gutter and is in the range from 31 to 37 cm from the first ordinary crate.
-
Aeroelements are installed with cilia up and fastened with screws or nails.

Fastening the overhang aero element Overhang aero elements are fastened with self-tapping screws or nails
- After the required length of the aerial element has been measured, the position of its legs falling on the folded flange and the brackets of the drainage system is noted. Interfering legs are cut off.
- In order for the first fragment of the trimmed tile to have reliable support, the extension of the aerial element to the groove must be 10 cm.
Strengthening the valley
The functionality of the valley is directly related to the quality of its foundation. To strengthen the valley, it is better to use a solid crate.
- A waterproofing layer is installed along the entire length of the base. The best option for reinforcing the gutter knots is to use a valley carpet. This protective coating is made of non-woven polyester material impregnated with concrete mixtures with the addition of modifiers. A sprinkling of basalt chips is applied to the upper side of the valley carpet; the lower part is covered with sand granules.
- The waterproofing material is fixed with special stickers or nails. If the carpet is nailed, the distance between them should be about 20 cm.
- The lower elements of the valley, roofing, seals and decorative details are mounted.

Instead of standard waterproofing, polyester nonwovens can be used to reinforce the valleys.
Installing a bitumen-impregnated polyester cloth allows solving a number of problems:
- to provide reliable protection of internal bends of the structure and other places most vulnerable to moisture ingress;
- create a shock-absorbing layer that will soften the load from the snow;
- improve the aesthetic qualities of the roof;
- completely eliminate leaks.
Trimming shingles when equipping the valley
If the valley is arranged on a tile roof, trimming of the elements of the roofing material is often required:
-
First, a rough fit is carried out, and then a final markup and trimming of the tiles exactly along the line drawn on the valley groove.

Trimming shingles Shingles must be trimmed using a circular saw
- A shingle spike that hits the valley is bounced or cut off so that it does not crack on the groove.
- The foam strip under the tiles should be cut off - this allows you to immediately lay the roofing evenly, without waiting for it to push the strip under its own weight and lie in place.
- A hole for a self-tapping screw is pre-drilled in the trimmed tiles so that it does not fall on the groove.
-
The prepared roofing element is installed in place and secured with a self-tapping screw.

Trimming tiles along the valley line All laid elements must form a straight line parallel to the axis of the groove
-
Sometimes, when marking, it can be seen that after cutting off some elements, a small triangular fragment remains, which is difficult to fix. This happens if the cutting line falls on the right edge of the tile, then the cutting line is shifted by 5 cm, and half tiles are used nearby. It is installed instead of the usual ordinary one column from the cropped one. The consumption of half roofing elements is one piece per two rows on each side of the valley.

Using half shingles in the valley Half shingles add a missing piece of roofing if in this row a large part of the surface of the last roofing element falls under trimming on the valley
- The prepared cut shingles are placed in their place and fixed with a self-tapping screw. The tiles from the top row slide down and press the trimmed element down.
- The rest of the roofing material in the valley is laid in the same way. When installed on a ridge, the outer ridge shingles, which come out to the joint of the valleys, are cut along the same line as the shingles located in rows on the slope.
-
The upper edge of the extreme ridge tile is closed with a special abutment tape. The installation of the valley is completed.

Corrugated abutment tape Corrugated tape is a convenient and effective material for sealing protruding parts of the roof
Video: installation of ceramic tiles - formation of the valley
Errors when installing the valley
Installing a valley gutter requires care and skill. Since this roofing element carries a lot of rainwater, the slightest mistake in its installation can lead to serious problems and additional costs. The most common mistakes when installing a valley are:
-
Trying to cut shingles directly on the valley using a grinder. This often results in damage to the already attached groove. In addition, it is very difficult to achieve a straight cut line along the entire length of the gutter, so the valley and the entire roof will look sloppy, and runoff and snow will be difficult.

Incorrect cutting of shingles If the shingles are cut unevenly, the roof will look sloppy, and water and snow will come off it intermittently.
- Fastening the groove with nails along the entire length.
- Installing valley slats from the ridge to the bottom edge. In this case, the lower bar will cover the upper one. At the junctions of these elements, moisture will enter the roof, and will not drain down.
- Narrow crate or no additional slats. This error will cause the weight of the snow to deform the valley. As a result, gaps and gaps are formed through which moisture penetrates.
-
Twisted or insufficiently tightened screws. In the first case, the roofing is damaged, in the second, moisture will penetrate under the self-tapping screw.

Errors when installing the valley with roofing screws If the screws are improperly tightened, water will flow into the under-roof space, contributing to the destruction of the rafter system
The process of installing a valley requires special knowledge and construction skills. Therefore, it is better to entrust the installation of this roofing element to experienced specialists. In this case, errors leading to serious problems will be excluded.
Recommended:
Roofing Made Of Roofing Material: Features Of The Device And Operation, Repair, How To Avoid Mistakes During Installation
Roofing roofing felt: features, manufacturers and types of material. Installation of soft roofing: calculations, tools, nuances and mistakes. Roof operation
The Welded Roof, Including The Features Of Its Construction, Operation And Repair, As Well As How To Avoid Mistakes During Installation
The main features and characteristics of the overlaid roof. Materials and tools required for the job. Installation, operation and repair of the overlaid roof
Membrane Roof, Including The Features Of Its Design, Operation And Repair, As Well As How To Avoid Mistakes During Installation
Technical characteristics, advantages and disadvantages of membrane roofing. Features of installation. Rules for the operation, maintenance and repair of a membrane roof
Roofing From A Profiled Sheet, Including The Features Of Its Design And Operation, Repair, As Well As How To Avoid Mistakes During Installation
What kind of profiled sheet can be used for the roof. DIY cold and insulated roof device. What mistakes are possible. Features of operation and repair
Polycarbonate Roofing, Including The Features Of Its Construction, Operation And Repair, As Well As How To Avoid Mistakes During Installation
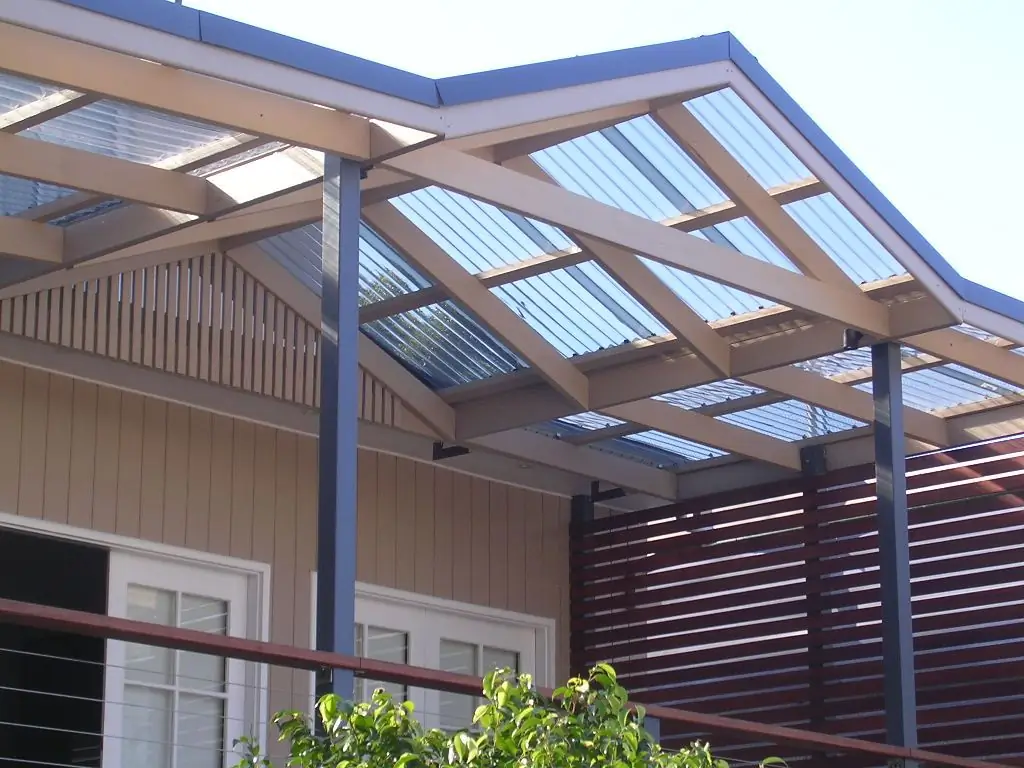
Characteristics of polycarbonate as a roofing material. How to make a polycarbonate roof with your own hands. Features of operation and repair. Photo and video
