Table of contents:
- Author Bailey Albertson albertson@usefultipsdiy.com.
- Public 2023-12-17 12:53.
- Last modified 2025-06-01 07:32.
Growing strong bell pepper seedlings at home

Sweet peppers in most regions of our country are grown in greenhouses: they are more thermophilic than tomatoes we are used to. And they begin to prepare seedlings for him even in winter, and they usually do this at home. The process of growing seedlings is not so difficult, but there are some nuances, without knowing which you can fail. However, nothing is impossible for a Russian summer resident.
Content
- 1 Is it necessary to grow seedlings
- 2 When to plant peppers for seedlings: lunar calendar 2019
-
3 Preliminary preparation
- 3.1 Seed preparation
- 3.2 Soil preparation
-
4 Growing pepper seedlings at home in different ways
-
4.1 Growing in a house or city apartment
- 4.1.1 Sowing in separate cups
- 4.1.2 Sowing in a box with subsequent picking
- 4.2 In greenhouse conditions
- 4.3 Use of peat tablets
- 4.4 Germination of pepper in a "snail"
- 4.5 Growing in a diaper
-
- 5 Features of growing on the northern windowsill
-
6 Is picking mandatory
6.1 Video: tips for growing pepper seedlings
Is it necessary to grow seedlings
Agrotechnology of bell pepper is very similar to that of tomatoes, but there are significant differences. They are connected with the fact that pepper is a more thermophilic plant, it also needs more moisture, and the growing season in pepper is longer than that of tomatoes. Various varieties of pepper begin to yield crops only 4-5 months after sowing the seeds.
All this leads to the fact that even in the southern regions of our country and neighboring states (including Bulgaria), pepper is necessarily grown through seedlings. True, in Bulgaria, sowing begins in January, but in our country it happens about a month later, in the second half of February. The last date for sowing pepper for seedlings is the beginning of March. From now on, it's time to move on to growing tomato seedlings.
When to plant peppers for seedlings: lunar calendar 2019
At the end of the twentieth century, it became fashionable to compare your life with the rhythms of the planets, astrological forecasts and other moments related to the movement of heavenly bodies in their orbits appeared. In the same years, gardeners and truck farmers drew attention to the lunar calendar, which describes the location of the moon in a particular constellation. There is a theory that the phases of movement of this heavenly body somehow affect the success of plant development: from sowing seeds to any other manipulations. Every year, for each culture, calendars are compiled and published, which indicate favorable and unfavorable days for planting, transplanting, inoculating, picking, etc. The irony is that in different sources these dates rarely coincide.
But if we take the average data, then the following days will be favorable for planting seedlings:
- January: 19, 20, 27, 29;
- In February: 6-8, 11-13, 20-25, 28;
- In March: 8-12, 15-20, 23-25, 27-29;
- In April: 1-4, 6-9, 11-13, 20, 21, 24-26, 29, 30;
- In May: 3, 4, 8-10, 17, 18, 21-23, 26-28;
- In June: 5-6, 13-15, 18-20.
The days of the new moon and full moon are considered unfavorable for working with pepper:
- In January: 5, 6, 21;
- In February: 4, 5, 19;
- March: 6, 7, 21;
- April: 5, 19;
- In May: 5, 19;
- June: 3, 4, 17.
Preliminary preparation
As with growing any vegetable seedlings, a gardener for pepper seedlings needs reliable seeds, suitable containers and the right, disease-free soil. For an experienced summer resident, the container always lies in a safe place, but with the rest, options are possible, but by February everything should already be in the house.
Seed preparation
It is not always possible to use your seeds for growing seedlings: recently, many hybrids (F1) have appeared, bringing a much richer harvest of significantly better quality than the good old varieties, and many gardeners have switched to hybrids. And collecting seeds from hybrids is useless: according to the laws of genetics, nothing good can come of them. Therefore, most often the preparation of seeds is to go to the store and buy the bag you like. But if you have been growing a good variety of pepper for several years, and you collect seeds from its ripe fruits, then you need to tinker a little before sowing.

Pepper seeds are very similar to tomato seeds and should be treated in much the same way.
This is not to say that the acquisition of unknown seeds will necessarily lead to a disastrous result: here is a lottery, so lucky. So, once the author of these lines really liked a large, fleshy sweet pepper, bought in the winter in "Magnet". I tried to take seeds from him. In February I processed and sowed. The harvest is wonderful! So, it makes sense to experiment!
So, seeds of unknown origin must be prepared for sowing. But I would also like to advise the purchased seeds of hybrids not to put them in the ground immediately from the bags. Most likely, if the seeds are sold in a normal store and prepared by a well-known company, they are disinfected in advance, and it is not worth dressing them. But to harden, especially if it is supposed to plant seedlings not in a greenhouse, but in open ground at the end of May, it does not even hurt.
In general, I want to give one simple advice: you need to read everything that is written in numerous sources, evaluate what you read. After all, if you do everything that you have read, there will not be enough time not only to live, but also to go to work. We do only what is really necessary. And we dismiss tips like bubbling pepper seeds with air from an aquarium compressor: it makes sense only for the seeds of those plants that sprout in 2-4 weeks, because they are covered with a dense film of essential oils (for example, parsley). Pepper sprouts a maximum after a week perfectly! Therefore, only three things need to be done:
- calibrate (if you don't trust the manufacturer);
- disinfect (in the same case);
- harden (if adult plants will grow in open ground).
If you do not want to disinfect, you can calibrate manually (if you have good eyesight, discard the smallest seeds) or by density: pour the seeds into a jar of salt water (a tablespoon for half a liter of water). If mixed vigorously a few times, good seeds will drown. The ones that come up are bad. Not entirely bad, most of them will also sprout, but the plants will be weaker.
If you disinfect, salt water is not needed, this is unnecessary trouble. The disinfection procedure is compatible with seed rejection. Let's prepare a strong solution of potassium permanganate. Strong is not 1%, as you can read in many publications, this is too much. And it is unlikely that you have a scale at home to take a sample of the drug of the order of 1 gram. Therefore, we will consider a dark-violet solution "strong", but we prepare it by eye. Fill a tiny pinch of crystals in a half-liter jar with warm water, 200 milliliters (dissolution is very slow in cold) and shake well periodically. We look carefully so that all crystals dissolve! In no case do we throw seeds until we achieve this. The light pink solution is not a seed disinfection, it is a waste of time.

To dress the seeds, prepare a solution of the same color intensity as in the left vessel
When all the permanganate is dissolved, throw the seeds into the jar and shake well. Within a few minutes the best ones will go to the bottom, and those that did not drown in 8-10 minutes can be thrown away. Strain the rest through a strainer and wash very well with running water from the tap.
And a few words about hardening. Pepper seedlings are afraid of low temperatures, seeds are not very. But before hardening, you need to let them swell properly. The signal is the beating of the quickest. Therefore, we put wet seeds in a wet cloth and in any closed bowl. If you have a Petri dish - perfect. No - in any other closed vessel. But you don't need to put it in a bag: they will suffocate, you need at least a little air. And we check it periodically. As soon as they saw that a tail appeared from several seeds - a cup of seeds in the refrigerator. 12 hours in the refrigerator, then the same amount in the room. And so three times. The seeds are ready for sowing. There are many tips for soaking in growth stimulants, warming up, which you just can't find, up to ultrasound. Do not. If the soil is normal, everything will be fine, subject to temperature and humidity conditions.
Soil preparation
Pepper is a relatively capricious crop, and is more picky about the composition of the soil than, for example, tomatoes. Seedling soil should have the following properties:
- be loose, air and moisture permeable;
- do not form a superficial crust after watering;
- be fertile, but not due to the abundant application of mineral fertilizers;
- have acidity close to neutral.
Since gardeners usually plant not very many pepper bushes, you can go to buy a bag of ready-made soil in the store. It will not come out so expensive, but one must not be mistaken, read well what is written on the package. And choose only among those where the word "pepper" is present in capital letters. If it is possible to prepare the soil mixture on your own, and even more so if you need a lot of it, it is better to do so.

If there is no word "pepper" on the package, you should bypass such soil.
They recommend different compositions of soil for peppers, it would be optimal to mix humus, sand and sod soil in a 2: 1: 1 ratio and add a little wood ash. Humus can be replaced with good compost, any other sod land, but not from the garden where the nightshade crops grew. No additional fertilization is necessary.
Self-prepared soil must be disinfected. The easiest way is to pour it well with potassium permanganate solution. Here the concentration may already be somewhat lower than for seed dressing. The guideline for the intensity of the color is as follows: so that through a layer of solution in a half-liter can you can see what is behind it.
Steaming the soil in the oven is an amateur activity. Firstly, in a city apartment, this is a dubious pleasure. Secondly, the soil must contain not only inorganics, but also useful microflora, and at high temperatures it will die.
The soil prepared a few days before sowing the seeds must be poured into containers, and on the eve of sowing, disinfection can be repeated, just in case, by watering it with a bright blue solution of copper sulfate.
Growing pepper seedlings at home in different ways
There are vegetables, the seedlings of which are very difficult to grow in a city apartment: these are any varieties of cabbage, it is hot at home. Tomatoes are easier: the temperature is ideal, but they usually plant so many of them that there is not enough space, and, if possible, grow seedlings in a greenhouse. Well, the pepper in the apartment is very good: this vegetable is very thermophilic, it is usually grown in not very large quantities, so in the apartment its seedlings are the place. In mass production, of course, the seedlings are planted in a greenhouse.
Growing in a house or city apartment
Pepper seeds are sown 2.5-3 months before the planned planting in a permanent place, since the seedlings grow slowly, especially at first. In open ground, it can be planted not earlier than the end of May, and in the middle lane and in the northern regions it is generally planted in a greenhouse. Therefore, sowing seeds is carried out at the very end of winter or early March.
The pepper does not like the transplant, so the seeds can be sown immediately into individual cups. But often, in order to save space in the apartment at least for some time, it is sown in small boxes or boxes, and then dived into separate “apartments”.

At first, you can grow peppers in a common home, but the plants shown in the photo should be planted in separate pots after a few days
Thus, two options are possible:
- sowing in separate pots;
- sowing in a box followed by a pick.
Sowing in separate cups
If you choose the first way, then the cups should immediately be chosen not too small, their volume should be at least 200 cm 3. Peppers grow at home for a long time, so it is not very convenient to use peat pots: in three months they manage to get so wet and sour that they literally fall apart in a pallet, and it can be very difficult to pick them up by the end of spring. Best suited plastic cups with a pull-out bottom: it is very convenient to remove the seedlings from them by pressing on the hole in the bottom.

The pots are very convenient, from which you can push the plant along with the earthy clod by pressing your finger on the hole in the bottom
Sowing seeds in cups is not difficult:
- Fill containers with pre-prepared soil.
- Marking a small hole, place two seeds 1-1.5 cm deep (then the worst plant can be removed).
- Cover with soil and pour gently with warm water.
- Cover with glass and put in a warm place, the temperature before germination is from 24 to 28 o C.
- When "loops" appear (the beginning of seedling hatching), reduce the temperature to 20-22 o C during the day and 15-17 o C at night, placing the seedlings in a good light.
We keep it this way for five days, then we raise the temperature again: up to 23-26 degrees during the day and no higher than 20 at night. All care for seedlings in pots consists of watering, feeding, observing temperature and light conditions.
You can water the peppers only with warm water, about 25 o C. Frequent watering is not necessary, but the soil should not dry out. Watering should be done carefully, from a small teapot, always at the root, without soaking the leaves. As the water grows, more and more will be required, in the phase of several true leaves, depending on the conditions, it will have to be watered every other day or even daily. From time to time, instead of water, you should take a pink solution of potassium permanganate.
You need to feed the seedlings only a couple of times, and even then slightly: you can not use nitrogen fertilizers at all in fertilizing, but limit yourself to ash infusion. The first feeding - when the second pair of true leaves appears, the second - 7-10 days before transplanting to a permanent place. Immediately after feeding, as, in fact, and before carrying out it, you need to water the peppers with clean water.

For feeding seedlings, you can also buy a bottle of ready-made fertilizer: its composition is well balanced, and it is very convenient to use
After the second feeding, it is time to harden the seedlings, it is gradually taught to the breeze and lower temperatures, for which it is taken out onto the balcony, first for half an hour, and then for a longer time. The best seedlings ready for planting should have not only a few pairs of true leaves, but also the first flower buds. If without buds, it doesn't matter, but it should be a fully formed plant with a height of at least 20 cm.
Sowing into a box with subsequent picking
Pepper picking is not very desirable, but it is quite possible if necessary. Therefore, often, in order to save space, seeds are first sown in small boxes or just cardboard boxes of a suitable size: for the first time, a layer of soil 4-5 cm thick is enough. Sowing is simple.
- If the planting container does not have holes in the bottom for the drain of excess water, you should put a centimeter layer of drainage (coarse sand, crushed eggshells, etc.), and the prepared soil on top.
- Mark grooves (up to 1.5 cm deep), placing them 4 cm apart and water them well.
- Sow prepared pepper seeds 2 cm apart.
- Sprinkle the seeds with soil; re-watering is not required.
- Cover with glass and put in a warm place, temperature from 24 to 28 o C.
- After emergence, lower the temperature for several days.
- When a pair of true leaves appear or a little later, plant them in separate pots and continue to look after as usual.
What are the advantages of growing pepper seedlings in a city apartment? In the ability to constantly check the condition of plants, quickly correct the situation. The downside is that it is not always easy to provide suitable temperature conditions and sufficient illumination.
In a greenhouse
In a heated greenhouse, you can sow peppers at any time, in an unheated one - as the heat comes: the temperature regime is no different from that which should be maintained in an apartment. As a rule, in most regions, heat comes later than is required for sowing pepper seeds for seedlings, so an unheated greenhouse is not very suitable for growing seedlings of this crop: seeds can be sown at home a little earlier. In addition, the greenhouse should be close to the house, because leaving seedlings even for 1-2 days unattended is risky: any temperature fluctuations can cause disease or death of plants. The plus in using the greenhouse is obvious: it is spaciousness and a sufficient amount of light.
Growing seedlings in greenhouse conditions is carried out in the same way as at home. The only peculiarities are that if it is supposed to grow peppers in this greenhouse until the harvest is obtained, the seeds should be sown in a box, and the seedlings should be cut straight to a permanent place so as not to injure the plant roots once again.

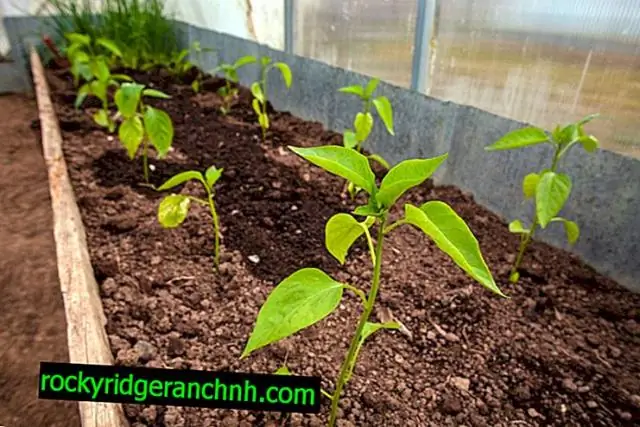
In such a state, as in the figure, the seedlings can be immediately planted in a garden prepared in the greenhouse.
It seems irrational to immediately lay out the seeds in the holes in the garden, without subsequent diving.
With the onset of heat, they make sure that the greenhouse does not overheat, periodically ventilate it: stagnation of air greatly increases the likelihood of plant diseases.
Use of peat tablets
Besides sowing seeds in boxes or individual pots, the use of peat tablets is popular. They have a lot of advantages. The tablets are convenient for growing seedlings of those vegetables that do not like transplanting. They are made from pressed peat, to which the nutrients necessary for the seedlings to grow quickly are added. These are various growth stimulants, fertilizers, anti-fungal components. During manufacture, tablets are placed in a light mesh, which prevents the destruction of the tablets. The shelf life of the tablets is not limited. True, they are not very cheap, and this is their only drawback, but they are quite affordable for growing a small amount of seedlings.
The optimal diameter of tablets for pepper seedlings is 7 cm, but smaller ones can be used, depending on the type of pepper. First, the tablets must be filled with warm water. At the same time, their height will grow several times, and the width will hardly change. Water can be added little by little, until the peat is saturated with it. Before pouring the water, you need to find out where the pill is up: there is a small dimple into which the seeds are sown. Sowing pepper is carried out, as in ordinary soil, after which the seeds are slightly covered and watered a little again. When grown in tablets, the sowing time of pepper can be slightly shifted, it should be carried out after March 8, since the pepper will grow better without picking.

Peat tablets (in the background), when soaked in water, swell and turn into an excellent container for seedlings
Seed tablets should be placed in a transparent box, closed and placed in a warm, bright place, making sure that the tablets do not dry out. The contents of the box must be ventilated periodically. After the shoots appear, the box is opened, the tablets are poured by spraying or simply pouring water into the box. It is not necessary to feed the seedlings in tablets. The main advantage of the tablets is that the seedlings are not dived, but planted in the ground together with the tablet, but it is better to carefully remove the mesh.
Sprouting pepper in a "snail"
The most important advantages of such a "tricky" technique are space savings and ease of retrieving seedlings for picking. However, since pepper does not really like picking, the technique is not very widely used for growing it. The procedure is approximately as follows:
- Cut a strip of dense material that can be rolled up, such as linoleum or bubble wrap. The strip should be about 15 cm wide and a meter or more long.
- Having spread the strip on the table, cover it with a layer of toilet paper, and then pour about 1.5 cm of soil for pepper seedlings, level it.
- The soil is leveled along the edges and the prepared seeds are laid out along one long edge: 1-1.5 cm from it, with a distance of about 4 cm between the seeds.
- On top of the soil, another layer of toilet paper is spread and everything is rolled into a tight roll, fastening it with a suitable elastic band or twine.
- Place the "snail" in a suitable container, with the seed side up, cover with a plastic bag.
-
The container is placed in a warm place and wait for the emergence of seedlings, after which the seedlings are grown until they are picked in the resulting structure.

Growing pepper in a "snail" The snail saves space, but does not last long, until the pepper is transplanted into separate pots
Periodically, the bag is removed and the soil moisture is checked. Remember to lower the temperature in time and then raise it again.
Growing in a diaper
An option for growing in a snail is to use disposable polypropylene diapers. In this case, the diaper can simply play the role of the very material on which a thin layer of soil is poured, seeds are sown and the resulting cake is rolled into a snail. The advantages and disadvantages of this technique are the same as with any variant of the "snail".
Sometimes at home growing seedlings do without soil at all, germinating seeds on "hydroponics". On the unfolded diaper, toilet paper is laid in several layers, moistened well, the seeds are laid out, rolled into a snail and peppers are grown in it until a dive. For pepper, this option does not seem very suitable, it needs nutrients from the very beginning of development.
And, finally, the third direction of using diapers is to make full-fledged containers from them for soil cultivation of seedlings: polypropylene is strong, flexible, the diaper is breathable. Therefore, the material is much better suited for rolling "cups" than dense plastic wrap. In such cups, seedlings are kept until they are planted in the garden. Compared to reusable plastic cups, this design is less durable, but it is not necessary to store boxes with containers in winter, which take up a lot of space.

Perhaps the only reasonable use of non-woven diapers is to make them like pots.
Features of growing on the northern windowsill
Growing pepper seedlings requires heat and sunlight. If the windows face the north side, it is imperative to highlight the seedling containers. But first, they must be placed so that the seedlings are as close to the sun as possible.
You can install various reflective elements: a mirror or, for example, food foil. They need to be placed so that as much sunlight as possible gets into the screen, and the light is reflected on the plants.
But still, on the north side, sowing pepper seeds should be done much earlier. And even backlighting is not a savior. Illuminating pepper seedlings with ordinary lamps is bad: they heat the air too much, and even for bell pepper seedlings, excess heat can lead to excessive drying. Diode lamps for illuminating seedlings seem to be the best option.
Is a pick mandatory
Unlike many other vegetables, picking is not only optional for pepper, but also undesirable: it does not like unnecessary trauma to the roots. But the classic picking is the pinching of the lower segment of the central root to ensure the growth of the lateral roots. However, if there is such a need, the pick can be carried out, but on time and according to the rules.
Pepper picking is carried out in the phase of three or four true leaves, that is, about 3 weeks after the first shoots appear. The day before the pick, the seedlings must be watered abundantly. You can dig up the seedlings with any suitable small tool. It is not necessary to shorten the central root too much, pinch just a little.
Having made a small hole in the ground with a pencil, it is necessary to lower the seedling there to almost the same depth as it grew in the same place: unlike tomatoes, there is no need to do significant deepening, up to cotyledonous leaves. Only if the seedlings managed to stretch out, it should be planted deeper during transplantation, but even then not very deeply.

When planting peppers in pots, do not deeply deepen it
After transplanting, it is necessary to carefully squeeze the roots and pour well with warm water. For three to four days, pepper seedlings should be removed away from the bright sun and the temperature should be slightly raised.
Video: tips for growing pepper seedlings
Growing bell pepper seedlings at home presents certain difficulties, but it is quite affordable even for a beginner. If you choose and prepare seeds and soil correctly, subject to temperature conditions, sufficient illumination and simple care, the seedlings grow of high quality, there is no need to spend money on its purchase. In addition, home grown always adds pleasure.
Recommended:
Seedling Cucumbers At Home: When To Plant In According To The Lunar Calendar, Growing Methods, Rules Of Care
When and how to sow cucumber seeds to get seedlings on time at home, what techniques help in this matter, how to avoid offensive mistakes
When To Plant Peppers For Seedlings In 2019: General Dates And Lunar Calendar
When to sow peppers for seedlings: terms, taking into account the lunar calendar and the characteristics of the region
When To Plant Asters For Seedlings In 2019: General Dates And The Lunar Calendar
When to plant asters for seedlings in 2019. General timing. moon calendar. Features for regions
Seedlings Of Eggplant At Home: Planting According To The Lunar Calendar 2019, Features Of Growing In Different Ways, Rules For Leaving With Video
How does growing eggplant seedlings differ from growing any other, why you need to do it and how to avoid mistakes when planting at home
Seedling Of Petunias At Home: When To Plant In According To The Lunar Calendar, Methods Of Growing, Rules Of Care

Do I need to grow petunia seedlings at home, what problems await, is it possible to overcome them
