Table of contents:
- Author Bailey Albertson albertson@usefultipsdiy.com.
- Public 2024-01-17 22:26.
- Last modified 2025-01-23 12:41.
Beautiful orchids from sugar mastic: manufacturing rules
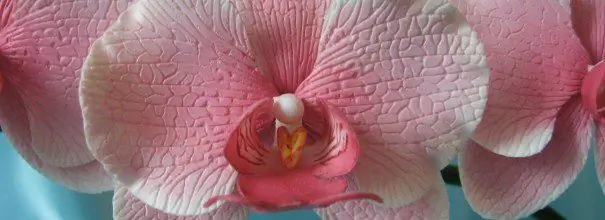
Decorating cakes and other pastries is a very exciting experience. Most often, mastic is used for this, which takes any shape depending on the imagination and skill of the one who works with it. Let's together learn how to make noble orchids out of mastic, which will become a real decoration of the festive table!
Content
-
1 Molding from mastic: the basics
- 1.1 Filipino mastic
- 1.2 From marshmallows
-
2 Sculpting tools
2.1 Tools for working with mastic (gallery)
-
3 Step by step master classes
- 3.1 Classic flower on a wire
-
3.2 Cymbidium
3.2.1 Creating a Cymbidium orchid (video)
- 3.3 Singapore Orchid
-
3.4 Phalaenopsis
3.4.1 How to make a Phalaenopsis orchid (video)
- 3.5 Without punching and wire
Molding from mastic: the basics
At first glance, creating figures from mastic seems to be a difficult task, requiring certain skills not only in cooking, but also in needlework. Looking at the photos of cakes decorated with beautiful flowers, indistinguishable from real ones, it is difficult to believe in the possibility of doing the same with your own hands.
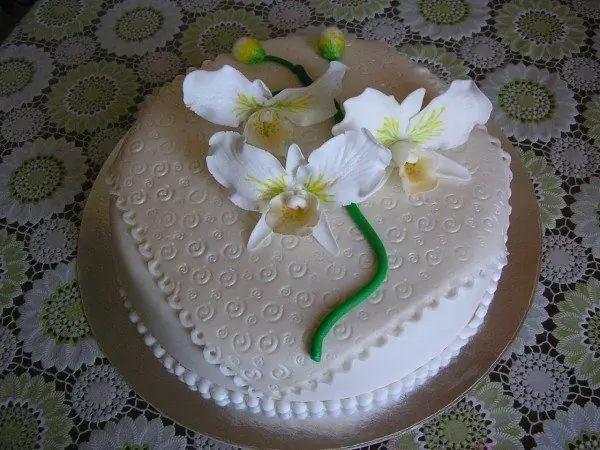
Mastic orchids are very similar to real ones.
However, nothing is impossible if there is desire and patience. And besides this, you will need:
- mastic;
- food colorings;
- tools for working with mastic;
- knife.
When buying tools for working with mastic, take special molds with which you can cut petals
You can easily prepare mastic at home from available products. We offer you several recipes.
Filipino mastic
This snow-white mixture is very good at sculpting. For her you will need:
- 900 g icing sugar;
- 10 tablespoons of water;
- 10 g of gelatin.
Soak gelatin for an hour, heat in a water bath and cool. While it is still liquid, add the icing sugar while stirring the mixture thoroughly.
From marshmallows
Novice pastry chefs appreciate this mastic recipe for its simplicity. At the same time, the mixture turns out to be delicious, in addition, you can add lemon juice to it instead of water and even a drop of flavoring.
You will need:
- 1.5 cups powdered sugar;
- 1 glass of marshmallows;
- 2 tablespoons of water.
- Melt marshmallows in the microwave
-
Place in a special bowl, add water or lemon juice, microwave for another 30 seconds. During this time, the marshmallow will swell. Remove and stir until smooth. If you don't have a microwave, melt the marshmallows in a water bath.

marshmallow mastic Marshmallow is one of the most suitable materials for making mastic
- Gradually add the icing sugar by sieving it through a sieve. Mix thoroughly. The mass should become elastic, but not tight. For greater elasticity, you can add half a teaspoon of butter to such a mastic.
- While the mixture is still sticking to your hands, roll it in powdered sugar and wrap in cling film. Refrigerate for 30 minutes.
These are the simplest and most common recipes for mastic. In fact, there are many more of them.
Sculpting tools
For such a delicate and filigree work, you will need the appropriate tools. You will definitely have a lot at your fingertips:
- rolling pin;
- knife;
- small cookie cutters (sometimes they can be replaced with bottle caps).
But if you are engaged in modeling from mastic, then it is better to purchase special devices. Fortunately, now this activity is very popular, everything you need can be easily bought in a store or ordered online.
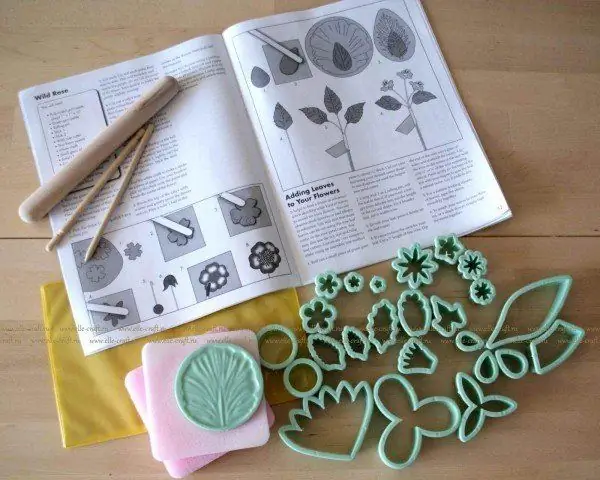
A set of tools for working with mastic can be purchased in the store or ordered online
It is very important to buy exactly what will definitely come in handy in your work, and not to buy everything
- A silicone mat is the most suitable surface for rolling out the mastic. In addition, it is convenient to sculpt figures on it. It is desirable that the rug is absolutely smooth. Its size depends on your preference. The main thing is that working with it is convenient.
- Special smooth plastic rolling pin. Wooden rolling pins often get rough and uneven from frequent use, and glass bottles can be uncomfortable.
-
To trim the mastic and cut out parts from it, roller wheel knives are used. You will need a cogwheel and 3 types of knives:
- large (you can use a pizza knife as it);
- small straight;
- small wavy.
- Stacks are considered the most important and essential tools in mastic work. It is better to take the whole set at once. If you buy selectively, do not forget about the Dresden stick: you will use it all the time.
- Plungers (notches) are small shapes for cutting flat shapes. Since we will be creating an orchid, you need plungers in the form of a drop, leaves and petals, or special cuttings of certain shapes.
- You will often have to cut out circles of different diameters. In order not to look for suitable caps, buy a set of cutters.
- To make it convenient to glue the parts and paint them with food colors, buy brushes. Instead of special ones for working with mastic, which are expensive, you can purchase ordinary ones. Most importantly, they must be synthetic (brushes made of natural wool or hair are not suitable).
- To roll the edges of the petals and leaves of the future orchid, you will need soft mothers or large cosmetic sponges.
- You may need a special kit to dry flowers. You can use candy boxes.
Tools for working with mastic (gallery)
-

cutters - Round cutter set
-

plungers - Leaf plungers
-

stacks - Stacks
-

roller knife straight - Roller wheel knife straight
-

roller knife wavy - Wavy roller knife
-

rolling pin made of plastic - Smooth plastic rolling pin
-

silicone mat - Smooth silicone mat
Step-by-step master classes
So, you got acquainted with the basics of modeling, stocked up with the necessary tools. We will tell you how to make some very beautiful orchids that will become a real cake decoration.
Classic flower on a wire
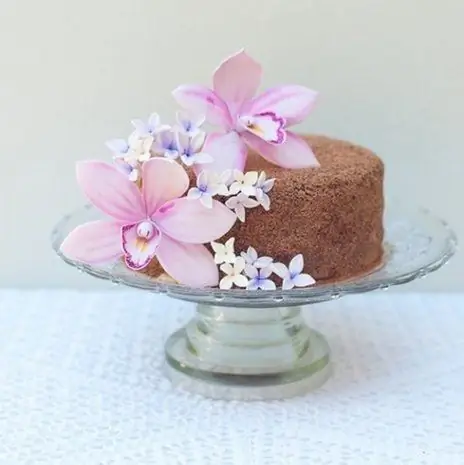
Mastic orchid looks like a real one
For such an orchid you will need:
- marshmallow sugar mastic;
- plungers or sharp knife;
- plastic stack;
- food coloring (if it is powdery, use alcohol for dilution);
-
wire.

marshmallows Use to make marshmallow mastic
-
Take the mastic and roll it out as thin as dough. Use a plunger to squeeze out the petals. They should be of three types:
- with smooth edges;
- smooth with a pointed projection;
-
with carved edges.

blanks for petals Using a plunger, cut out the petals
-
In order for the petal to take a rounded shape and acquire a relief, press it down in the center with a stack and slightly raise the edges.

petal decoration Shape and shape the petal with a stack
-
A petal with smooth edges and a sharp ledge must be attached to the wire. Do this carefully: the wire should be inside the petal, and not stick out from the mastic.

petal on a wire Attach a wire to the petal with smooth edges and a sharp protrusion
-
Stack the groove in the center of the petal. For convenience, hold on to the wire.

petal on wire and stack Add volume with a stack
-
Wrap the petal and make grooves on it, like a real orchid. The middle of the flower is ready.

middle of the flower Form the center of the flower by wrapping the petal and making grooves
-
Attach a petal with a carved edge to the center. Pin it with your fingers to secure it to the wire.

petals on a wire Attach the second petal with carved edges
-
At this stage, you can start painting. Dilute colorants in small containers, such as plastic bottle caps. For a classic orchid, choose several shades of pink and purple. Gently apply lilac paint to the edge of the petal and draw a line in the center. Do this lightly, blending in with a small amount of dye on the brush.

petal coloring Start applying dye to the petals
-
Apply orchid-like spots to the petal around the core. Color in all the other details. For clarity, you can keep a photo of a real orchid in front of your eyes. After that, collect all the petals into a flower and dry the finished product.

orchid petals Apply orchid-specific spots
Cymbidium
This beautiful flower of incredible color will require neatness and attention from you.
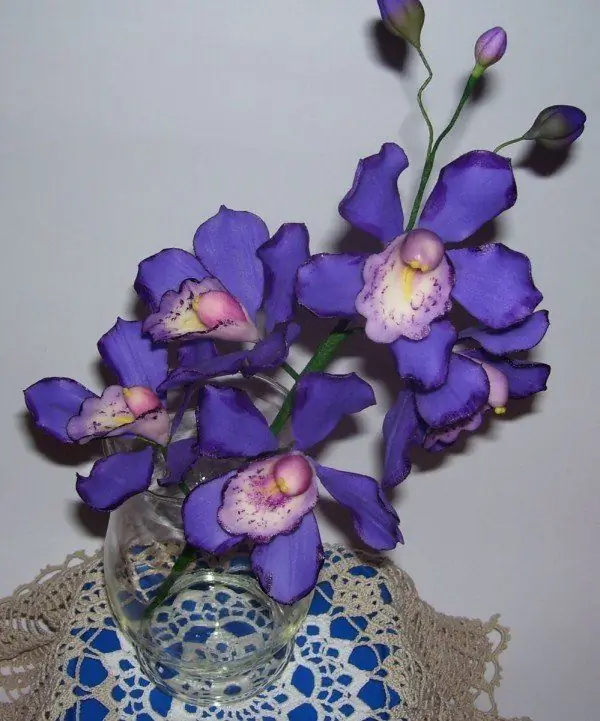
Mastic Cymbidium Orchid will take a little more time, but the result is worth it
So, you will need:
- purple mastic;
- felling;
- board or rug (with outlines for veins);
- rolling pin;
- teip tape;
- wire;
- stack ball;
- stack bone;
- dry dyes.
You can take special cuttings for orchids.
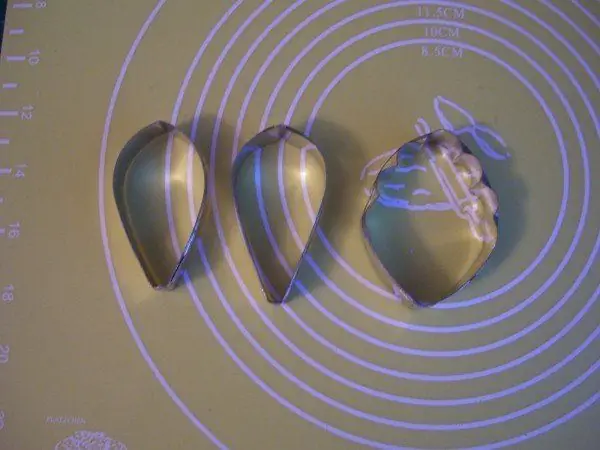
Special cuttings for orchids make your work easier
And if they are not, then use homemade stencils.
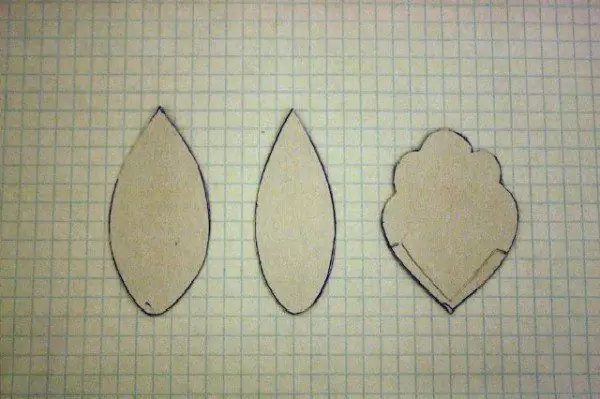
You can make DIY stencils for orchid petals
Make a small ball, form a droplet with your fingers and make a depression with a stack.
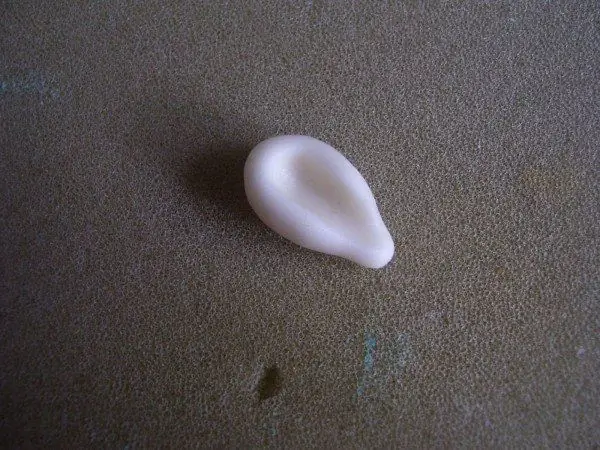
Form an orchid
Make a hook at the end of the wire, thread it into a drop. Dry.
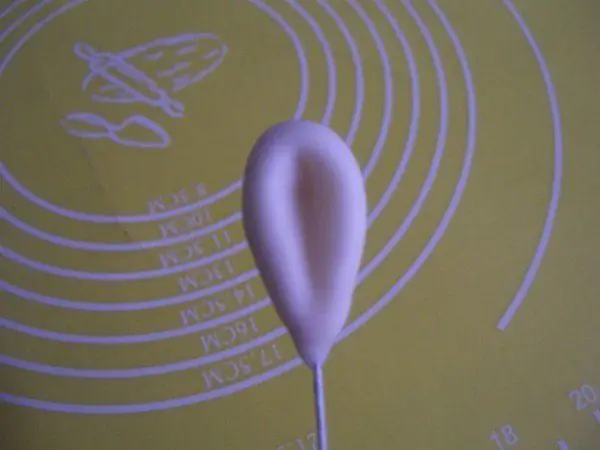
Connect the core to the wire
In order to make the petals, take a wire, "wind" a little mastic on it, lay it on a rug with a line for the veins. Put some more mastic on top, roll out and cut with a punch.
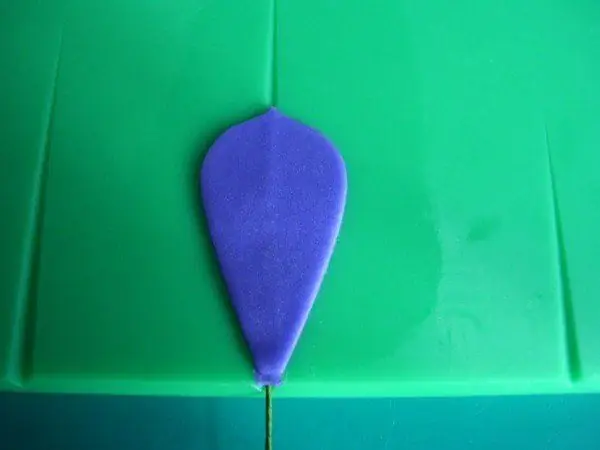
Make some petals using a lined rug
Give the petals a relief using a stack, "stir up" a little ball and leave to dry.
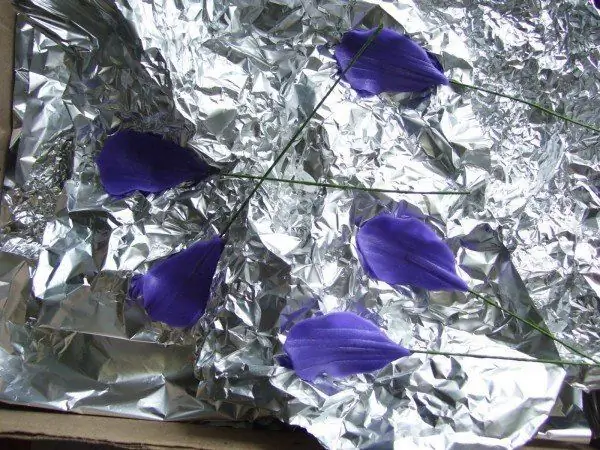
After adding volume and shape, leave the petals to dry
Now make the "lip" of the orchid, that is, the lower petal.
Roll out the mastic, cut out the petal, process the edges with a ball, creating light waves. You can do this directly on the wire, or attach it later - as you like.
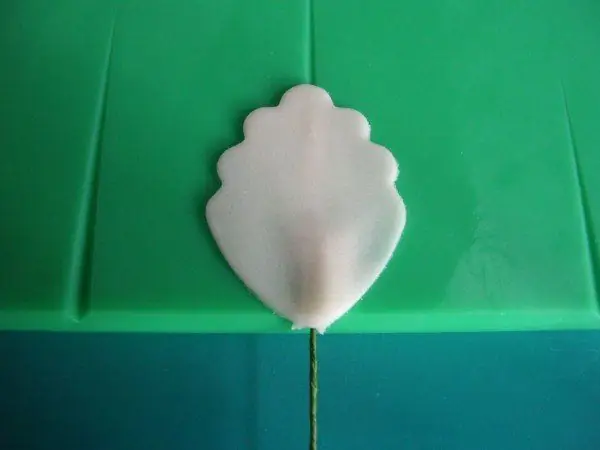
Make the bottom petal with wavy edges
Glue the “lip” to the first piece, dry it.
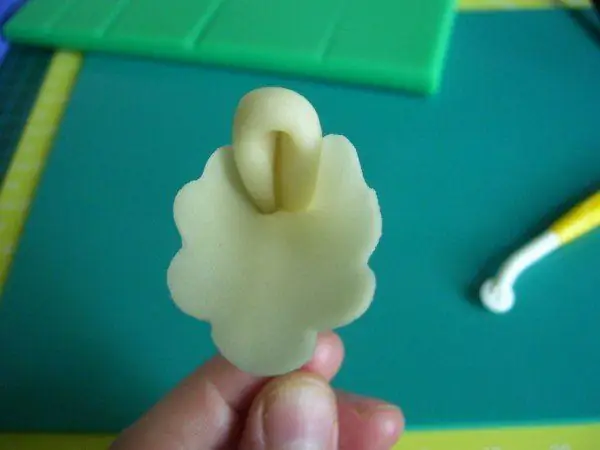
Connect the core to the lower petal
When the blanks are dry, paint them with gel and dry colors.
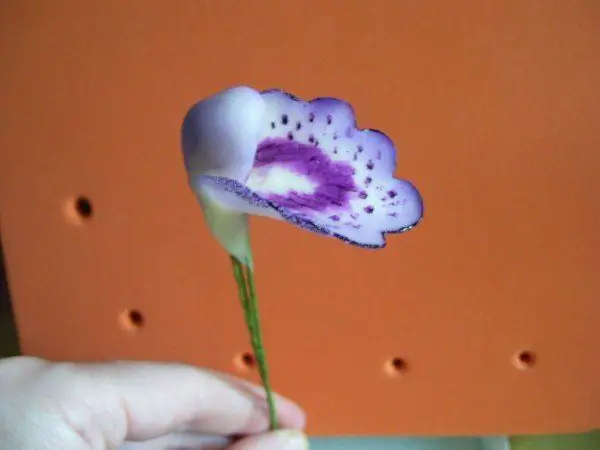
Color the blank with food colors
Glue pistils made of balls and threads to the core.
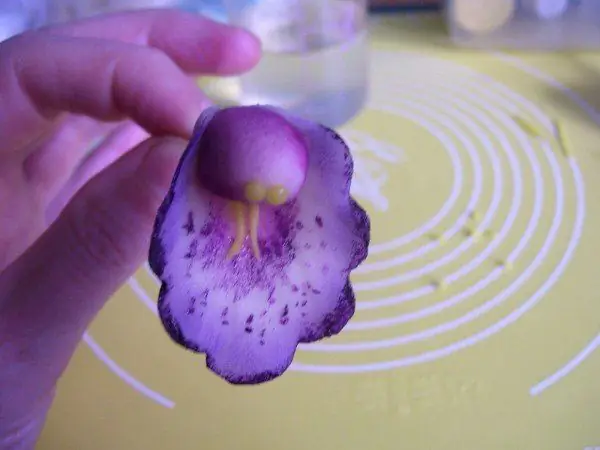
Glue the pistils to the core
Now all that remains is to collect the core and petals.
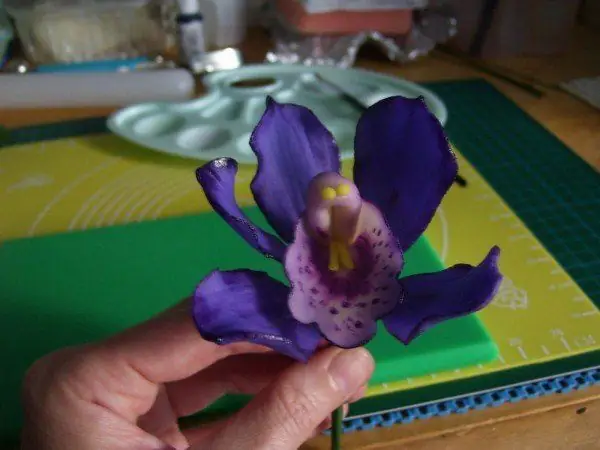
Collect orchid flower
That's all, the sugar mastic Cymbidium orchid is ready!
The creation of the Cymbidium orchid (video)
Singapore orchid
This flower consists of many petals of a complex shape, so you should not make it using improvised tools, for example, a knife. Be sure to buy a special cutting Singapore Orchid.
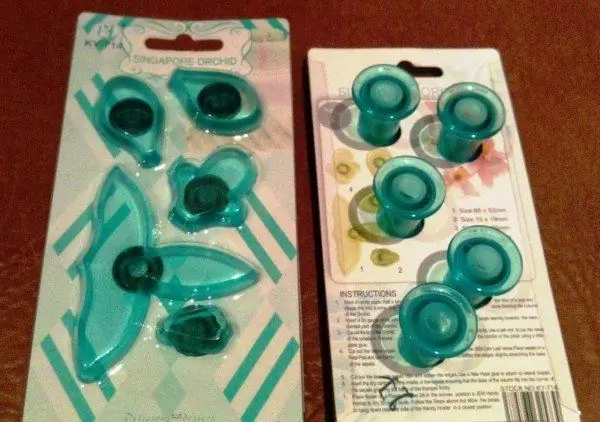
To make a Singaporean orchid, purchase a special felling
In addition to cutting and mastic, you will need:
- food colorings;
- stack ball;
- toothpick;
- drying surface (foil is great).
Roll out the mastic no more than 1 mm thick. First, cut the 3-petal flower. Iron the edges gently with a stack.
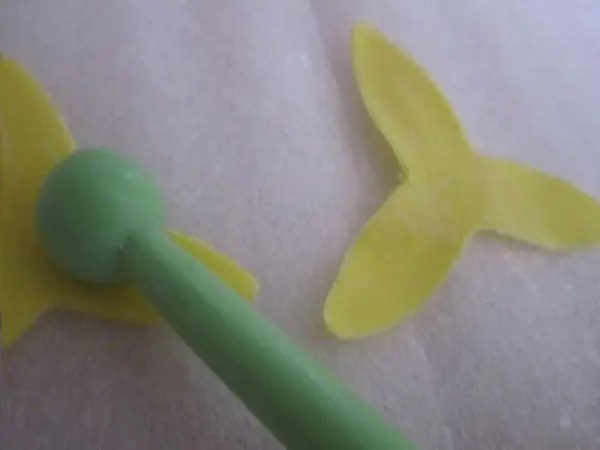
Cut out leaves with three petals, iron them in a stack
Do the same for the reverse side. After that, iron the leaves from edge to center so that they fold slightly.
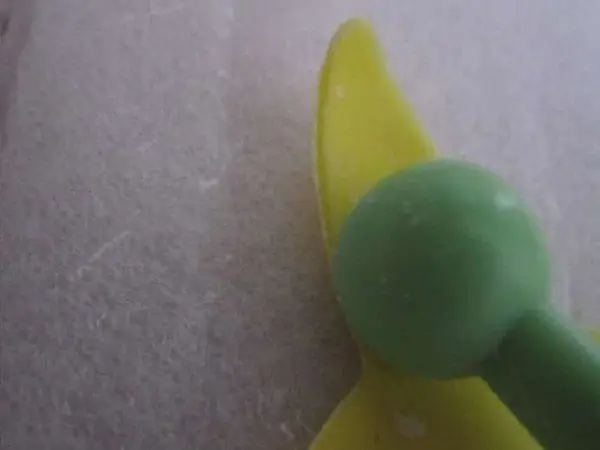
Iron on the back with a stack and then from edge to center
Place the sheets on foil and let dry.
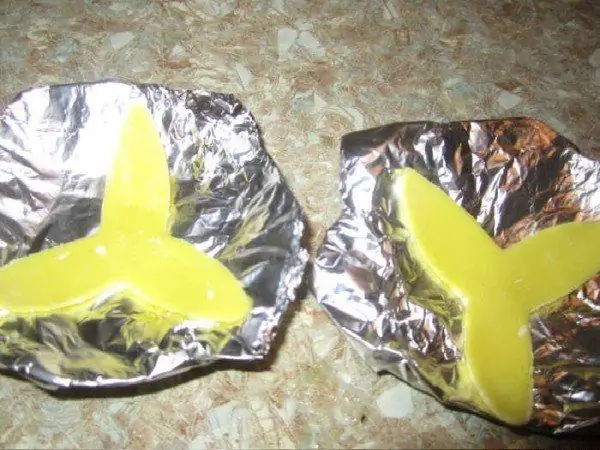
Leave the blanks to dry
Start cutting the petals. There should be 2 of them for each flower.
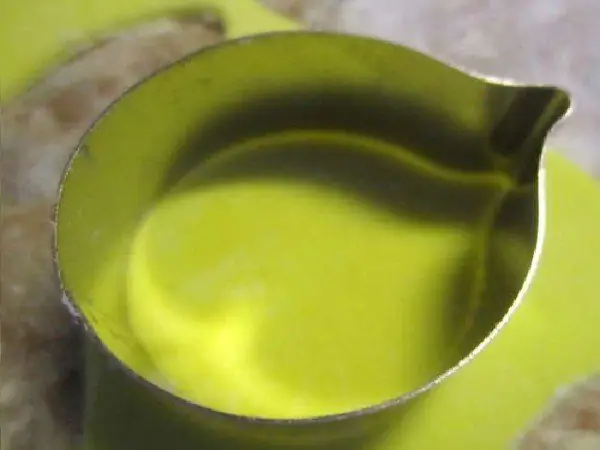
Cut out the petals with a punch or cutter
Iron the edges of the petals with a ball-shaped stack.
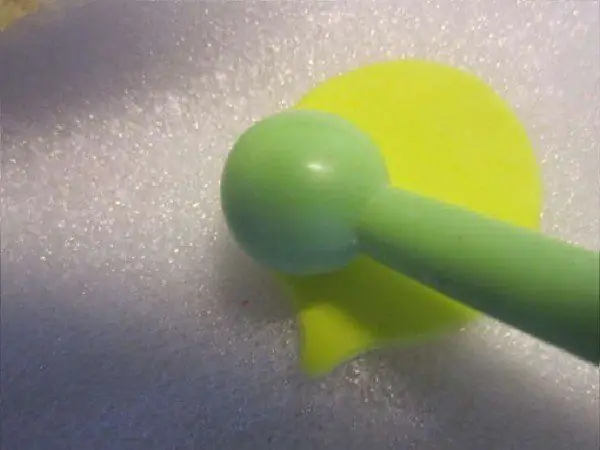
Stack the edges of the petals
Leave the petals to dry, for example, on a wooden rolling pin.
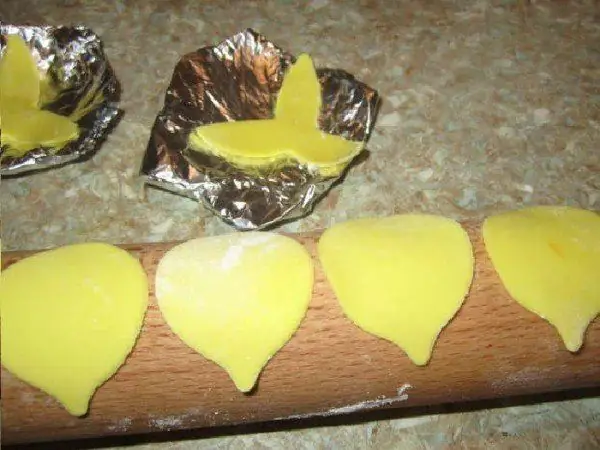
Dry the petals on a wooden rolling pin
Cut out the center of the flower.
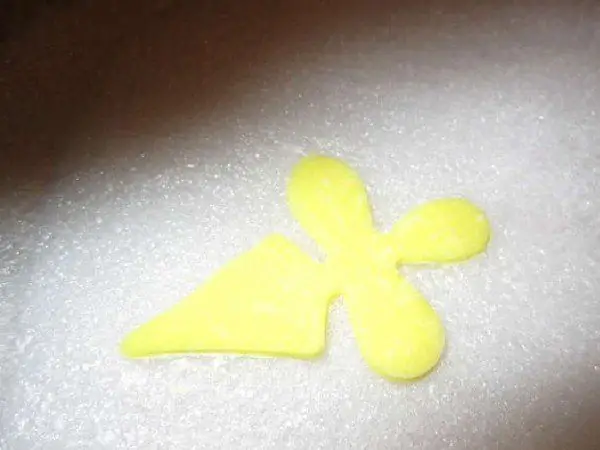
Making the middle of a flower is the hardest part
Carefully cut the ponytail with a knife.
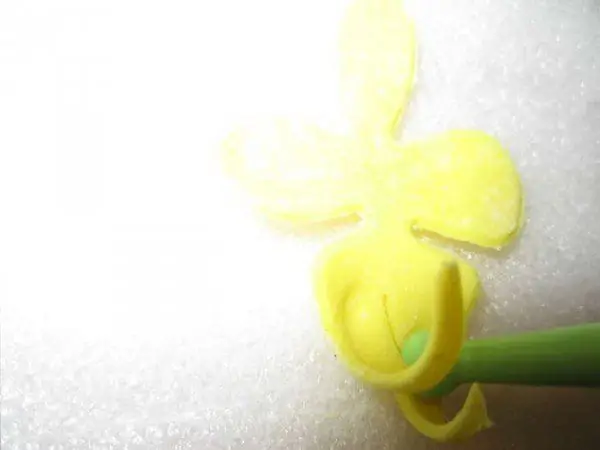
Cut the ponytail and stack the edges
Do the same with the remaining leaves. Walk over them in a stack to wrap them towards the center.
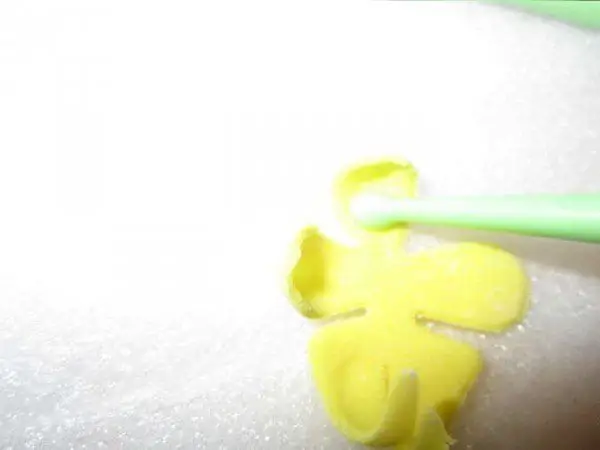
Walk over the leaves in a stack to add volume
Wait until everything is dry.
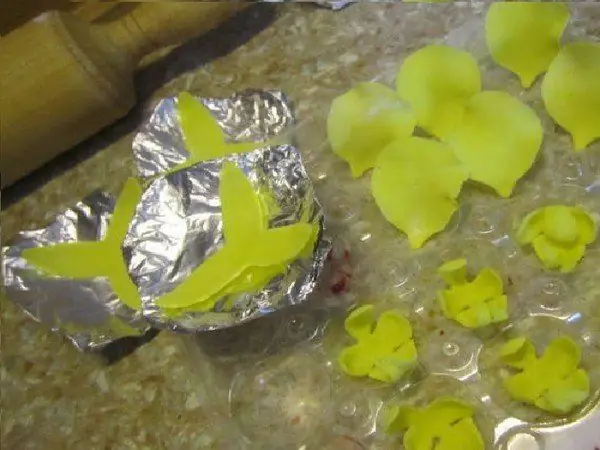
Dry all parts
Now you can collect the orchid. Moisten the middle of the flower with water.
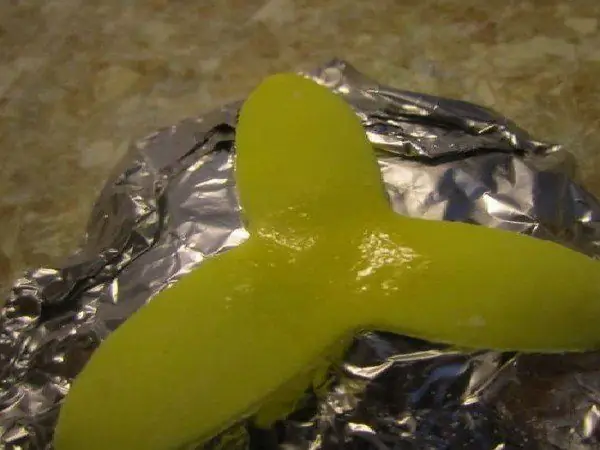
To connect the parts, moisten the flower with water
Glue each leaf carefully.
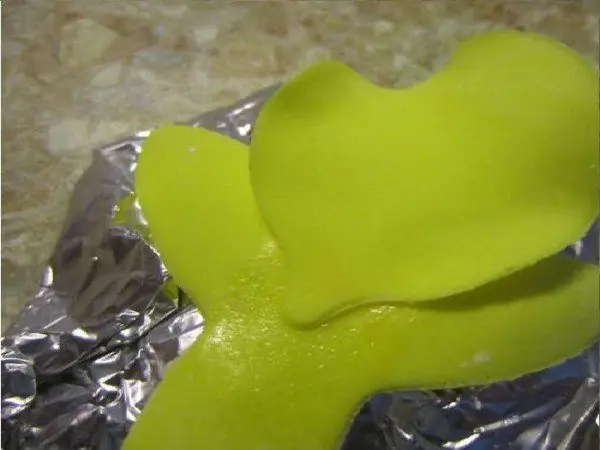
Glue the leaves
After everything is glued, leave the flower to dry.
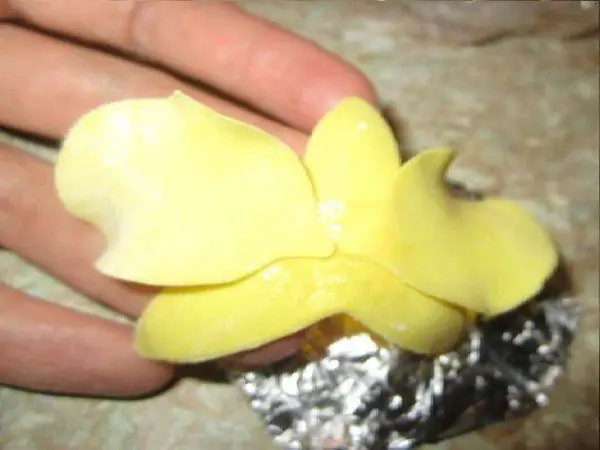
Leave the collected flower to dry
The speck pattern is convenient for applying with a toothpick.
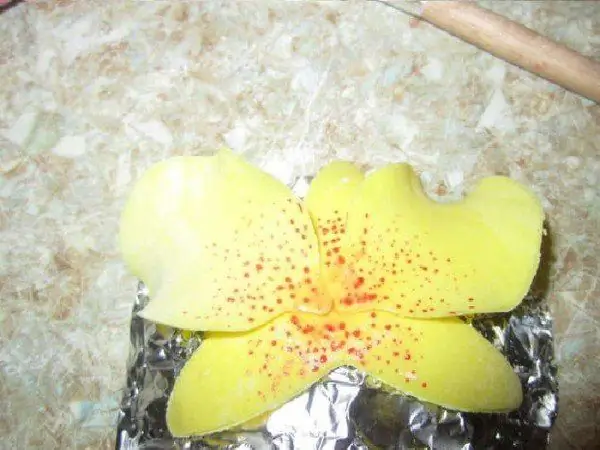
Use a toothpick to paint
Attach the middle:
- make a small ball of mastic;
- run a strip along its surface;
- attach to the center of the flower.
At the end, you can tint the orchid a little.
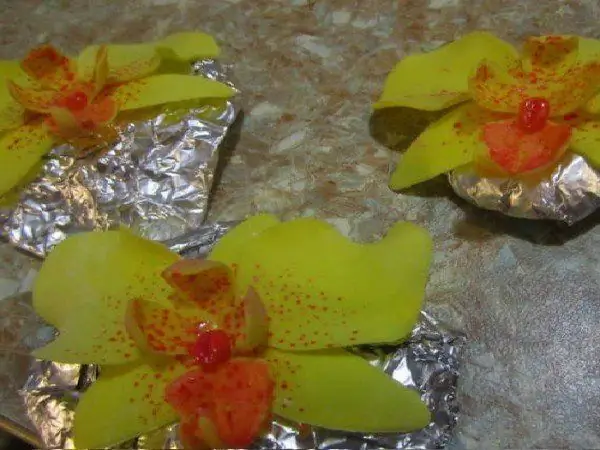
Singaporean orchid is a great decoration for baking
Phalaenopsis
We recommend using professional tools when working on this flower. So, you will need:
- mastic;
- dry food dye, color "Plum";
- cutting down and imprint "Phalaenopsis Orchid";
- teip tape;
- floristic wire No. 24.
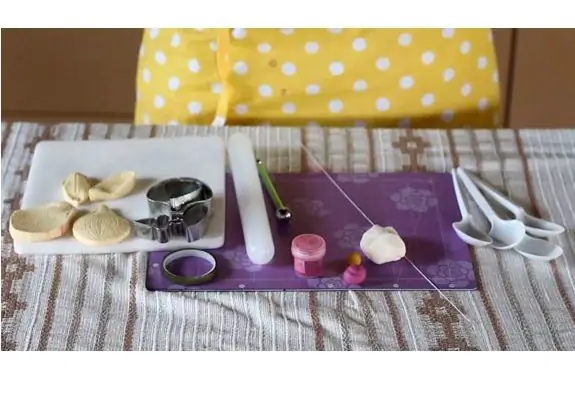
Materials and tools for making Phalaenopsis orchids from mastic are better to purchase professional
Divide the wire into 5 equal pieces with wire cutters.
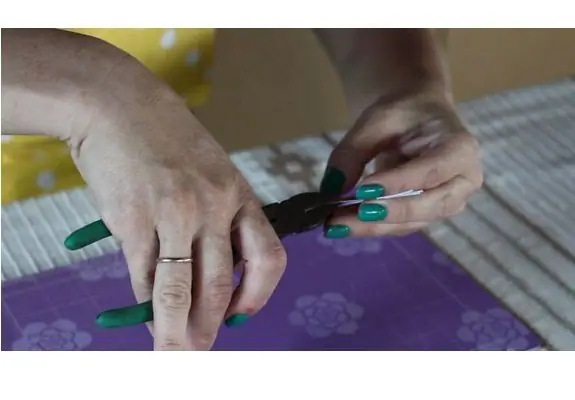
Divide the wire into 5 equal pieces
To make the lower petal, roll a small ball of plum-colored mastic, put it on the wire, roll it out thinly and cut it out.
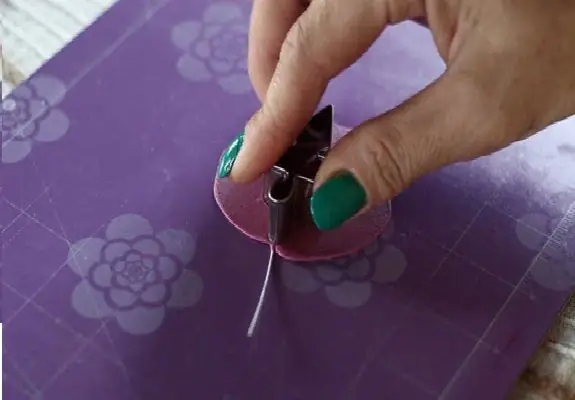
Make the bottom petal of the flower
Roll two small balls out of yellow mastic. Put one of them on the wire. Use the knife to shape the stamens.
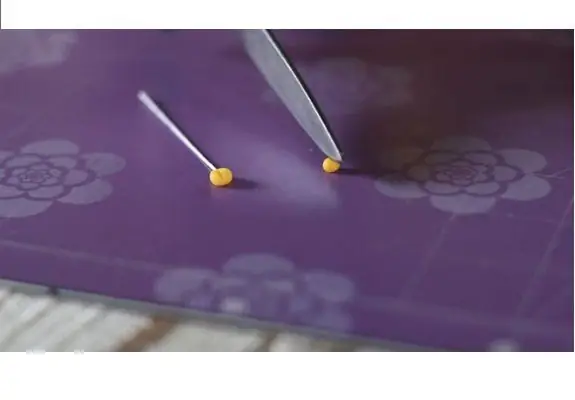
Make stamens from yellow balls
Using the Metal Ball tool, roll out the petal slightly from the sides. Divide the narrow part with a knife, twist with a toothpick.
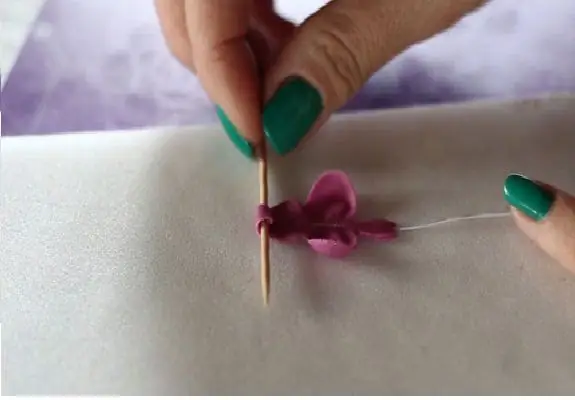
Treat the petal to shape and volume with a stack
Glue the stamen on the petal. You can use vodka or food glue for this. Leave the workpiece to dry.
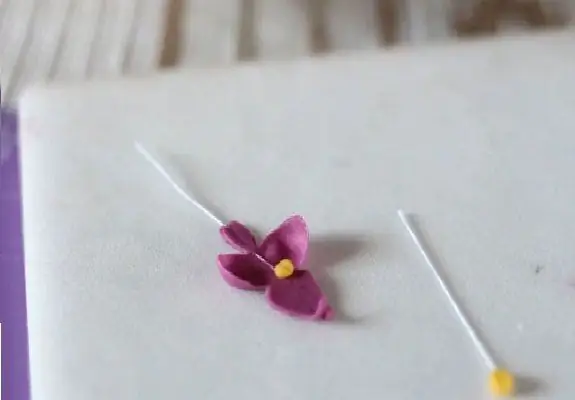
Stick a stamen on the petal and leave to dry
Make 2 more petals in the same way: put a ball of white mastic on the wire, roll it out thinly. Give the shape by the punching cut and the petal structure with the print.
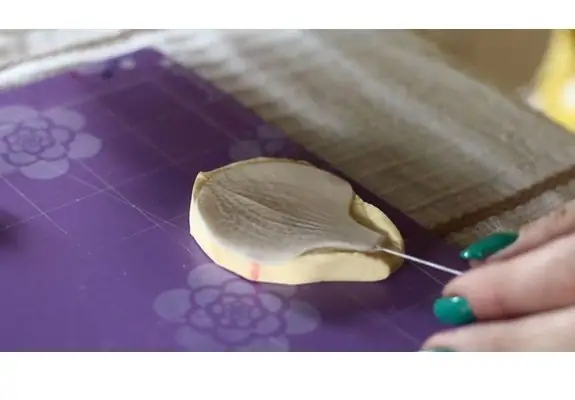
Make two more white mastic petals
For the top and two bottom cups, use the appropriate impressions and notches. Otherwise, they are done in the same way as the previous ones.
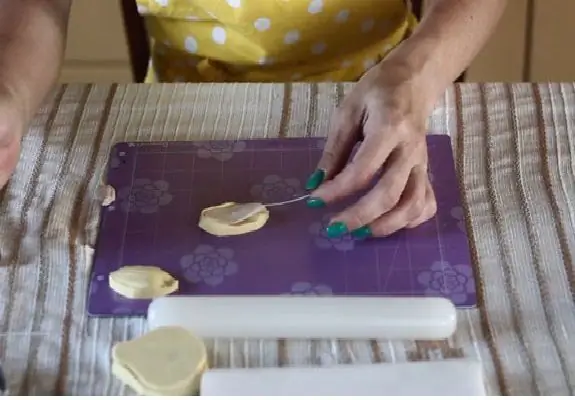
Create a drawing with matching prints
It is very convenient to dry the petal blanks in plastic spoons. This will take about an hour.
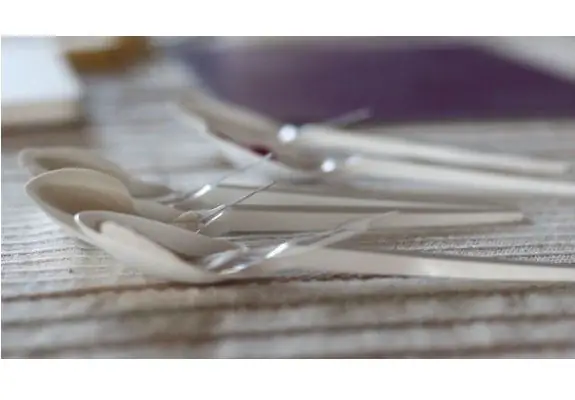
Dry petals conveniently in plastic spoons
When the petals are dry, start painting them with dry dye.
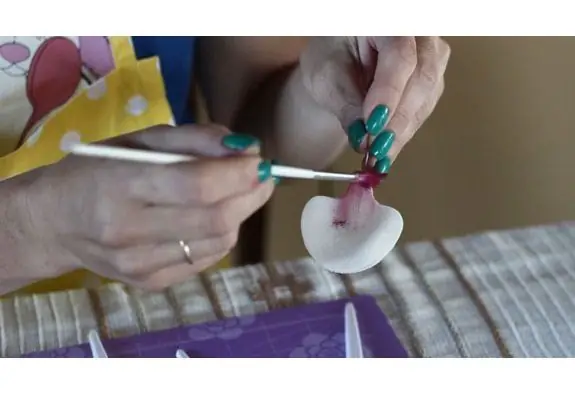
Start painting the orchid with dry dye
Collect the flower. Connect the stamen to the lower petal, twist it with tape. Attach the top leaf in the shape of a bowl opposite the bottom petal, roll again with tape.
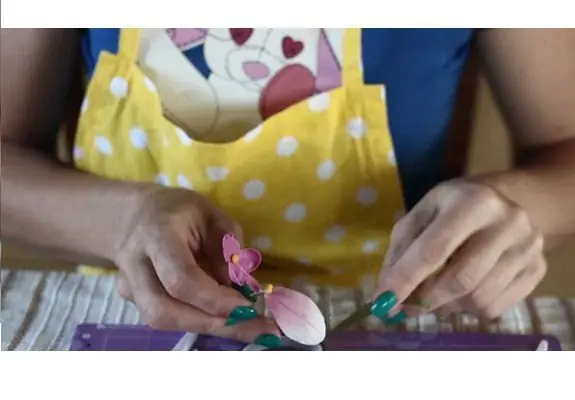
Start assembling the flower
Attach the bottom leaves in the same way.
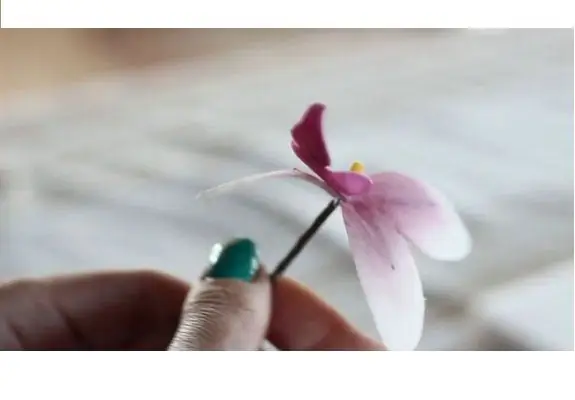
Attach the bottom leaves
Attach the side petals last.
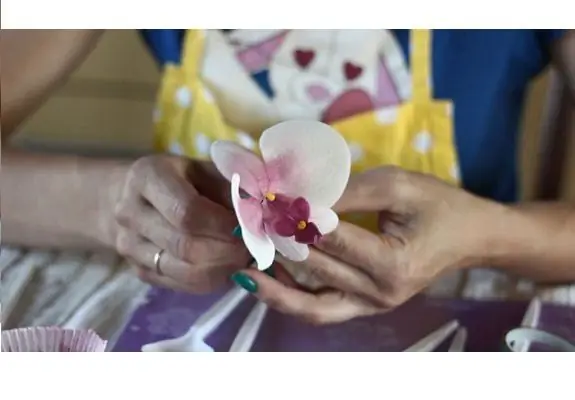
Attach the side petals
Your orchid is ready!
How to make a Phalaenopsis orchid (video)
No punching and wire required
Even if you do not have the opportunity to purchase special tools and cuttings for making orchids, do not despair. You can use a knife, plastic lids, or other handy tools. True, it will take a little more time and effort. In addition, you can easily make your own cutting, for example, from a sheet of tin using a stencil.
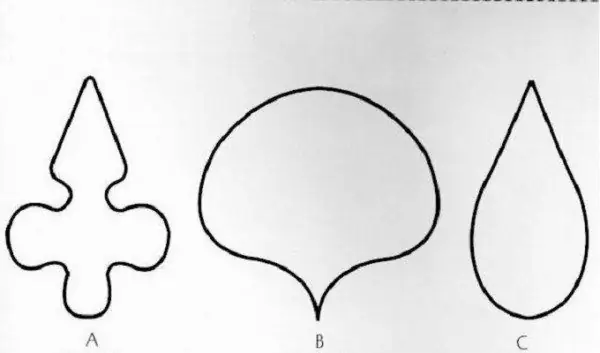
You can make do-it-yourself cuttings using a stencil
Wire for workpieces is also optional. It is most often needed in order to facilitate the creation of the petals and keep them together. This can be easily achieved by simply gluing the flower elements together.
Now you have another one in your collection of ideas. We hope our master classes will help you fall in love with mastic modeling and create luxurious orchids with your own hands. If you have any questions, please ask them in the comments. Comfort for your home!
Recommended:
Master Class For A Cat Lover: How To Make A Collar For A Pet With Your Own Hands

Cats have long and firmly entered our life as pets. These cute animals cheer us up, keep us company and even treat! And we also love to please them with something special. Pets, like humans, have their own fashion, and a collar is a must. Today we will tell you how to make a collar with your own hands []
How To Knit Socks On Two Needles Without A Seam: A Step-by-step Master Class With Photos And Videos

Features of knitting seamless socks on two needles, the choice of materials and tools. Step-by-step descriptions of different knitting options
How To Make A Scratching Post For A Cat With Your Own Hands: A Master Class, Step-by-step Instructions (diagrams, Sizes, Photos And Videos)

Practical step-by-step advice and recommendations for owners of cats and cats: how to make an excellent scratching post with a house with your own hands, with diagrams, photos and videos
How To Sew Roman Shades With Your Own Hands - A Master Class With Photos, Videos And Step-by-step Instructions

Features of Roman blinds, rules for the selection of suitable fabrics. A detailed description of sewing Roman shades with diagrams
How To Glue Wallpaper With Your Own Hands Correctly And Beautifully - A Step-by-step Master Class With Photos And Videos
We correctly glue the wallpaper on the wall on our own. How to glue wallpaper of any kind in the corners of a room. Detailed process description with step-by-step photos and videos
