Table of contents:
- Author Bailey Albertson albertson@usefultipsdiy.com.
- Public 2023-12-17 12:53.
- Last modified 2025-06-01 07:32.
Building a bath from blocks with your own hands with step by step instructions
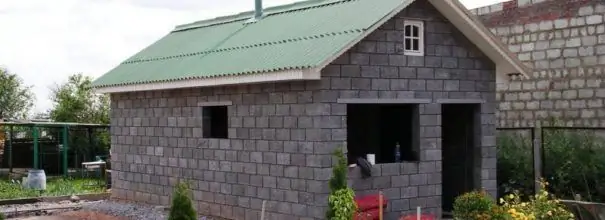
A private bath is convenient and pleasant. Now, when many want to build a bathhouse on their site, the choice of a project and a method of building a building with their own hands from economy class materials is becoming relevant. Building a bathhouse from blocks will cost less than from a traditional rounded log, and will last a long time not only for you, but also for your children, of course, subject to the technology and construction rules.
Content
-
1 Varieties and characteristics of building blocks
- 1.1 Table: characteristics of the most commonly found lightweight aggregate blocks on sale
-
1.2 The choice of blocks for the construction of a bath
1.2.1 Video: construction from blocks based on expanded clay
-
2 Preparatory work before the construction of the bath
- 2.1 Table: materials required for the construction of a bath from blocks
- 2.2 How not to be mistaken when choosing a material
- 2.3 Required tools and protective equipment
-
3 Step-by-step instructions for building a bath
-
3.1 Zero cycle
3.1.1 Video: the foundation for a bath
-
3.2 General construction work during the construction of a bath
3.2.1 Video: laying of expanded clay concrete blocks during the construction of a bath
-
3.3 Finishing work
- 3.3.1 Recommendations for interior decoration
- 3.3.2 Video: finishing the steam room, ventilation
- 3.3.3 Recommendations for outdoor decoration
-
Varieties and characteristics of building blocks
Building blocks are produced using a wide variety of technologies and materials, with some types of blocks available for making in the home workshop. But they are absolutely not suitable for such a structure as a bath. The following materials are used for casting blocks:
- Gas silicate.
- Arbolit.
- Foam concrete.
- Expanded clay concrete.
- Slag concrete.
The binding element of the building blocks can be lime or cement.
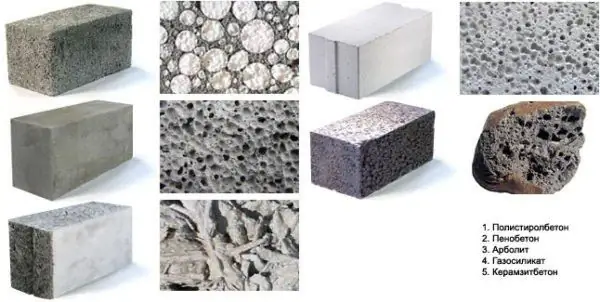
Building blocks made of different materials have different structures
The main properties of building blocks are mainly due to their porous structure:
- Low thermal conductivity.
- Low volumetric weight.
- Medium strength.
- Frost resistance.
- High water absorption.
It is precisely with high water absorption that the prohibition by the official building rules (SP) on the construction of buildings and premises with high humidity, which include baths and saunas, is associated.
Table: characteristics of the most commonly found expanded clay concrete blocks
| Name | Thermal conductivity coefficient, W / (m * K) | Strength grade | Density, kg / m 3 | Frost resistance index |
| Double-hollow expanded clay block 390x190x188 mm | 0.35 | M50 | 1050 | F50 |
| Lightweight aggregate concrete block with four slots 390x190x188 mm | 0.35 | M50 | 1050 | F50 |
| Eight-slot expanded clay concrete block 390x190x188 mm | 0.35 | M75 | 1150 | F50 |
| Solid expanded clay block 390x190x188 mm | 0.3 | M100 | 1100 | F50 |
| Lightweight aggregate concrete block with three slots partition 390x190x188 mm | 0.35 | M50 | 1050 | not standardized |
| Expanded clay concrete block, solid partition 390x190x188 mm | 0.3 | M75 | 1300 | not standardized |
Choosing blocks for building a bath
The choice should start with a clear idea of what a bath is and what qualities the wall material should have for its construction. So, a bath is a high temperature and almost one hundred percent humidity. The building material for it must have the following qualities:
- Heat resistance.
- Fire safety.
- Moisture resistance.
Comparing the indicators of blocks from various materials, we come to the conclusion that the best type of blocks for building a bath are expanded clay concrete blocks, since they have:
- Highest durability.
- Good thermal conductivity.
- Frost resistance.
- Zero shrinkage.
- The least water absorption.
Another advantage is the fact that expanded clay concrete blocks cannot be produced at home, which means that there is less opportunity to run into low-quality goods.
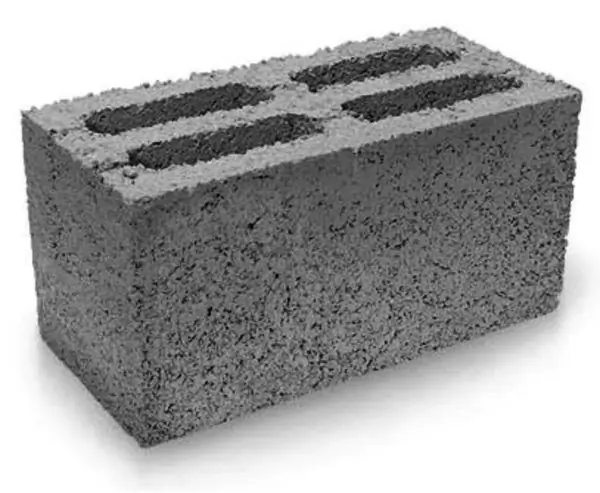
Expanded clay concrete blocks have the least water absorption, so they are best suited for building a bath
Any block is a porous material that absorbs a large amount of moisture under operating conditions. The construction of buildings and premises with high humidity is prohibited by the official regulations in force, but there is at least one way out of every hopeless situation. In our case, this is hydrophobization. In order to close the pores of the material from moisture accumulation and gradual destruction, it is required to treat the blocks with a hydrophobizing solution.
Different compositions are offered on the construction market. One of the most effective and at the same time the cheapest water repellent agent is based on organosilicon compounds. It is released ready-to-use or concentrated for dilution with water before use. The smallest consumption of water repellents is provided by spraying.
Video: construction from blocks based on expanded clay
Preparatory work before building a bath
Having decided on the material, we proceed to the choice of the project or the independent production of the drawing of the future bath. On a large area, you can build a real bath complex with several types of steam rooms (sauna, hamam, Russian bath), but if you own a summer cottage area of up to 10 acres, the size of the structure should be more modest. The mini-bath consists of only two rooms: a steam room and a dressing room.
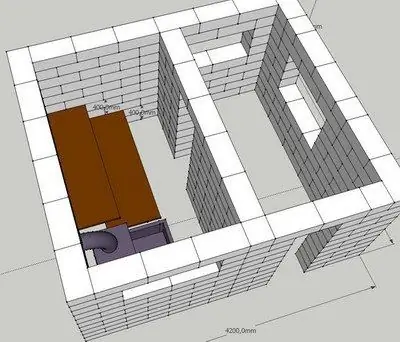
Mini-bath, measuring 4.2x3.6 m in plan, consists of a steam room and a dressing room
You will have to carry water to such a bath in an old-fashioned way - on yourself, no additional amenities - a washing room, a font or a bathroom - are not provided here due to the lack of space.
In a more spacious bath, which has a size of 6x6 m, there is enough space for a relaxation room, a steam room, a bathroom, a washing room with a font and a shower, and a terrace for summer relaxation. During the influx of guests, this house can comfortably accommodate a family of friends.
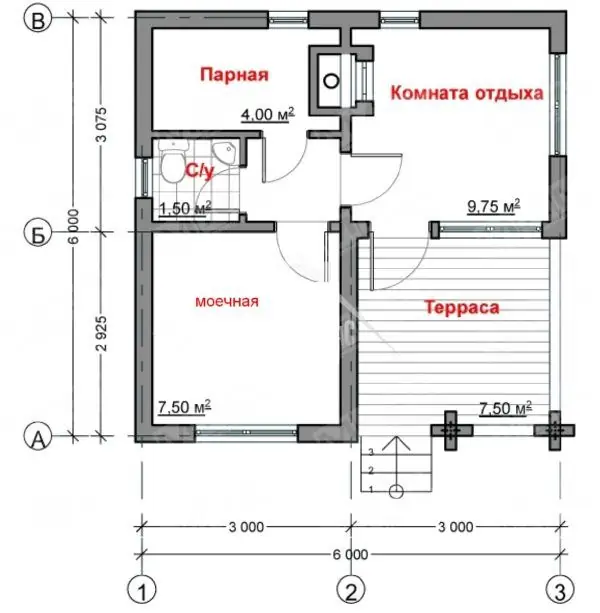
A 6x6 m bathhouse can accommodate a relaxation room, a terrace and even a bathroom
Having chosen a project, we determine the required assortment and quantity of materials.
The house needs a foundation, which can be:
- tape made of monolithic concrete with reinforcement;
- columnar made of concrete blocks;
- piled with a concrete or metal profile grillage.
Strip and columnar foundations require a pit, the depth of which is determined by the level of soil freezing. The depth of soil freezing for each area is determined according to SNiP "Climatology".
Pile foundations do not require excavation.
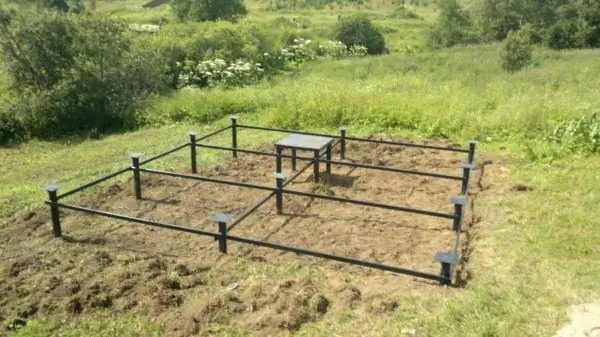
The foundation of screw piles does not require digging a pit and can be carried out in areas with a slope
Table: materials required to build a bath from blocks
| Design | Material | Calculation of the need | Mechanisms and requirements |
| Monolithic concrete foundation | M200 concrete | Foundation width (wall thickness + 30 mm overhang on each side x length of external walls x depth of soil freezing | concrete mixer |
| Reinforcement connected to a frame with a cell 100x100 mm with a wire Ø3 mm |
|
Wire knitting machine | |
| Crushed stone or sand | Foundation perimeter x (foundation width + 100 mm) x 15 mm | Moisten the pillow with water and tamp | |
| Formwork - plastic or edged board | Along the perimeter of the foundation on both sides | ||
| Waterproofing | Fusion bonded bitumen-polymer material based on fiberglass or PVC fabric on bitumen-polymer mastic | 2 layers on top of the foundation | Building hair dryer |
| Plinth | Solid ceramic brick M 150 on cement-sand mortar M 75 | Wall perimeter (length) x 300 mm (height) x 380 mm (width): (250x120x75) (volume of one brick) | |
| Walls | Lightweight expanded clay concrete blocks | (Wall perimeter x wall thickness x height minus the volume of masonry of window and door openings): (190 x 190 x 400) (volume of one block) | Scaffold |
| Water repellent solution | 150 - 300 g per 1 m 2 of block surface | spray | |
| Solid brick M 250 on cement-sand mortar M 75 (cornice) | Wall perimeter x wall thickness x 300 mm (masonry height): brick volume | ||
| Floor | The same, support posts for logs | 250 x 250 x 450: brick volume x quantity - depending on the layout, mesh from 50 x 50 to 100 x 200 cm | |
| Softwood logs | 200 (width) x 50 (thickness), length according to the plan, depending on the arrangement of the support posts | ||
| Insulation | Thickness 150 mm, planning area | Basalt wool or extruded polystyrene foam | |
| Edged board | Thickness 30-40 mm, area according to layout | Rest room, dressing room | |
| Ceramic tiles or porcelain stoneware with a non-slip surface and heat-resistant adhesive | According to plan | Steam room, washing room, bathroom | |
| Moisture resistant chipboard or cement-bonded particle board | 2 layers according to plan | Steam room | |
| Foil | According to plan | Steam room | |
| Windows and doors | Devevyannye with double-glazed windows | According to the project | Larch is desirable |
| Overlapping | Overlapping | 200 (width) x 50 (thickness) after 600 mm, length according to plan | |
| Foil | According to plan | Steam room ceiling | |
| Insulation | Thickness 200 mm, according to plan | Non-combustible slabs or mats made of basalt wool or extruded polystyrene foam | |
| Vapor barrier - moisture-proof membrane | According to plan, above and below the insulation | In addition to the steam room | |
| Running flooring in the attic made of boards or slabs of chipboard, OSB | According to plan | 2 layers | |
| Lining from the lining | Thickness from 10 mm | In a hardwood steam room | |
| Moisture resistant slabs | According to plan | Washing room, bathroom | |
| Coating | Mauerlat - support bar for rafters | Along the length of the longitudinal sides | |
| Softwood rafters | Through 600-900 mm, the section and the angle of inclination are determined by the project | ||
| Lathing, counter-lattice | According to the project | ||
| Super Diffusion Roofing Membrane | Also | ||
| Cover material | Also | ||
| Complementary roof elements: aerators, soffits, drainage system, cornice | Also |
How not to make a mistake when choosing a material
One of the main requirements for a bath is safety. In order not to be mistaken when choosing a material, always ask the seller for a certificate of conformity, buy materials from the manufacturer or in large shopping centers. A purchase from a private owner can turn into the acquisition of a fake. This is especially true for wall, roofing materials and insulation.
If the seller says that modern steam and waterproofing materials can be replaced with old-fashioned roofing felt and plastic wrap - do not flatter yourself, the service life of these materials is no more than 5 years, and your goal is to build a bathhouse that will stand for more than a dozen years.
For wooden structures of a bath, coniferous woods are recommended - spruce, pine, the best option is larch. All of them are resistant to decay and affordable. And it is better not to use conifers only for cladding a steam room, since at elevated temperatures they release resin.
Required tools and protective equipment
To build a foundation, erect a building from blocks and install a roof with a supporting structure made of wood, you will need the following tools:
- Building level.
- Measuring tape or tape measure.
- Plumb line.
- Cord.
- Electric jigsaw, plane, grinder or carpentry machine.
- Hacksaw for metal.
- Scissors.
- Stretcher or wheelbarrow.
- Solution container.
- Trowels.
- Hammer, pliers.
- Drill or screwdriver.
- Ladder.
- Shovel.
- Scaffold.
When performing work, you will need protective equipment and overalls:
- Coveralls.
- Helmet.
- Mittens.
- Respirator.
- Protective glasses.
Step-by-step instructions for building a bath
The construction of any structure can be divided into several stages:
- Preparatory work - collection of initial data, design, approval, provision of materials and equipment.
- Zero cycle - digging a pit, building a foundation, supplying underground utilities.
- General construction works - erection of walls, ceilings, coverings.
- Finishing work.
- Equipping with appliances and furniture.
- Delivery of the object.
Zero cycle
The construction of a bathhouse on its own site begins with zero cycle work.
-
Having determined the place where the building will be located, a trench is dug out by the size of the foundation. The depth of the trench is the height of the foundation plus the height of a cushion of sand or fine gravel. The cushion material is poured into the trench, spilled with water and compacted with a roller.

Foundation markings According to the available dimensions, a trench is dug under the foundation, which is then covered with a layer of sand and compacted tightly
-
Formwork is knocked down from the prepared boards, the internal dimensions of which exactly correspond to the external dimensions of the foundation according to the project.

Formwork under the foundation for a bath Before pouring the foundation in the dug trench, the formwork is knocked down, which is strengthened with transverse struts and struts
-
Reinforcement cages are installed in the formwork so that the concrete cover is at least 30 mm. The frames are tied together with wire.

Installation of the reinforcement cage in the formwork A reinforcement cage is installed in the assembled formwork
-
In the places of passage of communications, sleeves are laid from scraps of plastic pipes, with a diameter exceeding the pipes of communications by 70-100 mm.

Mortgages for entering communications At the places where engineering communications are entered in the formwork, sections of plastic pipes are mounted, which are filled with wet sand during the pouring of concrete
-
Concrete mix is poured. It is more convenient to do this with a concrete mixer by purchasing ready-made concrete. The concrete is left to mature for 3-5 weeks.

Bath strip foundation After the concrete has matured, the formwork is removed
Video: foundation for a bath
General construction work during the construction of a bath
-
The top of the concrete foundation is primed with a primer for better adhesion of waterproofing, then waterproofing is laid from two layers of fused bitumen-polymer material (waterproofing, bikrost, etc.). Fusion is carried out using a construction hair dryer. It is possible to lay waterproofing without fusing on a layer of bitumen-polymer mastic.

Bath foundation waterproofing It is possible to lay the waterproofing material on the frozen foundation by spraying or gluing on bituminous mastic
-
The base is laid from solid ceramic bricks of plastic pressing on a cement-sand mortar.

Brick base for a bath The basement row is laid out of solid red brick on cement mortar
-
They start laying walls from blocks pre-treated with a hydrophobizing solution:
-
masonry is led from the corners. Having laid out 3-4 rows of corner blocks along the building level, they pull the cord, and along it, checking the vertical with a plumb line, they lay the masonry to the entire height of the building, not forgetting about the window and door openings. Masonry should be carried out on a warm solution of fine-grained aerated concrete, in order to avoid cold bridges;

Laying of expanded clay concrete blocks Blocks are laid from the corner along the wall along a stretched cord
- if necessary, the blocks are adjusted to the desired size with a hacksaw. Each 4th row is laid with reinforcement or reinforcing mesh made of Ø3 mm wire with cells of 150x150 mm. The armature and all metal elements in contact with the masonry must be protected against corrosion by painting with enamel or special compounds;
-
over window and door openings up to 1200 mm wide, ordinary lintels are made by laying boards 40 mm thick. With a larger opening width, the lintel must be made of rolled metal or purchased ready-made from aerated concrete. A solid brick is placed under the support of concrete or metal lintels 250 mm wide on each side of the opening exceeding its width;

Laying blocks over window and door openings Ordinary lintels from a board or metal profile are made above window or door openings
- the upper part of the wall - the cornice - just like the basement, is made of solid brick. For laying the Mauerlat along the load-bearing walls in the brickwork, a recess is made with a width of brick and a height of at least 150 mm (depending on the height of the timber);
- when erecting the upper part of the walls, mortgages are mounted in the masonry for fixing the lags of the attic floor. Lags are attached using corners.
-
-
Mauerlat is being laid. The rafter structure is supported on it. A superdiffusion membrane is attached to the rafters using a counter lattice. Membrane sheets are mounted with a longitudinal and transverse overlap of 150 mm or according to the manufacturer's instructions.

Mauerlat mount For fastening the Mauerlat in the armopoyas, screw pins are walled up
-
The lathing is carried out according to the requirements of the manufacturer of the roofing material.

Bath roof lathing For many roofing materials under the crate, it is necessary to arrange a ventilation gap
-
They mount a coating, a drainage system, additional roof elements - strips, soffits, aerators, etc.

Bath from expanded clay concrete blocks After complete installation of the roof, the installation of windows and doors is performed
- They mount and perform sealing of window and external doorways.
- Around the building, a blind area of concrete with a thickness of 30 mm and a width of 700 mm is poured. It is arranged on a compacted crushed stone base with an iron surface or from paving slabs on a cement-sand mixture on a sand cushion.
-
Internal partitions are laid from blocks with a thickness of 90-120 mm or bricks, not forgetting about doorways and lintels.

Partition masonry Partition walls are made of special blocks of smaller thickness
- The attic floor is mounted: cranial bars are attached to the logs (you can do this beforehand, before the installation of the log), a subfloor is made, a vapor barrier is laid. A layer of foil is placed over the steam room to reflect heat. Insulation is mounted, running flooring is performed in the attic.
- Laying the floor: laying the supporting pillars, installing waterproofing on their top, installing the logs with attached cranial bars, laying the sub-floor.
-
Install moisture, windproof material, lay insulation, over the vapor barrier, securing it with a stapler. In the steam room, a heat-reflecting layer is additionally laid - foil or foil insulation.

Installation of a heat-reflecting layer in a steam room In the steam room, a foil material is laid on top of the insulation, which will act as a heat-reflecting screen
- In the recreation room, boards of a clean floor are mounted, in a steam room, a washing room and a bathroom, plates of moisture-resistant material are laid in two layers, and then tiles or other finishing coating.
General construction work completed. You can start finishing.
Video: laying of expanded clay concrete blocks during the construction of a bath
Finishing work
The decoration of the bath premises speaks most of all about the tastes of the owners. The variety of finishing materials gives a huge choice. There are no direct prohibitions on this or that material, with the exception of the steam room, where all materials must be heat-resistant, which means that no coatings made of plastic, linoleum or laminate can be used.
Interior design recommendations
-
In the steam room, interior decoration is traditionally performed with hardwood clapboard. The wall near the stove is faced with stone or brick.

Steam room decoration The steam room is usually upholstered with linden or aspen clapboard, and the wall around the heater is finished with stone
-
In rooms with a humid mode - a washing room and a bathroom - the walls are most often tiled with ceramic tiles.

Car wash finishing The washing room in the bath is most often finished with ceramic tiles.
-
If a shower stall is installed in the washroom, a moisture-resistant finish is optional. Walls can be sheathed with clapboard, painted or finished with decorative plaster. The same applies to the break room.

Finishing the sink when installing a shower stall If a shower cabin is installed in the washing room, the walls can be finished with any material, including clapboard
Video: finishing the steam room, ventilation
Exterior decoration recommendations
If we are guided by the current norms on the resistance to heat transfer of external enclosing structures, then a wall with a thickness of 400 mm made of expanded clay concrete blocks will have to be insulated from the outside.
-
The easiest way to insulate the walls is with stone wool or extruded polystyrene foam on a wooden frame with a curtain facade made of siding or block house, which will give the complete illusion of a log bath.

Thermal insulation of a bath from expanded clay concrete blocks The bath is insulated with mineral wool or extruded polystyrene foam, and the frame can be upholstered on top with siding, blockhouse or clapboard
-
The plinth, also insulated, can be faced with composite panels with imitation of stone masonry.

Bath plinth facing Insulated plinth can be finished with composite panels
The choice of roofing material is also great: from metal profiles to more expensive materials - composite or flexible tiles.
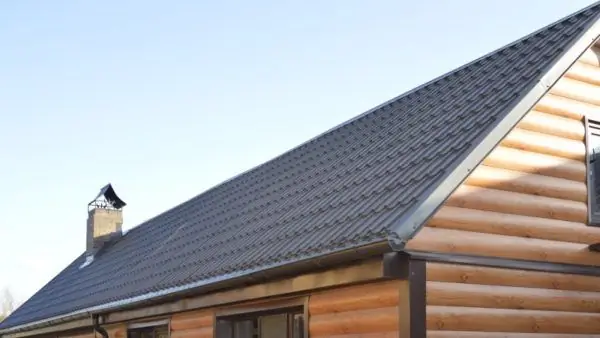
The most popular roofing for suburban buildings is metal
The bathhouse, built according to the rules and decorated in the taste of the owners, can serve for more than a decade and give pleasure from taking water procedures to several generations of owners.
Recommended:
How To Make A Shed With Your Own Hands From Foam Blocks - Instructions With Photos And Videos
Every owner knows about the need for a barn on the territory of home ownership. Everyone can build this necessary outbuilding without the involvement of specialists
DIY Concrete Or How To Knead Concrete With A Shovel
Do-it-yourself concrete, how to prepare concrete and spend a minimum of effort. Step-by-step instructions on how to mix concrete with photos and videos
Interior Sliding Partitions For Zoning The Space Of A Room: Design And Material Features, Their Pros And Cons, As Well As Installation Instructions, Photos
The device and purpose of interior sliding partitions. Varieties of partitions by design. Independent production and installation
Toilet Roller Shutters: Varieties And Material, Pros And Cons, As Well As How To Properly Install And Operate
Appointment of roller shutters in the toilet. Types and dimensions of roller shutters. Assembly and installation process. Features of repair and operation of roller shutters
Ondulin As A Roofing Material: Description, Dimensions, Pros And Cons, Reviews And Photos
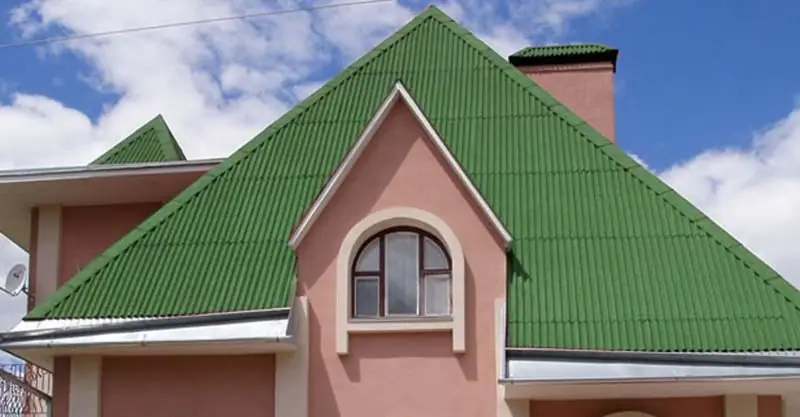
Ondulin characteristics: cost, service life, dimensions, ease of installation and operation. Advantages and disadvantages of the material. How to choose ondulin for the roof
