Table of contents:
- Author Bailey Albertson [email protected].
- Public 2023-12-17 12:53.
- Last modified 2025-06-01 07:32.
Winter shoes slip - what to do

With the arrival of frost, ice on the street becomes a serious problem. You have to walk carefully and slowly so as not to fall right on the road. And if winter shoes slip, then the risk of getting a real injury becomes very high. To avoid this, you can resort to tools at hand to help the outsole improve traction.
What to do if winter shoes slip
If the soles of your favorite boots or boots are too slippery, you can try to fix the problem yourself or contact a shoe maker.
Home Ways
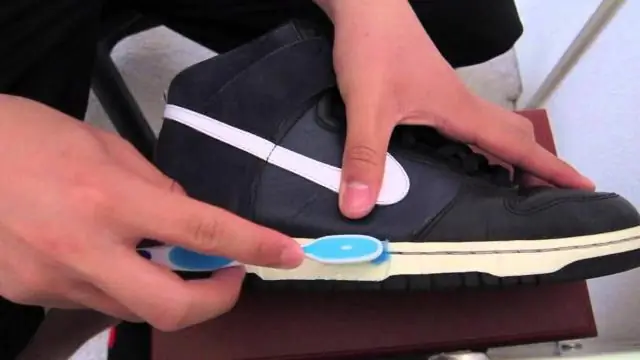
Before handling shoes, wash them thoroughly, brush the dirt from the sole with a brush and dry. After complete drying, you can start working. To quickly fix a slippery sole, you can resort to one of the proven folk methods:
-
adhesive plaster. This pad will last for 2-3 days maximum, so don't forget to update it. You will need the simplest textile adhesive plaster in a roll. No bactericidal, water-repellent and other variations - they will only worsen the situation with their slippery coating. Cut the patch into several small pieces (2x2 cm is enough) and glue them where the sole touches the ground. For the greatest effect, you can cut narrow strips (1x3 cm) and glue them crosswise. This method is not suitable for wet weather - the adhesive plaster will quickly get wet and fall off on the first day;

Adhesive plaster Use the cheapest rolled adhesive plaster for work (the one that is very painful to remove)
-
felt or felt. Processing will last for 3-5 days. If you have extra pieces of fabric, you can glue them onto the sole. To do this, use the Moment glue for rubber. There are two main methods for gluing felt - with a large piece in the center of the sole or with a narrow strip around the perimeter. To select, determine which area is most in contact with the road. To do this, pay attention to the scuffs on the sole - it is better to glue felt where there are more of them. This method is also not suitable for wet winters and slush;

Felt The harder the fabric feels, the better it will prevent slipping.
-
sandpaper. Effectiveness lasts up to 3 weeks depending on the weather. Select a coarse sandpaper and cut out four rectangles. Choose the size based on the area of the sole. You will need two rectangles for the heels and two for the area from the middle of the foot to the toes. Glue the sandpaper with the "Moment" glue for rubber or any equivalent;

Sandpaper on the sole Sandpaper on the sole does not look very aesthetically pleasing, but significantly reduces the risk of falling on a slippery road
-
PVA. Apply the anti-slip pattern of your choice with glue. You can even draw hearts if you like - the shape is not that important here. Most importantly, do not cover the entire surface of the sole. While the glue is still wet, sprinkle it with a small handful of regular sand on top. Wait until the composition is completely dry before going outside. The main advantage of this method is moisture resistance. Enough for it on average for a couple of weeks.

PVA The usual stationery PVA is quite suitable
Professional methods
If you want to get a reliable and lasting result, the best option would be to contact a master. He will be able to:
- optimize the tread. The sole pattern is the main mechanism for reducing slip. The deeper and more often it is, the more tenacious the shoe becomes. The craftsman will be able to deepen existing grooves and create new ones. Note, however, that this method is only suitable for shoes with thick soles. If you have boots with a sole thickness of 7 mm or less, it is better not to resort to this option - there is a risk that the shoes will simply crack and become unusable;
-
change or install heels on the heel. If your shoe has a noticeable heel or even a stiletto heel, you can add a heel to it to reduce slip. It will wear off over time. After that, the heel itself begins to deteriorate, so you need to change the heels on time - as soon as they wear out by about 2/3. The cost of such a service rarely exceeds 1,000 rubles. But the anti-skid effect will be noticeable - the hard part will bite into the ice and help you keep your balance;

Heel replacement Heels are designed not only to protect against slipping, but also to increase the wear resistance of the heel
-
install metal parts in the sole. Screws are usually used as anti-skid elements. If you have a rough idea of the principle of operation of studded tires, then this method will seem quite rational to you. Lots of small, rigid parts provide a good grip. This method is extremely effective, but very dangerous for the shoe itself. Only a proven master should perform the procedure;

Sole screws If a non-professional takes over the work, there is a risk of simply ruining the shoes.
-
make ice shoes. They can be bought not only from a shoe maker, but also in many shops of useful little things, departments like "everything for one price" and similar places. Their principle of operation is the same as in the previous method - many small spikes bite into the ice and prevent slipping. However, ice shoes are not built into the shoes, but put on them like galoshes. Now on sale you can find accessories for any foot size and style - from wide men's boots to narrow women's boots. The main plus of ice shoes is that your favorite shoes will remain intact;

Ice shoes Ice shoes differ in tread and anti-skid elements, so choose them wisely
-
replace the sole. This is the most expensive and difficult option. It is worth resorting to it only in extreme cases. It often happens that buying new shoes is cheaper than renewing the sole of an old one. Therefore, first you should familiarize yourself with the prices. The master will completely remove the old part and sew (or glue) a new one. The main disadvantage of this approach is unpredictability. The new outsole may not be much better than the previous one.

Separate sole Replacing the sole will require a long wait - most likely, the master will order the part, and not make it himself
What not to do
These life hacks are often repeated on the Internet, but you shouldn't trust them. At best, they will not change the state of affairs at all, and at worst, they will ruin the shoes:
- rubbing with potatoes. For some reason, it is widely believed that potato starch will help get rid of slipping. In fact, you only get white stains on the sole;
- rubbing. Never try to rub the soleplate with a kitchen grater or sandpaper. You will not make it more prominent and tenacious, but only reduce the tread depth. Moreover, an uneven sole will impair balance, making it even more difficult to maintain balance on slippery roads;
- Polish for hair. Perhaps this method was invented by girls who overdid the styling spray and got a hard and rough hairstyle. Lacquer, on the other hand, will make the surface of the sole even smoother, clogging up microcracks.
You can protect yourself from falling on the icy surface both with improvised means and with the help of professionals. Use these techniques wisely and your favorite pair of shoes will last you for years.
Recommended:
How To Bleach The Soles Of Sneakers, Clean Them On Sneakers Or Other Shoes, Wash Them To White Using Various Methods + Photos And Videos

Shoes with white soles (sneakers, sneakers, etc.) - how to clean them quickly and easily. How to preserve the result after cleaning and protect it from dirt
Life Hacks For Cats And Cats - Usefulness That Will Improve The Life Of Adult Pets And Kittens, Simplify Caring For Them And Ease The Life Of The Owners

How to make the life of a domestic cat better and more varied. How to arrange a place for a cat, a toilet, make toys and much more. Practical advice
How To Clean Suede Shoes At Home - Care Products For Shoes, Sneakers And Other Shoes Made Of Velor, Nubuck In Different Colors

Suede shoes are very beautiful, but they are not easy to care for. How and with what means can you clean velor shoes or nubuck sneakers at home?
Toilet Paper In Everyday Life: 5 Life Hacks For All Occasions

Why toilet paper has become my main household helper
Effective Life Hacks From A Mother Of Many Children

Tips for those with small children or grandchildren
