Table of contents:
- Author Bailey Albertson [email protected].
- Public 2024-01-17 22:26.
- Last modified 2025-01-23 12:41.
Secrets of using Venetian plaster to decorate kitchen walls

Decorating the walls in the kitchen is one of the important stages in the arrangement of the room. For this purpose, wallpaper, various panels and other materials can be used, but a particularly luxurious effect is created with the help of Venetian plaster. The correct use of this material allows you to decorate the walls and ensure the originality of the kitchen interior.
What is Venetian Plaster
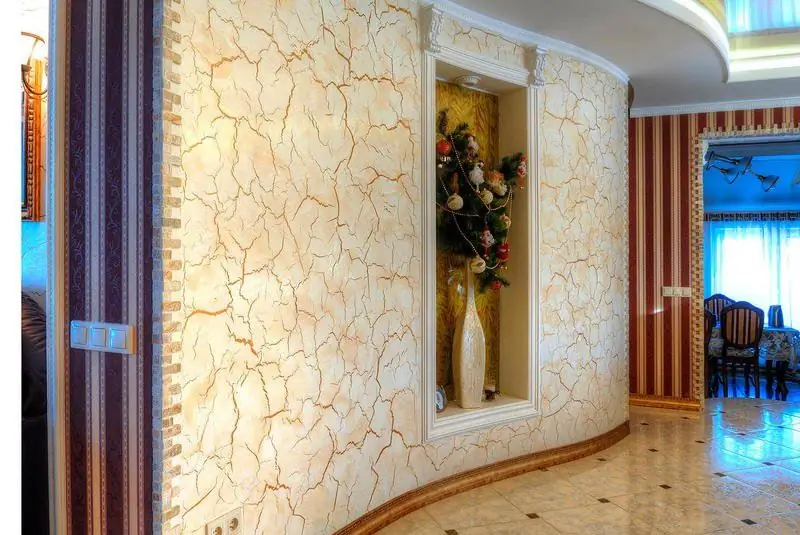
The surface treated with Venetian plaster is similar in color to marble or other natural structure. This effect is achieved due to the thoughtful composition of the finishing material, which includes acrylic dyes, binders, hydrated lime, marble dust and other structures. The result is a composition that is easy to use and forms an unusual, durable and high-quality coating.

The application of Venetian plaster does not require special skills
Venetian plaster has been used for many hundreds of years. During this time, it has not become less popular, but the composition of the coating has changed. This is due to the fact that with the development of industry, new components appeared that could improve the properties of the material.
The use of Venetian plaster: pros and cons
Decorating a kitchen with Venetian plaster is not difficult, but it is worth determining the area in which this material will be applied. In this case, plaster can be combined with ceramic tiles, wallpaper and other structures, as well as decorate one of the walls, an apron or a wall in half. Before using any finishing material, it is worth knowing its advantages and disadvantages, because this will help avoid the manifestation of defects during operation and select the optimal structure for comfort in the room.

In classic design, Venetian plaster is in maximum demand
Venetian plaster has the following advantages:
- unusual appearance of the coating, imitating the surface of marble and other natural structures, which gives the interior an originality;
- resistance to temperature extremes, humidity, mechanical stress;
- if applied correctly, the finish will last more than 25 years;
- achieving different visual effects using special application methods;
- a perfectly flat base is not required;
- a variety of options in different colors;
- lack of seams and joints, which often spoil the appearance of the finish.

Various effects can be created with Venetian plaster
Of the disadvantages of this finishing option, the following qualities are essential:
- high material cost;
- the need for certain skills to apply the composition;
- minimalism is not always suitable for modern design and interior styles;
- does not go well with a lot of indoor decor.

Plaster can be of any color
How to choose the right Venetian plaster
Venetian or decorative plaster differs from a simple leveling composition by the presence of plasticizers, structure-forming components and polymer-type binders. As a result of using this composition, the finish acquires a pattern resembling the surface of marble. However, the color and patterns may vary. Therefore, you should carefully consider the choice of composition and take into account the following features:
- simulated surface: leather, fabric, marble, onyx, quartz, etc.;
- glossy or matte surface;
- the color for finishing the kitchen can be of any brightness, but it is worth considering the style of the interior;
- the quality of the composition largely depends on the manufacturer. The most popular brands are Ruston, Klondike, Wall2Floor Top Coat, CeboGlam and Sambulador;
- the price of quality material cannot be too low and you should compare different types of Venetian plaster in terms of cost and characteristics.
Application technology
You can use Venetian plaster yourself. To do this, you need not only to choose the right composition, but also to prepare the surface, reliable tools and master the technology of using wall decoration products.
Preparation of materials and tools
In the process of applying plaster, several types of tools are used, with each of which you need to be able to work. The main devices are the following:
- trowel, Japanese spatulas, narrow spatula;
- sandpaper, medium and small containers;
- drill with mixer attachment;
- grinder with a polishing attachment;
- clean and dry rags.

Japanese spatulas help level the composition on the wall
How to prepare the base
Before applying the plaster, the walls must be cleaned of old wallpaper or paint, remove dust with a brush and primed. Then all the cracks are carefully sealed with putty. If the walls are leveled with plasterboard, then you just need to seal the cracks and holes with screws with putty. The protrusions are smoothed out with a grinder. After that, the following actions are carried out:
-
Priming the surface is necessary for better adhesion of the putty to the base. To do this, pour the primer into a small container, and then apply it with a wide brush to the wall. It is worth using at least two layers of the composition;

Priming the wall with a transparent compound The primer removes dust and provides better adhesion of the compounds to the base
-
After the primer has dried, the cracks and irregularities on the walls are eliminated, first with a starting and then with a finishing putty. To do this, you can use a dry mixture or a ready-made composition. With a small spatula, apply it pointwise or over the entire surface with a layer no more than 4 - 5 mm thick, leveling the wall;

Filling the wall before finishing Cracks and irregularities must be leveled with putty
-
After the putty has dried, the walls are treated with a special sanding mesh, eliminating minor irregularities. Next, remove the dust with a brush and reapply two coats of primer.

Preparing the walls before finishing Any walls are leveled and primed before finishing.
Video: features of wall putty
Stages of Venetian plaster application
The Venetian plaster can be given the desired shade before application. For this, a special color scheme is used, which is used according to the instructions indicated on the package with the product. You can also purchase ready-made colored plaster.
Further steps for finishing the walls of the kitchen:
-
Before using the plaster, you need to read the instructions for preparing the composition. Then a small amount of the mixture is diluted, which is enough for processing 1 - 2 m 2, since the plaster dries quickly. Before processing the wall, you need to practice applying the composition to the MDF panel or board. Next, a small amount of plaster is applied to a long spatula, distributing it evenly along the entire length of the tool. The spatula is applied with a tip to the wall so that an angle of 90 ° is obtained. Start working from the corner, applying the mixture with light rounded movements. The tool is carried over the surface, transferring the plaster to the wall. The first layer should be no more than 3 mm thick, as it is the link between the base and subsequent layers.

Plaster on a trowel Venetian plaster can be applied with a spatula or trowel.
-
After the first layer has dried, usually after 60 minutes, a second layer of Venetian plaster is applied with a trowel using random strokes. Its thickness should not be greater than the first. During the work with a spatula, patterns, veins are formed, which will subsequently imitate the surface of a natural stone or other structures.

Applying Venetian plaster to the wall The plaster is applied to the second layer with chaotic strokes.
-
To apply the third layer, "wipe", use a Japanese spatula. In this case, it is necessary not only to apply fresh plaster, but also to press with force on the spatula, making leveling movements. As a result of this, an uneven coating is obtained and in some places the composition lays down more densely. This allows you to achieve the effect of imitating the structure of natural stone. After the last layer has dried, all walls must be treated with an even and clean metal trowel, that is, ironing must be carried out, the resulting dust must be eliminated. The finishing touch is the waxing of the walls. This is done 24 hours after the last layer of plaster has been ironed. To do this, apply the composition to the plaster, removing the excess with pressure. Wax polishing is done using a fluffy attachment on a drill or grinder.

Wall surface after finishing with Venetian plaster The wax gives the plaster shine and protects it from moisture
Video: features of the classic technique of wall decoration with Venetian plaster
Photo gallery: kitchen interior with Venetian plaster finish
-

Classic style kitchen-dining room with Venetian plaster wall decoration - Venetian plaster looks best in a classic interior
-

Beige walls with Venetian plaster - Venetian plaster can be of any color
-

Ceiling decoration with Venetian plaster - Decorative Venetian plaster can even be used on the ceiling
-

Shiny ceiling in the kitchen with Venetian plaster - After waxing, Venetian plaster acquires a shine
-

Drawing on Venetian plaster - Various designs are created using Venetian plaster
-

Bright Venetian plaster on the kitchen apron - Color is given to the plaster using a color scheme
-

Glossy ceiling finished with Venetian plaster - Ceiling plaster is harder to work with than walls
-

Bright kitchen finished with Venetian plaster - Marble plaster suitable for classic interiors
-

Large kitchen with Venetian plaster wall decoration - In the kitchen, plaster can be used to decorate one or all walls
-

Bright modern kitchen with Venetian stucco - In a modern interior, it is best to choose nondescript patterns from Venetian plaster
-

Brightly colored Venetian plaster in the kitchen - It is best to make only one wall in the kitchen bright.
-

Light Venetian plaster in the kitchen with dark furniture - Beige wall decoration will harmoniously complement dark furniture
-

Spacious kitchen with Venetian stucco - Light finish visually expands the space
-

Venetian marbled plaster in the kitchen - Hanging lamps are appropriate in interiors of different styles
-

Apron in the kitchen with Venetian plaster wall decoration - In the area of the apron, you can use plaster of any color
-

Stylish kitchen with Venetian stucco finish - Venetian plaster can be used in country and provence furnishings
-

Bright and spacious kitchen finished with Venetian stucco - You can complement the interior with an original chandelier
-

Bright kitchen with Venetian plaster - The bright kitchen is perfectly decorated with Venetian plaster
-

Kitchen with Venetian plaster - Plaster can contrast with kitchen furniture
-

Beige kitchen with Venetian stucco - Often, not only walls, but also the ceiling are finished with Venetian plaster.
Independent application of Venetian plaster requires preliminary training in applying the composition to the walls. This will create a beautiful pattern and avoid scratches on the surface that will spoil the look of the finish.
Recommended:
How To Make Venetian Plaster With Your Own Hands - Application Features + Photos And Videos

Features and benefits of Venetian plaster, materials and tools used. Step-by-step instructions for applying this coating of different types
Warm Floor In The Kitchen Under The Tiles: Features, Advantages And Disadvantages, Installation, Photo

What is underfloor heating and its types. Recommendations for choosing a coating for underfloor heating. The sequence of work on the installation of a warm floor
Vinyl Wallpaper For The Kitchen: Features, Advantages And Disadvantages, Interior Design, Photo

Features and selection of vinyl wallpaper for the kitchen. How to properly glue the wallpaper and take care of the coating in the kitchen. Wall decor options with vinyl wallpaper
Ceramic Tiles 10x10 For The Kitchen: Features, Advantages And Disadvantages, Main Application, Examples With Photos

10x10 cm tiles: features, advantages and disadvantages. Selection recommendations. Kitchen design options with square tiles. Styling tips
How To Plaster Walls Or Plaster Walls With Your Own Hands

How to plaster walls with mortar without the involvement of specialists. Step-by-step instructions on how to make plastering walls with your own hands with a cement-sand mortar
